How To Draw a Baseball
Learn how to draw a baseball step-by-step with this easy tutorial. Perfect for beginners who want to create their own fun baseball drawings!
Equipment
- Pencil
Ingredients
Instructions
- Start by printing out the free baseball drawing guide at the bottom of the post with simple steps to create your own real baseball

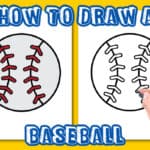
- The first step is to draw a perfect circle. You can do this by tracing a cup or lid.

- The next step is to draw a curved line on the left side of the circle with the curve towards the inside of the ball.

- Next, draw a similar curved line to the one in the previous step but curve on the other side. This should result in two lines curving inward but in opposite directions.

- The next step is to draw the seams of the baseball. This is the red stitching along the curved lines we drew in the previous steps. For this starting on the left curved line, draw a very wide upside-down V shape. This is a thicker line than the lines they are drawn on, so you could create a tube-like shape. Draw at least six of the seams on the left curved line.

- Continue drawing the stitching seams along the right side of the ball. Once you draw the same amount of seams as the other side, you will have yourself a real baseball drawing!

- The final step is to grab your colored pencils, crayons, or markers and color in your baseball drawing.
