How To Draw Stocking
Embrace the holiday cheer as you follow our simple steps on How to Draw a Stocking, bringing festive creativity to your art this season!
Equipment
- Pencil
Ingredients
Instructions
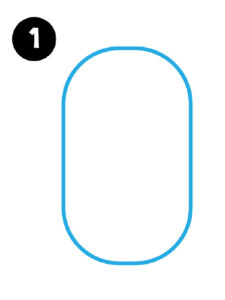
- First, draw a vertical (up and down) rectangle shape with rounded corners. Remember that with any drawing, start with light pencil strokes and you can always erase unwanted lines at the end.
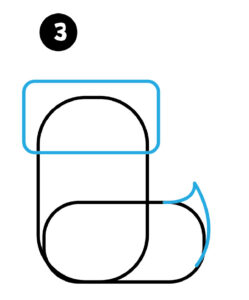
- Next, draw a second rectangle, this time make it horizontal (side to side) with rounded corners. This is the foot of the stocking.

- Draw a small point off the toe of the stocking to give it an elf shape and feel. Then draw a horizontal rectangle at the top of the stocking. This will be the opening of the stocking.
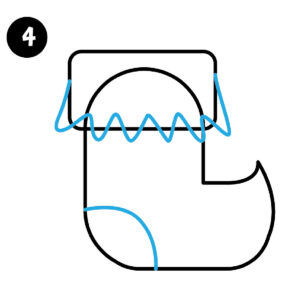
- Next, add some wavy lines along the bottom of the last rectangle. This will give your Christmas stocking some fun detail. Then add a small curved line to the back or heel of the stocking. Then erase any of the extra lines.
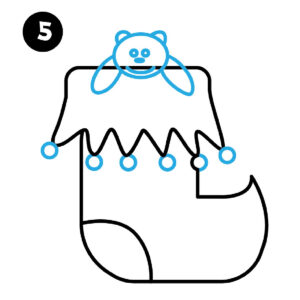
- We then added small circles to the bottom of each of the wavy lines for more detail as well as a small teddy bear shape at the top. For the teddy bear. Simply draw an oval for the face, then two long oval shapes off each side for the arms. Add two small curved lines for ears a simple face of two eyes and small circle for the nose and a curved line for the smile. Viola, you have a cute Christmas Stocking Drawing.
- We love to outline our finished drawing with black pen and then use your favorite coloring tools (crayons, colored pencils, or markers) color in your drawing!