How to Draw a Cone
Learn how to draw a cone in 3D with a free printable step-by-step drawing tutorial. Having some easy 3D shapes fun and how to draw fun for kids of all ages.
Equipment
- Drawing Pencils
Ingredients
- Drawing paper
Instructions
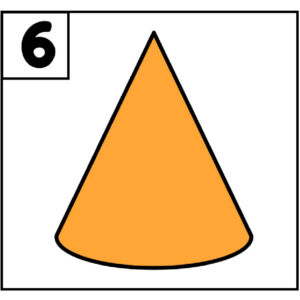
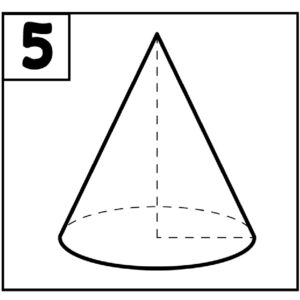
- The first step is to draw an oval at the bottom of your paper. We made the top half of the oval a dotted line to help with dimension. This will be the base of the cone.
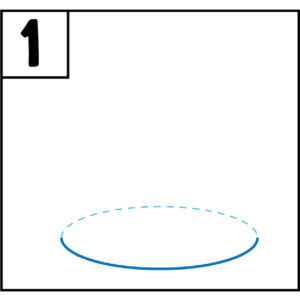
- The next step is to draw an L shape. Draw a vertical line (up and down) from a point at the top of the cone to the middle of the oval. Next, draw a line from the center of the oval to the outside line of the oval.

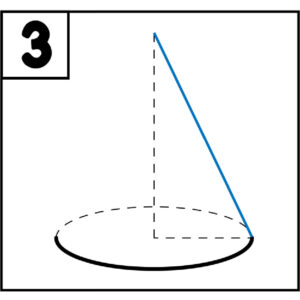
- The next step is to draw a diagonal line from the top point of the cone to the side of the oval connecting the two ends of your "L".
- The last step is to draw a similar diagonal line from the last step but on the left side. Draw a diagonal line from the point to the other side of the bottom of the cone.
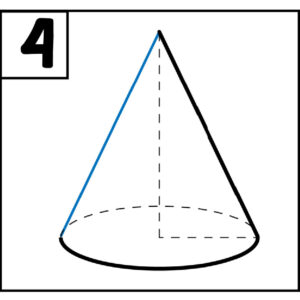
- Viola, you have yourself a cone. At this point, you can darken the sides of the cone and the bottom of the curved surface and either erase the dotted lines or make sure those lines are not as dark.
- Color in your cube with your crayons, pencils, or markers.