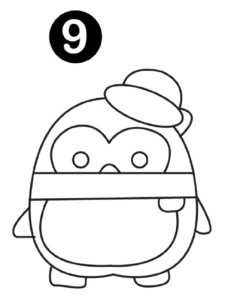
How to Draw a Penguin
Learn how to draw a penguin easily with this simple step-by-step tutorial along with a free printable guide. Have fun with this winter drawing!
Servings: 1 Penguin Drawing
Equipment
- Markers
Ingredients
Instructions
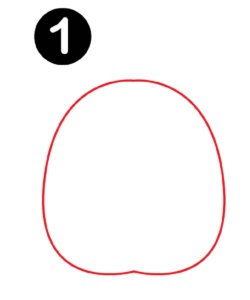
- The first step is to draw an oval with a flat bottom.
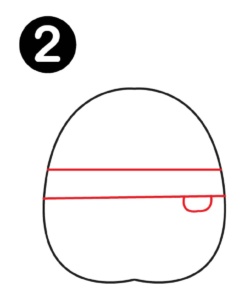
- The next step is to draw two straight lines from one side to the other. These should be approximately halfway up the height of the oval. This will create the scarf. Then draw a small wide U shape on one end of the scarf. This is a small end of the scarf.
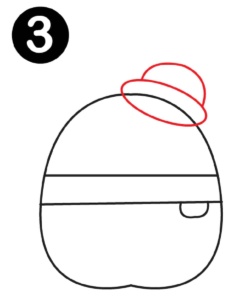
- The next step is to draw a small oval on the corner top of the penguin's head. Draw a slightly smaller upside-down bowl shape on top of the oval. This will create the hat.
- The next step is to draw a small line from where the base of the hat meets the top of the hat in a small 7 like shape to create the back part of the hat. Then draw what looks like the top part of a heart from the scarf in the upper section of the penguin. Two round mounds. This is creating the outline of the penguin's face.

- The next step is to draw a large wide U shape from the bottom of the little scarf piece down to almost the bottom of the penguin and then up to the other side of the underside of the scarf.
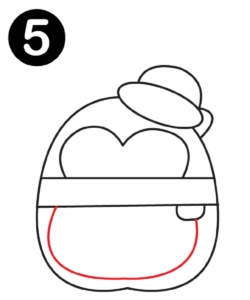
- The next step is to draw the face of the penguin. Start with a small half circle in the middle of the face (top half of the heart) and draw it on the top of the scarf to create its nose. Then draw two circles on either side of the nose for the eyes.
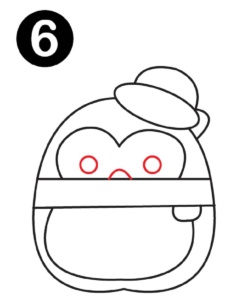
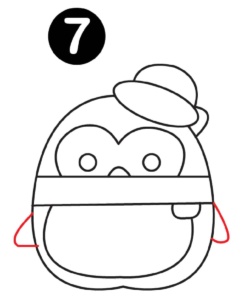
- The next step is to draw the arms (fins) on either side of the penguin's body. Draw small triangle shapes on each side of the penguin right below the scarf.
- The last step is the feet. Small half square shapes on the bottom of the penguin.
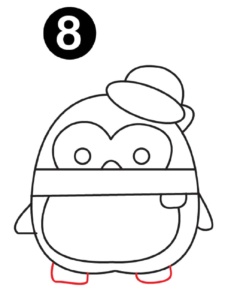
- Viola, you have drawn a penguin. Now it's time to color it in. Let the creativity run wild!