How to Draw a Watermelon
Learn how to draw a mouth-watering watermelon with our step-by-step tutorial! This beginner-friendly guide will take you through the simple steps of creating a realistic watermelon slice, from sketching the curved lines to adding vibrant colors and textures. Discover the art of capturing the green skin, juicy red pulp, and even the tiny details like seeds. Unleash your creativity and enhance your drawing skills with this refreshing and fun tutorial. Whether you're an aspiring artist or just looking for a creative project, this tutorial will help you master the art of drawing a delicious watermelon. Let your imagination run wild and create your very own slice of watermelon masterpiece!
Equipment
- Drawing Pencils
Ingredients
Instructions
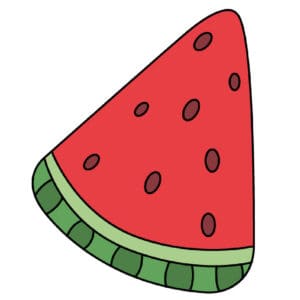
- Star with the outline of the watermelon slice. Draw a rounded edge triangle for the outer shape of the slice.
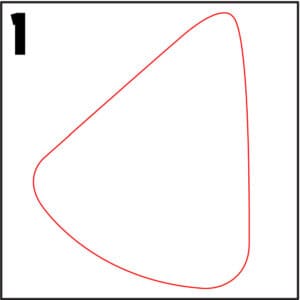
- The next step is to draw two curved lines between the skin of the watermelon and the middle of the pulp.
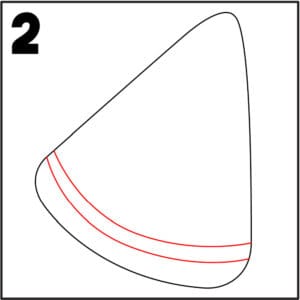
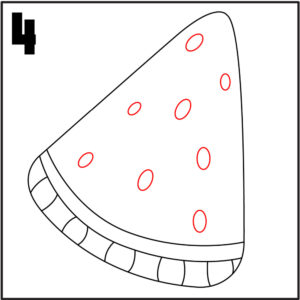
- Next, draw small curved lines almost like a parenthesis along the bottom of the watermelon and the next curved line in. This will give the watermelon skin a pattern.
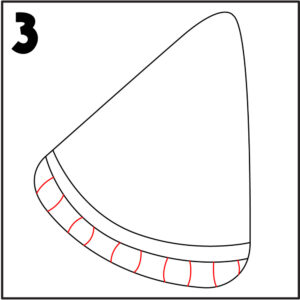
- The last step is to draw small circles throughout the middle of the watermelon slice as the seeds.
- Once you have your sketch how you like, then we like to go over it with a black pen. Then grab your crayons and markers and color in the watermelon. We like to use darker green for the skin, and a lighter green for the stripe between the red pulp of the fruit to give it a more realistic watermelon look.