How to Draw a Winter Scene
Learn how to draw a winter scene with our easy step-by-step tutorial along with a free printable guide. Happy winter scene drawing!
Equipment
- Markers
Ingredients
Instructions
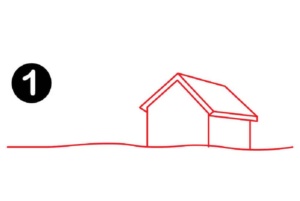
- The first step is to draw a line about ⅓ way up from the bottom from one side of the paper to the other. It doesn't need to be straight, it is the ground in the picture. Next, you are going to draw the house to one side of the paper. Start with the front side of the house with an A-like shape at the top. Then draw a rectangle off the side of the house from where the A meets the sides of the house. Next, draw a parallelogram above the rectangle side of the house and it meets the top of the A part of the house.
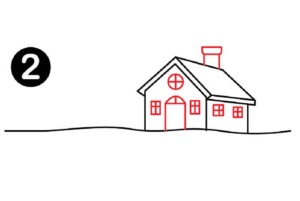
- The next step is to add a window, a door, and a chimney to your house. We like a simple circle with the cross at the peak of the house and the other sare square.
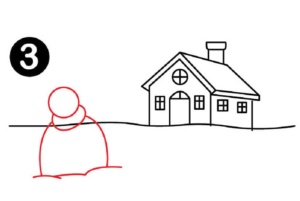
- It's now time to add the snowman. We started with a smaller circle right above the ground line, then added a second loop underneath that. The last section is to add the larger base of the snowman along with a few rounded lines where the snowman meets the ground.
- Add an upside bowl shape to the top of the snowman as the hat and a rectangle coming off the second body section of the snowman going down the base of the snowman. Add a few lines at the end of the scarf for fringe.

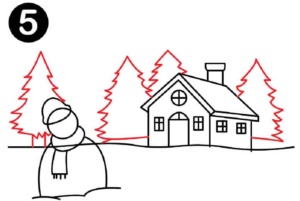
- Next, is to add trees to the winter scenery drawing behind the snowman and the house. It is nice to have them evenly spaced to make it more realistic.
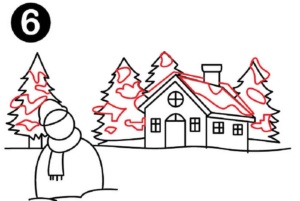
- Add swirly lines over the trees and the roof of the house for snow.
- At this point, you have a sweet winter wonderland scene.

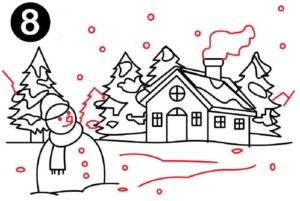
- The last step is to add a face and buttons to your snowman. Adding lines in the ground and snowflakes make the scene more wintery. You can also add another tree and some smoke out of the chimney.