How To Draw Olaf
Learn how to draw Olaf with a free printable drawing tutorial. Having some easy Olaf drawing how-to-draw tutorial fun for kids of all ages.
Equipment
- Drawing Pencils
Ingredients
Instructions
- The first step is to start drawing Olaf's head. Start by drawing a simple circle.

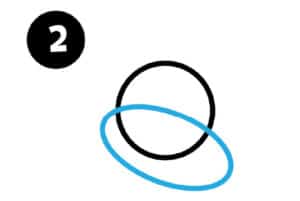
- Next, draw an oval at a slight diagonal over the bottom of the circle.
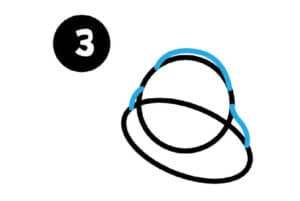
- Draw a few connecting curved lines to the top of the circle and oval smoothing out the top of Olaf’s head.
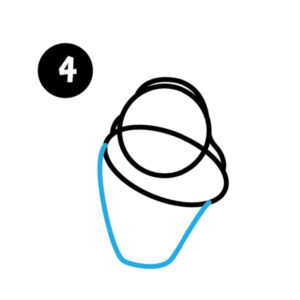
- The last part of Olaf's head is the bottom half of the head and "neck". That is if Olaf had a neck. :). Create a bucket-like U shape from one side of the oval to the other side of the oval. Erase all the inside lines after you have the head to the correct shape.
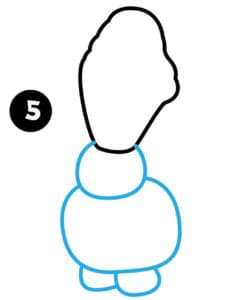
- Next, you are going to create one smaller circle at the base of the "neck" as the middle of Olaf. Then add another slightly bigger circle under that as the general body. The last piece in this step is to draw two smaller circles at the very bottom as Olaf's legs.
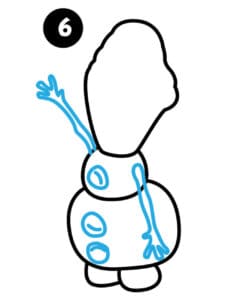
- The next step is to draw Olaf's arms and coal buttons on the front of his body. Remember Olaf's arms are twigs. If you draw straight lines and then add small branches at the ends. For the buttons, draw three small circles on the front of Olaf's body. Then a small curved line inside each one gives the coal buttons shape.
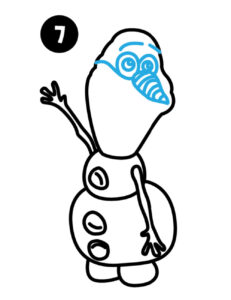
- The next step is to draw Olaf’s carrot nose and Olaf’s eyes. We drew lines across his carrot nose.
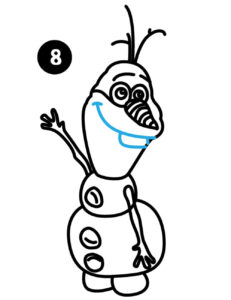
- The next step is to draw Olaf’s teeth and smile. Viola, you have yourself the cute cartoon version of Olaf!
- What we love to do at this point is to outline the drawing with a black marker. Black marker outline of Olaf and then color in your drawing with crayons, pencils, or colored markers! Have fun!