
How to Draw a Snowman
Learn how to draw a snowman with this simple step-by-step tutorial along with a free printable guide. Have fun this winter drawing!
Equipment
- Drawing Utensil
Ingredients
Instructions
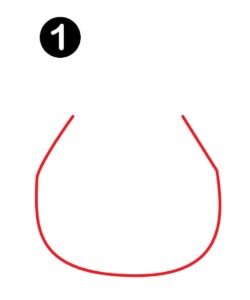
- The first step is to draw the base of your snowman. Create a large U-like shape at the bottom of your page.
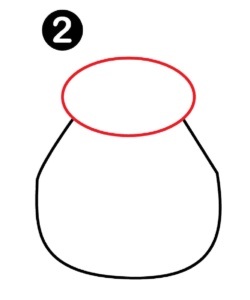
- The second step is to draw an oval shape at the top of your base U-like base shape.
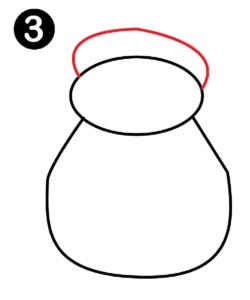
- Next, draw a half oval shape above the last oval shape making it roughly the same size.
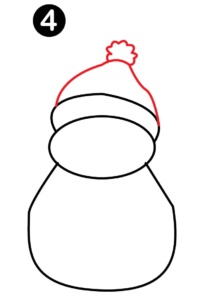
- The next step is to draw the hat on top of the last half oval. This is first drawn like a small mountain shape on the top of the half oval. Making it roughly the same width as the half oval. Then draw a small poof-like shape on the top of the hat.
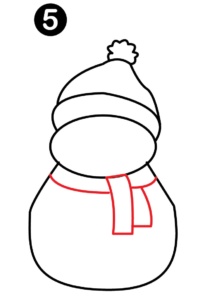
- Next, it is time to add the scarf to your snowman. First, draw a vertical rectangle off-center from the head of your snowman down half the bottom half of the snowman. Then draw a line the same width of the rectangle right below the head, from one side of the base of the snowman to the other. Avoid a line through the long rectangle. To complete the scarf, add a smaller rectangle next to the longer rectangle coming off the line you drew across. This will create a scarf.
- The last part is to add the arms, buttons, face, and stripes to your snowman's hat. For the arms, simply create stick-like figures from each side of the snowman. You can make them have as many or as few off branches. For the buttons, simple circles under the scarf. For the face, we created a carrot nose with a triangle and half-circles for both eyes and mouth. Lastly, the stripes on the crown of the hat. These are optional, but we love detail.
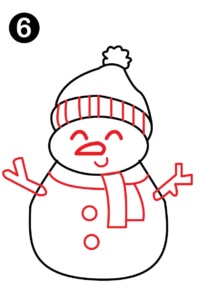
- Viola, you have a snowman.
