How to Draw an Apple
Learn how to draw an apple step-by-step with our easy tutorial! Discover essential tips and create a sweet apple illustration.
Equipment
- Drawing Pencils
Ingredients
Instructions
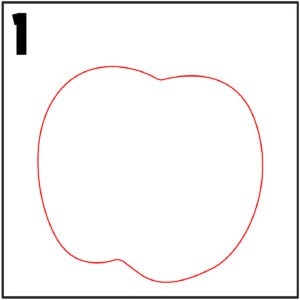
- The first step is to draw the base shape of an apple. It's not a perfect circle. It's more like two if you were to draw two ovals that overlap at a slight v in the middle. Erase the middle lines to give you the basic apple shape.
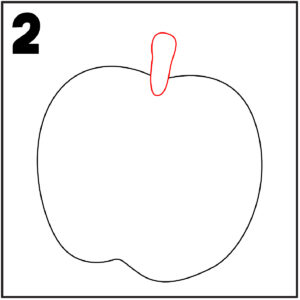
- Next, it's time to draw the stem of the apple. We went with a basic shape, but you may want it to slightly curve. Whichever stem you draw, make sure it is drawn right in the "v" of the top of your apple.
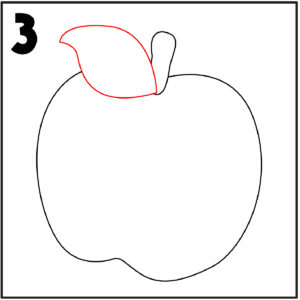
- The next step is to draw a leaf off the stem of your apple. A curve line off where the stem meets the apple and out.
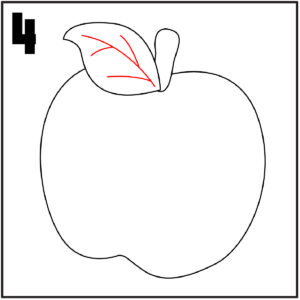
- For the fourth step, add extra lines and details to the leaf. Drawing in the veins of the leaf with simple small lines. Viola, you have an apple drawing!
- The last step is to clean up any extra light lines. Once you have your drawing where you want it, we like to go over the lines with a hard pencil line and outline the apple with a black sketch pen.