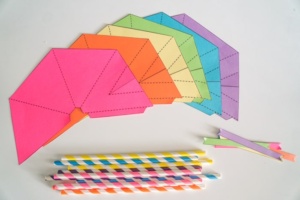
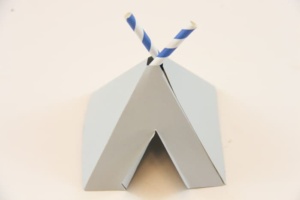
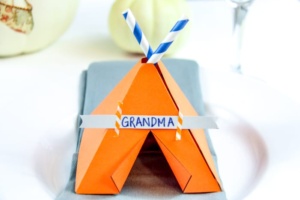
Print out your free teepee printable thanksgiving place cards. This is where you can coordinate with your table decor. We went with blue and orange a few years back and then of course went a little more colorful this time.
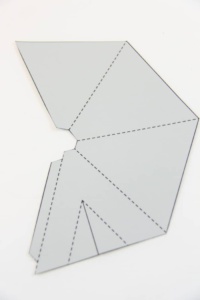
Cut along the solid black lines. If you are doing this with the kids, the smaller babes may need a little help with this part. My general rule is if they cannot cut somewhat of a straight line (like kinder and below) then I cut them for them and let them color and decorate the teepees. If they are able to cut, then they are in charge and working on their fine motor skills.
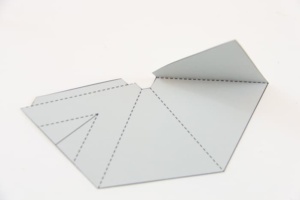
Fold along dotted lines. What I found to make this easier after the first one is that when you start to fold a single flap over, the bottoms match up.
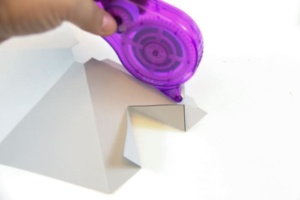
Apply a strip of double sided tape to folded flap. This will connect the two sides of the teepee. In the case you only have single side tape, you can simply tape the flap down like a present, or tape in on the inside. That is what I like about this craft is that you use what you have and there are lots of different way to get to the end results.
Cut straws to 5 inches each. This is just a general measurement for those that like precise lengths. If you would rather eye-ball it, I would say its ¾ths of a standard paper straw length.
Tape each straw to the inside of the teepee. What you'll find once you stick the straws through the whole at the top of the teepee, that they really only fit with the straws taped to the side.
Cut out banner, write name on it, and tape above door of teepee. Again, if you have decorative washi tape and want to take it that way, awesome.
If you have double sided tape, then you can tape them to the teepee with that. I've also rolled a piece of wrapping paper tape up and attached it to the back and it worked like a charm.