

Transform your cluttered workspace with these tool bench organization ideas. Maximize efficiency and tidiness in your workshop.

Want to save this project?
Enter your email below, and then we'll send it straight to your inbox. Plus get awesome new projects from us each week.
Hello! As we mentioned early this week we are tackling a new monthly home beautify project. For January we will be tackling storage spaces:
Garage/Basements/Attics
First up is showcasing
Tool Bench Organization
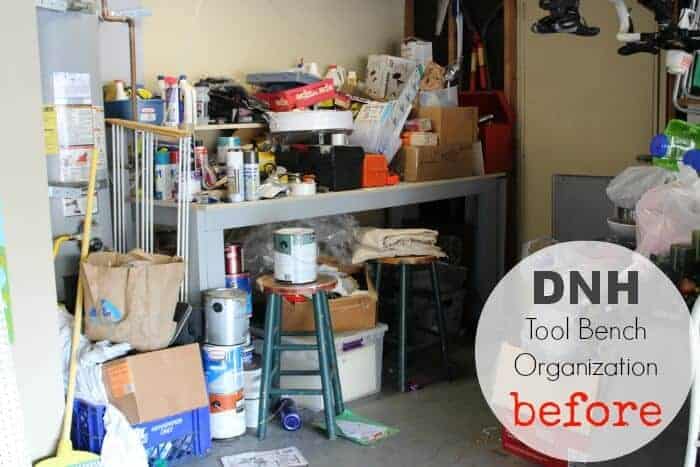
Over the last couple of years, our tool bench has been more of a collect all then its intended use of housing our tools and home repair products. Its rather embarrassing showing the before picture, but for the love of Diapers-n-Heels, we're going to do it. Okay, as you can see we have a mishmash of all kinds of garbage on our tool bench.
Here is how we tackled it and recommend these steps to making the organization easy and effective.
- Remove everything
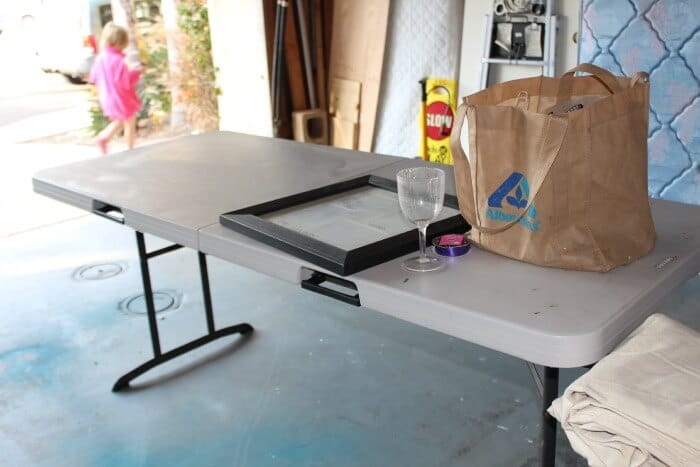
 We used a card table where we placed everything from the tool bench. We found it helpful to group like items on the table like spray cans or nails/screws, etc. There are a few reason as to why you want to move everything off the work area.
- It lets you see the full space of the work area you have to work with.

- It also let's you see ALL that the items you have stored in the work area currently. From tools to paints to nails and such.
- It gives you the opportunity to purge. Old, broken,unused items. Its time to throw it out or move it to the donate pile
- Once you have an accurate assessment of what all you have stored on the work area, then you know what kind of containers and bins you will need to help in organization. YES, you are going to need bins and containers.
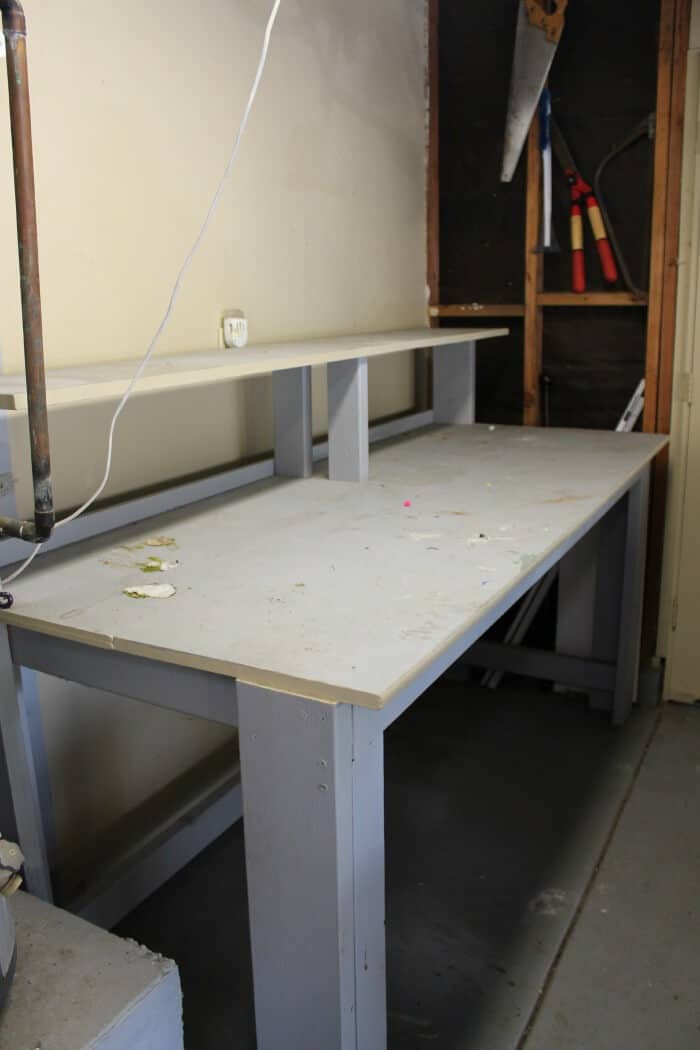
- Lastly, clearing the work area allows you the opportunity to give that bench or area a deep clean or in some cases a fresh coat of paint if its needed.
- It lets you see the full space of the work area you have to work with.
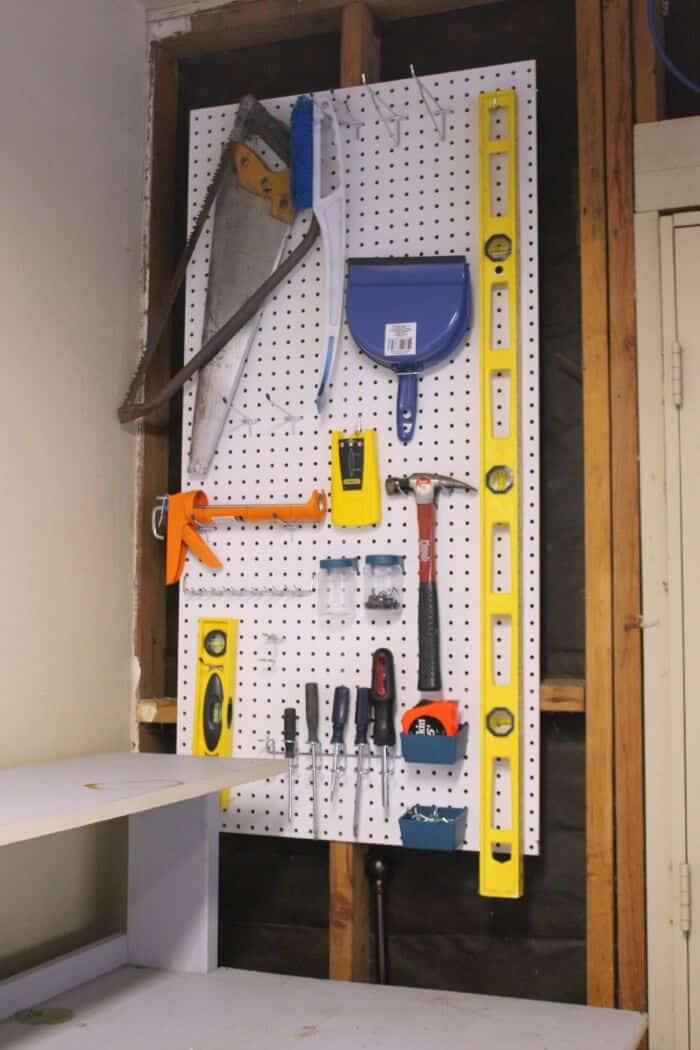
- Assess Tools - Especially in a work area like a tool bench, you tend to have a lot of awkward shaped tools that may not necessarily fit into a tool box. We decided to add a peg board to the wall on the side of our tool bench. Initially when we were looking we thought about above the tool bench, but remember this needs to be accessible and seeing as I'm about 2 inches tall, it wouldn't work up there. 🙂 We found this pre-cut pegboard at Home Depot for about $7.They also sell for about $11 a kit of 43 different pegboard hooks. They sell individual hooks as well if you're not looking for that many. For less than $20 we were able to get the loose tools like the level and caulking gun off the tool bench and out so we can see it when we need it.
- Buying Containers - Depending on all that you have loosely on the work bench area, its time to go get some containers. The ultimate goal is to not have items just sitting on the work area. Grouping like items within a container helps in the future when you're looking for a specific item or group of items. They will all be in the same spot. I loved putting all the nails and screws into separate bins. We had a ton of the nail/screw boxes that were either broken, torn apart or taking up a ton of space for just a few nails. I found the small nail containers at the dollar store 2 for $1. SCORE!Buying containers does not have to break the bank. We got the majority of our smaller containers at the dollar store. We did purchased the one large bin for the paint at Big Lots, but other than that, we spent less than $10 for the other bins.
- Put it all back - Now you're armed with containers and peg boards and all like items are grouped together, its time to put it all back onto the bench. Keep it organized and don't stack too high as you will ultimate need something at the bottom and you don't want to tear the whole bench apart trying to get to it.Most importantly, have fun!!!
 We used a card table where we placed everything from the tool bench. We found it helpful to group like items on the table like spray cans or nails/screws, etc. There are a few reason as to why you want to move everything off the work area.
 They also sell for about $11 a kit of 43 different pegboard hooks. They sell individual hooks as well if you're not looking for that many. For less than $20 we were able to get the loose tools like the level and caulking gun off the tool bench and out so we can see it when we need it.
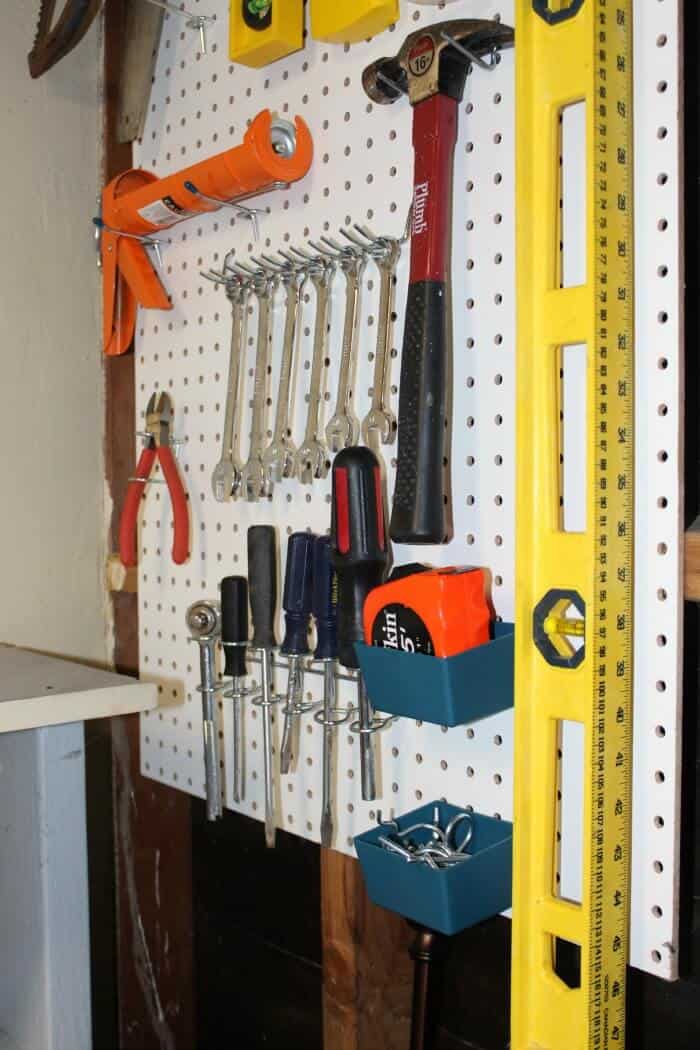
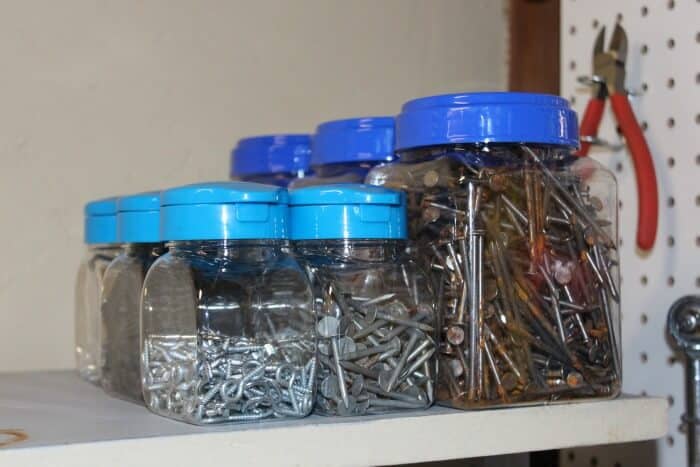 I loved putting all the nails and screws into separate bins. We had a ton of the nail/screw boxes that were either broken, torn apart or taking up a ton of space for just a few nails. I found the small nail containers at the dollar store 2 for $1. SCORE!
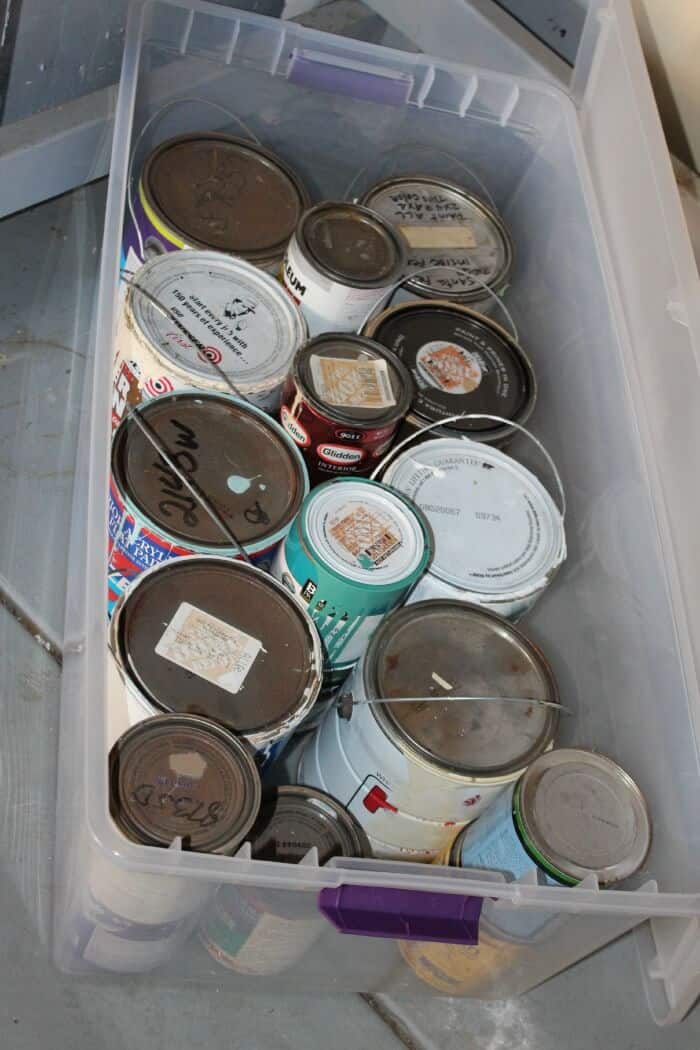 Buying containers does not have to break the bank. We got the majority of our smaller containers at the dollar store. We did purchased the one large bin for the paint at Big Lots, but other than that, we spent less than $10 for the other bins.
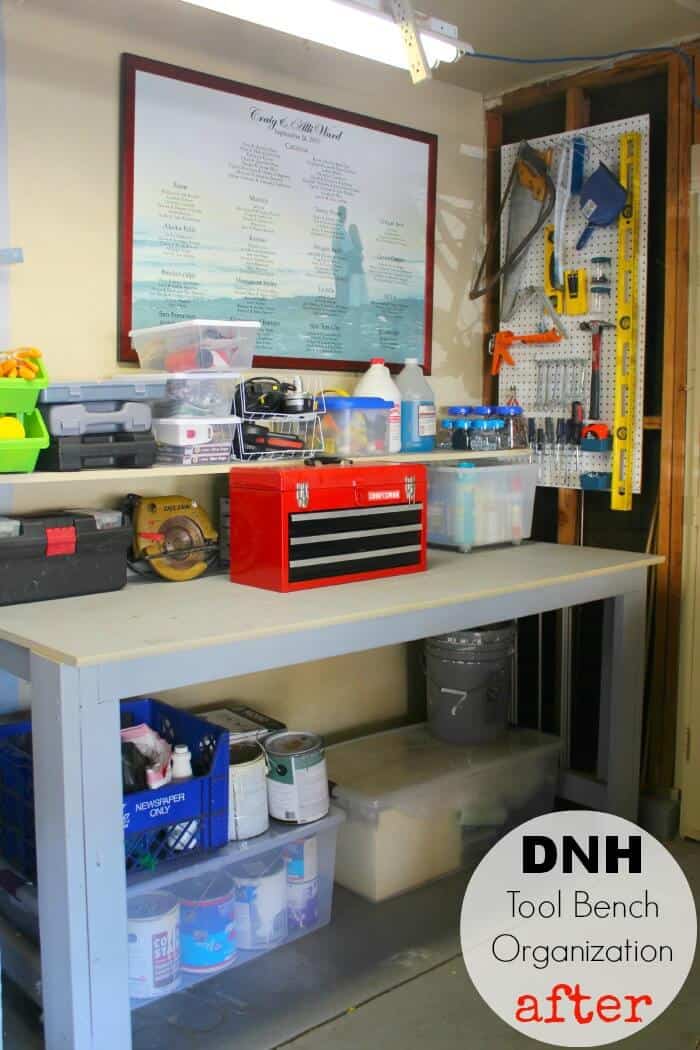 Most importantly, have fun!!!
Happy Organizing!


