

Want to save this project?
Enter your email below, and then we'll send it straight to your inbox. Plus get awesome new projects from us each week.
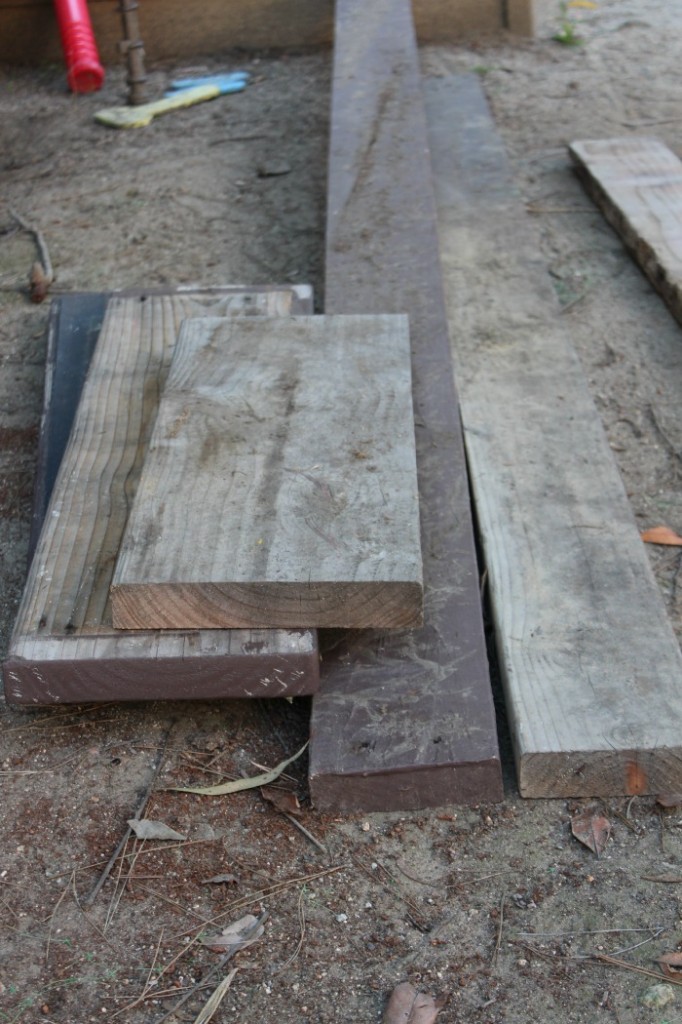
It was pretty simple inexpensive project, especially if you have scrap wood around like we did from taking out our old deck
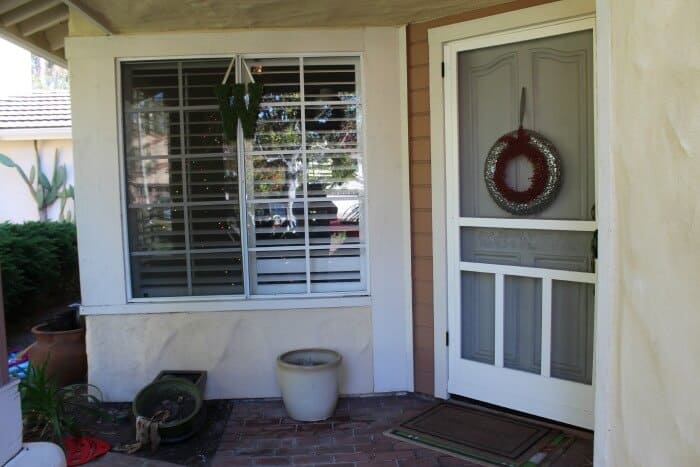 In terms of curb appeal, our front door area was definitely lacking something. It had become the collect all of old pots rather than something pretty.
That's when I got with DNH's DIY Dad (aka DNH Grandpa) and together we came up with something for that space. P.S. If you'd like to see some of DNH Grandpa's other work, check out our Home Office Make-over.
Here's how we did it!
Supplies
- Wood - Scrap or if you're buying it (we'll show you what you need)
- Saw
- Drill
- Screws
- Measuring Tape
Directions
First thing to do is to measure the space for the bench. Once you've determined your height and length, then start to sketch it out. I used just a scratch paper and started with the design. Once you have the design, depending on the wood then you determine the measurements.
As I mentioned before, we had scrap wood from the old deck we demolished, so it was a matter of determining what we have and what would fit. Remember if you're working from scraps, you sometimes have to adjust what you're building. We initially wanted one piece of wood for the top, but realized we didn't have a piece long enough, so it became two.
Once you've determined what wood you have or what you would need, then you can back out lengths of each piece depending on the size of the space. We wanted the bench to sit under the window and the window was just shy of 24 inches, so we backed out measurements depending on the width of the wood. We recommend using at least 2 inch thick wood to provide sturdiness to the bench.
After all the measurements are determined, then its time to cut to size.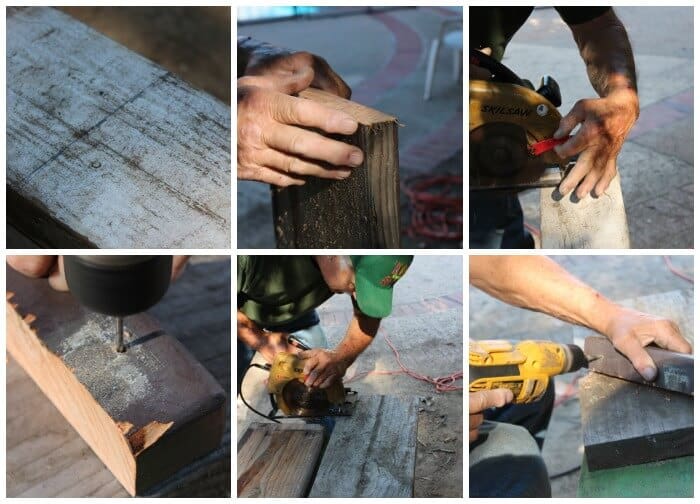 Using the tape measure, mark the lines on the wood and then using the saw, we cut each piece to size. We recommend starting from the bottom and working your way up on a piece like this. We started with the bottom shelf.
We determined that we wanted the bottom shelf to be 3 feet long. We ended up cutting off 2- 3 inch pieces from that large piece before cutting it to length at 3 foot. We used the 2-3 inch pieces as braces or brackets for the shelf. Using a drill we drilled holes into the wood providing a guide as to where we would attach the screws. 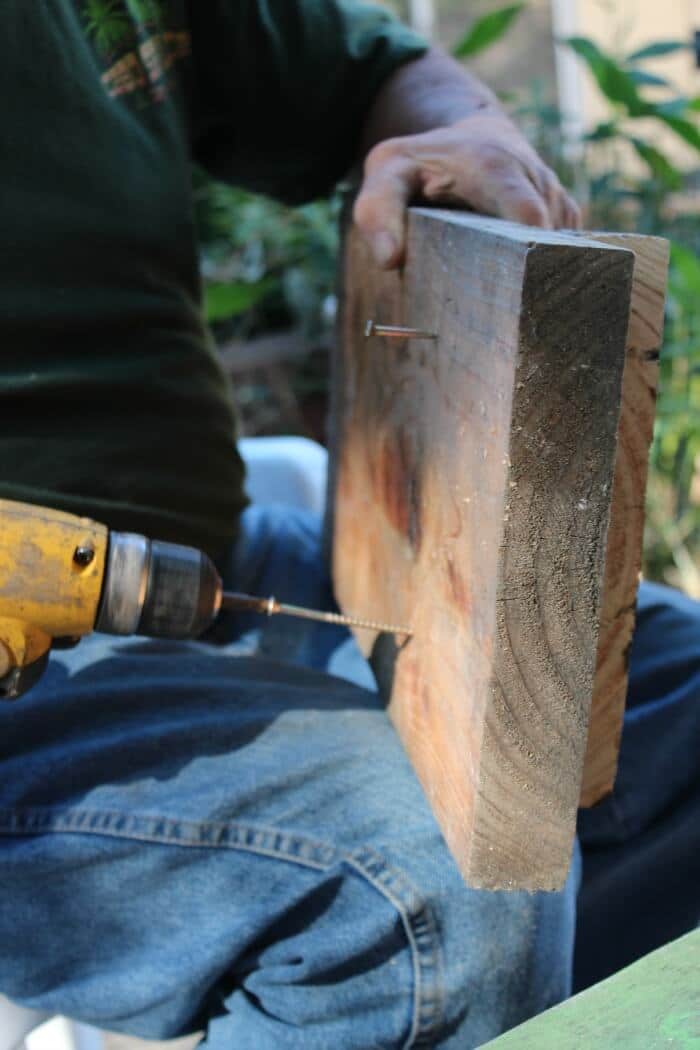 For the brackets we attached them from the outside through the leg piece and half way through the brace.the leg piece of the wood.
 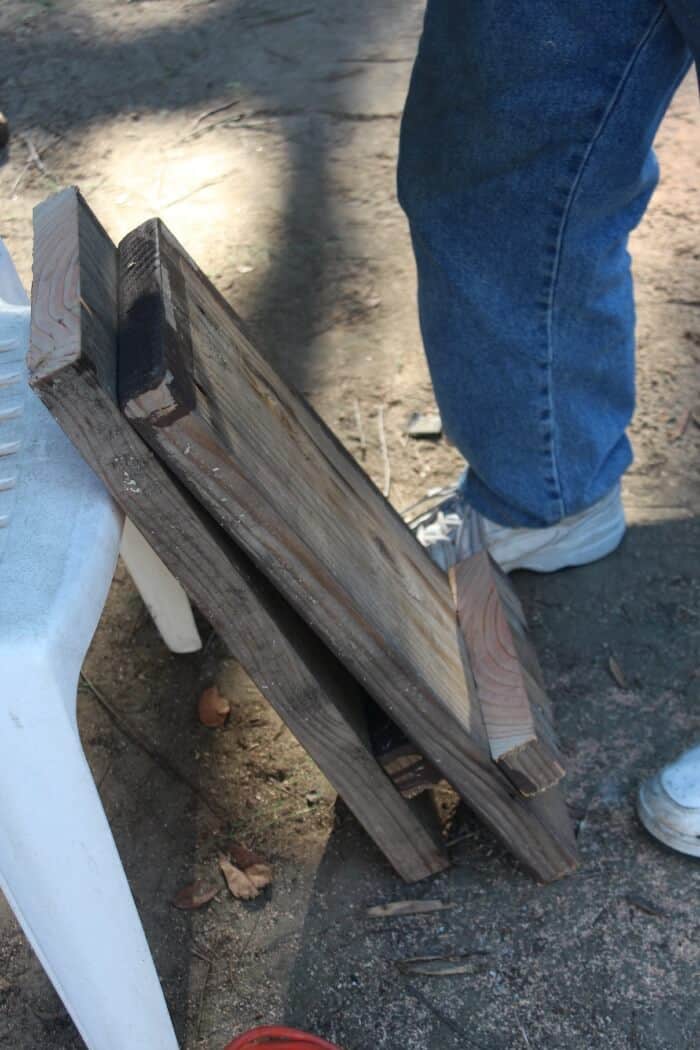 You've now finished the hard part! Once you have the braces attached, the rest is just a matter of attaching.
First the bottom shelf. Drilling holes through the bottom shelf before adding screws made attaching the shelf a piece of cake.
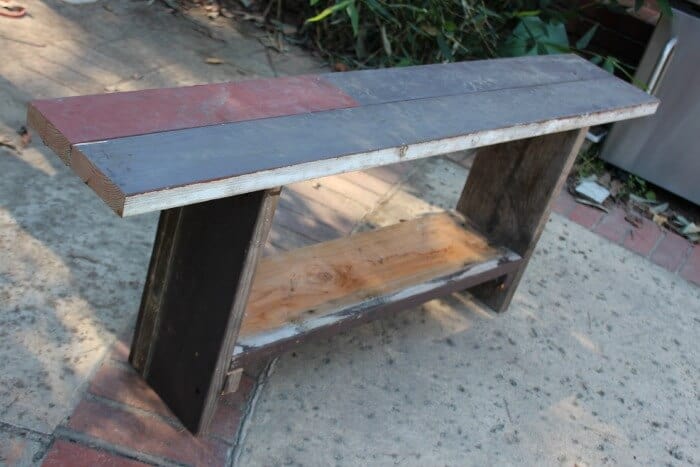 Lastly, align the top shelf (we ended up only have two pieces) and using screws attach from the top.
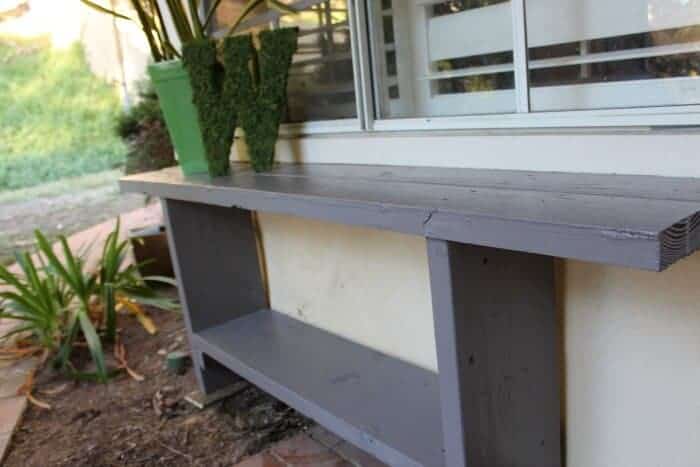
 Viola, we have ourselves a new front porch bench!
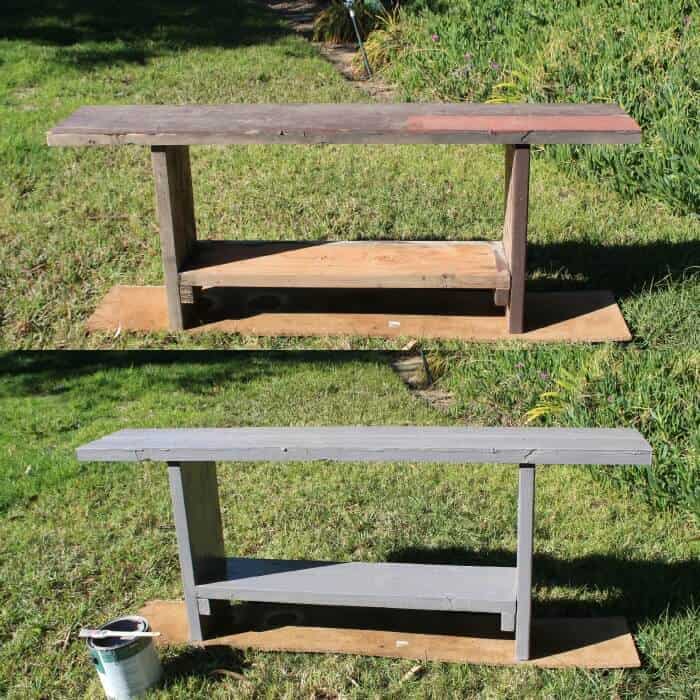 A little paint and we have ourselves a brand new bench.
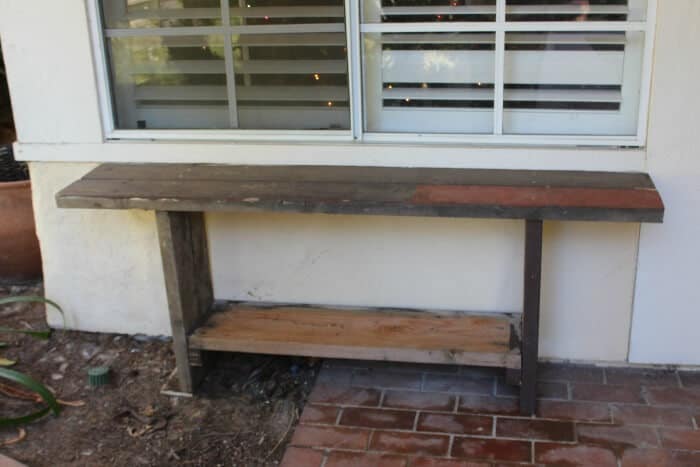
 Add some dimension and organization to our front porch area. Next up adding some bright colored pots or decor to give this whole area a great makeover. What do you think of our essentially free DIY Porch Bench?


