Wouldn't you know it, with all the excitement around our October Craft-vino Night, I hadn't showed you the third craft we created, mason jar Halloween Lanterns. There are so many different variations of this craft, but here are some ideas on how to create your own.
Supplies
Want to save this project?
Enter your email below, and then we'll send it straight to your inbox. Plus get awesome new projects from us each week.
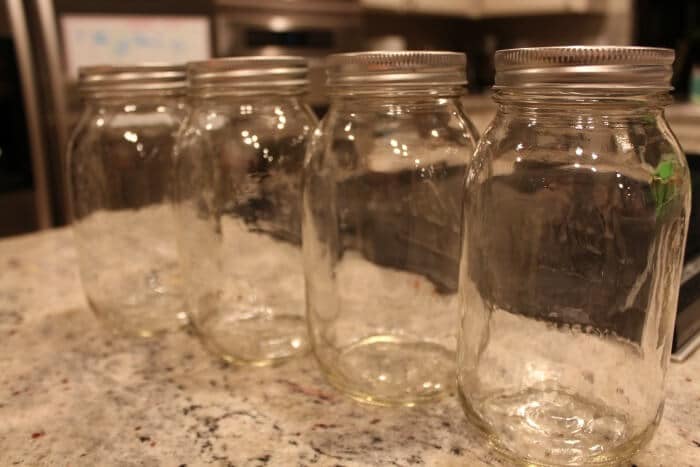
- Mason Jars - Any Size
- White Glue or Mod Podge
- Scissors
- Tissue paper (Green, Orange, Black) or White Gauze
- Paint brush
Directions
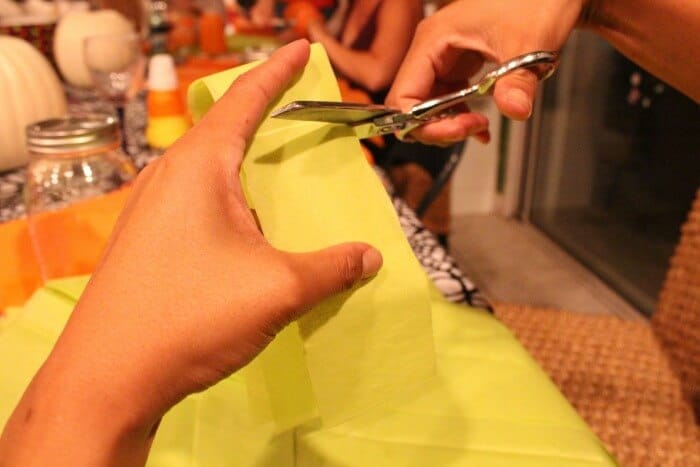
If you're going for tissue paper lantern, you will need to cut the tissue paper into strips the length of the jar. I like to keep the width to about an inch or two. Enough to handle, but not too wide where it doesn't lay against the lantern flat.
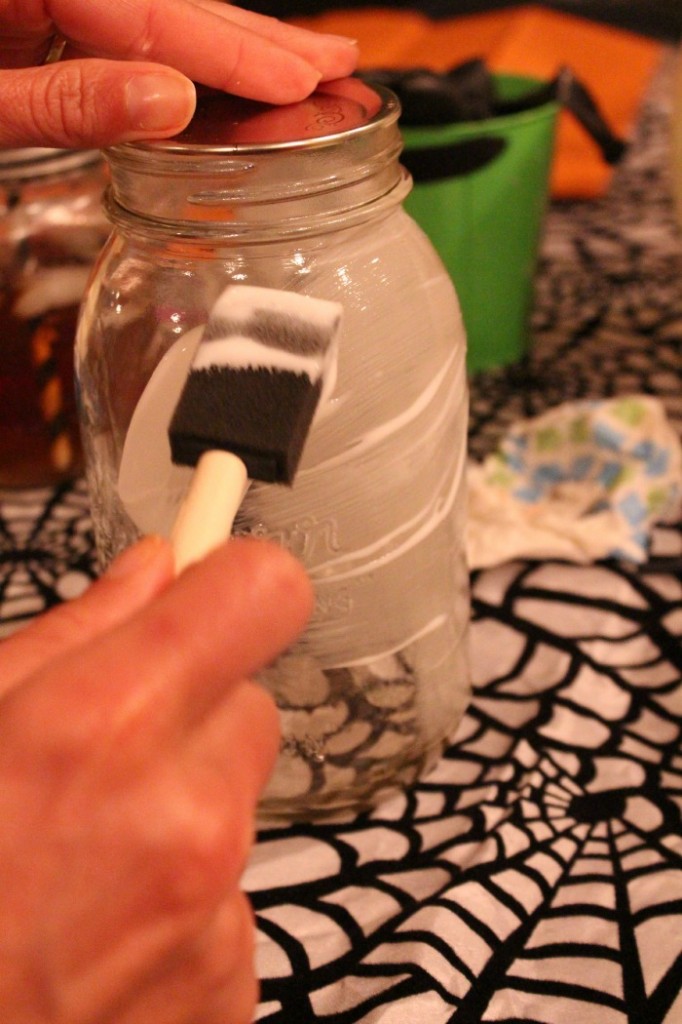
Apply the glue/mod pod to OUTSIDE of the lantern with the paint brush. The outside because you don't want the paper to catch fire if you're using a candle (no bueno)!!

Then you apply your tissue paper. Once you've laid your tissue paper down, then apply another layer of glue/mod podge on top.
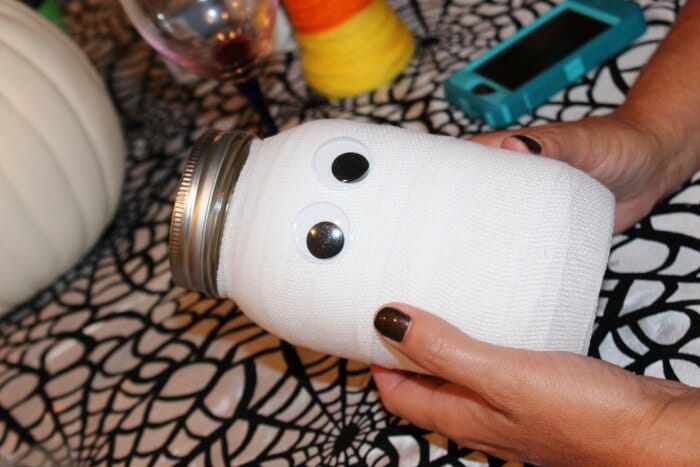
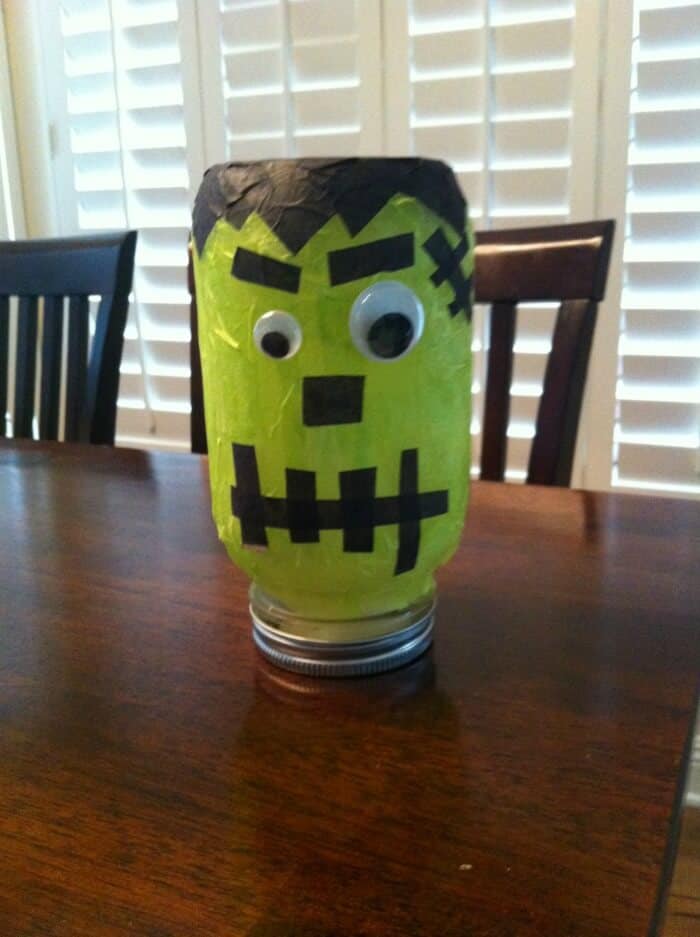
If you're going for the mummy lantern, wrap the gauze around the glued outside. We applied googly eyes to the outside of the mummy. Super cute!
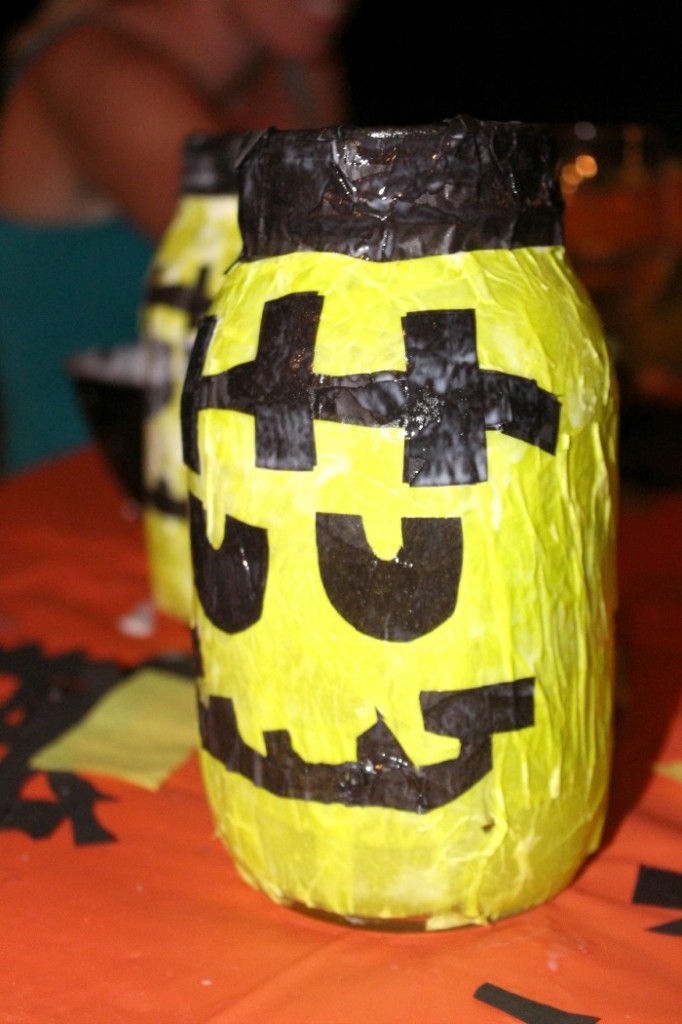
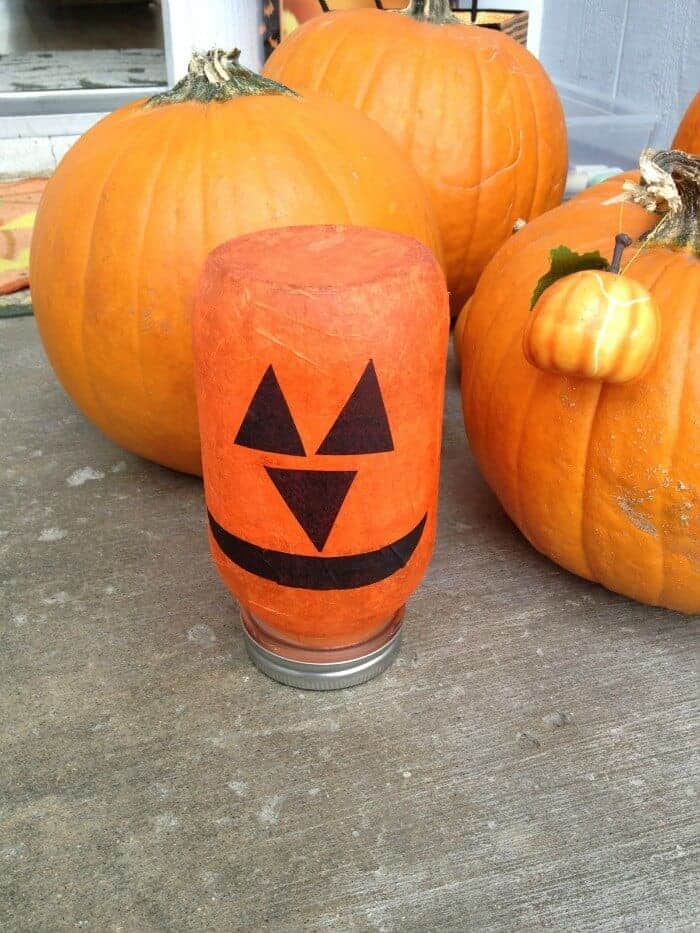
Cut the black tissue into eyes for a mummy or ears if you're going for the Frankenstein look. Let the kids be creative and I know they will all come out cute!
One thing to remember: If you are going to put a candle in the lantern, make sure the top of your mummy/Frankenstein/pumpkin is the opening of the jar. The candle will not work without oxygen. If you are using a battery operated light, then it doesn't matter which direction the jar is pointed.