• Skip to primary navigation
  • Skip to main content
  • Skip to primary sidebar
Made with HAPPY
  • Crafts
  • Printables
  • Holidays
  • Fun Facts
  • Recipes
    • Email
    • Facebook
    • Instagram
    • Pinterest
    • Twitter
    • YouTube
menu icon
go to homepage
  • Crafts
  • Printables
  • Holidays
  • Fun Facts
  • Recipes
    • Email
    • Facebook
    • Instagram
    • Pinterest
    • Twitter
    • YouTube
  • search icon
    Homepage link
    • Crafts
    • Printables
    • Holidays
    • Fun Facts
    • Recipes
    • Email
    • Facebook
    • Instagram
    • Pinterest
    • Twitter
    • YouTube
  • ×
    Home » DIY » Home + Garden DIY

    Painted Oil Pan - {DIY}

    This post and its photos may contain affiliate links. As an Amazon associate I earn from qualifying purchases. If you make a purchase through these links, I may receive a small commission at no extra cost to you!
    • Facebook
    • Yummly

    Happy Monday!

    Gearing up for the great week ahead. I know, its the first Monday after the time change and I spent the morning peeling my kids out of bed to get them off to school, but lots of fun happening this week. If you remember, last week we brought you the Painted Rock Magnets. In keeping with trying new Pinterest finds, we're trying out the oil pan magnetic board.

    painted-oil-pan

    Want to save this project?

    Enter your email below, and then we'll send it straight to your inbox. Plus get awesome new projects from us each week.

    Save Recipe
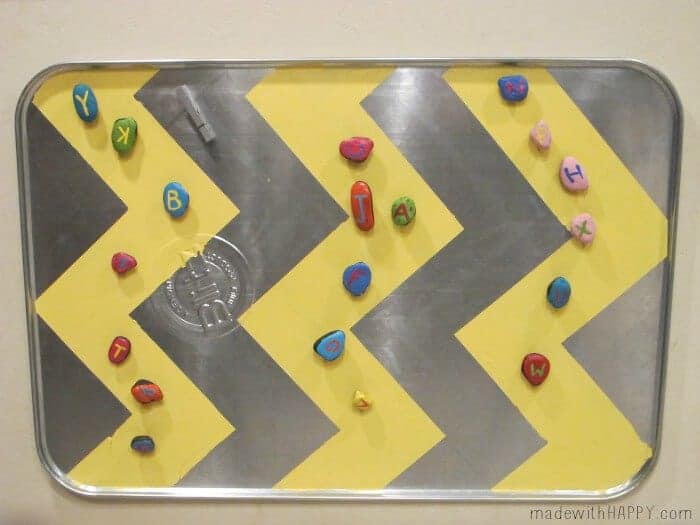
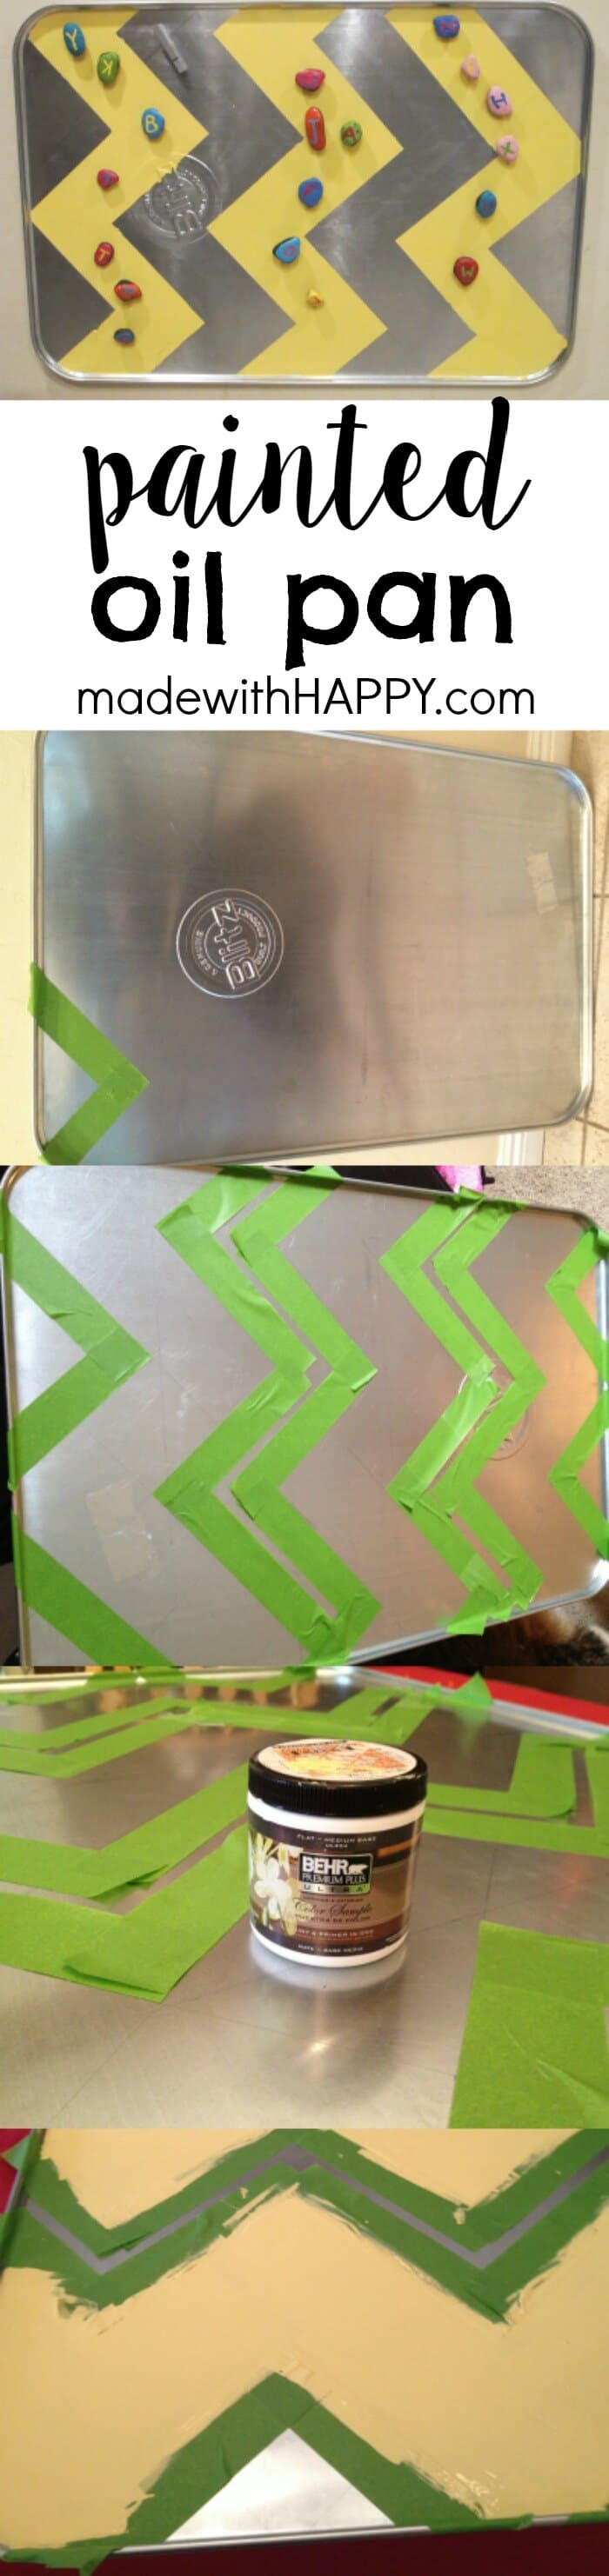
    In true Made with HAPPY style, we jazzed up the oil pan with a little chevron paint action. Turned out super cute! Here is how we did it!

    Supplies:

    • Oil pan from local automotive supply store - $10
    • 8oz sample of ultra Behr premium plus paint - we used "Spirited Yellow" - $4
    • Command Strips to hang - $1
    • Paint Brush
    painted_oil_pan
     
    painted_oil_pan_2
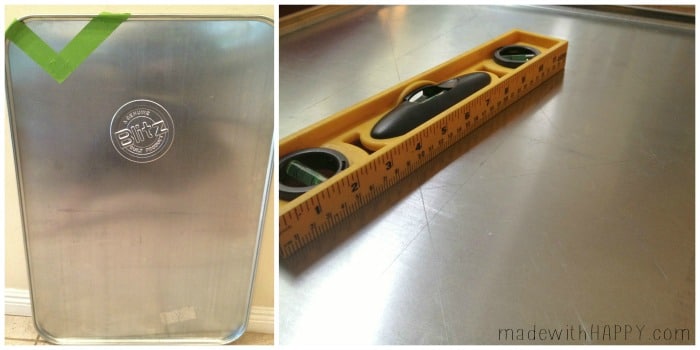
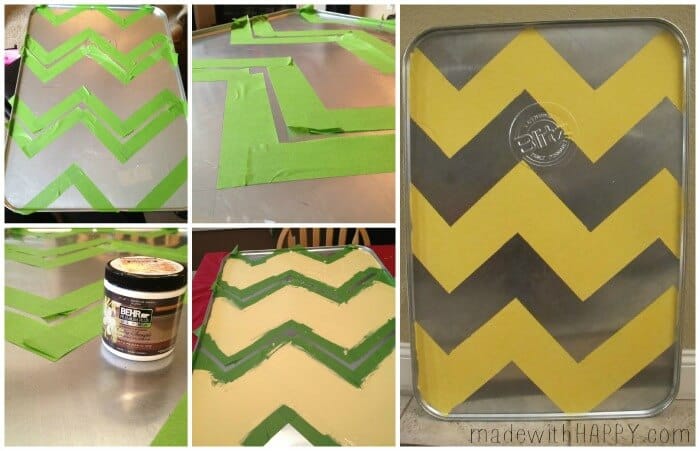
    First, we took our handy-dandy ruler and measured out the chevron lines. We went with four inch width bands. Then using painters tape, we taped up the oil pan along the pencil lines drawn.
     Once it was taped up, you paint! Two coats of the ultra was plenty! Let it dry and remove the tape!
    painted_oil_pan_4
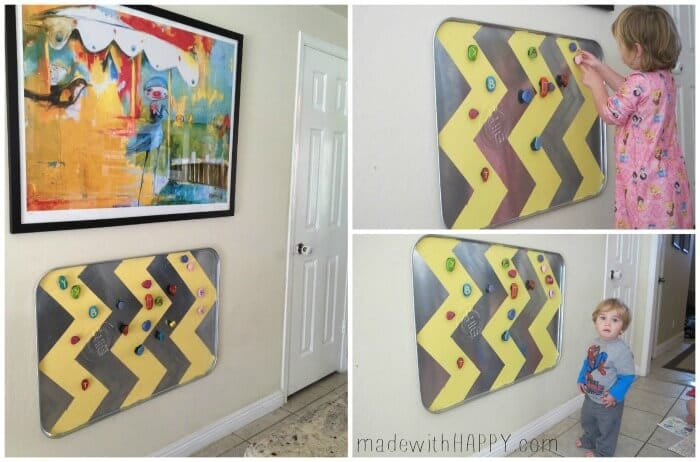
    We then used command strips and mounted it just below our beloved Beth Tom print in the kitchen. Just the right size for the kids to add their newly painted alphabet rock magnets!

    Will be great for kids art and other notes the kids would like to add up there for years to come!

    painted-oil-pan

    Like it? Pin it!

    More Home + Garden DIY

    • christmas paper wreath
      Paper Christmas Wreath
    • strawberry painting
      Strawberry Painted Rock
    • dollar tree fairy garden
      DIY Dollar Tree Fairy Garden
    • kids camping crafts
      Easy Ladybug Painted Rocks
    • Facebook
    • Yummly

    About Alli

    Discover a world of creativity and joy with Alli Ward, the creative mind behind Made with Happy. From DIY crafts to delicious recipes, Alli brings happiness to every project!

    Primary Sidebar

    Welcome Friends!

    alli ward

    Hi, I'm Alli Ward, the Maker behind Made with Happy. I'm a color-obsessed creative mom of two sharing easy crafts, printables, and home DIY projects that the whole family will love! 

    More about me →

    Check Out Our

    MWH Shop Sidebar

    Web Stories

    Trending Post

    popsicle stick dragon puppet

    Dragon Puppet

    Footer

    ↑ back to top

    About

    • About
    • Disclosures & Privacy Policy
    • Accessibility Policy

    Newsletter

    • Sign Up! for emails and updates

    Contact

    • Contact

    We are a participant in the Amazon Services LLC Associates Program, an affiliate advertising program designed to provide a means for us to earn fees by linking to Amazon.com and affiliated site