Personalizing your presents this season with this DIY photo wrapping paper.
Want to save this project?
Enter your email below, and then we'll send it straight to your inbox. Plus get awesome new projects from us each week.
Personalize any gift with this photo wrapping paper.
Every year, I dig and dig through the piles of wrapping paper looking for the perfect combination of colors and designs to wrap our Christmas presents.
Of course, I'm not your typical red-and-green traditionalist, so it has proven to be quite difficult. While you all know I love making gifts and all the joy it brings, the idea of making my own wrapping paper makes my cup overflow.
Be sure to check out the 101 more free printables for kids like this one.
We highlighted these Christmas printables along with some other fun kid's crafts in our December Crafts for Kids along with our 101+ Easy Craft Ideas for kids.
Photo Wrapping Paper
You all know that I love photo gifts more than most all things. Like the mother's day flower picture, the Modern DIY Photo Tray, or the driftwood picture display. I mean, if I could have all things with photos of my family, I really would. 🙂
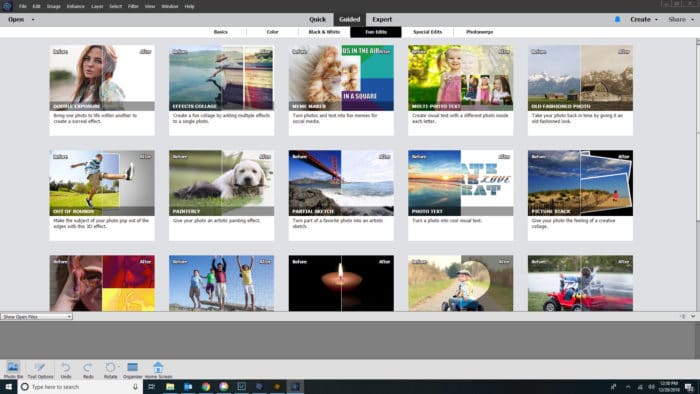
In any case, as I was looking through all the cool tools within the new Photoshop Elements 2019, I quickly saw that they have this new "Guided Edits" tab within the software that walks you through a number of ways to edit or create fun things with your photos.
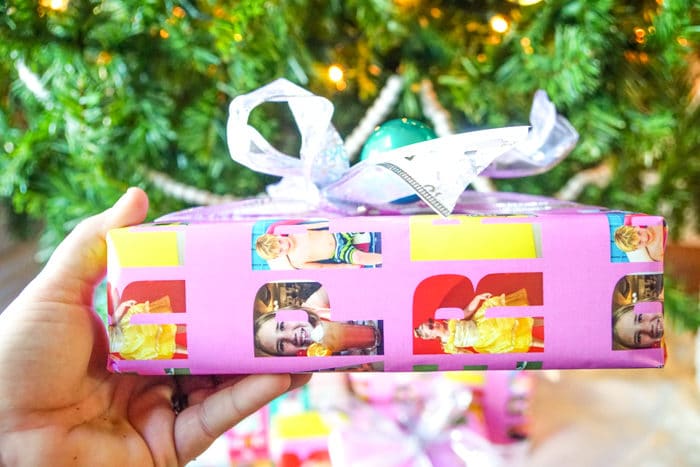
The one that got my wheels turning was the Multi-Photo Text. It will allow you to place your pictures within any text you want. UMMMM... so many great possibilities.
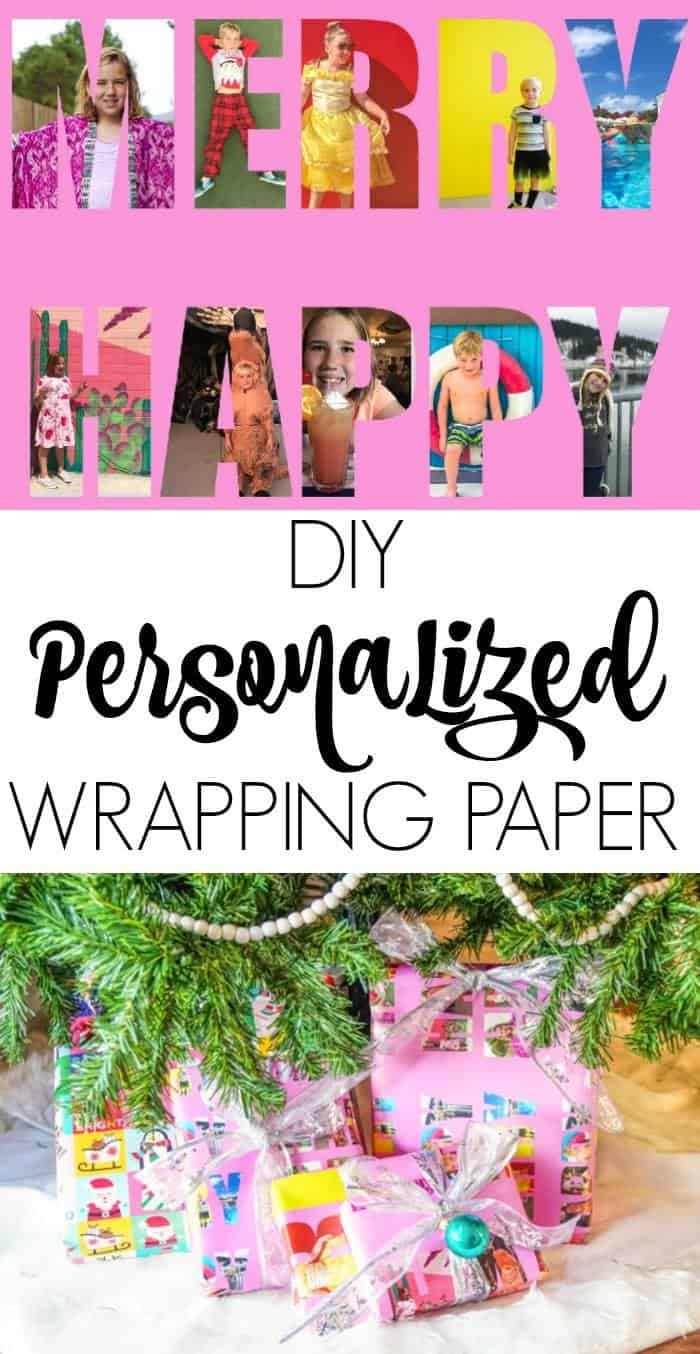
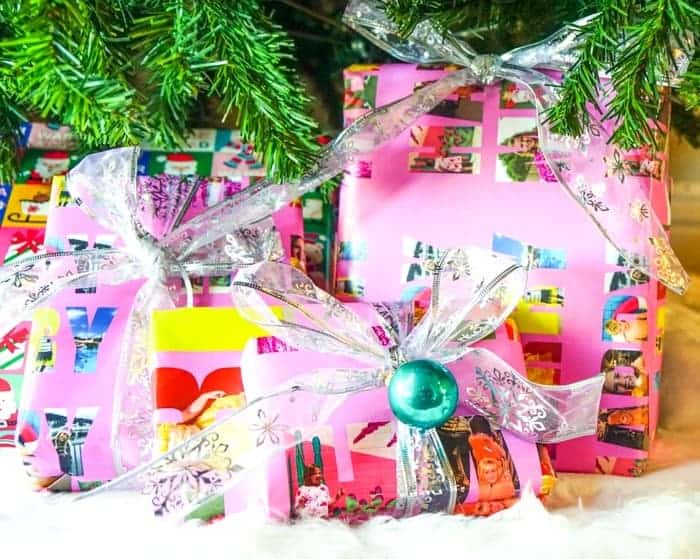
Kid's names, family names, and then I got thinking how fun would it be to use that picture on wrapping paper. Oh, hot diggity dog. So that is what I did. I of course was going for the rainbow colorful look, but you could go with a color scheme that matched your family pictures this year or even black and white pictures which would look incredible on photo wrapping paper and Christmas gifts.
In any case, here is how I made mine, and I can't wait to hear what you make for yours.
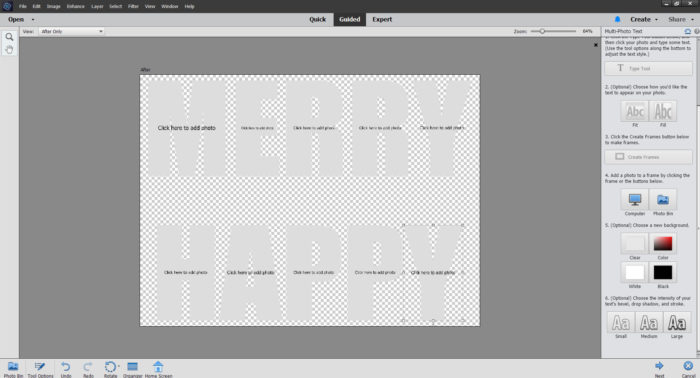
Open up Adobe Elements 2019 and under Guided Edits, the fourth option on the top row, click multi-photo text. It asks you to pick a photo to place the text on. I picked a random picture but ultimately ended up changing the background. From there, you type what you want it to say. I went with MERRY HAPPY. It then guides you through the process on the right-hand side, so it's super easy.

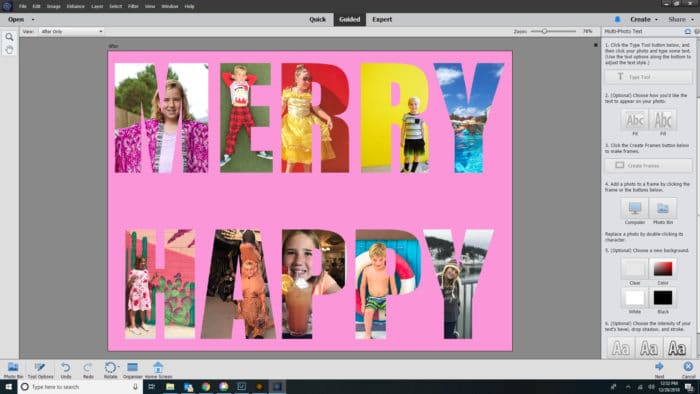
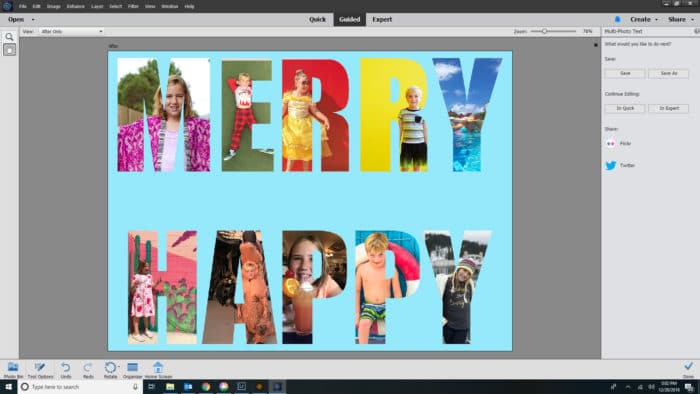
I then filled in each of the letters with the pictures I wanted. I then decided that I needed a different colored background. I went with both pink and turquoise as my backgrounds as they are two of my favorites. From there you simply save it as JPEG.
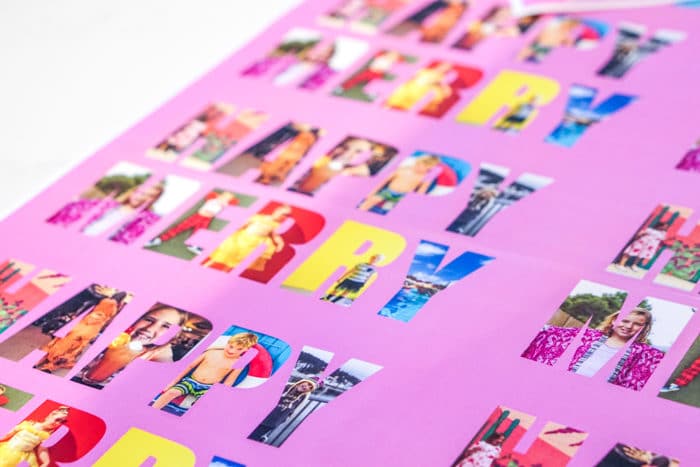

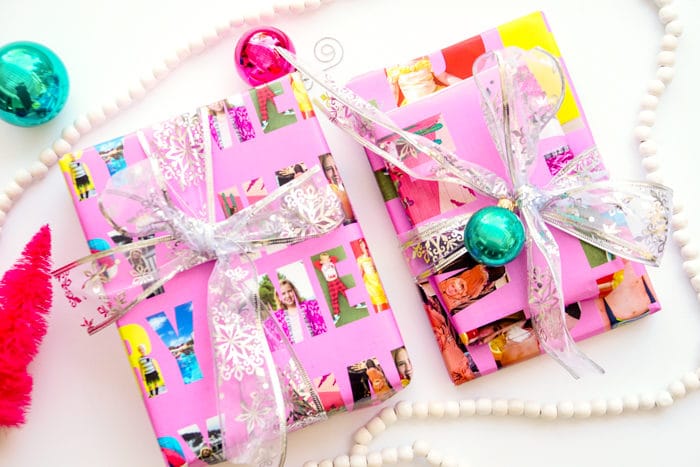
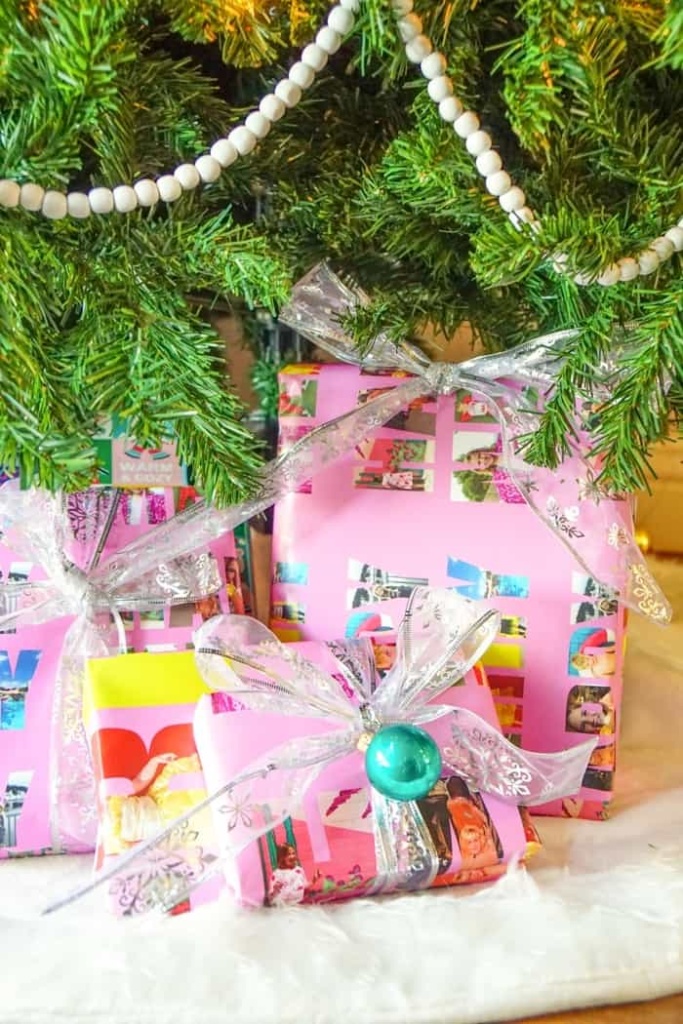
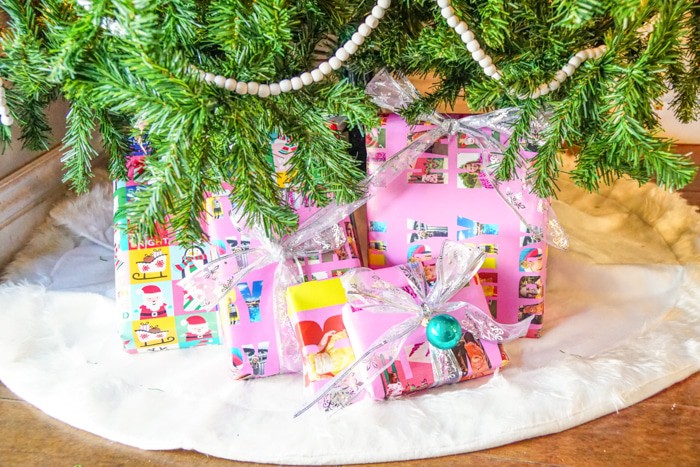
I then went over to Zazzle where you can print your own wrapping paper. You can do one image or tile image and then order. I got mine overnight!Wrap all thing things and then be so excited when you give a gift that not only sits under your tree all purrrty, but can sit under your loved ones tree with cutie patooty pictures looking back

I love the idea of using all the great pictures from that year on your wrapping paper and I think its going to be a tradition moving forward that we create photo wrapping paper each year from here on out!
OTHER PHOTO CRAFTS YOU MIGHT ENJOY
PHOTO WRAPPING PAPER
PIN IT TO YOUR CRAFTY BOARD ON PINTEREST!
FOLLOW MADEWITHHAPPY ON PINTEREST FOR ALL THINGS HAPPY