Celebrating all the Thanksgiving HAPPY with this Thank you Bank. We're sharing a DIY on how to make it and what it is and how it is awesome.

Today I'm sharing with you the How-To on this ADORABLE
We highlighted this Thanksgiving Craft along with some other fun kids craft in our November Crafts for Kids along with our 101+ Easy Craft Ideas for kids.
You also do not want to miss our 101+ Free Kids Printables full of Crafts & Coloring Pages.
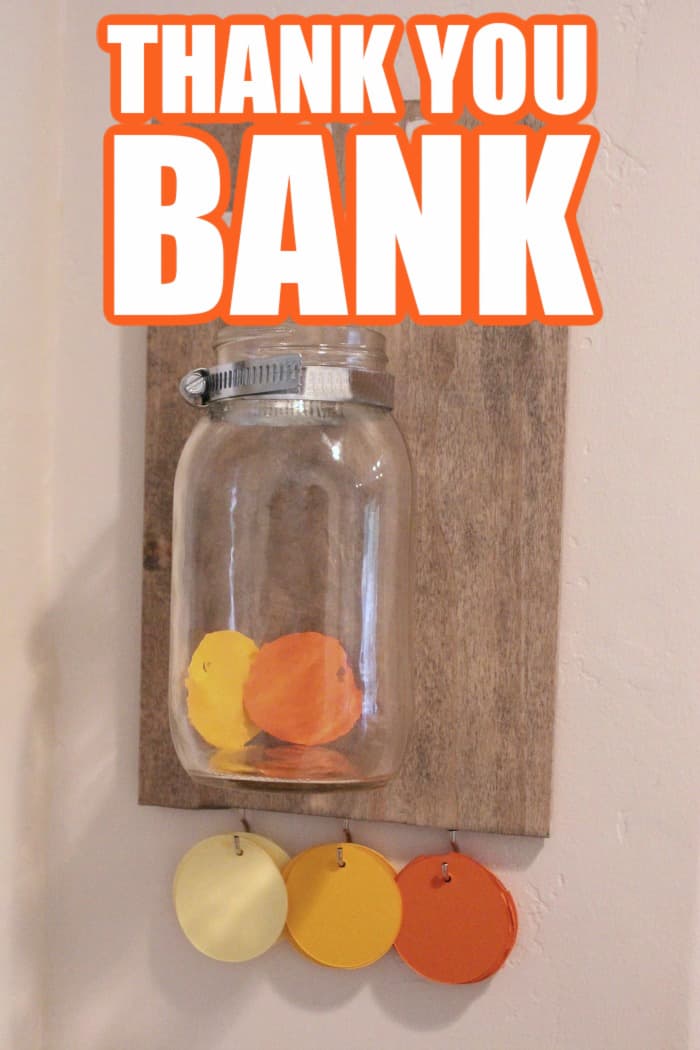
Thank You Bank
Such a great way to remember to say thank you, and teach your children kindness and gratitude.
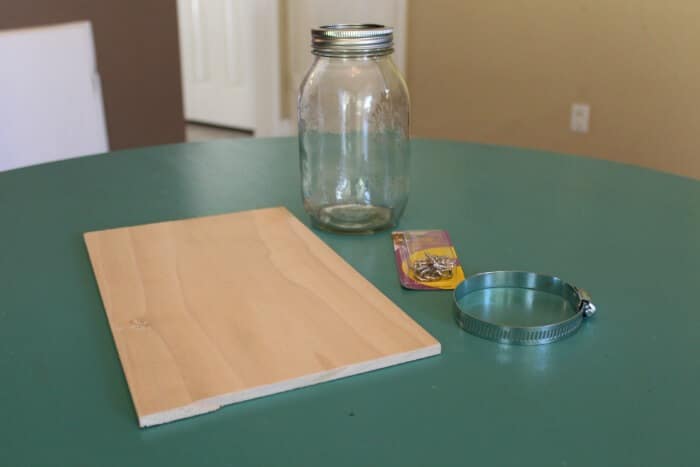
Supplies
Want to save this project?
Enter your email below, and then we'll send it straight to your inbox. Plus get awesome new projects from us each week.
- A small piece of wood - I used a hobby plank 9 inch wide by 1 foot long
- A mason jar
- A pipe fastener (up to 3 ½")
- 1 small screw (shorter than the thickness of your wood piece)
- 3 nickel cup hooks
- white acrylic paint
- wood stain
- paint brush
- picture hanging kit
Directions
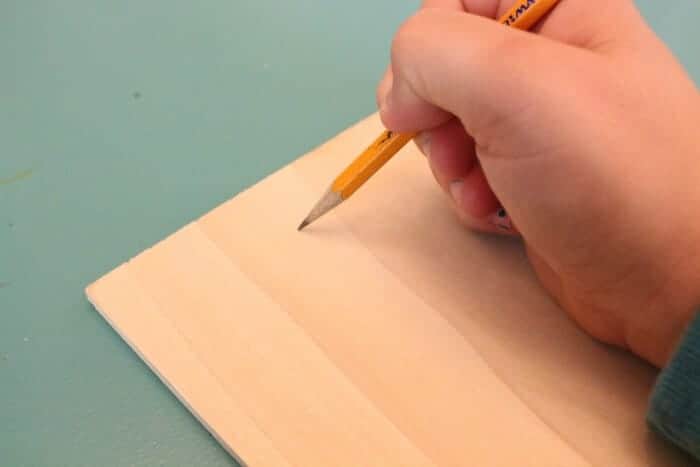
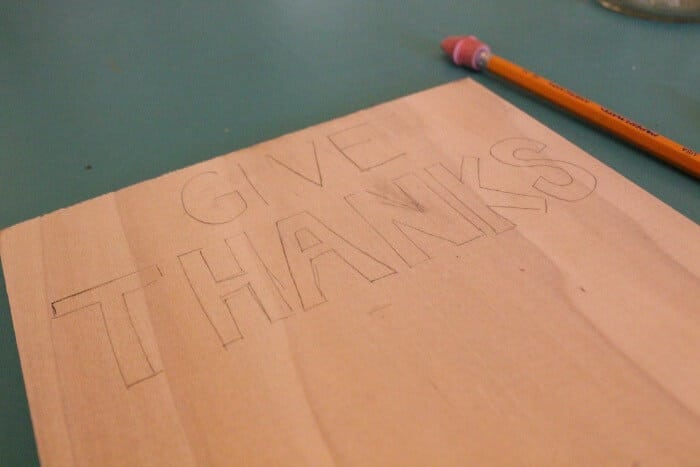
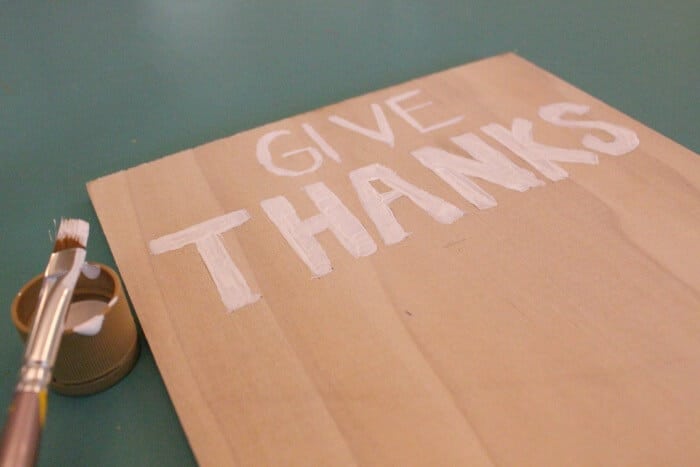
I'm still holding out for Santa on my Silhouette Machine (hint hint), so instead of a stencil, I went with hand drawing on the lettering.
Staining Your Project

Then using a paint brush paint over your lettering. I went with white paint, but of course any color would look great!
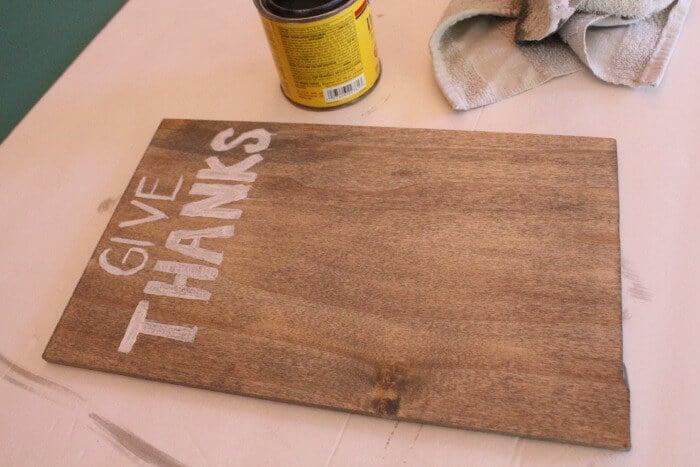
Then using a rag, whip on the stain. I used a grey finish which I think gives it a little more modern feel. Depending on the wood and the richness you're going for will depend on how many coats. My project only used one.
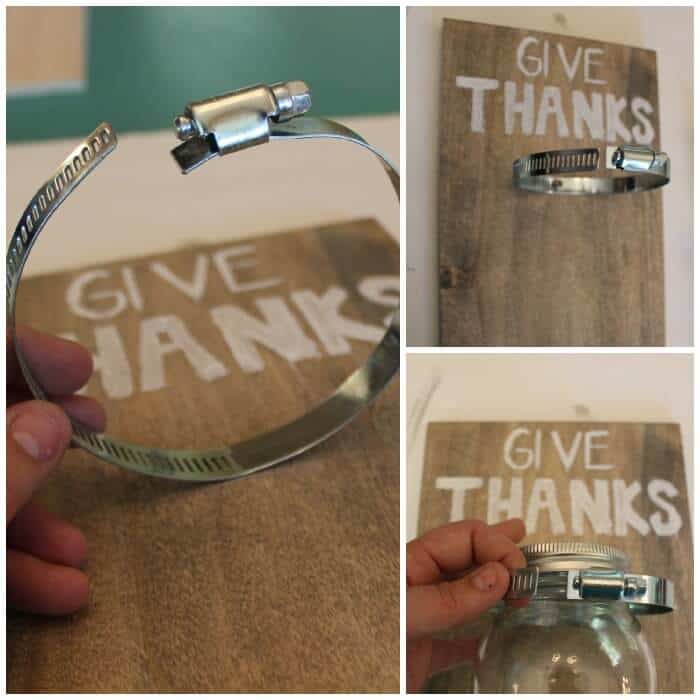
Once the stain is dry, then its time to fasten the clamp to the wood. Placing the jar on the plank, measure out where you would like the jar to hang from. Remove the jar, and using the small screw, attach the fastener to the wood through the last slit in the fastener.
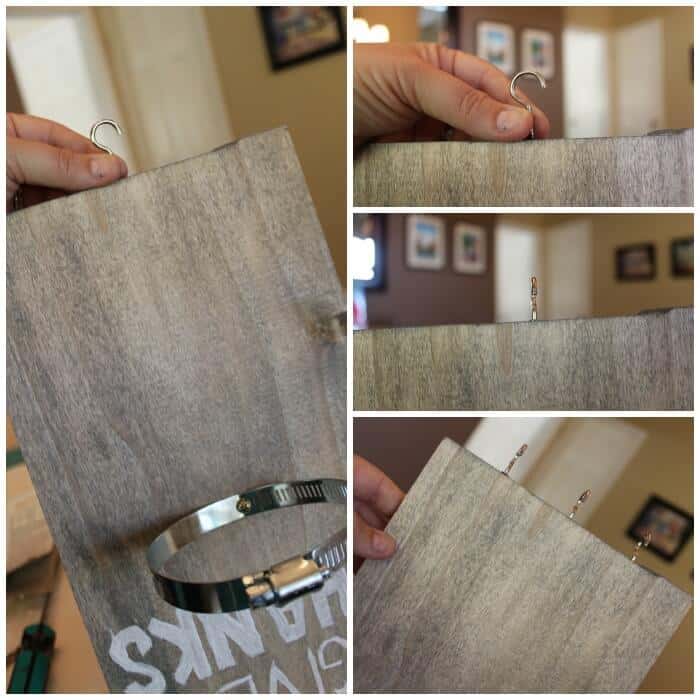
Next to be attached are the hooks to the bottom of the wood piece. I went with three different hooks. Start in the middle and then fasten the other two hooks evenly spaced from the center hook.
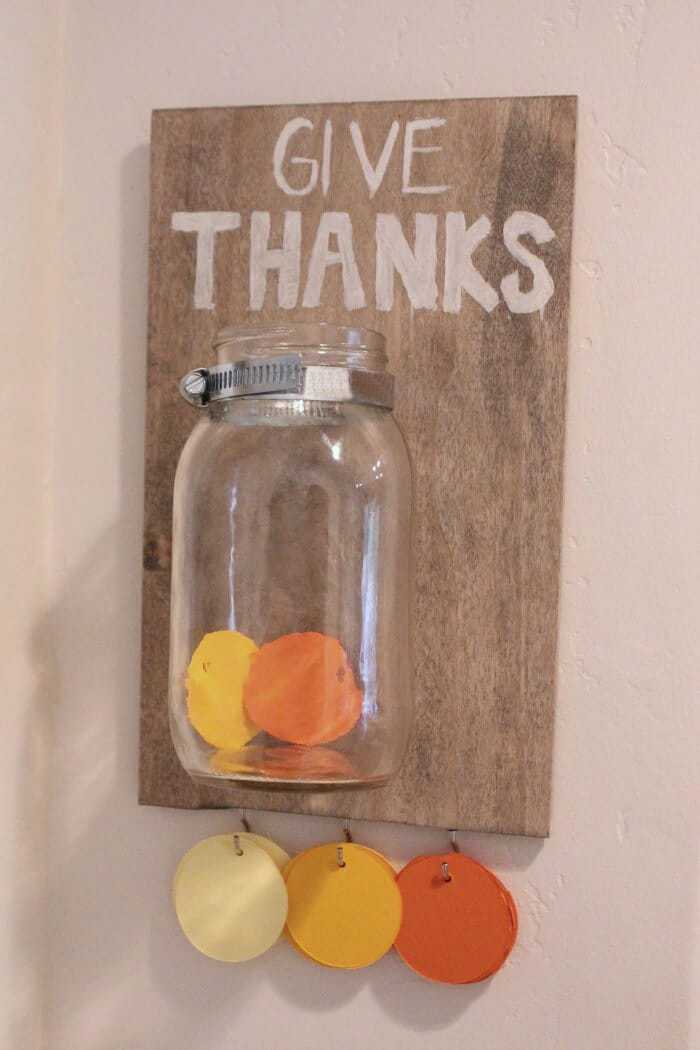
After the hooks are attached, using a simple picture frame hanging kit, I attached it to the back allowing for the Thank You Bank to hang on the wall.
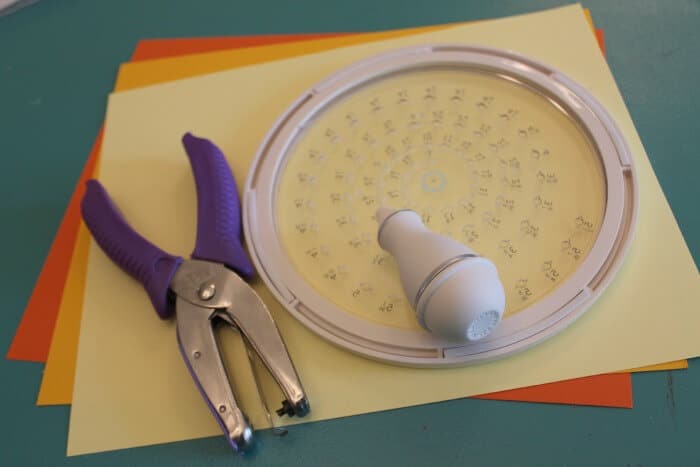
Last but certainly not least is the paper for the thank you's. Using a circle paper cutter, I cut out 2 inch circles. Toward the top of the circle I punched a hold allowing for it to hang on the hooks.
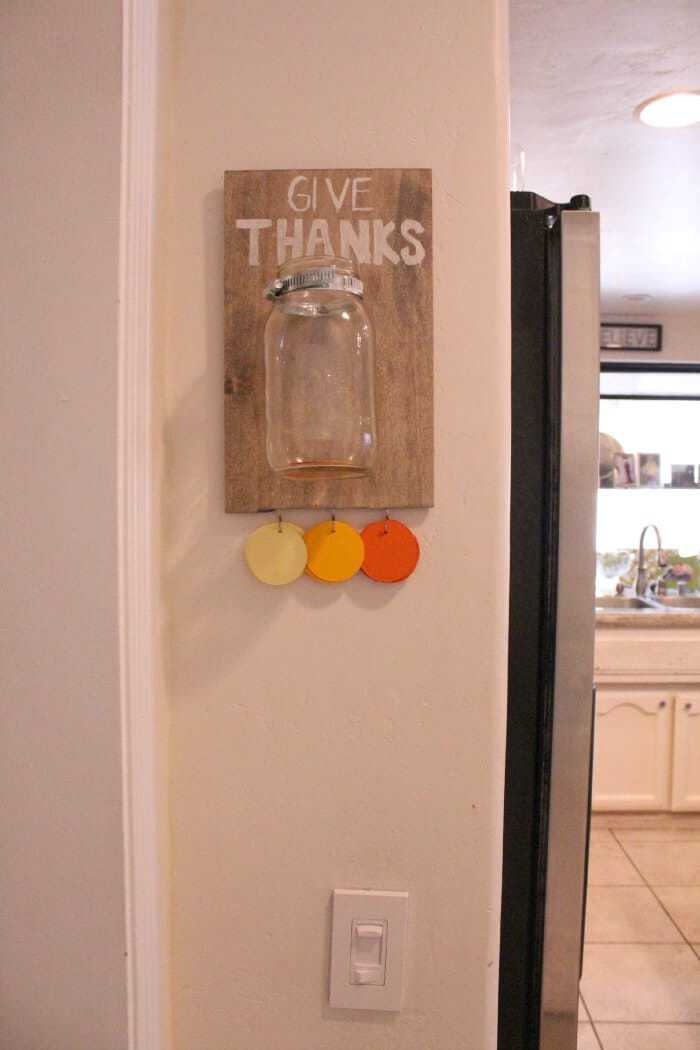
We hung our bank right as you walk into the kitchen so that we remember to continually talk as a family about gratitude and thank yous. Collect the thank you throughout the year and read them at the Thanksgiving table.
Hope you enjoy your Thank You Bank as much as we do!
Other Thanksgiving Crafts You'll Love
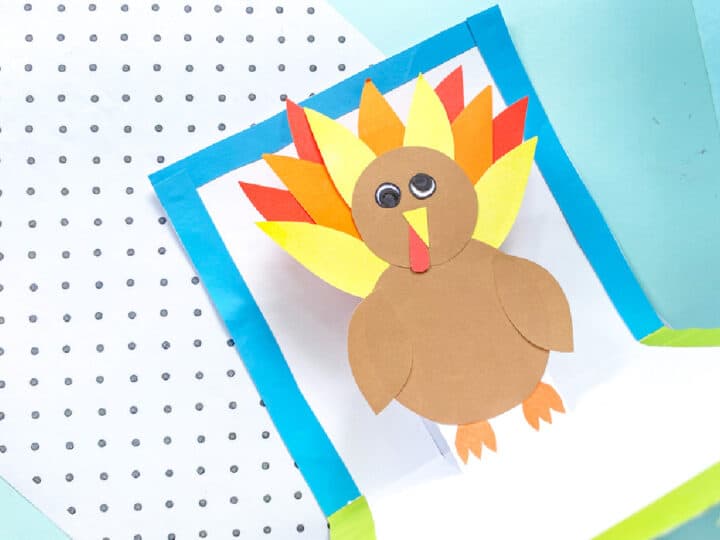
- Super Cute Turkey Handprints Craft
- Teepee Paper Craft
- Photo Turkey Craft
- Cinnamon Stick Candle Craft
- Felt Sunflower Craft
THANK YOU BANK
Celebrating all the Thanksgiving HAPPY with this Thank you Bank. We're sharing a DIY on how to make it and what it is and how it is awesome.
Materials
- A small piece of wood - I used a hobby plank 9 inch wide by 1 foot long
- A mason jar
- A pipe fastener (up to 3 ½")
- 1 small screw (shorter than the thickness of your wood piece)
- 3 nickel cup hooks
- white acrylic paint
- wood stain
- picture hanging kit
Tools
- paint brush
Instructions
 Either using a stencil or hand drawn like I did, the words "Thank You."
- Then using a paint brush paint over your lettering. I went with white paint, but of course any color would look great!
- Then using a rag, whip on the stain. I used a grey finish which I think gives it a little more modern feel. Depending on the wood and the richness you're going for will depend on how many coats. My project only used one.
 Once the stain is dry, then its time to fasten the clamp to the wood. Placing the jar on the plank, measure out where you would like the jar to hang from. Remove the jar, and using the small screw, attach the fastener to the wood through the last slit in the fastener. Once the stain is dry, then its time to fasten the clamp to the wood. Placing the jar on the plank, measure out where you would like the jar to hang from. Remove the jar, and using the small screw, attach the fastener to the wood through the last slit in the fastener.
- Next to be attached are the hooks to the bottom of the wood piece. I went with three different hooks. Start in the middle and then fasten the other two hooks evenly spaced from the center hook. After the hooks are attached, using a simple picture frame hanging kit, I attached it to the back allowing for the Thank You Bank to hang on the wall.
- Last but certainly not least is the paper for the thank yous. Using a circle paper cutter, I cut out 2 inch circles. Toward the top of the circle I punched a hold allowing for it to hang on the hooks.
 We hung our bank right as you walk into the kitchen so that we remember to continually talk as a family about gratitude and thank yous. Collect the thank you throughout the year and read them at the Thanksgiving table.
CONNECT WITH MADE WITH HAPPY!
Be sure to follow me on social media, so you never miss a post!
Facebook | Twitter | YouTube | Pinterest | Instagram
Find and shop my favorite products in my Amazon storefront here!
Thank You Bank
PIN IT TO YOUR DIY BOARD ON PINTEREST!
FOLLOW MADE WITH HAPPY ON PINTEREST FOR ALL THINGS HAPPY!