

Embrace positivity with our 'Be Happy, Be Bright, Be You' craft. Create uplifting and colorful art that reflects your unique self.
I've been slacking off around here lately, and I have to apologize. I've been working pretty diligently behind the scenes, but that shouldn't mean that the front end should slack. I was going through some of the projects I've been working on lately and realized that there are quite a few that you haven't seen the end product. DOH! The list is getting longer and longer and so today I figured I'd sit down and get them out.
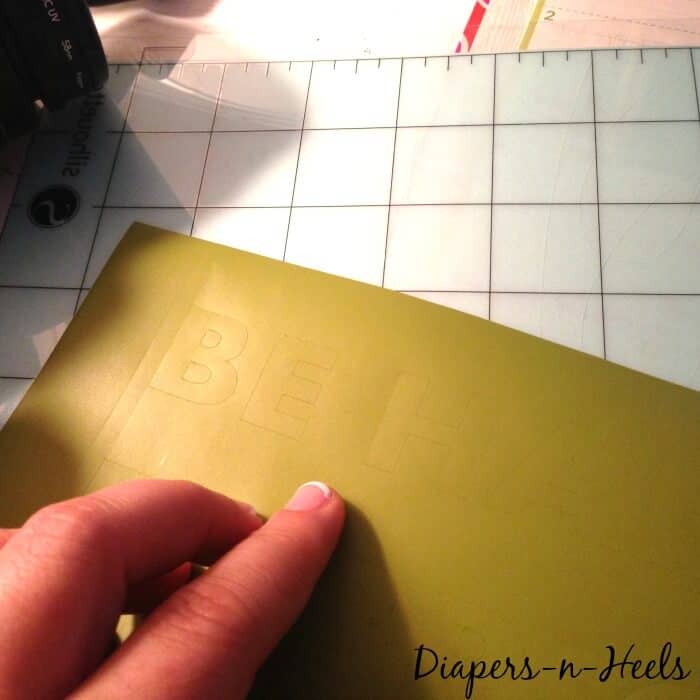
First up... I wanted to share the end product of my first stencil with the Silhouette. Santa brought me the rockin' Silhouette Portrait for Christmas and even though I had opened it the morning of and had it all set up and raring to go, I hadn't taken the time to sit down and create something. A WHOLE MONTH!!! I KNOW, IT IS A SHAME!
Have I mentioned my obsession for the last couple of months?
***GOLD***
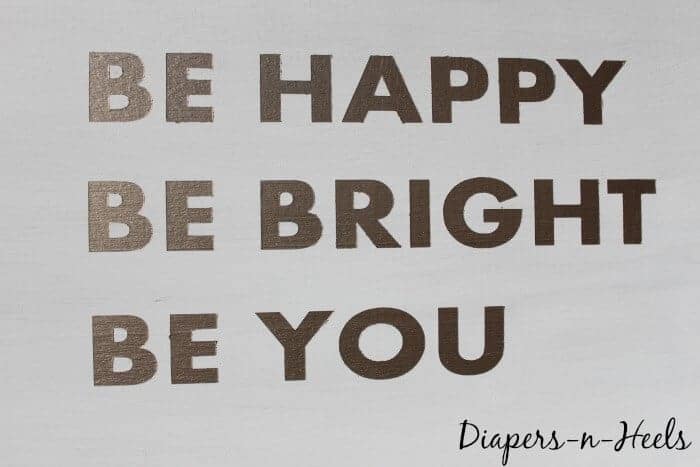
Be Happy Be You
I want to wear it, decorate my house with it, and craft everything in some gold glitter... the works. When I get something in my head, then I tend to obsess on it for a while. A few months ago, I came across this beautiful print from Sugar Paper in Los Angeles and you guessed it, I've been obsessed with it. I WANT IT!!!! Gold foil --- ahhh, so pretty!
When I finally sat down to work on my first project for the stencil, I thought, why not try and create my own hack knockoff of that beauty? This is by no means a way to steer you away from buying the print from Sugar Paper. I highly recommend that you go and get one for yourself.
This is how I turned that beauty into a fun little sign for my office that I love and look at every day!
Okay, here was the sneak peek Instagram from a month ago --- yep I am behind 🙂
Here's how I did it!
Supplies:
- Piece of craft board - size is up to you
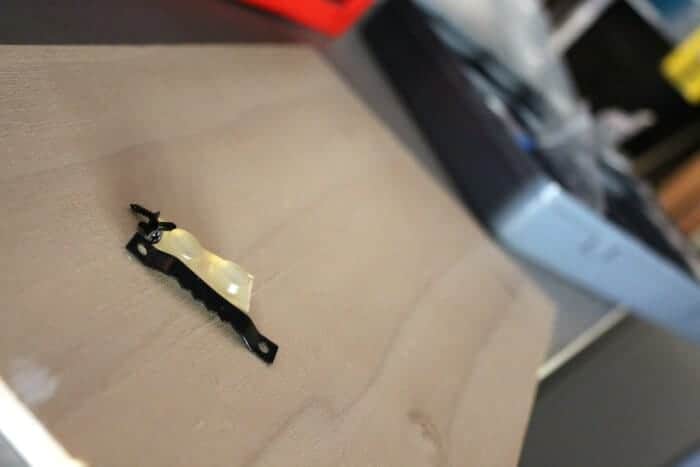
- Picture hanging kit
- Paint
- Paint Brush/Stencil Brush
- Stencil
Directions:
Want to save this project?
Enter your email below, and then we'll send it straight to your inbox. Plus get awesome new projects from us each week.
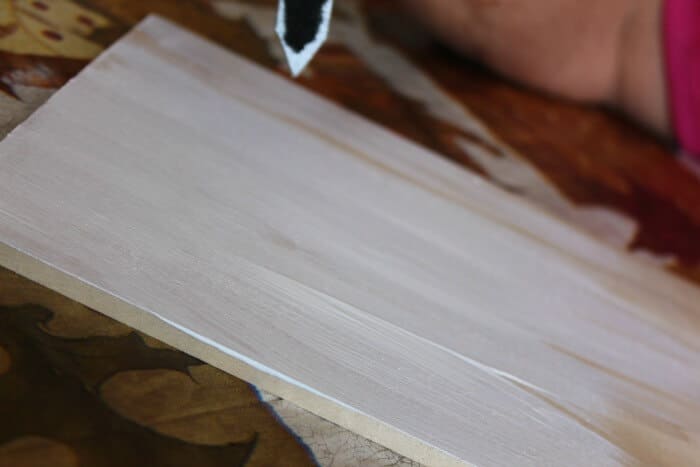
Determine the size you want your sign. I had leftover craft board from my Thank You Bank so I based my sign on that whether you will be creating the stencil or having someone else create the stencil, it's important to know the size of your end product in order to create the stencil at an appropriate size.
Print your stencil.
If you want to paint the letters, then you remove that part of the stencil. If you want to keep the letters unpainted, then you remove the outside of the letters.
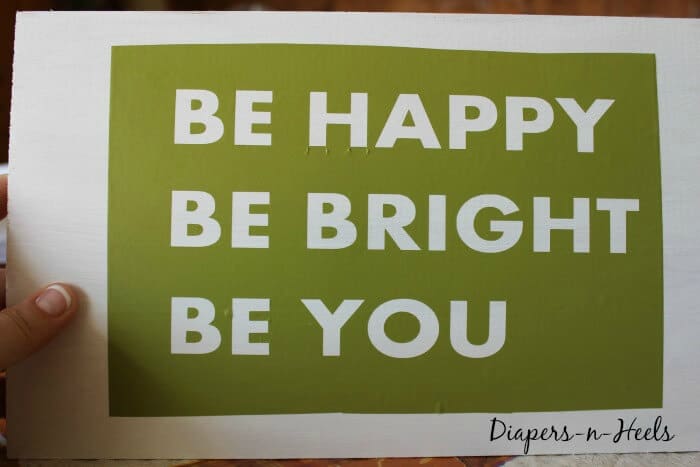
Make sure if you'd like your sign to have a background color, paint the board that color before adding the stencil. Using the smoothing tool (or credit card) make sure to smooth down the letters especially right around the outside of the letters as to make sure the paint doesn't bleed.
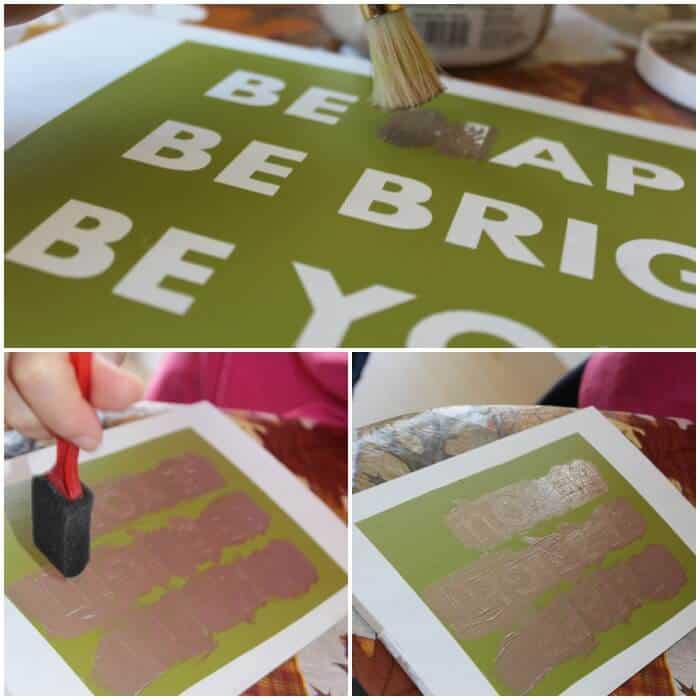
Then using a stencil brush and or sponge brush, paint on the color of the letters. I used Folk Art Metallic Pure Gold Acrylic Paint. Once its dried, then you remove the stencil.
Eeeek... How much do you love it? I heart it so!!!Then its just a matter of adding the hanging kit to the back and viola, you have yourself a little piece of happiness.
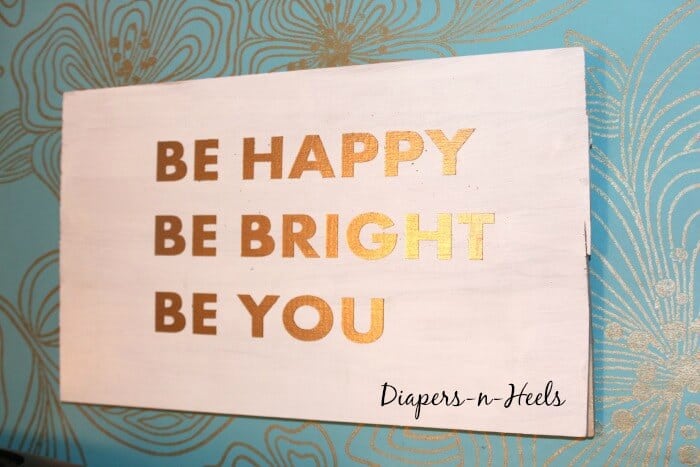
I think it goes perfectly with the gold-embellished wallpaper in my office. Although, I've been having the hardest time capturing the true gold color on my camera. Wah wah.
What do you think?
Other DIY Projects You'll Enjoy
- Popsicle Stick Bird Feeder
- Pinata Alternative
- DIY Pool Heater
- How to Build a Treehouse
- How to Make a Rope Basket
CONNECT WITH MADE WITH HAPPY!
Be sure to follow me on social media, so you never miss a post!
Facebook | Twitter | Youtube | Pinterest | Instagram
Find and shop my favorite products on my Amazon storefront here!
Be Happy Be Bright Be You
PIN IT TO YOUR DIY BOARD ON PINTEREST!
FOLLOW MADE WITH HAPPY ON PINTEREST FOR ALL THINGS HAPPY!


