Create this easy DIY Wine Barrel Tray is simple and only takes a few supplies from your local hardware store. Makes a great gift!
Want to save this project?
Enter your email below, and then we'll send it straight to your inbox. Plus get awesome new projects from us each week.
This wine barrel tray is a fun gift to give anyone starting out their new lives as a married couple.
If you love DIY projects like this, then you will not want to miss our most popular post including: How to Make a Lazy Susan, How to Make an Outdoor Easel, and our DIY Made with Happy Treehouse.
Wedding Gift Idea
I know, I've been alluding to how much we had been traveling lately, and I haven't given you much more than that. Well one of the trips we recently took, was out to Phoenix where my husband served as the best man for one of his best friends wedding!
First off, the wedding was UNBELIEVABLY beautiful! The desert backdrop... SO PRETTY! I would describe it as simple elegant. Oh my goodness, I could go on and on about this wedding and if I can get a thumbs up from the bride and groom, maybe I'll share some pics. SO FUN!
Second, the wedding couple are some of our best friends, and so it was just incredibly special to be part of such an important day.
Third, they just purchased their first home. So not only did we want to give them something special for the wedding, I was thinking about their house and if there is something I could make that would be great in their house as well.
Wine Tray

Rewind about a year ago! Typical Alli style, I'm combing the web for different things when I came across Lil Blue Boo and of course was immediately in awe. She is all kinds of cool and awesome in one!!!! I then stumbled on her DIY of a Wine Barrel Tray!
I began to think of who the heck I could make this for and the list started to add up. A bit overwhelmed, I tabled that thought. A wee bit later, I heard the unbelievable news that our friends got engaged and were getting married. You all know where I'm going with this, but essentially they were high on my initial list and with the nuptials coming up, and the grooms LOVE AFFAIR with wine, I just knew I was going to make it for them.
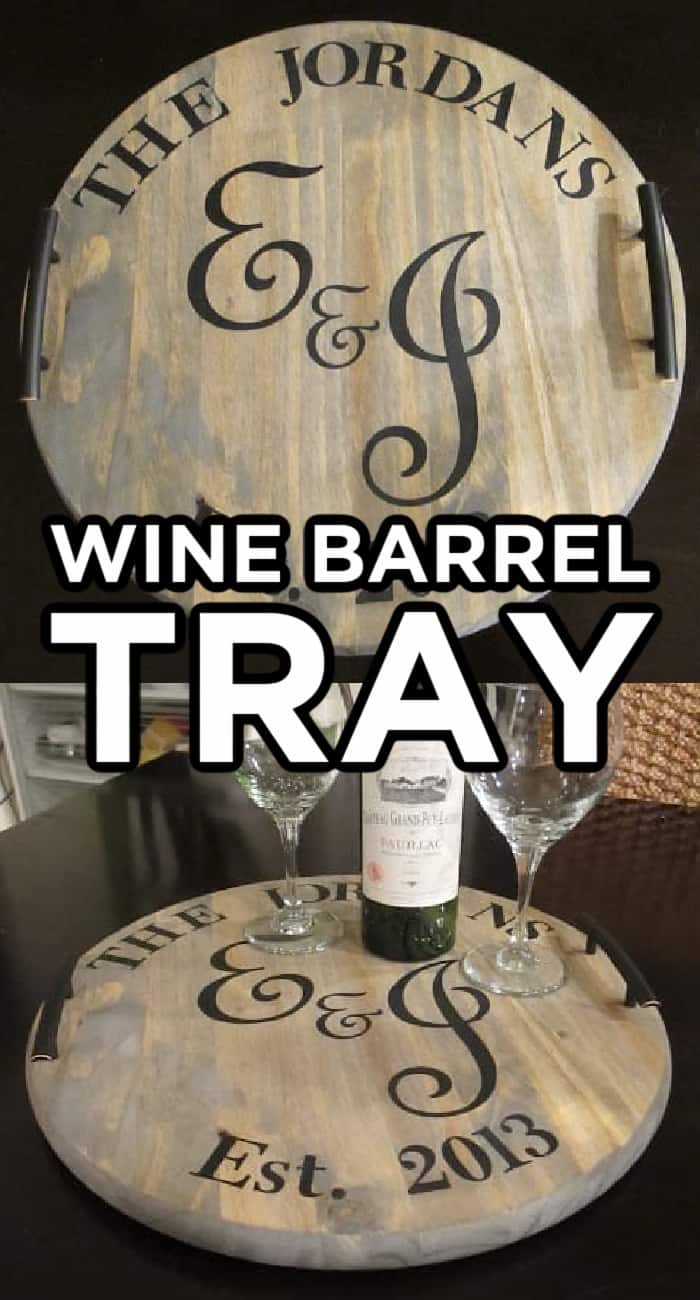
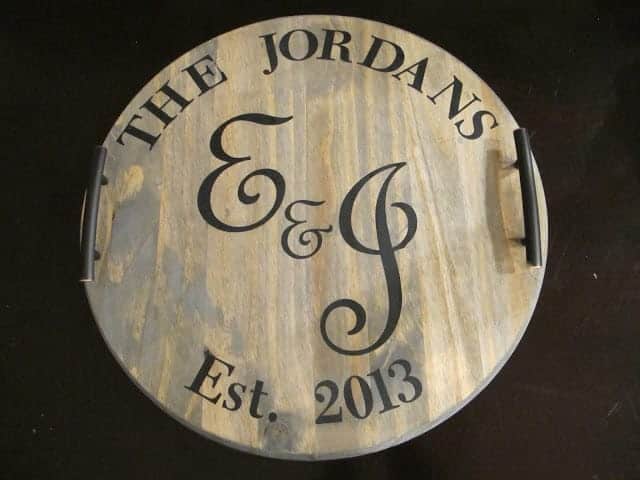
The hardest part for me was deciding on a design for the middle of the tray. I know, you aren't supposed to reveal what it was supposed to be, but for this, I think its important for you think about it when putting it together for a wedding or something extremely special.
For this couple, the first edition Pride and Prejudice book played an important role in their engagement and so my initial thought was to try and recreate this peacock for the middle and then instead of the "Pride and Prejudice" I would put the city and state of their wedding and new home. Remember that in order to make this, you are making a stencil and something that intricate would never work. So defeated, I went back to the drawing board. I attempted to narrow down one of the couple's favorite wines and then recreate the wine bottle label, but that too proved to be difficult. Lastly, I decided to mimic the wedding and go with something simple and elegant!
Ok, so here's how I did it. Went a slightly different route than Ashley from Lil Blue Boo.
Supplies
- Wood Table Top
- Black Craft Paint
- 8 oz. Wood Stain
- 8 oz. Polyurethane
- Stencil
How to Make Wine Barrel DIY
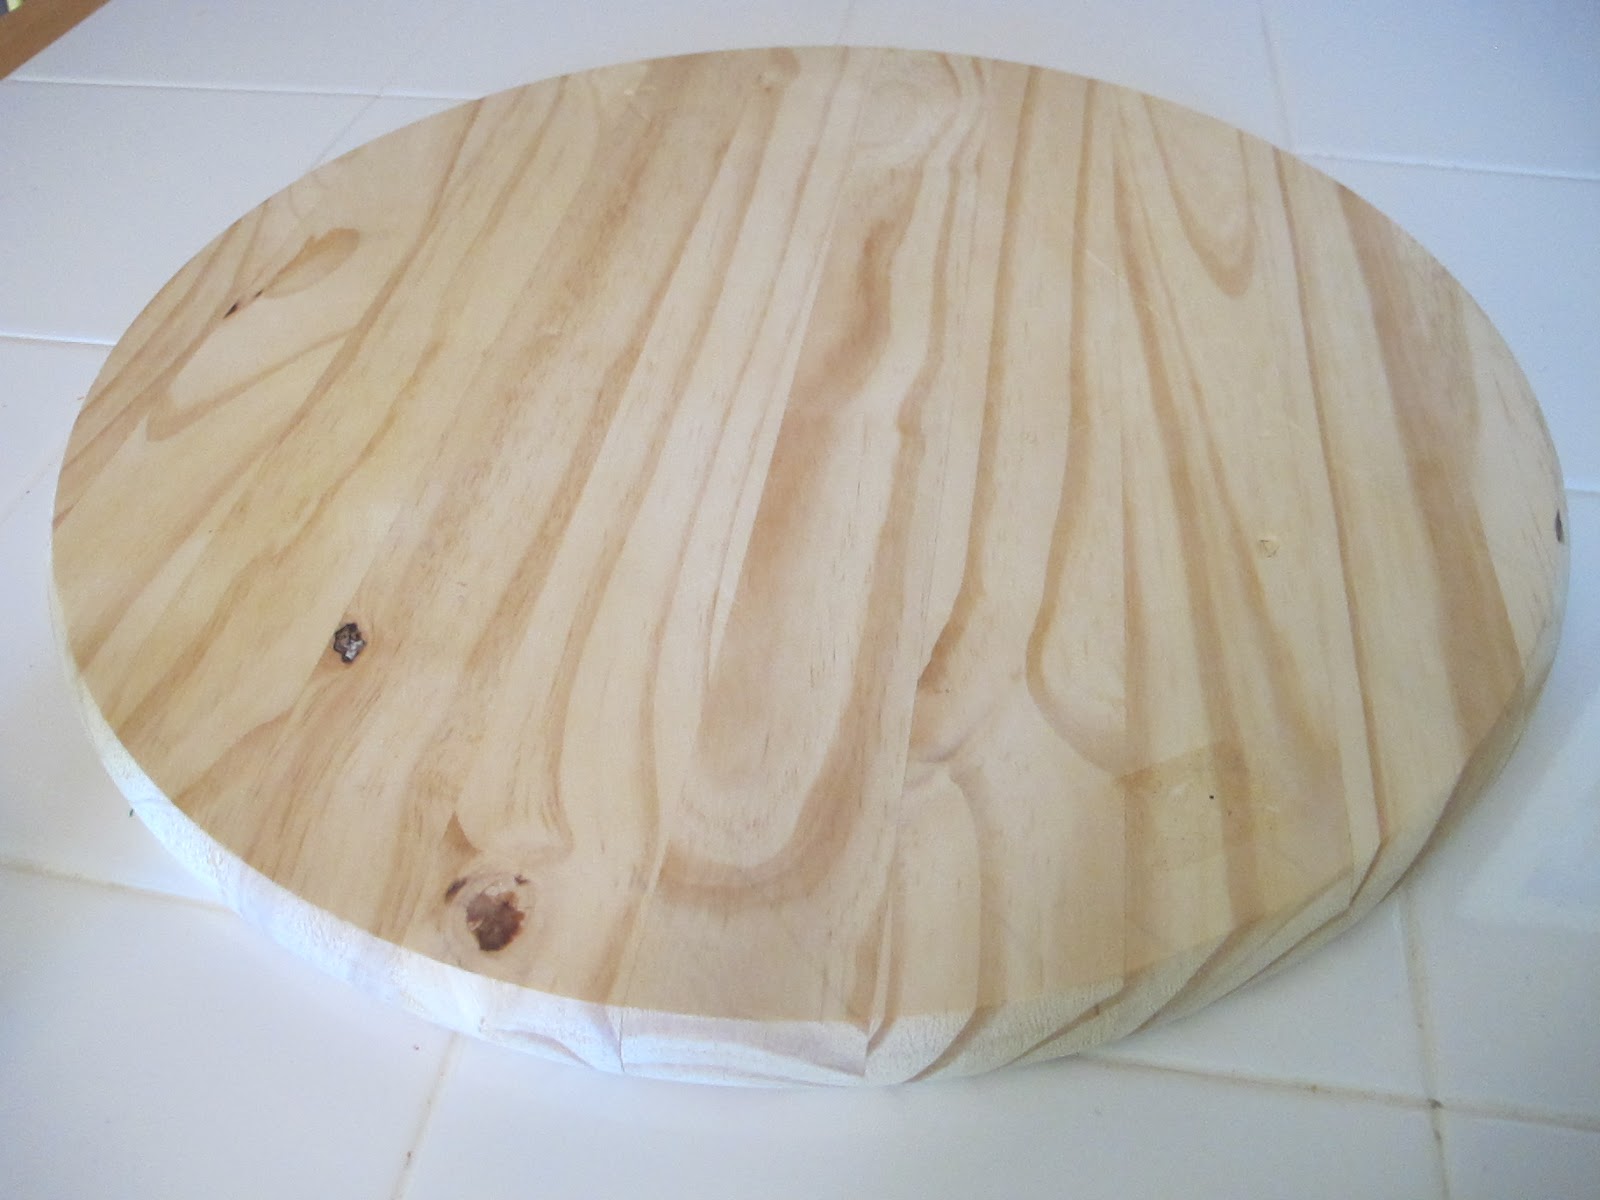
First, went with the smallest table top I could find at the local Home Depot

Next is the stencil. If you have a fancy cricket or silhouette machine, you go on with your bad self and just know that I'm all kinds of jealous sitting here envious. If you don't, then there are a few different routes to take with the stencil. A.) Make friends with someone with one of those machines or B.) Make friends with someone at your local sign shop. They should have the ability to print larger "sign" type stencils. or C.) You could go with a pre-made stencil from the craft store.

Layout your stencil and then proceed to paint it I painted it with an all purpose black craft paint that is good on wood.

Let it dry, and then remove the stencil.

I then decided to go with a classic gray stain. Our friends are a bit more modern and so the gray felt a little less rustic and modern to me.

Using a rag, I applied a few coats of stain, let it dry and then a few coats of clear satin finish.

Using the toothpaste technique, I drilled holes according to the size of the handles. The toothpaste technique is to place a small amount of toothpaste to the outside of the holes of the handle and then place the handles one the board when you want them. When you pick the handles up, the holes will be identified. I then outlined with pencil and proceeded to drill !

Add handles and viola, you have the prettiest wine barrel "inspired" tray.

Very rarely can you go wrong with anything personalized or made from the heart! Other variations to this would be to distress the heck out of the tray. You can do that with more rustic vanishes or even coffee staining. You decide what you feel is best and go with it!
Other DIY Projects You'll Love
- DIY CHARGING STATION
- DIY OUTDOOR STORAGE TABLE
- NO SEW REUSABLE SNACK BAGS
- DIY ROUND BEACH BLANKET
- SIMPLE GARDEN BOX

Wine Barrel Tray {DIY}
Create this easy DIY Wine Barrel Tray is simple and only takes a few supplies from your local hardware store. Makes a great gift!
Equipment
- Stencil
Ingredients
- Wood Table Top
- Black Craft Paint
- 8 oz. Wood Stain
- 8 oz. Polyurethane
Instructions
- First, went with the smallest table top I could find at the local Home Depot

- Next is the stencil. If you have a fancy cricket or silhouette machine, you go on with your bad self and just know that I'm all kinds of jealous sitting here envious. If you don't, then there are a few different routes to take with the stencil. A.) Make friends with someone with one of those machines or B.) Make friends with someone at your local sign shop. They should have the ability to print larger "sign" type stencils. or C.) You could go with a pre-made stencil from the craft store.
- Layout your stencil and then proceed to paint it I painted it with an all purpose black craft paint that is good on wood.
- Let it dry, and then remove the stencil.
- I then decided to go with a classic gray stain. Our friends are a bit more modern and so the gray felt a little less rustic and modern to me.
- Using a rag, I applied a few coats of stain, let it dry and then a few coats of clear satin finish.
- Using the toothpaste technique, I drilled holes according to the size of the handles. The toothpaste technique is to place a small amount of toothpaste to the outside of the holes of the handle and then place the handles one the board when you want them. When you pick the handles up, the holes will be identified. I then outlined with pencil and proceeded to drill !
- Add handles and viola, you have the prettiest wine barrel "inspired" tray.


Video
CONNECT WITH MADE WITH HAPPY!
Be sure to follow me on social media, so you never miss a post!
Facebook | Twitter | Youtube | Pinterest | Instagram
Find and shop my favorite products in my Amazon storefront here!
WINE BARREL TRAY
FOLLOW MADE WITH HAPPY ON PINTEREST FOR ALL THINGS HAPPY!