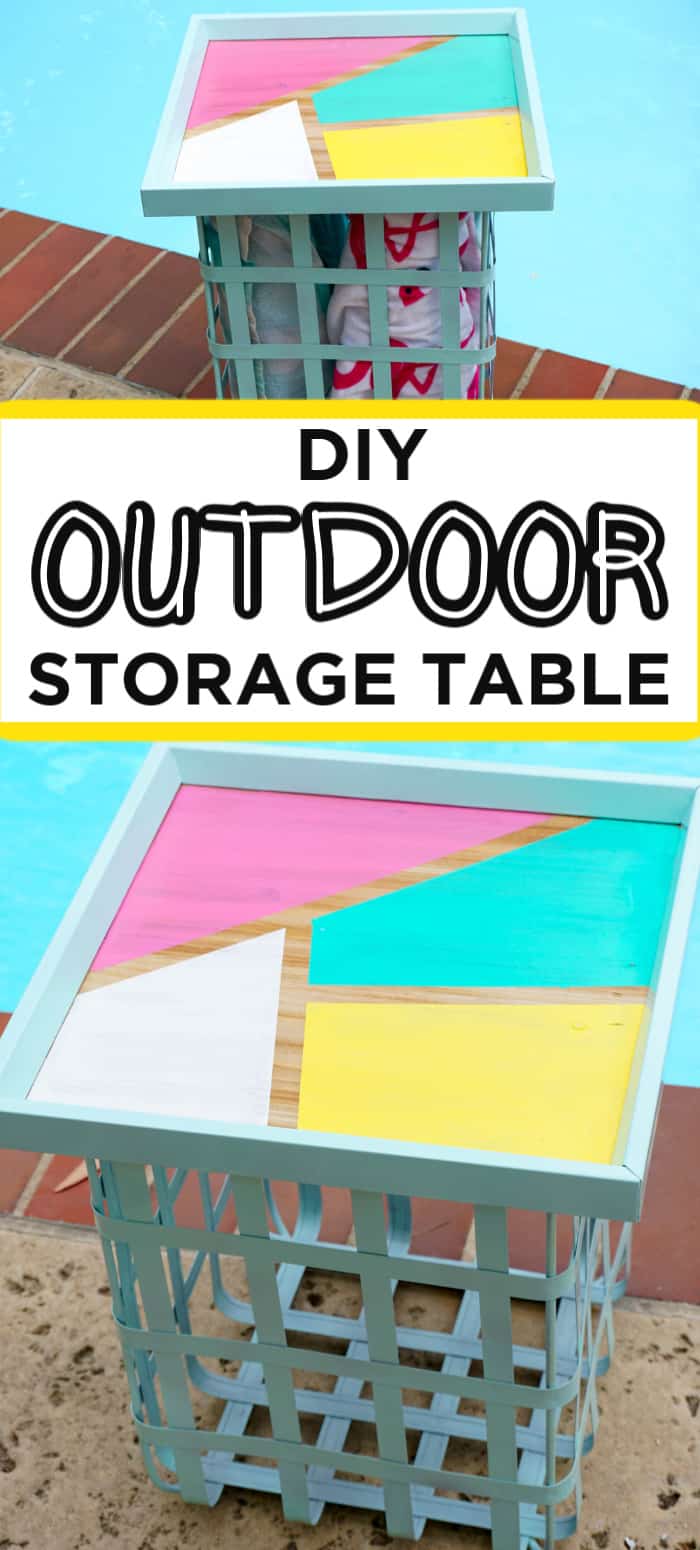
Add fun and functionality to your patio furniture with this DIY outdoor storage table. We are sharing our fun step by steps to do it yourself.
Want to save this project?
Enter your email below, and then we'll send it straight to your inbox. Plus get awesome new projects from us each week.
This outdoor storage table is giving us all the Summer feels.
We have been working hard over the last few weeks to clean and update our backyard to get it Summer ready.
Outdoor Tables With Storage
While assessing the Winter wear and tear, we found some outdoor furniture pieces were broken, our outdoor cushions needed some cleaning and all around they all needed some TLC.
One thing was for certain, we were definite in need of some updating.
We have lived in our house for over 10 years, and every year as we head into Summer, I find myself always looking for functional storage ideas for the pool.
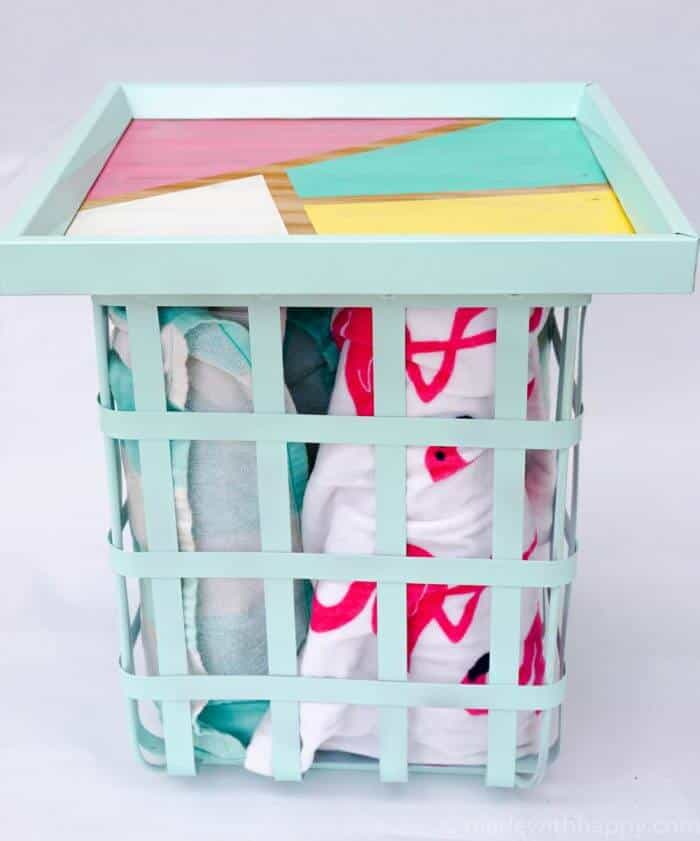
We have our fair share of pool toys, grilling accessories, towels, goggle, sunscreen, etc and no where to put them. Its time to get our Summer DIYs on.
Portable Outdoor Side Table
Storage was at the top of my idea list when heading into Hobby Lobby. Lucky me, I ended up finding two super fun pieces that I was sure I could turn into some fun and functional for the Made with HAPPY pool.

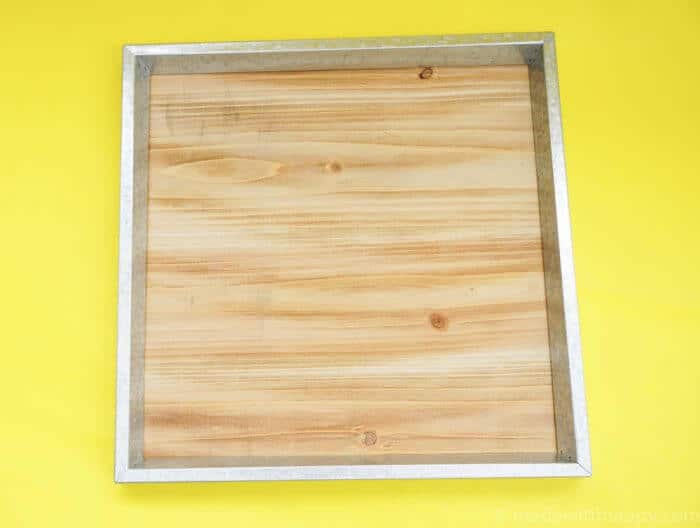
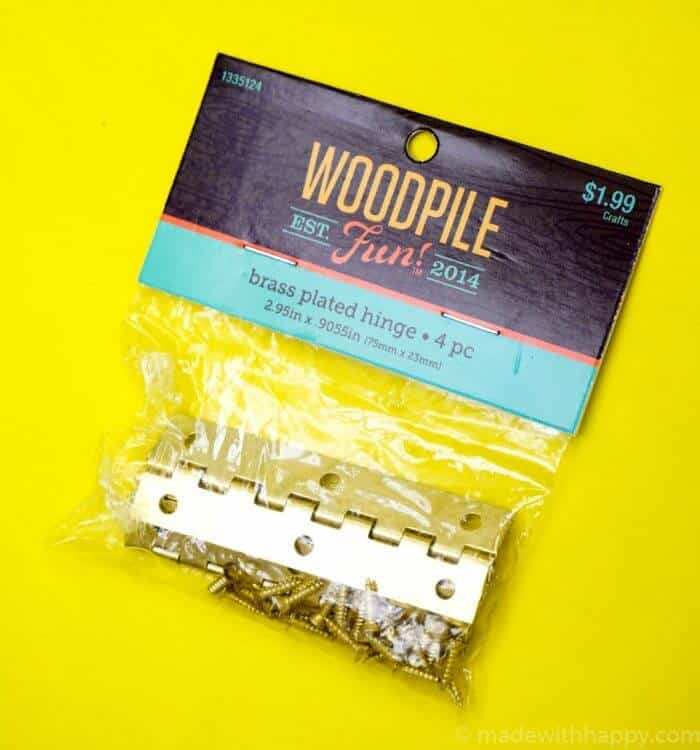
First I found this wood sign with a galvanized frame. Then I found this basket that I'm I absolutely adore also made out of galvanized metal as well. I also purchased a hinge which is how we going to bring this project together.
What I love about this project is that you do not have to have the bright colorful style that I prefer to create something fun. If farmhouse is more your style, simply leaving the pieces unpainted would be great as well.
I love color, and so it is NECESSARY for me to add some color to make this project a HAPPY one.
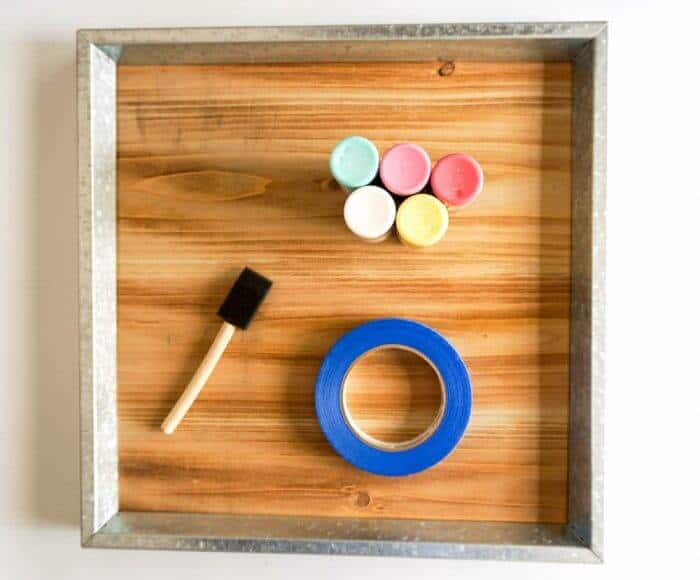
Full Supply List:
- Woodpile Wood Sign Frame
- Metal Basket
- Woodpile Hinge
- Paint (Acrylic and Spray Paint)
- Paint Brush
- Painters Tape
- Clear Gloss Polyurethane
- Drill - Make sure your drill bits are HSS, Titanium, or Cobalt where they can drill through metal.
- Wood Screws = #2 x ¼
- Machine Screws with nut #2 x ¼
How to Make the Outdoor Storage Table
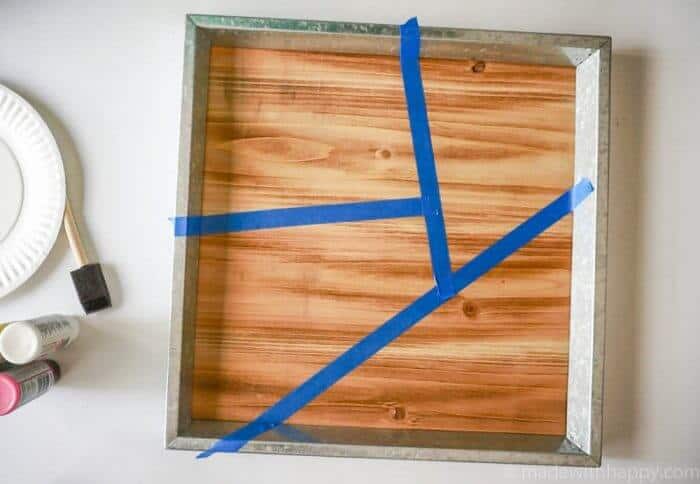
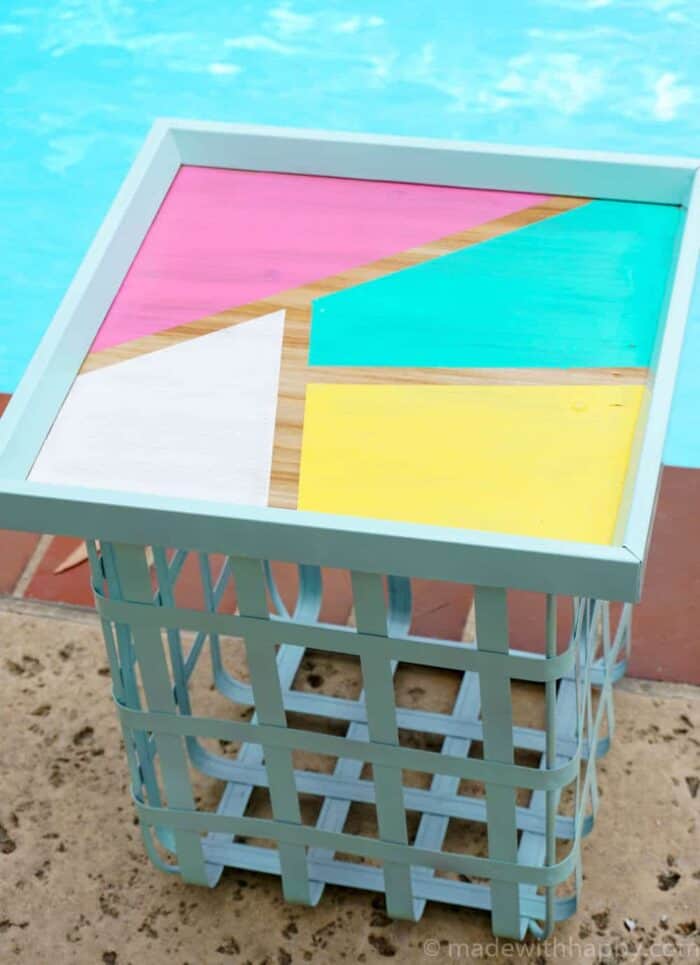
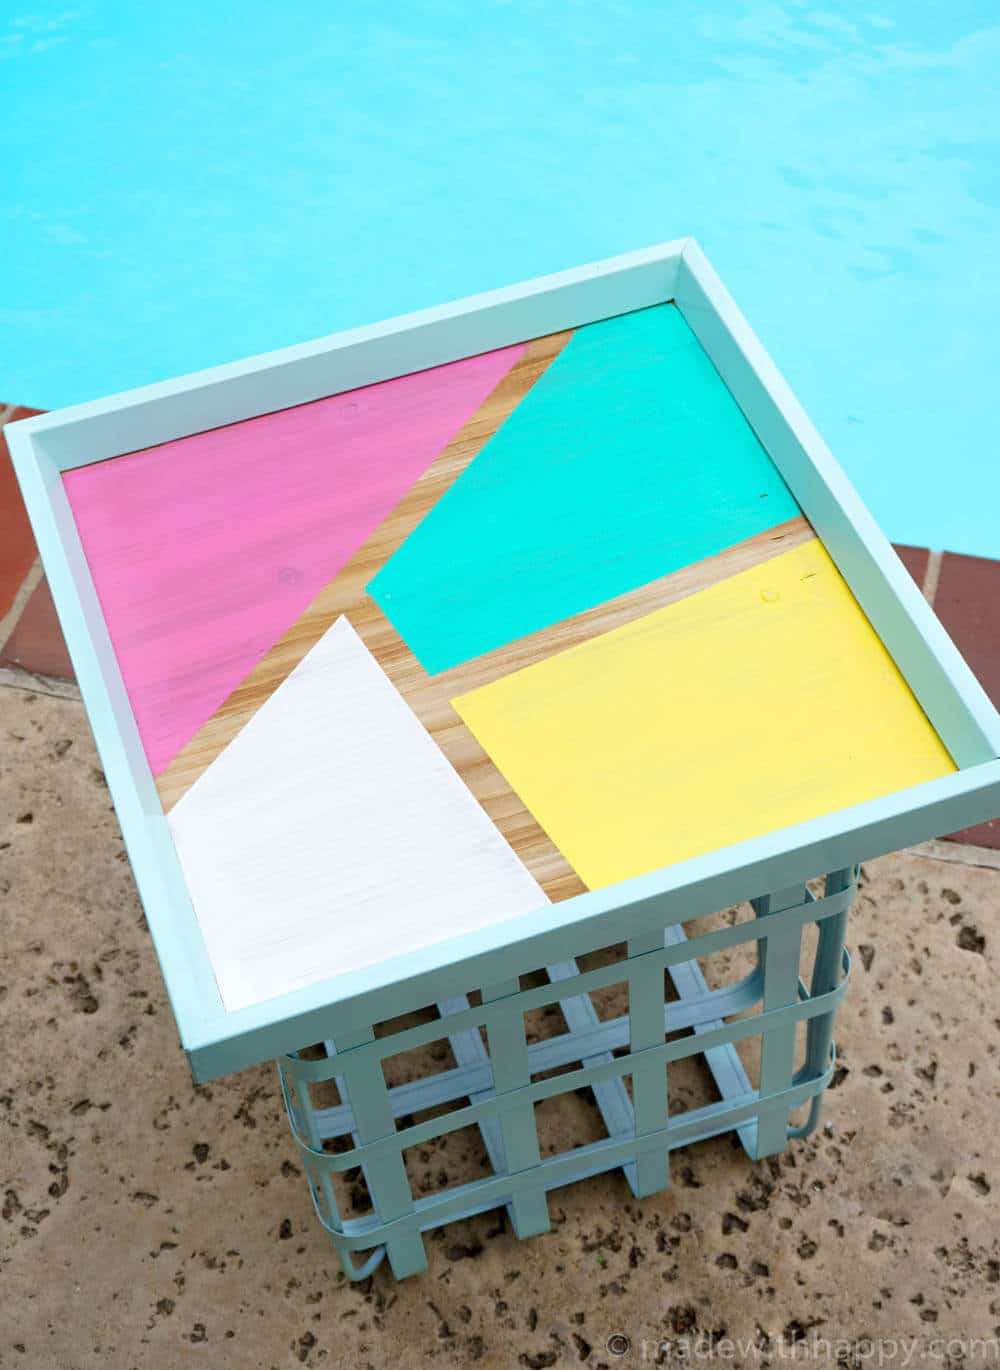
I first started by creating a color block design on the wood frame using the painter's tape.
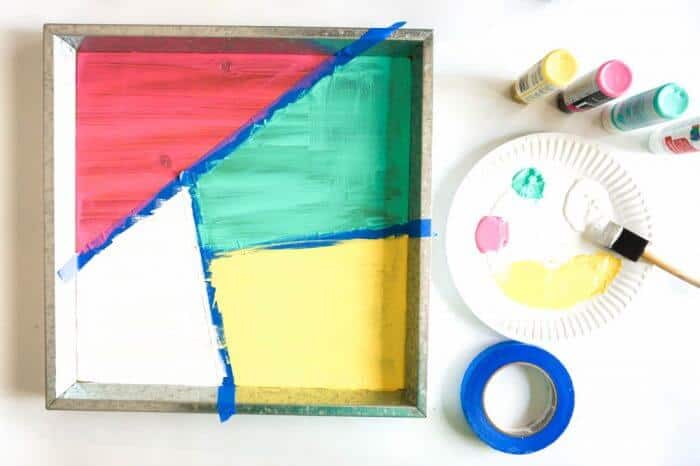
I then painted each of the sections a different color and waited for it to dry.
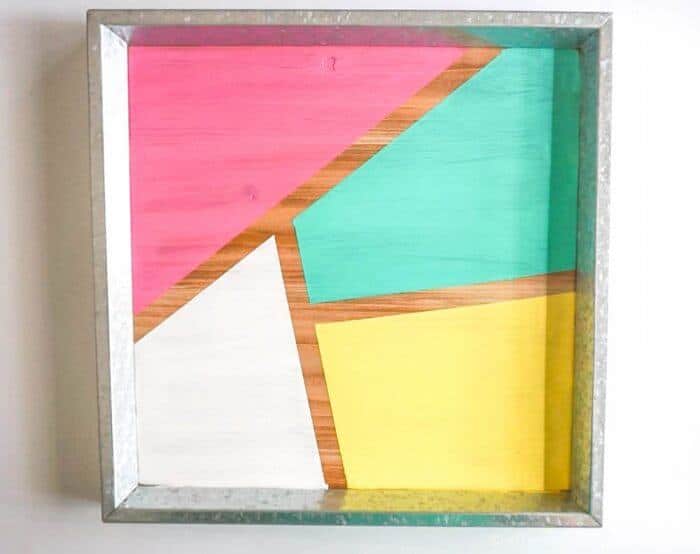
Once it is dry, remove the tape and paint or spray the Polyurethane over the top and let it dry. This is to seal the exposed wood portions and ensure it is weatherproof.
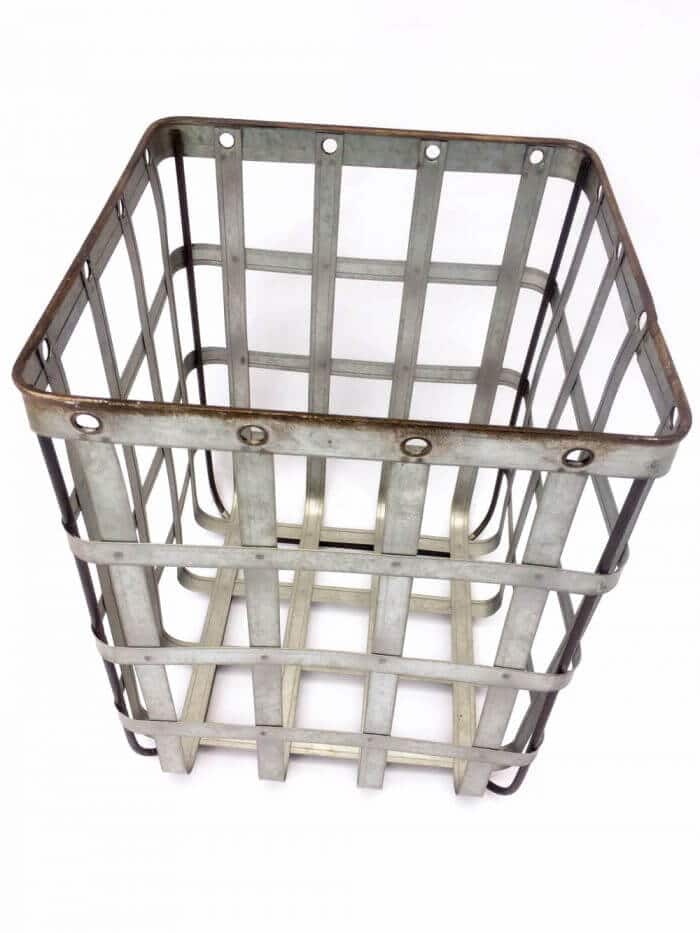
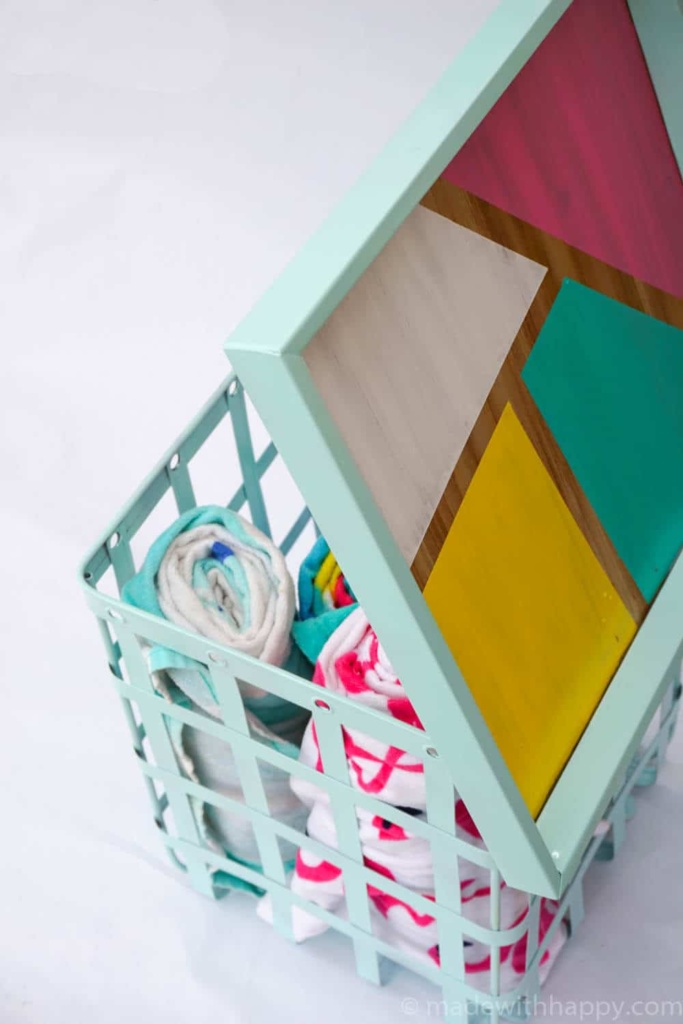
Next you will need to remove the rope handles from the basket. They were attached with a small wire twist-tie, so I simply untwisted it and the rope slipped out.
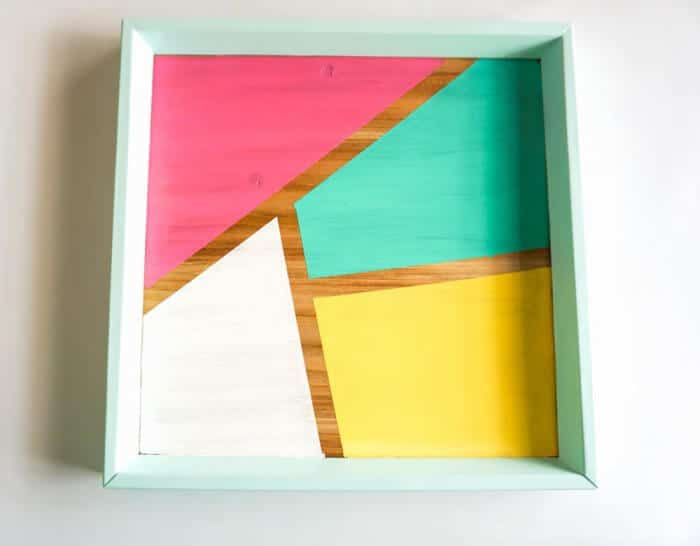
Next I covered the top of the frame with paper and spray painted both the outside of the frame as well as the basket my fun mint color.
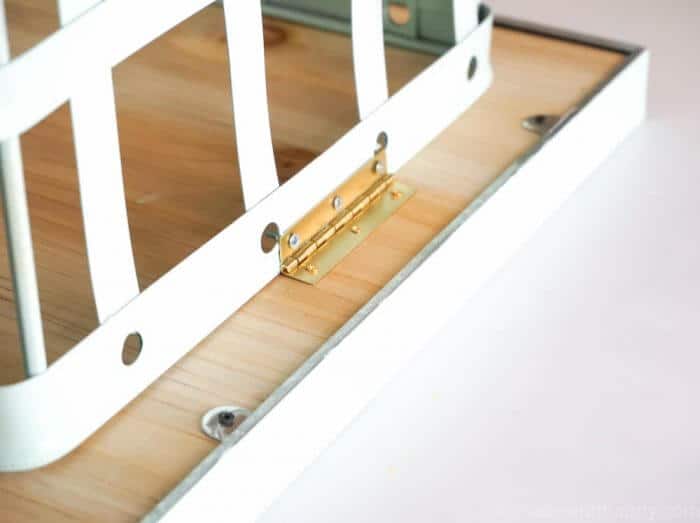
The last thing you need is to attach the hinge.
I placed the hinge on one of the sides and using a pencil and marked where the screws should go.
Using the machine screws for the basket side. Use those screws because the ends are flat and will not harm anyone or anything on the inside of the basket.
Then used the wood screws for the wood frame. Note: You will need the shortest screws you can find (¼ inch) otherwise, it will poke through the top of your table, it is not very thick.
You have yourself a great new table perfect for poolside.

This DIY outdoor storage table should fit in great in an outdoor kitchen dining area or add coloring to your outdoor living room space.
Here is a coupon for you if you decide to do some shopping over the next week.
HAPPY MAKING!
Some other Summer DIY Favorites
- Turn that dollar spot hat into a Summer dream with this DIY Beach Please hat! This is a fun and flirty hat that you can make with just a few supplies.
- These DIY Sandals are a fun project for Sring and Summer to add some HAPPY to your simple sandals. They are great for both kids and adults.
- DIY Round Beach Blanket is the perfect blanket or beach towel for Summer. It is bright and fun and no sewing is required. Perfect Summer Craft Project.
- How to throw your favorite Summer Dive-in Movie Night.

Outdoor Storage Table DIY
Add fun and functionality to your patio furniture with this DIY outdoor storage table. We are sharing our fun step by steps to do it yourself.
Equipment
- Drill
- Paint Brush
- Painters Tape
Ingredients
- Woodpile Wood Sign Frame
- Metal Basket
- Woodpile Hinge
- Paint Acrylic and Spray Paint
- Clear Gloss Polyurethane
- Wood Screws = #2 x ¼
- Machine Screws with nut #2 x ¼
Instructions
- I first started by creating a color block design on the wood frame using the painter's tape.

- I then painted each of the sections a different color and waited for it to dry.

- Once it is dry, remove the tape and paint or spray the Polyurethane over the top and let it dry. This is to seal the exposed wood portions and ensure it is weatherproof.

- Next, you will need to remove the rope handles from the basket. They were attached with a small wire twist-tie, so I simply untwisted it and the rope slipped out.

- Next, I covered the top of the frame with paper and spray painted both the outside of the frame as well as the basket my fun mint color.

- The last thing you need is to attach the hinge. I placed the hinge on one of the sides and using a pencil I marked where the screws should go. I used the machine screws for the basket side. I used those screws because the ends are flat and will not harm anyone or anything on the inside of the basket. I then used the wood screws for the wood frame. Note: You will need the shortest screws you can find (¼ inch) otherwise, it will poke through the top of your table, it is not very thick.


Video
CONNECT WITH MADE WITH HAPPY!
Be sure to follow me on social media, so you never miss a post!
Facebook | Twitter | Youtube | Pinterest | Instagram
Find and shop my favorite products on my Amazon storefront here!
DIY OUTDOOR STORAGE TABLE
PIN IT TO YOUR FAVORITE BOARD ON PINTEREST!
FOLLOW MADEWITHHAPPY ON PINTEREST FOR ALL THINGS HAPPY!