

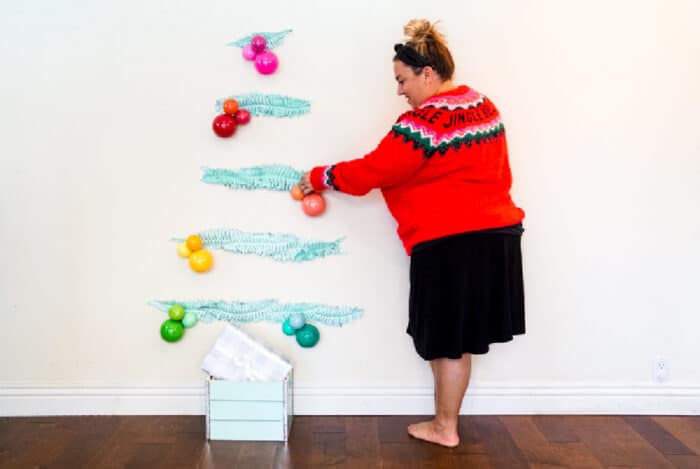
If you are looking for a creative Christmas tree for small spaces, then you'll love our wall Christmas tree.

Want to save this project?
Enter your email below, and then we'll send it straight to your inbox. Plus get awesome new projects from us each week.
Every year, as we start our Christmas decorating, we find ourselves looking for a fun way to decorate our playroom without a real or even artificial Christmas tree.
We love the idea of a flat Christmas tree on the wall, but it wasn't until this year, that we decided to create our own HAPPY version of a wall hanging Christmas tree.
We highlighted this Christmas DIY Craft along with some other fun kid's crafts in our December Crafts along with our 101+ Easy Craft Ideas for kids.

Reasons For Wall Christmas Tree
There is always a reason for Christmas tree ideas for small spaces. One of the best ways to save on space is to have a wall Christmas tree. Here are my top three reasons why I want it.
- Saves on space - There is nothing you can do about the size of a traditional Christmas tree. Lack of floor space and tight spaces means whatever size tree will just not fit. That's when we recommend moving the tree to the wall!
- Convenience - Saves the hassle of tree purchase, tree hauling, tree decorating, and tree cleanup
- Budget Friendly - Trees (real or artificial) can become quite expensive. We found all our supplies at Walmart and were able to create them for a fraction of what a full tree would cost.
Supplies Used to Make This Flat Christmas Tree
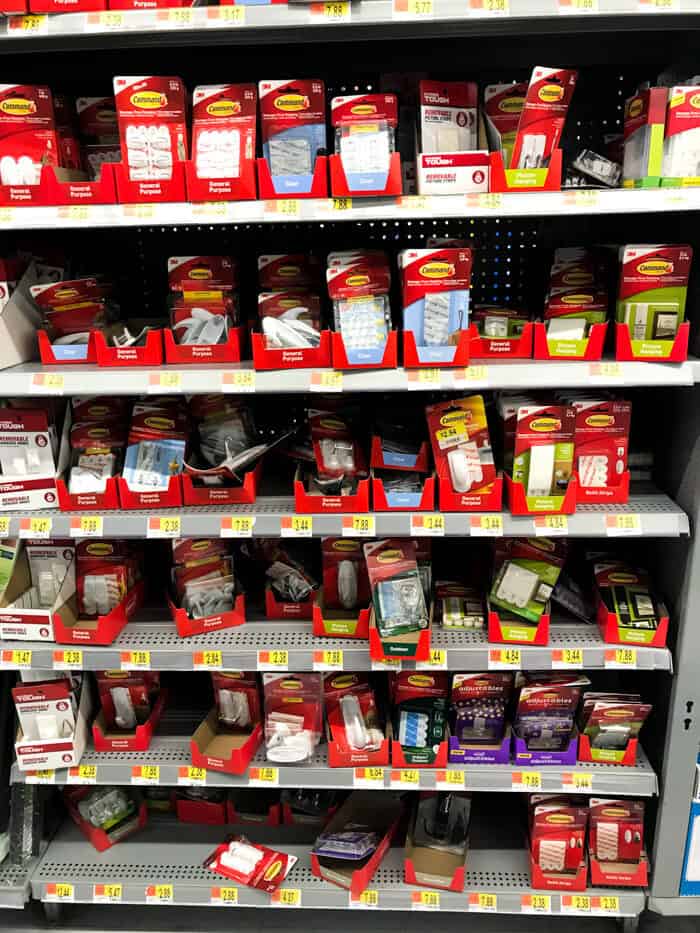
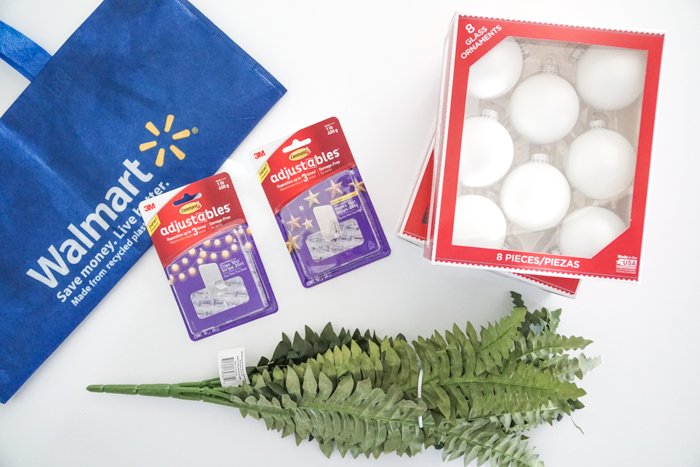
We were able to find all our supplies at our local Walmart. We found the garland and ornaments in their seasonal aisle. The Command® Adjustables™ repositionable 1 lb. hooks and Command® Adjustables™ repositionable 1 lb clips are located in the hardware section. Look for the purple!
- Command® Adjustables™ repositionable 1 lb hooks
- Command® Adjustables™ repositionable 1 lb clips
- Holiday Garland - I chose the fern
- Ornaments
- Scissors
- Measuring Tape
- Christmas Box - Bucket - Basket (optional)
How To Make Wall Christmas Tree

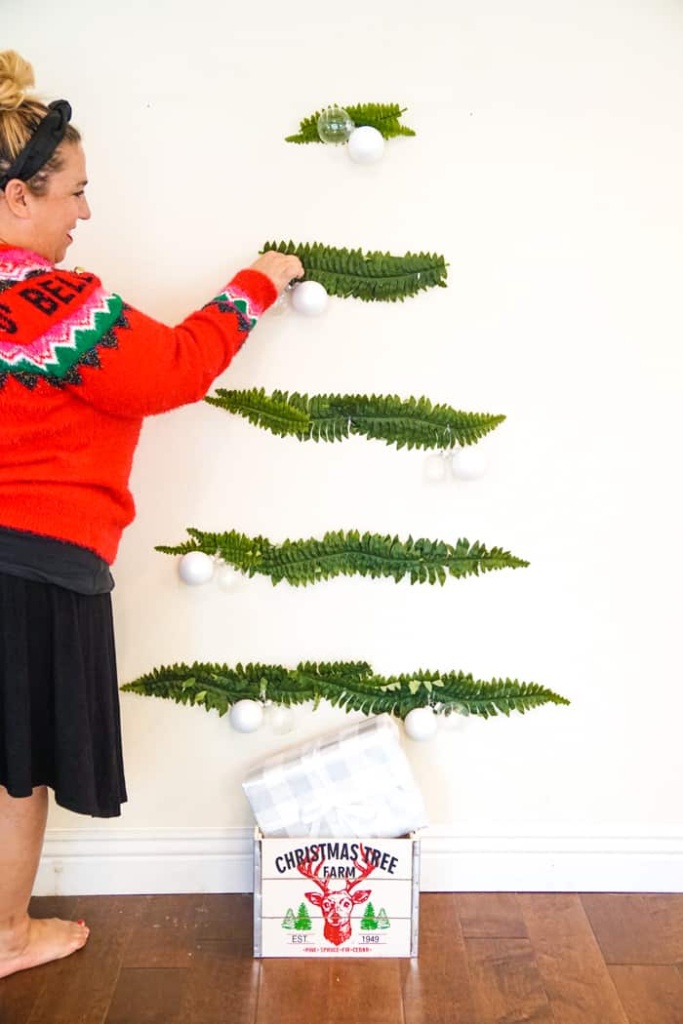
Whether you a more traditionalist with the green and white wall tree, or our Made with HAPPY colorful tree, they both start with cutting off the leaves of the fern. What I love about the leaves of the fern garland is that they come in different lengths within the same bundle.
This is great for creating a wall tree because the smaller leaves can be used for the top shorter lengths and the longer ones can be used on the bottom longer levels. Next, its time to hang the Command® Adjustables™ repositionable 1 lb hooks and Command® Adjustables™ repositionable 1 lb clips.

Download this free printable Christmas Wall Tree Template at the bottom of the post!
The use of both are great for this project because they both hold strong and are super easy to put up and super easy to take down. I used the Command® Adjustables™ repositionable 1 lb clips for the middle of the tree levels and the Command® Adjustables™ repositionable 1 lb hooks for the outer positions.
The Command® Adjustables™ repositionable 1 lb clips are great and providing and anchoring the garland and keeping it level. The Command® Adjustables™ repositionable 1 lb hooks are great at allowing you to add the garland and the ornaments.
Step by step to Hanging the DIY Wall Hanging Christmas Tree
Start by measure 60 inches up from the floor to the middle of where you want your tree and place your first Command® Adjustables™ repositionable 1 lb. clip.

Next measure 10.5 inches down from there and place your second Command® Adjustables™ repositionable 1 lb. clip.

From there you will then measure another 10.5 inches down from there to place your third that Command® Adjustables™ repositionable 1 lb. clip.
Repeat that two more times and your fifth Command® Adjustables™ repositionable 1 lb clips should be approximately 18 inches off the ground.
Next, I started at the second from the top level and measured out 4 inches from the center on both sides and placed a Command® Adjustables™ repositionable 1 lb. hook.
For the third level from the top, I measured out 7 inches from the center on both sides and placed a Command® Adjustables™ repositionable 1 lb. hook.
For the fourth level, I measured out 10 inches from the center on both sides and placed a Command® Adjustables™ repositionable 1 lb. hook.
Then on the lowest level, I placed two Command® Adjustables™ repositionable 1 lb. hook on each side of the center. The first was 6 inches from the center and the second was 6 inches out from there.
I then hung the fern leaves. The most important part is that you want to leave 2-3 inches over the edges of the outer-most hooks to give it a tree feel.
Once you have your leaves in place, hang your ornaments.
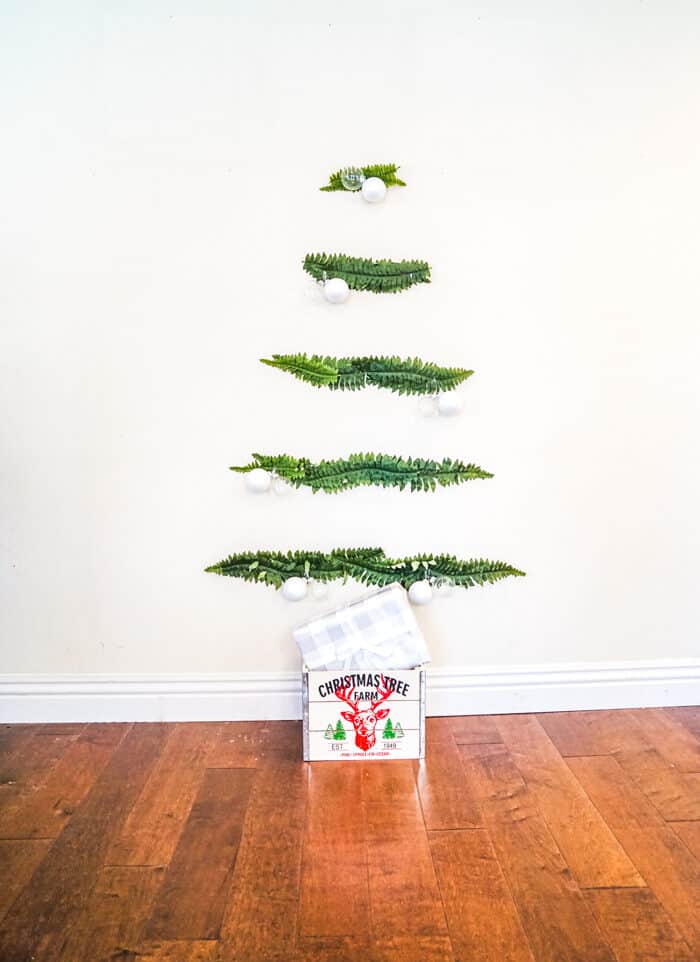
Lastly, add a bucket, basket, or box to the bottom of your tree to collect presence. I found a cute Christmas box at Walmart in their seasonal aisle. No need for a tree stand or tree skirt!

For those that are looking to recreate the colorful tree, you will follow the same steps as above. The only difference was that I grabbed a can of spray paint and painted the fern leaves. For the ornaments, I have a simple tutorial here.

Adding Christmas Decoration
The beauty of a wall Christmas tree is that you can add your own touches to make it your own. Adding Christmas lights, a tree topper or whatever ornaments to make your holiday tree look as you wish!
I hope that you enjoy this wall tree as much as we do.
Happy Holiday Season! Merry Christmas!
Other Christmas Decorations You'll Love
- DIY BIRDHOUSE CHRISTMAS VILLAGE
- 25 CHRISTMAS DOOR WREATH IDEAS
- DIY CHRISTMAS ADVENT CALENDAR
- DIY HOLIDAY DECOR
Download Wall Tree Printable Document
I have created the above dimensions and positioning of the wall tree in a printable document. Simply enter your email below and it will take you to the printable.
CONNECT WITH MADE WITH HAPPY!
Be sure to follow me on social media, so you never miss a post!
Facebook | Twitter | Youtube | Pinterest | Instagram
Find and shop my favorite products in my Amazon storefront here!
WALL CHRISTMAS TREE
PIN IT TO YOUR DIY BOARD ON PINTEREST!
FOLLOW MADE WITH HAPPY ON PINTEREST FOR ALL THINGS HAPPY!


