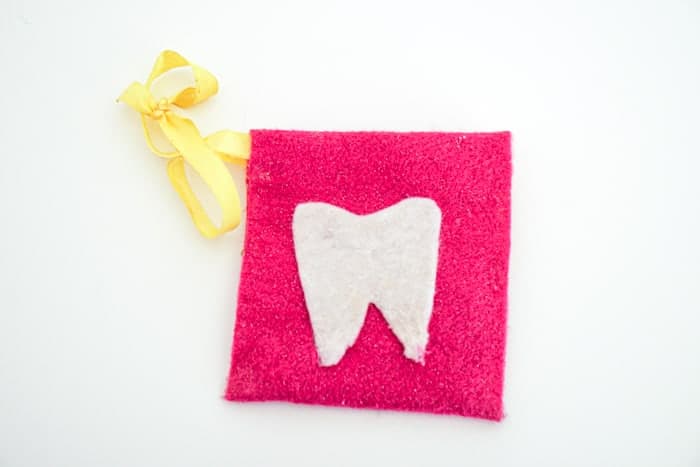
We are sharing a quick and easy no-sew tooth fairy bag that will make your little's first visit from the tooth fairy that much more special.
Want to save this project?
Enter your email below, and then we'll send it straight to your inbox. Plus get awesome new projects from us each week.
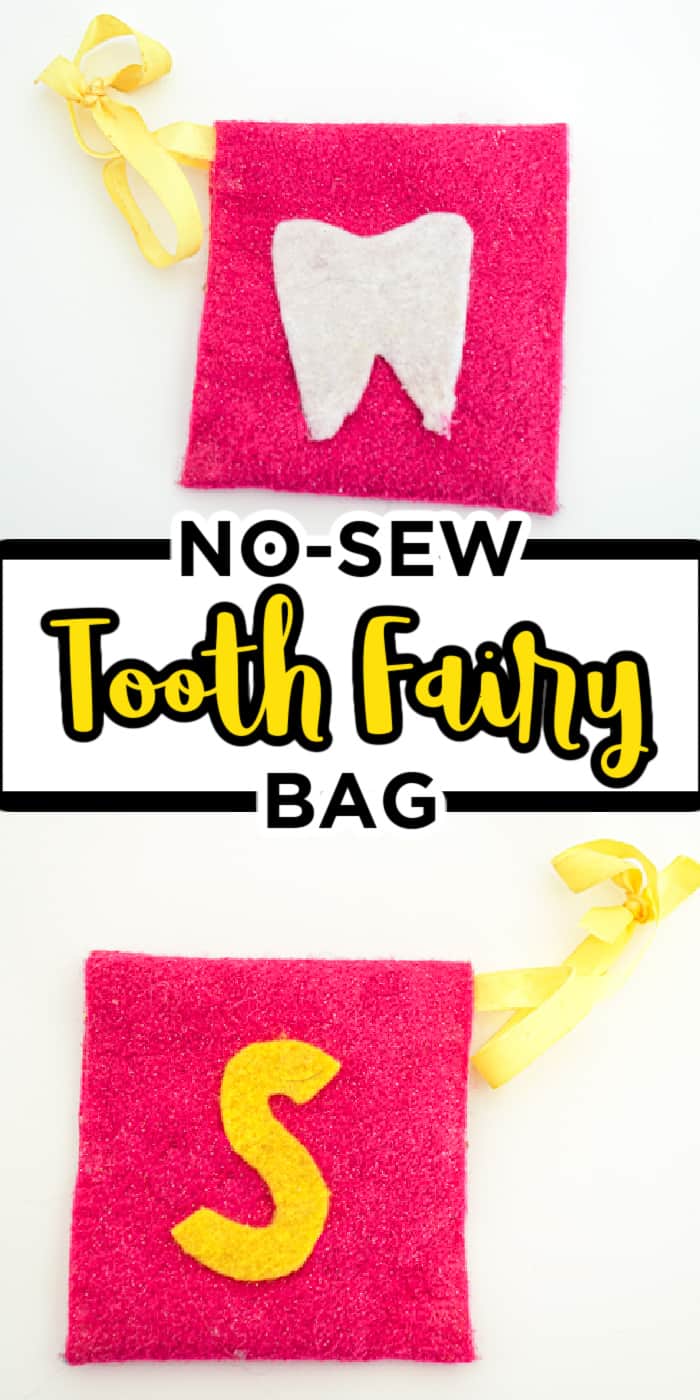
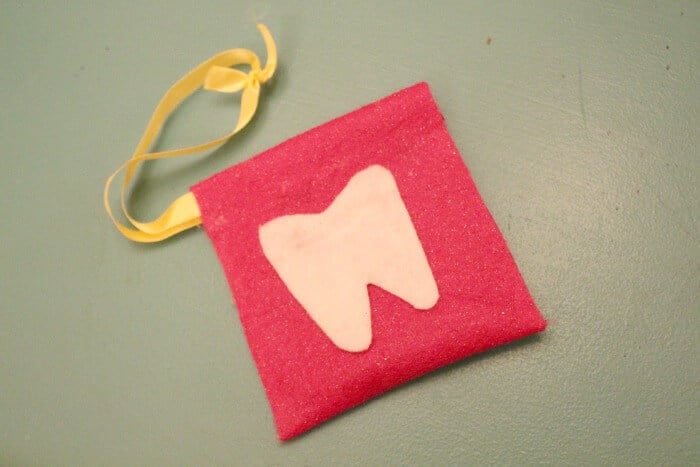
This is a sweet little tooth fairy bag that can be made with just a few craft supplies in under 30 minutes.
Right around bath and pajama time, I start to realize, we had no idea what is entailed in the tooth fairy business. So onto Pinterest I go. I see all kinds of fun stuff, but I have about an hour from when the kids are asleep till I'm going to pass out from exhaustion myself. So off to my craft cabinet to find something to whip together.
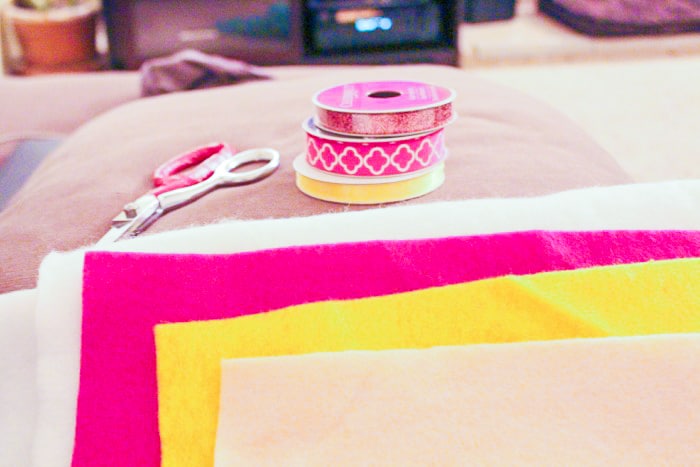
I grab some felt left over from our advent calendar and some ribbon. I'm going to make a small tooth pouch.

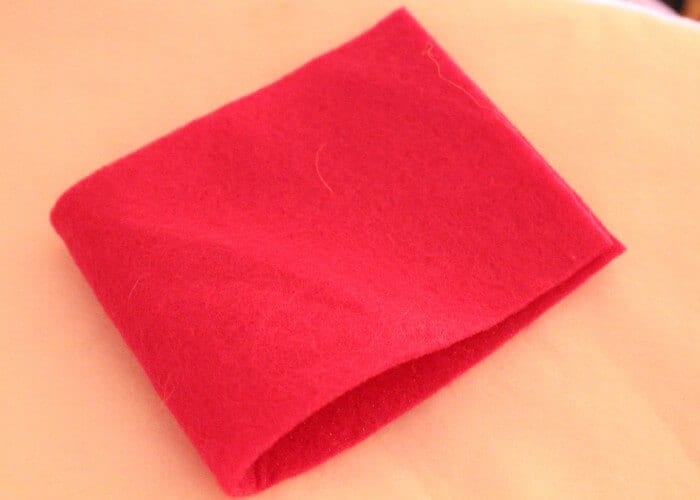
First fold the piece of felt in half, then cut out the size pouch you are looking for. Leave a little room at the top to fold down the edges.
I created ours about 2.5 inches wide and about 3 inches tall.
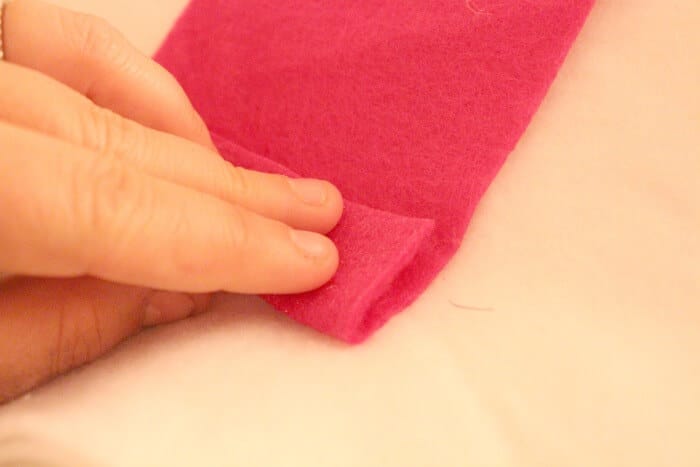
At the top of each side, fold and glue about 2 centimeters down allowing for your ribbon to slide through. We're doing all glue with this one folk. Do the same on the other side.
Then folding the pouch again in the middle, glue the sides. Easy peasy. Feed the ribbon through the top sections your glued and you have yourself a tooth fairy bag.
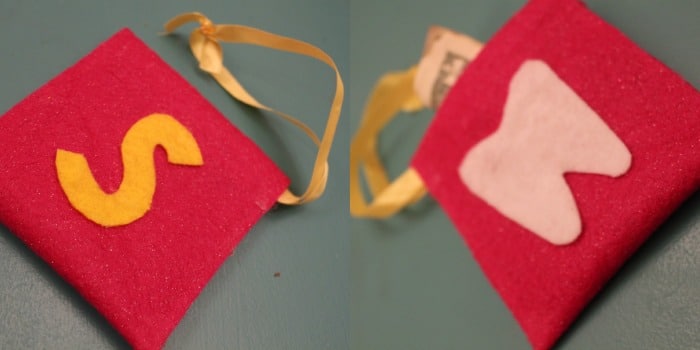
I then cut out a tooth out of the white felt and a "S" out of the yellow and glued to each of the sides of the pouch. Add your tooth fairy loot and it can hang on your child's door.
Made with HAPPY Girl's 1st tooth is one for the record books.
Other No-Sew Projects You'll Love
- HOW TO MAKE NO-SEW ROPE BOWL
- NO SEW REUSABLE SNACK BAGS
- DIY ROUND BEACH BLANKET
- NO SEW ZIPPER PENCIL CASE
CONNECT WITH MADE WITH HAPPY!
Be sure to follow me on social media, so you never miss a post!
Facebook | Twitter | Youtube | Pinterest | Instagram
Find and shop my favorite products on my Amazon storefront here!
TOOTH FAIR BAG
PIN IT TO YOUR FAVORITE BOARD ON PINTEREST!
FOLLOW MADE WITH HAPPY ON PINTEREST FOR ALL THINGS HAPPY!