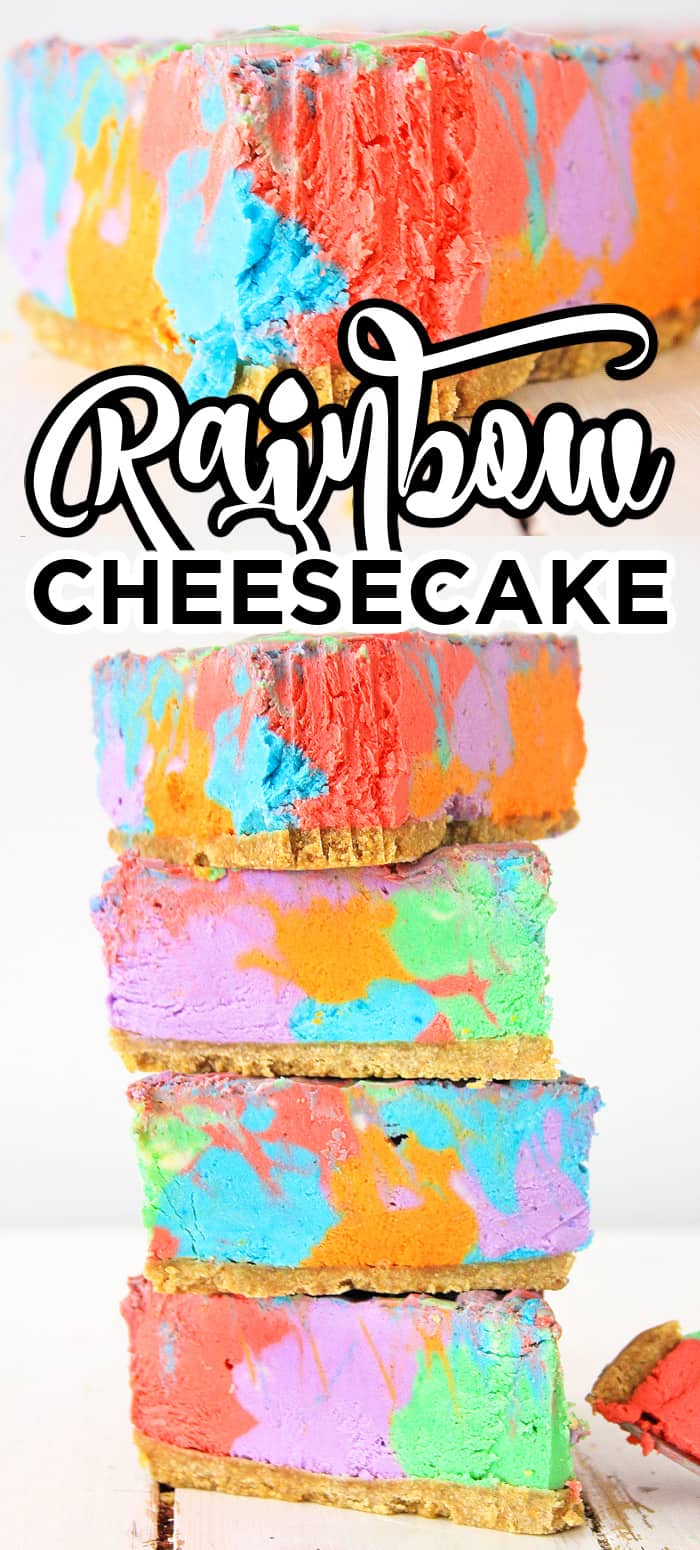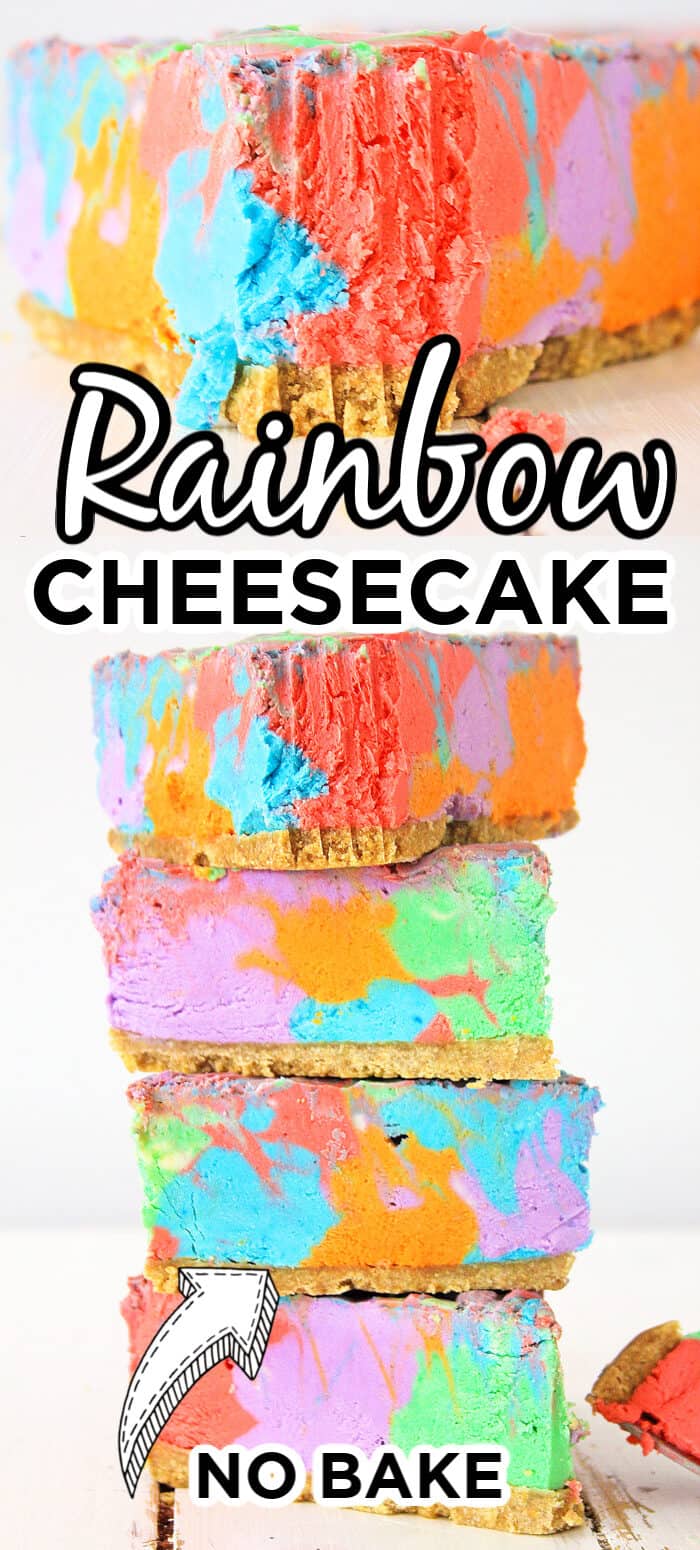
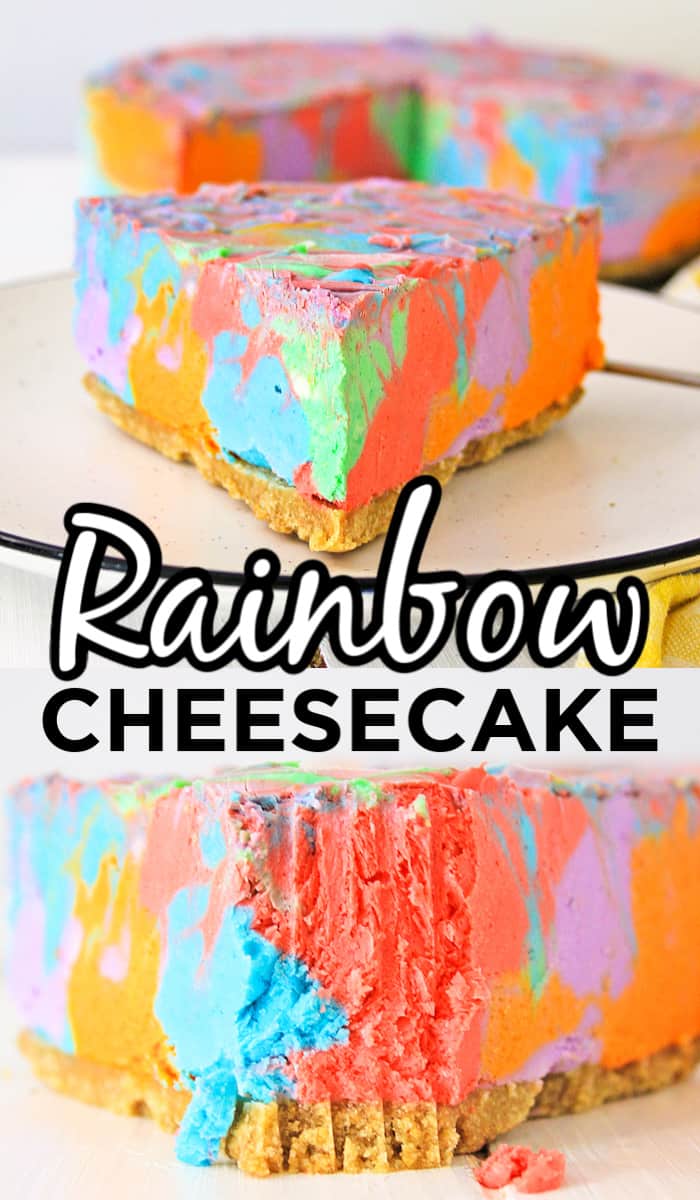

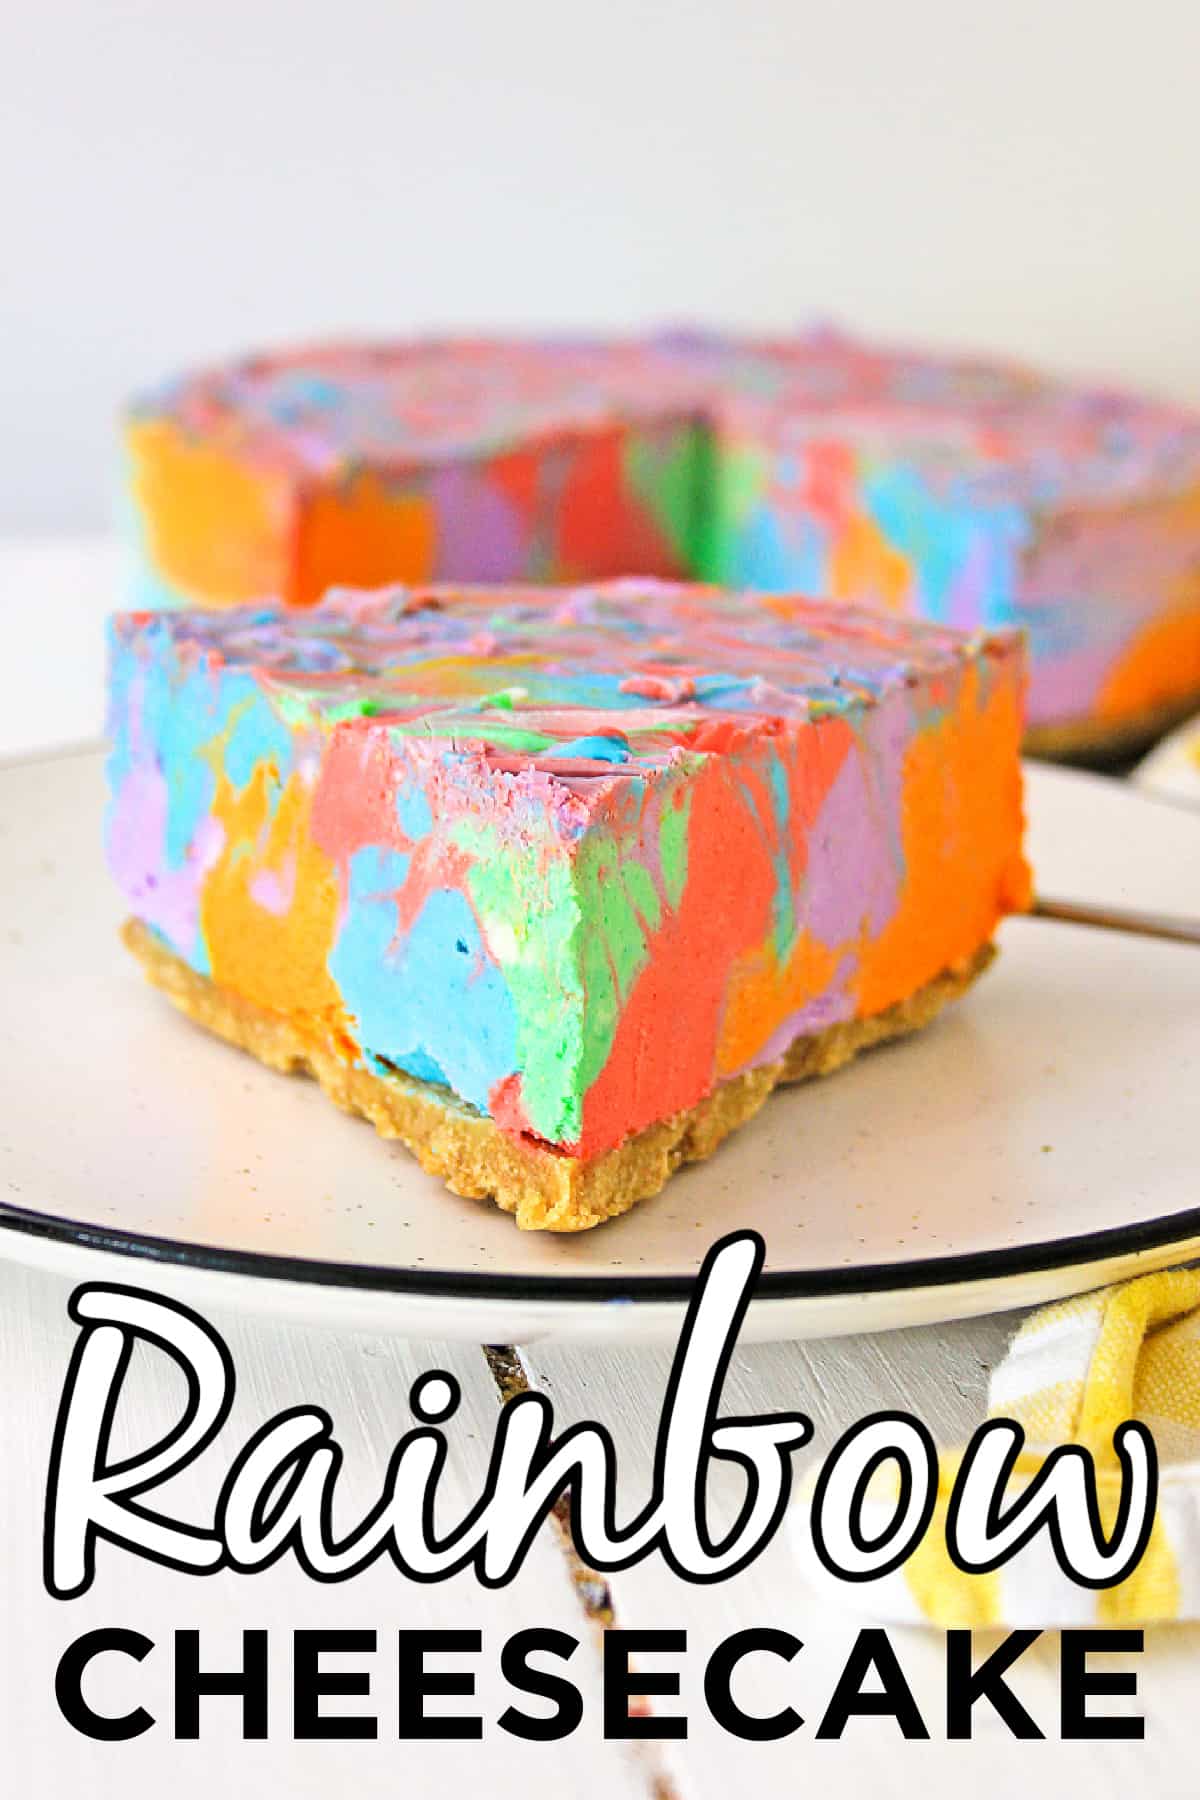
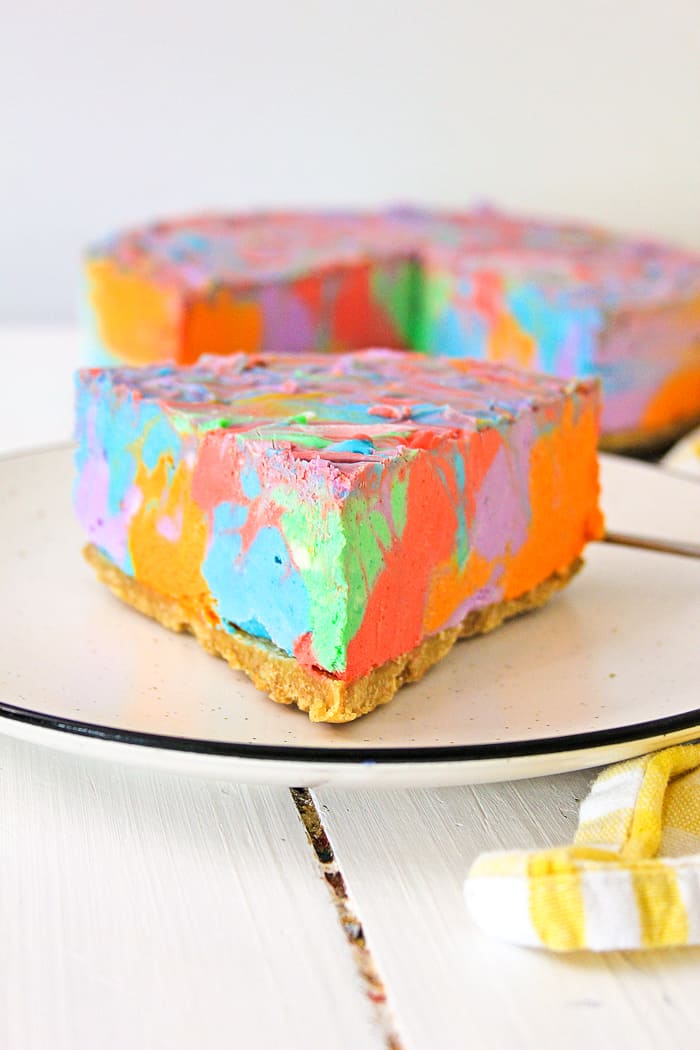
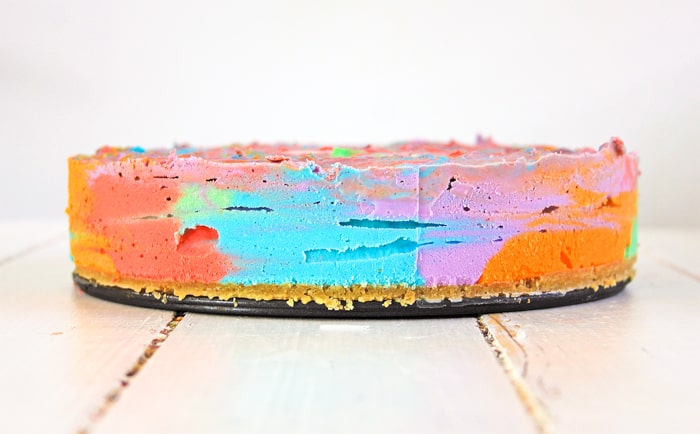
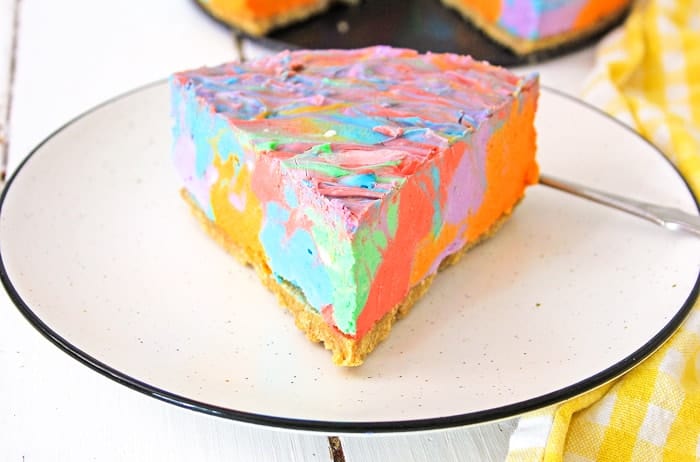
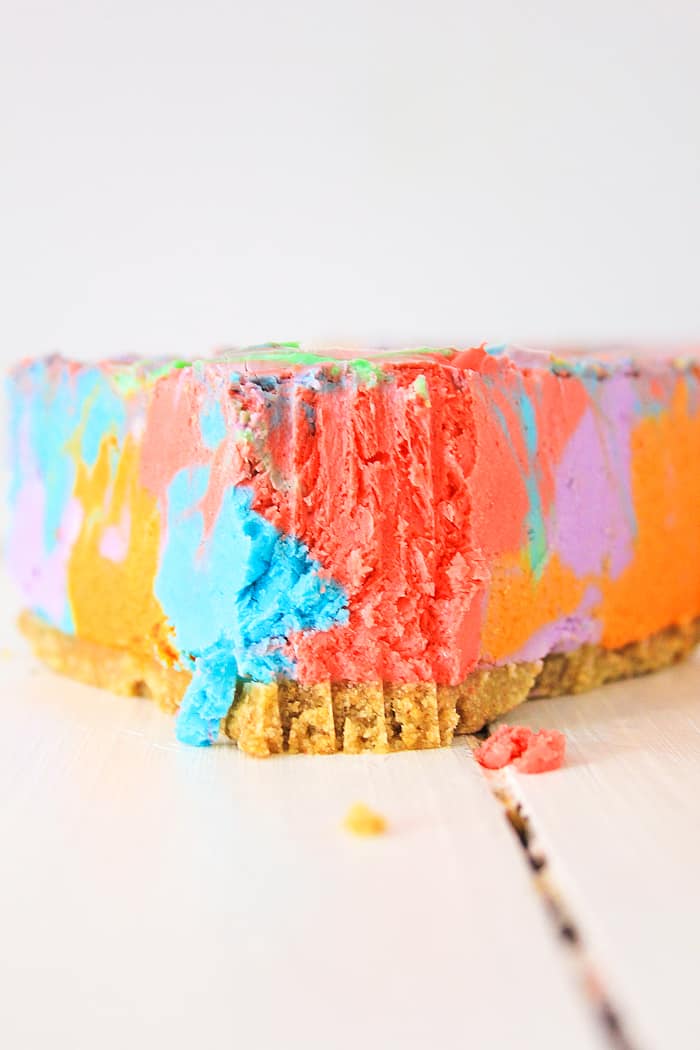
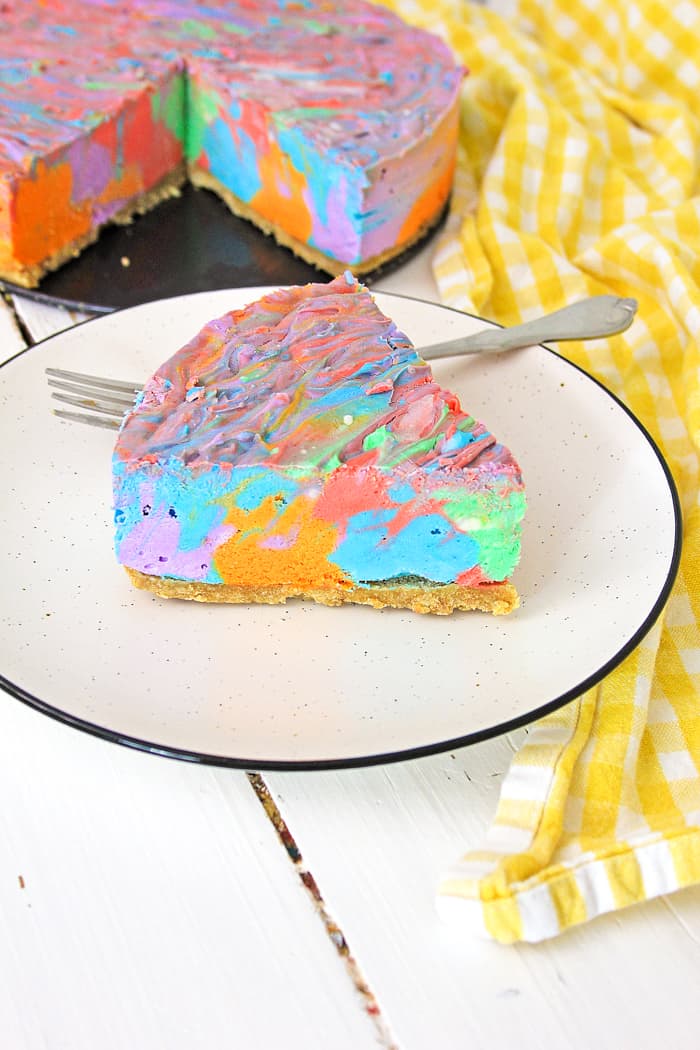
Bring on the bright and colorful deliciousness of our no-bake rainbow cheesecake. Bring in all the colors of the rainbow with this fun dessert.
Want to save this project?
Enter your email below, and then we'll send it straight to your inbox. Plus get awesome new projects from us each week.
This rainbow cheesecake is so much fun to make. Everyone wants to join in making these eye-catching swirls.
If you're looking for an amazing dessert that's just right for special occasions, let me introduce you to Rainbow Cheesecake. It's like a party for your taste buds and your eyes! This dessert combines the smooth and creamy goodness of cheesecake with a burst of rainbow colors.
It's not only super tasty but also looks really cool. Whether you're throwing a big birthday bash, throwing a baby shower, or just want something awesome to eat, Rainbow Cheesecake is the way to go.
Get ready to learn how to make a dessert that's both yummy and social media -worthy. Get ready for the Rainbow Cheesecake experience!
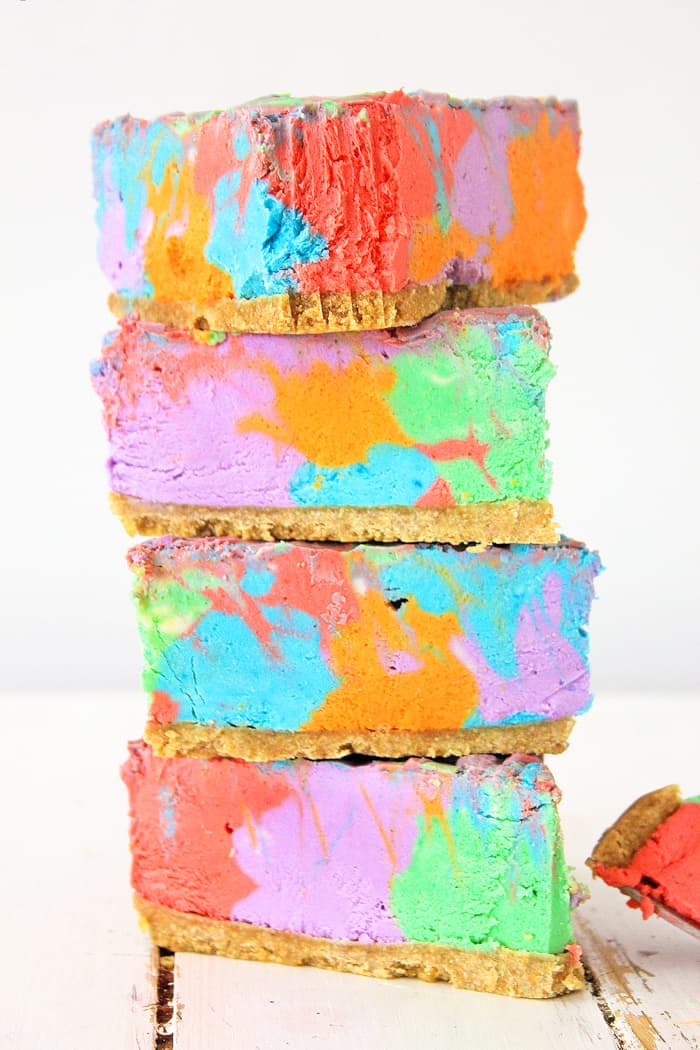
It is made with different flavors of Jello. You will get a lot of different smooth cool flavors coming together to make up all the pretty colors for this great dessert.
This would be a wonderful rainbow dessert for a rainbow party, St. Patrick's Day or just to brighten up someone's day. Be sure to check out some of our other fun sweet treats including our Easy Red Velvet Cookies, Churro Bites, Ice Cream Sundae Cupcakes, and Chocolate Rice Krispie Treats.
It is really versatile, and you can make it ahead so it's ready when you're ready to serve it. This is definitely one of my favorites!
Don't miss our Facts About Rainbows.
Ingredients
Crust
- Graham Crackers
- Butter
- Sugar
Filling
- Cream Cheese
- Sweetened Condensed Milk
- Powdered Sugar
- Orange Jello, Berry Blue Jello, Raspberry Jello, Lime Jello, and Grape Jello
Food Coloring Gel
- Liquid Food Coloring - Neon (Pink, Orange, Aqua, Purple, and Lime)
How to Make Rainbow Cheesecake Recipe
Crust
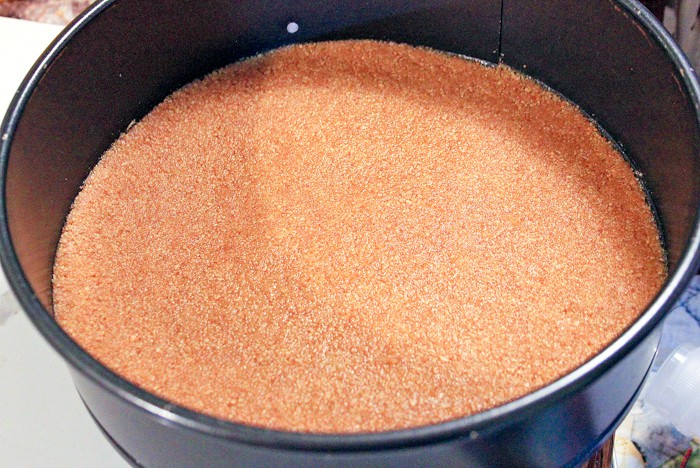
- Place the graham crackers in the blender or food processor, and blend on high until you have fine crumbs.
- Add the sugar, and blend again.
- Place the butter in a microwave-safe dish, and microwave to get melted butter.
- Line the bottom and sides of a springform pan with parchment paper, and set aside.
- Pour the graham cracker crumbs into a bowl, and pour butter over the crumbs.
- Stir well, until butter and crumbs are completely blended.
- Pour the crumb mixture into the springform pan, and press into the bottom of the pan.
- Place the pan in the freezer to set.
Rainbow Cheesecake Filling
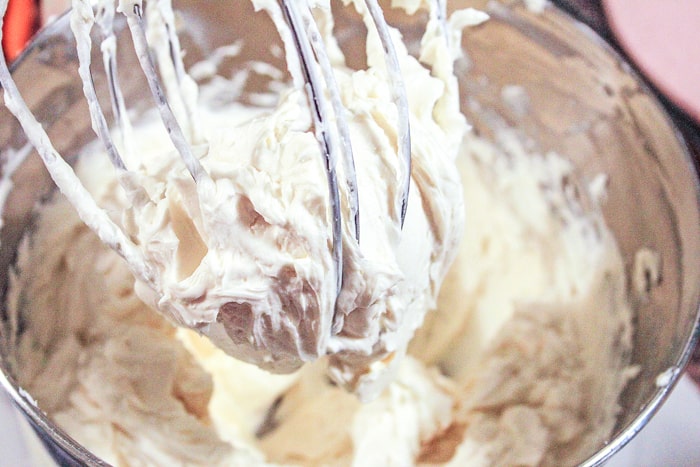
- Place the softened cream cheese into the mixing bowl of an electric mixer, and mix with the whisk attachment until the cream cheese is smooth and creamy.
- Scrape down the sides of the mixing bowl, and blend again.
- Add the sweetened condensed milk, and blend until creamy.
- Add the Powdered sugar, and continue to blend on low speed until the cream cheese is completely smooth.
- Scrape down the sides of the bowl, and the bottom of the bowl, and blend again until smooth, and creamy.
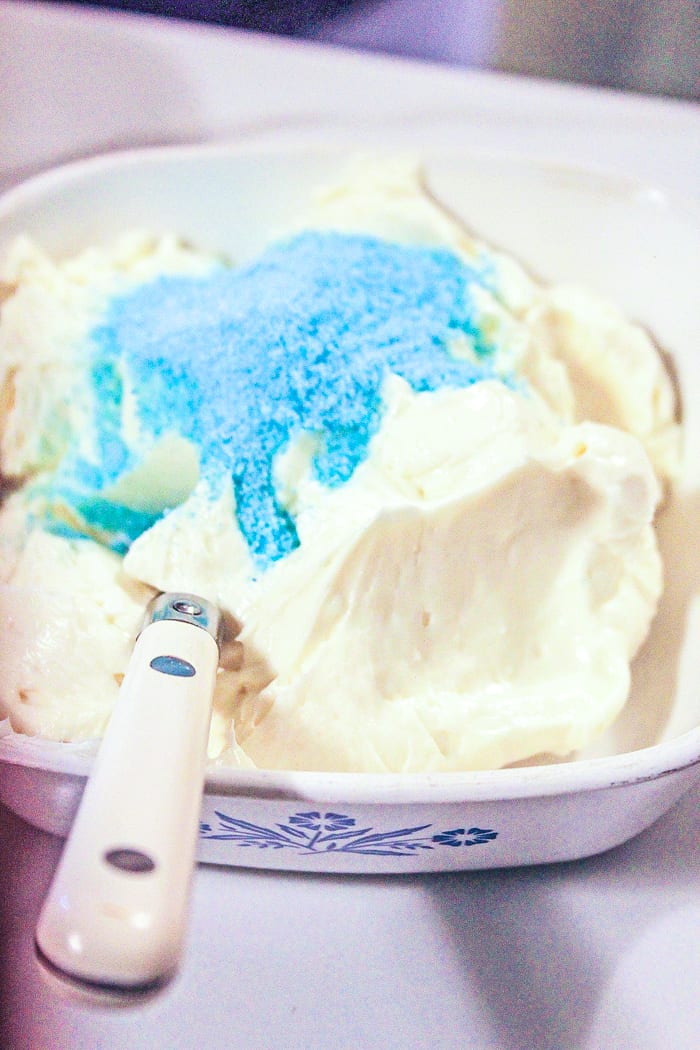
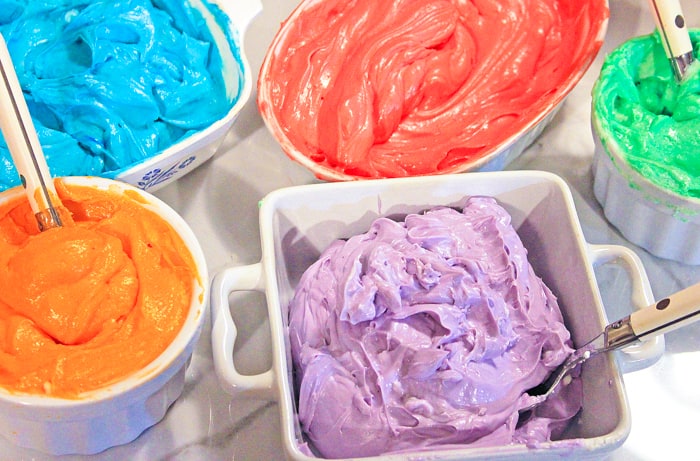
- Divide the cream cheese mixture evenly into the 5 small bowls.
- Grab one bowl add the Orange Jello, and stir to blend.
- In another bowl add the Berry Blue Jello, and stir well.
- For the next bowl add the Raspberry Jello, and stir well.
- In the last two bowls, add the lime to one and the grape to one, and stir well.
- Go back to the Orange flavored bowl, and add two or three drops of neon orange food coloring gel, or more until the desired orange color is achieved.
- In the Berry Blue flavor, add two or three drops of neon aqua food coloring gel, or more if you want a brighter blue.
- Continue to add neon pink, neon lime green, and neon purple to the raspberry, lime, and grape flavors.
- Starting with two or three drops, stirring well, and adding more food coloring gel to achieve the desired color.
- Make sure all the bowls have been well stirred, and the colors of the rainbow blended.
Assemble Cheesecake
- Remove the prepared pan from the freezer.
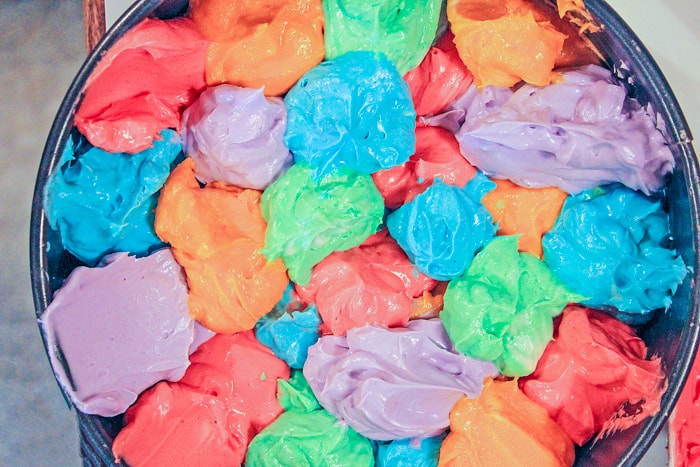
- With a Tablespoon; get about ½ a Tablespoonful of the first color - Orange cheesecake batter, and drop it on the crust in the springform pan.
- Follow with about ½ a Tablespoonful of the next color, and next, alternating between the colors until you fill the bottom of the pan.
- Continue to drop the ½ Tablespoons of cheesecake mixture on top of the bottom layer until you've used all the cheesecake mixture.
- Either continue the same colors on the second layer to form a uniform thick tie-dye look. Or drop different colors on top of the bottom layer, and get a more swirled look.
- When all the cheesecake mixture has been added, take a wooden skewer, and swirl the skewer through the cheesecake, swirling the colors around to make a mixed tie-dye look.
- For any cheesecake that's left in the bowls; use a small spatula to remove the cheesecake, drop it on top of the cheesecake in the pan, and swirl slightly.
- Place the springform pan back in the freezer, and let sit for at least 6 hours to completely set, or overnight for best results.
- When you're ready to serve, remove the cheesecake from the freezer about 15 minutes before the time to serve.
- Optional - Add a little whipped cream to top
- Cut into 2 - 3 inch pieces, and serve on dessert plates. Enjoy!
Changing the flavor of Jello
As with any recipe, you can change it up to whatever flavor you want.
The only thing that I warn is that you will want to change the color of the neon food coloring gel to match. Meaning you would want to change the food coloring gel to yellow if you change the orange jello to lemon.
We hope you find this rainbow cheesecake as delicious as we do.
HAPPY NO-BAKING!!
Frequently Asked Question
Can I use any flavors I want for the rainbow layers?
Absolutely! One of the fun parts of making a no-bake rainbow cheesecake is the freedom to experiment with flavors. You can choose a variety of fruit-flavored gelatin or food coloring to create rainbow layers. Just keep in mind that the flavors should complement each other and the cheesecake base.
How long does it take for the no-bake rainbow cheesecake to set?
Patience is key when making a no-bake rainbow cheesecake. Typically, it takes about 4 to 6 hours for the layers to set properly in the refrigerator. However, it's even better to leave it overnight for the best results. This ensures that each layer is firmly set, resulting in a stunning and delectable dessert that's worth the wait!
Can you freeze no-bake rainbow cheesecake?
Yes, you can freeze no-bake rainbow cheesecake by wrapping it tightly and placing it in an airtight container for optimal preservation. While freezing can help preserve the cheesecake, it's recommended to consume it within a reasonable time frame for the best taste and texture. Typically, frozen cheesecake can be kept for a few weeks in the freezer.
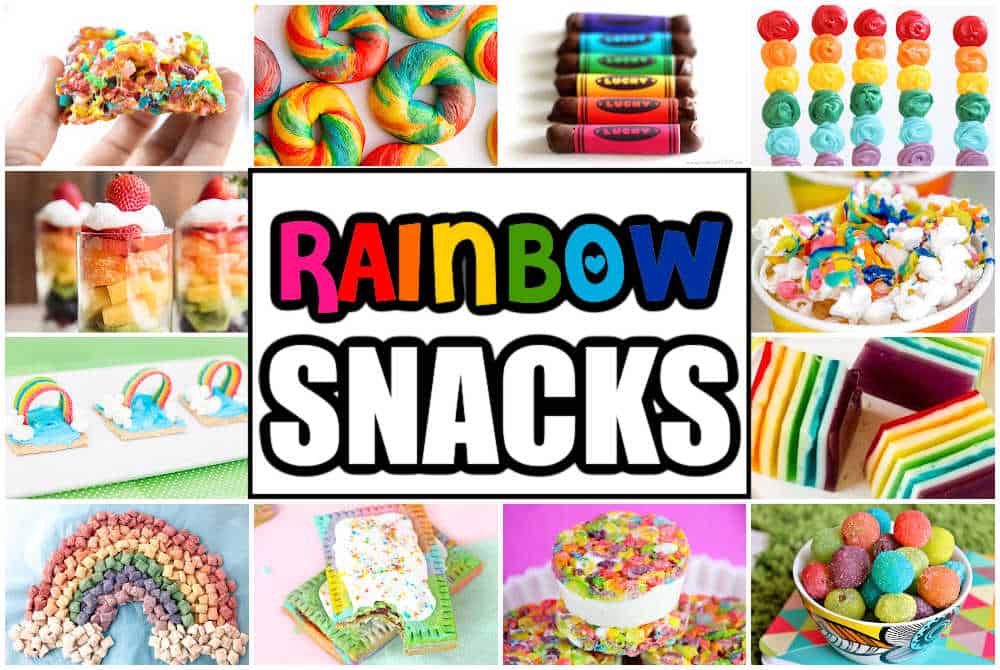
Other Rainbow Snacks You Might Enjoy
- Rainbow Popcorn - A kid favorite all year long, but always popular as a St. Patrick's Day Treat
- Rainbow Edible Crayons - These edible crayons are fun and colorful.
- The Best Rainbow Rice Krispie Treats - These are soft and gooey and all kinds of delicious.
- Rainbow Seeds and Happy St Patrick's Day Printables. These are a super fun way for the kids to give their friends a little treat and wish them HAPPY St. Patrick's Day!
- These Rainbow Ice Cream Sandwiches bring together two of our favorite sweets, rice crispy treats, and ice cream!

Rainbow Cheesecake
Bring on the bright and colorful deliciousness of our no-bake rainbow cheesecake. Bring in all the colors of the rainbow with this fun dessert.
Ingredients
Crust
- 1 ½ sleeves of graham cracker crumbs
- 1 stick of butter - melted
- 1 Tablespoon of sugar
Filling
- 5 - 8 ounce packages of cream cheese - softened
- 1 can of sweetened condensed milk
- ½ cup of powdered sugar
- 1 Tablespoon of orange Jello
- 1 Tablespoon of Berry Blue Jello
- 1 Tablespoon of Raspberry Jello
- 1 Tablespoon of Lime Jello
- 1 Tablespoon of Grape Jello
Food Coloring Gel
- Neon pink
- Neon Orange
- Neon Aqua
- Neon Purple
- Neon Lime
Instructions
- Crust
- Place the graham crackers in the blender, and blend on high until you have fine crumbs.
- Add the sugar, and blend again.
- Place the butter in a microwave safe dish, and microwave to get melted butter.
- Line the Spring Form pan with Parchment paper, and set aside.
- Pour the crumbs into a bowl, and pour butter over crumbs.
- Stir well, until butter and crumbs are completely blended.
- Pour the crumb mixture into the Spring-form pan, and press the mixture evenly into the bottom of the pan.
- Place the pan in the freezer to set.
- Rainbow Filling
- Place the softened cream cheese into the mixing bowl of a stand mixer, and mix with the whisk attachment until the cream cheese is smooth and creamy.
- Scrape down the sides of the mixing bowl, and blend again.
- Add the sweetened condensed milk, and blend until creamy.
- Add the Powdered sugar, and continue to blend on low until the cream cheese is completely smooth.
- Scrape down the sides of the bowl, and the bottom of the bowl, and blend again until smooth, and creamy.
- Divide the cream cheese mixture evenly in to the 5 small bowls.
- In one bowl add the Orange Jello, and stir to blend.
- In another bowl add the Berry Blue Jello, and stir well.
- In the next bowl add the Raspberry Jello, and stir well.
- In the last two bowls, add the lime to one and the grape to one, and stir well.
- Go back to the Orange flavored bowl, and add two or three drops of Neon Orange food coloring gel, or more until desired orange color is achieved.
- In the Berry Blue flavor, add two or three drops of Neon Aqua food coloring gel, or more if you want a brighter blue.
- Continue to add the Neon pink, Neon Lime green, and Neon purple to the Raspberry, lime, and grape flavors, starting with two or three drops, stirring well, and adding more food coloring gel to achieve the desired color.
- Make sure all the bowls have been well stirred, and the colors of the rainbow blended.
- Assemble Cheesecake
- Remove the Spring-form pan from the freezer.
- With a Tablespoon; get about ½ a Tablespoonful of the Orange cheesecake, and drop it on the crust in the Spring-form pan.
- Follow with about ½ a Tablespoonful of each of the colors, alternating between the colors until you fill the bottom of the pan.
- Continue to drop the ½ Tablespoons of cheesecake mixture on top of the bottom layer until you've used all the cheesecake mixture.
- You can either continue the same colors on the second layer to form a uniform thick tie dye look, or you can drop different colors on top of the bottom layer, and get a more swirled look.
- When all the cheesecake mixture has been added, take a wooden skewer, and swirl the skewer through the cheesecake, swirling the colors around to make a mixed tie dye look.
- Any cheesecake that's left in the bowls; use a small spatula to remove the cheesecake, and drop it on top of the cheesecake in the pan, and swirl slightly.
- Place the Spring-form pan back in the freezer, and let sit for at least 6 hours to completely set, or overnight for best results.
- When you're ready to serve, remove the cheesecake from the freezer about 15 minutes before time to serve.
- Cut into 2 - 3 inch pieces, and serve on dessert plates. Enjoy!
- NOTE: You can change the flavors of Jello, if there is one you don't care for. Just make sure if you change the flavor, that you have the Neon Food Coloring Gel to match that flavor, i.e., if you use lemon instead of orange, you'll need Yellow food coloring gel instead of Orange. If you choose Strawberry instead of Raspberry, the Neon pink will still work with the strawberry. Just remember to coordinate your food coloring gel with the color of Jello you're using.
Makes Six to Eight 2 - 3 inch pieces
Nutrition
CONNECT WITH MADE WITH HAPPY!
Be sure to follow me on social media, so you never miss a post!
Facebook | Twitter | Youtube | Pinterest | Instagram
Find and shop my favorite products on my Amazon storefront here!
Rainbow Cheesecake
PIN IT TO YOUR FAVORITE BOARD ON PINTEREST!
FOLLOW MADE WITH HAPPY ON PINTEREST FOR ALL THINGS HAPPY!