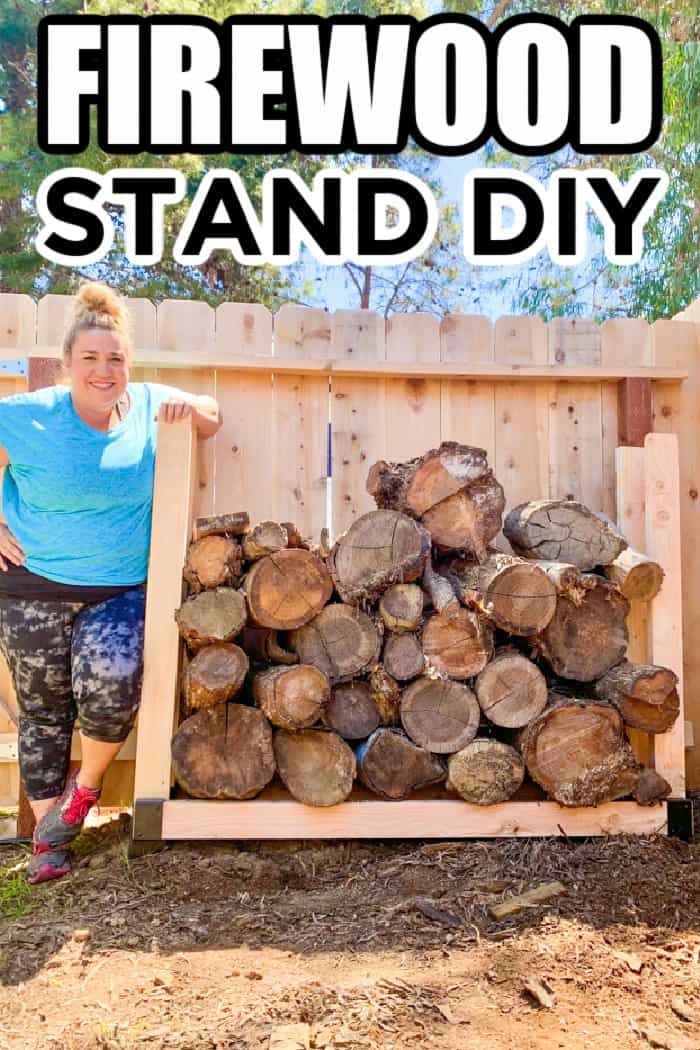
Looking for a simple inexpensive outdoor firewood storage rack? Then we have you covered with this firewood stand DIY.
Want to save this project?
Enter your email below, and then we'll send it straight to your inbox. Plus get awesome new projects from us each week.
With this firewood stand DIY, we are sharing that storing your wood doesn't have to look crazy or cost an arm and a leg.
If fun wood DIY Projects are your jam (like ours) then you won't want to miss our other popular projects including: How to Make an Outdoor Easel, DIY Treehouse, and How to Make a Lazy Susan.
You also don't want to miss our Summer DIY's full of all kinds of DIY fun!
Storing Firewood
Anyone that owns a home or even rents a home, knows that there are always a million things to fix, organize, and do around your house. Add family to the mix and the list gets longer and longer.
Recently we have been talking about organizing our side yard to make room for some other projects we have on the horizon. More on that later. But as I thought about organizing the side yard, the one area that was a pain point was our firewood storage.
Over the years we have collected firewood for camping, bonfires, etc., and have just stacked it in the side yard. A few months ago, the fence between us and our neighbors was being replaced and so we had to move the wood away from the property line. I will not bore you with details, but there was a run in with a number of rodents and lizards and now the wood stack gives me the heeby jeebies.
Which then lead me down the path to find a firewood log rack. Putting the wood into a log holder, would get the wood off the ground away from creepy crawlies and keep the wood dry. The all metal wood racks I found started at $80 and up for the size we wanted. After realizing I could build a firewood rack for less than that, we are here and showing you just what you need to build your own DIY outdoor firewood rack.
Supplies Needed For DIY Firewood Rack
- 2 - 2x4x5 - Pressure Treated Lumber Pieces
- 4 - 2x4x4 - Pressure Treated Lumber Pieces
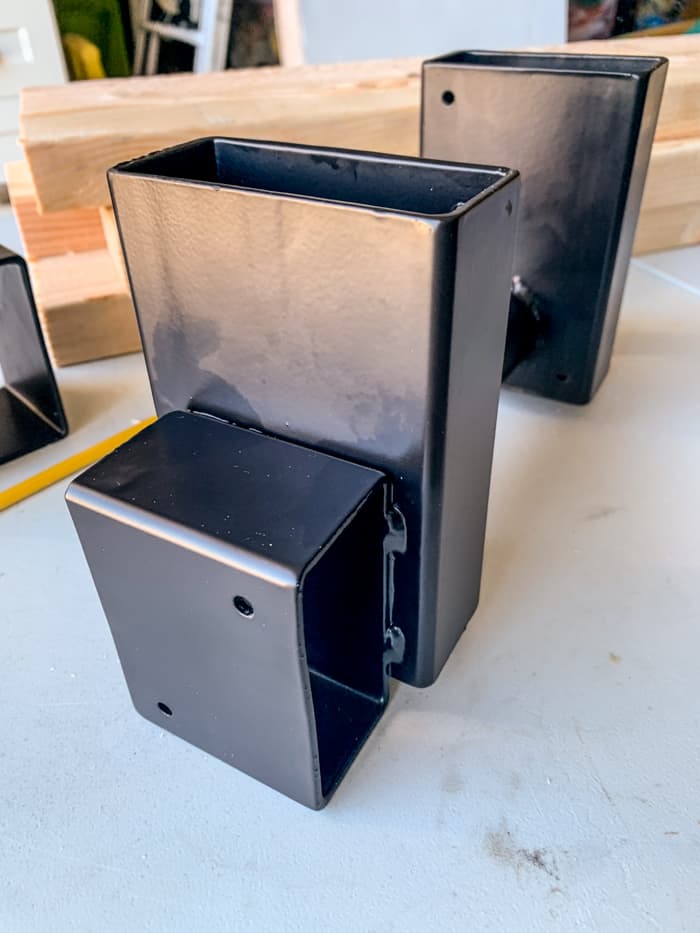
- Metal Firewood Rack Brackets
- Screwdriver
How to Make Firewood Rack
The first step is to cut your 2x4s to the appropriate length. We went with 5 foot long pieces and the sides at 4 feet. It is all dependent on where you are going to store the wood and how much wood you have.
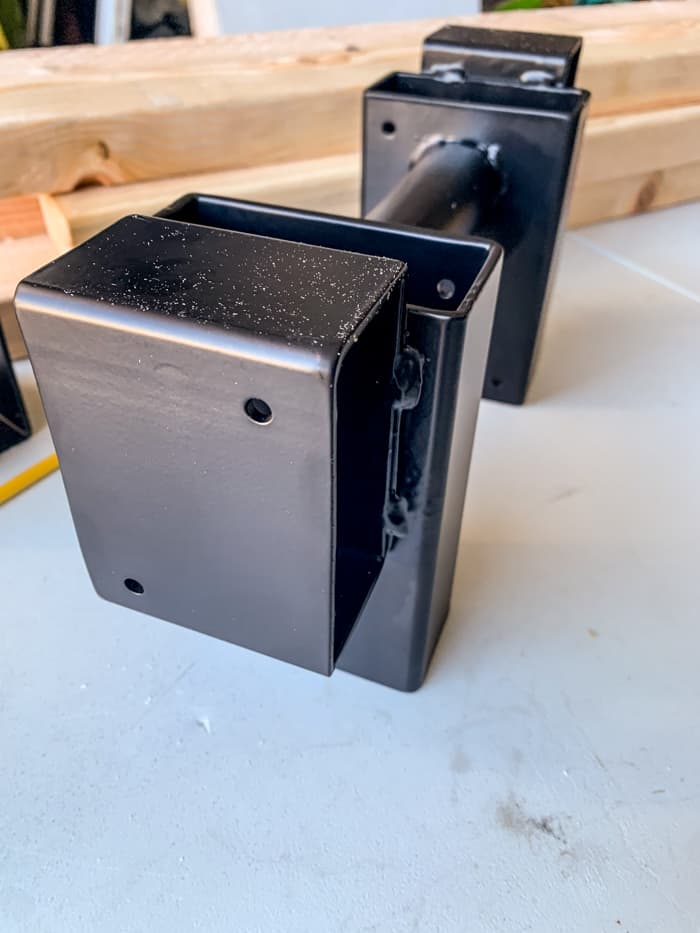
The next step is in determining how far you want the wood off the ground. The image that came with the metal rack, had the horizontal 2x4's on the ground. This will lift the firewood about 3 inches off the ground. If you flip the brackets over like we have pictures above, then the firewood would be about 6 inches off the ground.
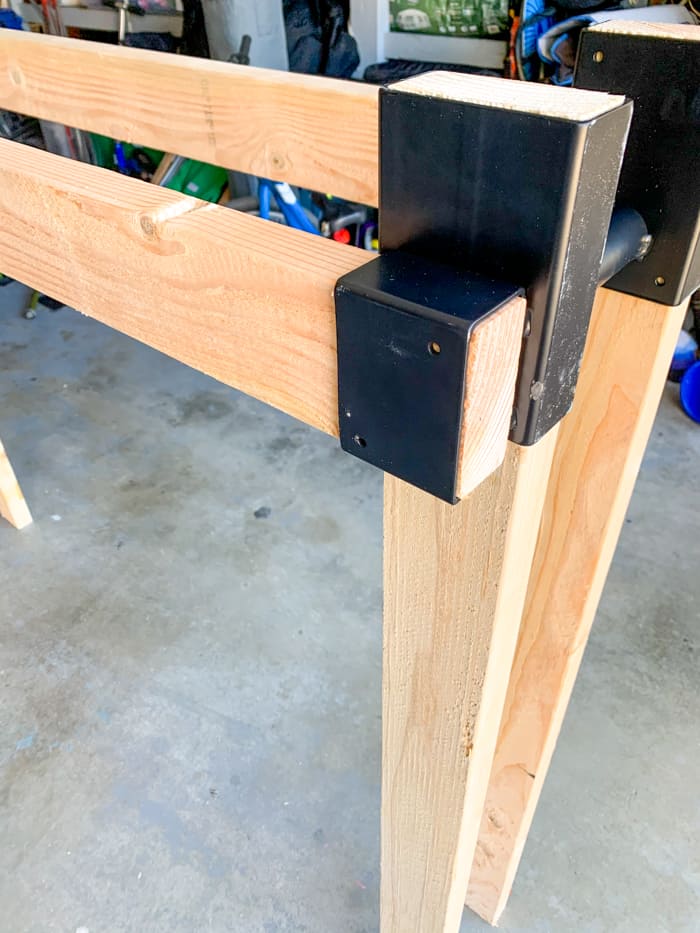
Next step is place the wood into each of the brackets. You may need a hammer to pound the wood into the brackets in the case they it is snug. Once they are in place, screw in the screws that come with the metal racks into the wood. This make the stand that much more sturdy.
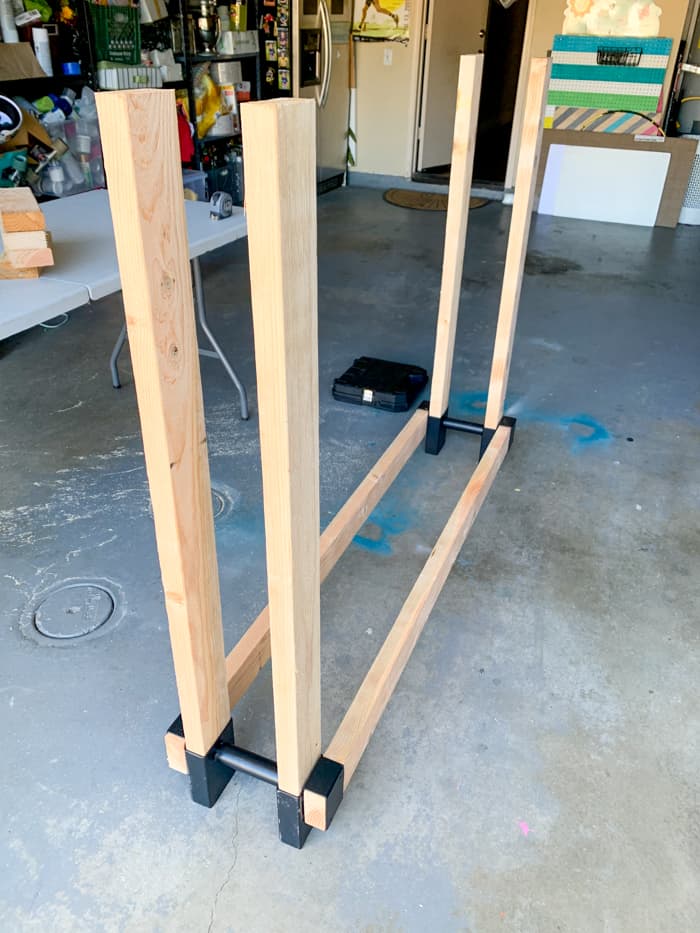
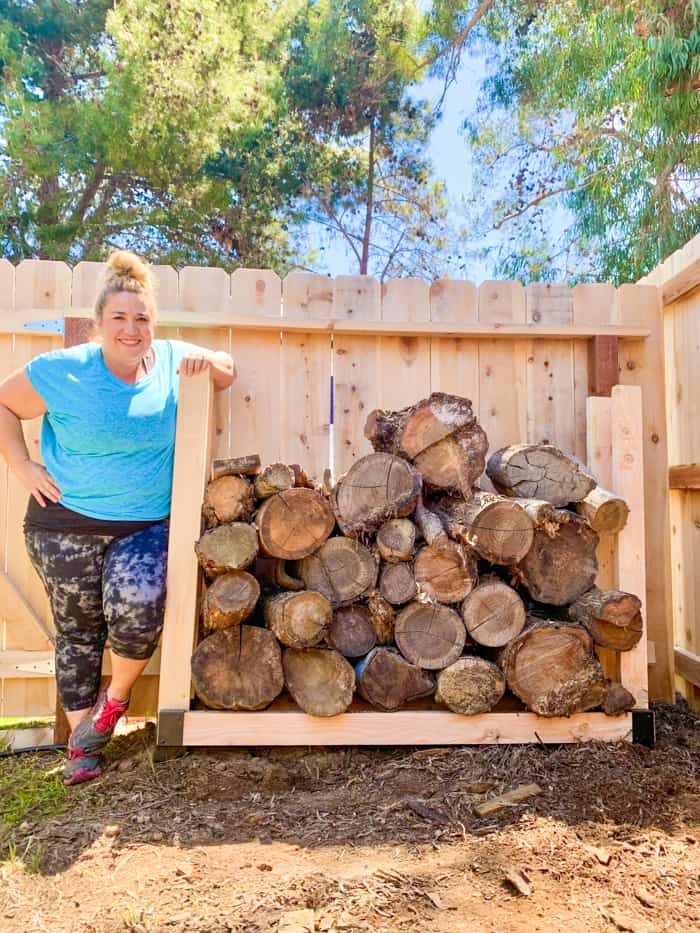
Once you have it built, its a matter of clearing out a space for your rack.
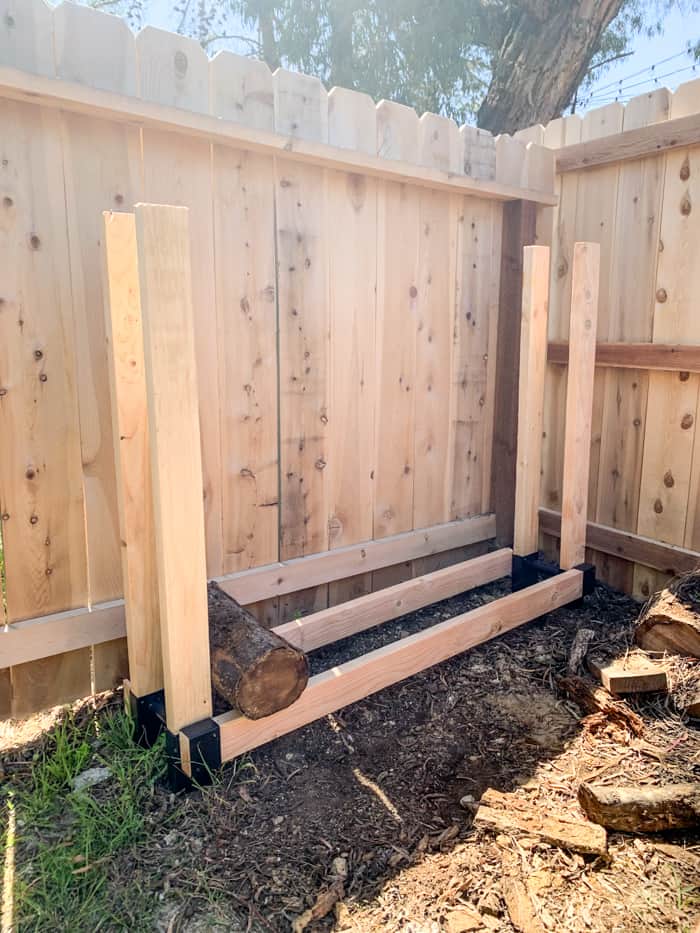
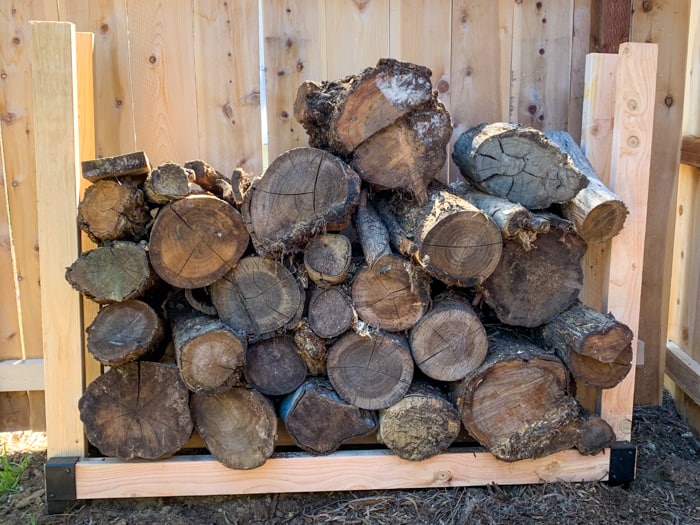
Start stacking your wood. If you use both large and smaller pieces regularly, I would recommend stacking one side with larger pieces and the other side with smaller, rather than putting all the large pieces on the bottom. Then you won't be digging through the stack every time you want a large log.
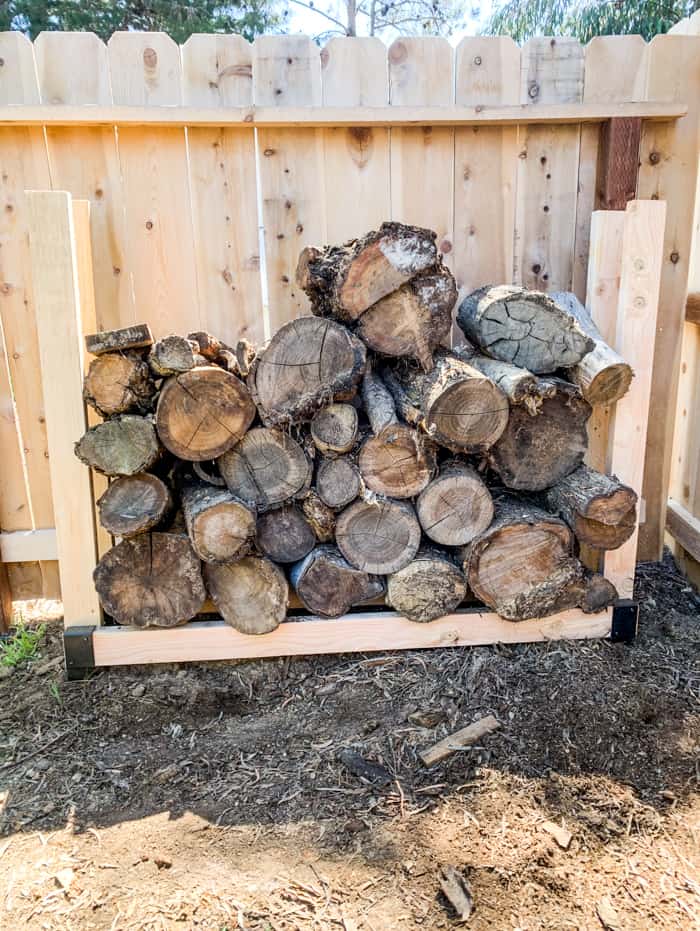
Viola, you have yourself a firewood stand DIY!
How Do You Keep Firewood Dry Outside?
One of the best reasons to make this firewood stand is to get the wood off the ground to keep it dry. While we do not live in a terribly wet region of the united states, its still important to keep your firewood dry.
One of the best ways to keep the wood dry is to use a firewood cover. If you do not want to purchase a cover, a tarp will work just as good too.
Other DIY Projects You'll Love
- DIY POOL HEATERS
- DIY CHARGING STATION
- RAINBOW VERTICAL GARDEN
- DIY OUTDOOR STORAGE TABLE
- DIY ROUND BEACH BLANKET

Firewood Stand DIY
Equipment
- Screwdriver
Ingredients
- 2 - 2 x4x5 - Pressure Treated Lumber Pieces
- 4 - 2 x4x4 - Pressure Treated Lumber Pieces
- Metal Firewood Rack Brackets
Instructions
- The first step is to cut your 2x4s to the appropriate length. We went with 5 foot long pieces and the sides at 4 feet. It is all dependent on where you are going to store the wood and how much wood you have.

- The next step is in determining how far you want the wood off the ground. The image that came with the metal rack, had the horizontal 2x4's on the ground. This will lift the firewood about 3 inches off the ground. If you flip the brackets over like we have pictures above, then the firewood would be about 6 inches off the ground.
- Next step is place the wood into each of the brackets. You may need a hammer to pound the wood into the brackets in the case they it is snug. Once they are in place, screw in the screws that come with the metal racks into the wood. This make the stand that much more sturdy.
- Once you have it built, its a matter of clearing out a space for your rack.
- Start stacking your wood. If you use both large and smaller pieces regularly, I would recommend stacking one side with larger pieces and the other side with smaller, rather than putting all the large pieces on the bottom. Then you won't be digging through the stack every time you want a large log.
- Viola, you have yourself a firewood stand!


Video
CONNECT WITH MADE WITH HAPPY!
Be sure to follow me on social media, so you never miss a post!
Facebook | Twitter | Youtube | Pinterest | Instagram
Find and shop my favorite products in my Amazon storefront here!
FIREWOOD STAND DIY
FOLLOW MADE WITH HAPPY ON PINTEREST FOR ALL THINGS HAPPY!