Learn to draw a stylish bow tie effortlessly with this easy step-by-step easy tutorial. Enhance your art with a touch of elegance!

Want to save this project?
Enter your email below, and then we'll send it straight to your inbox. Plus get awesome new projects from us each week.
This How to Draw a Bow Tie tutorial is so fun for the kids to learn the easy step-by-step lesson on how to draw their own bow ties.
Whether it's Father's Day or when drawing something fun for a present. Have fun learning to draw this bow tie and then decorating it.

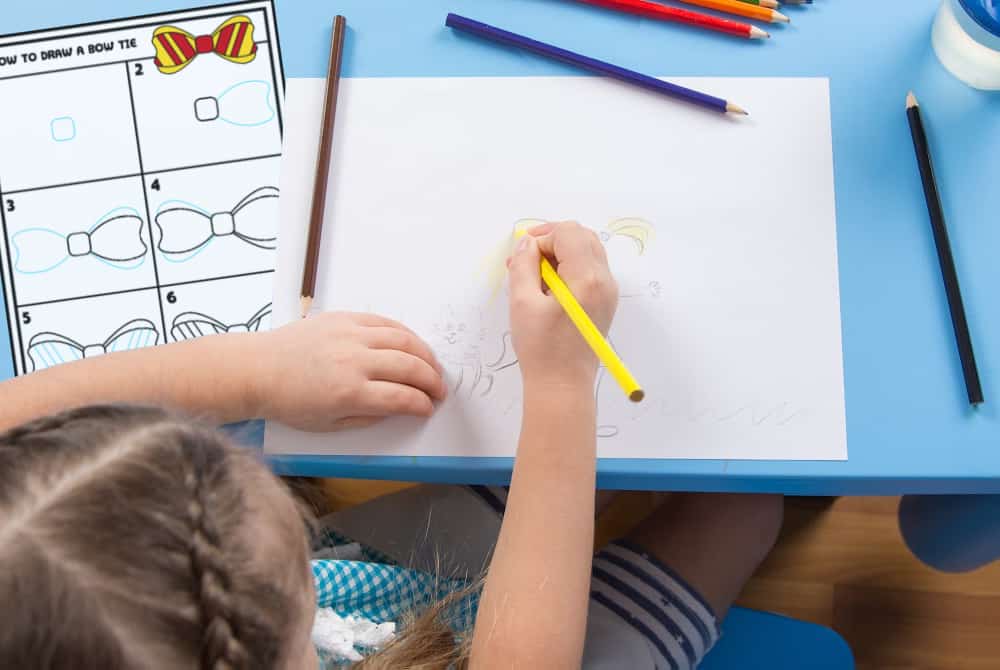
Hi there, parents and teachers! Today, we've got something really fun lined up. We're going to learn how to draw a bow tie. So, grab a sheet of paper, a good eraser, and a pencil, and let's get started!
Bow ties are pretty cool, aren't they? They've been a fancy clothing item for a very long time, all the way back to the seventeenth century. Picture your little boy showing off his own bow ties, maybe even ones he made himself. Sounds fun, right? You're in the perfect place to learn just that.
Today, we're focusing on drawing. Drawing is a great way to be creative and make interesting pictures. From simple lines to bright and detailed drawings, anyone can create something cool. And today, we're going to use that creativity to draw a beautiful bow.

Celebrating Father's Day
Father's Day is all about celebrating our dads and all the great things they do for us. It's a special day to thank them for always being there. One of the ways people often celebrate Father's Day is by giving gifts. This year, why not make handmade gifts from the heart with a drawing of a bow?
Imagine how happy a dad would be to get a card with an easy draw bow by his own child. It could be a simple one-color bow tie or maybe one with lots of cool patterns. The best part is, it's not just about the drawing, but the love and thought behind it.
In honor of Father's Day, today we're going to learn how to draw a bow tie in simple steps. Even though it's easy, there's still lots of room for creativity. After learning the basic steps, kids can create their very own bow tie look and bow tie pattern.
Learning to Draw
Drawing is a super fun way to be creative and make cool pictures. You can express your thoughts and feelings, and all you need is a sheet of paper and something to draw with. And even the simplest drawings can turn out really beautiful.
When you draw a bow tie, you start with basic shapes, and slowly those simple shapes turn into a finished picture. It's fun to see the bow tie take shape as you add more details. Let the kids show their creative side! Their dads will appreciate that much more if they do!
Drawing a bow tie isn't just fun, it can also be a learning experience. Kids can learn about different styles of bow ties and where they come from. And once they know how to draw a basic bow tie, they can try drawing different designs like a denim bow tie or a candy cane striped one.
Bow Tie Drawing
So, let's start drawing! This bow tie drawing activity isn't just about learning to draw something new. It's about showing love and appreciation for our dads in a creative way. And remember, the goal isn't just to draw the perfect bow tie, but to have fun while doing it. Let's make this Father's Day special with a handmade bow tie drawing!
This drawing uses simple lines with a few straight lines and no complicated curved lines.
The best part is that it then unlocks creativity and imagination on what else you can draw. Be sure to also check out some of our other easy drawings including How to Draw a Cube, How to Draw a Cone, and How to Draw a Rainbow.
Don't miss our Tie Craft For Father's Day and our Coloring Pages for Father's Day.
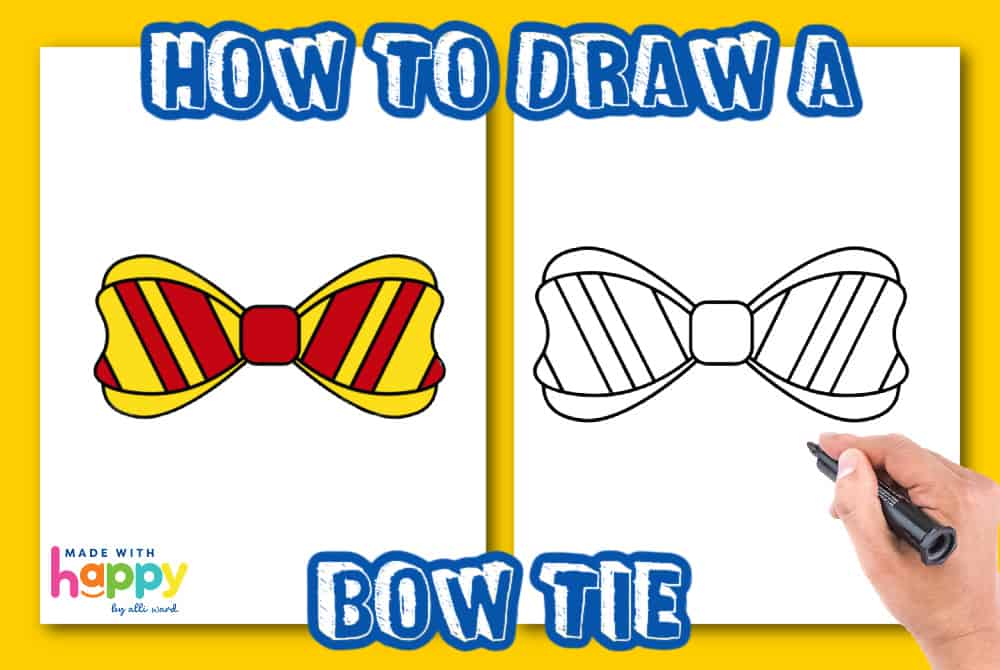
How To Draw a Bow Tie
Below we're sharing an easy drawing lesson for a bowtie. Don't forget to print out the printable bow tie drawing tutorial at the bottom and follow along.
Grab a large piece of drawing paper and a drawing pencil. Here are the easy steps to how to draw a bow tie.
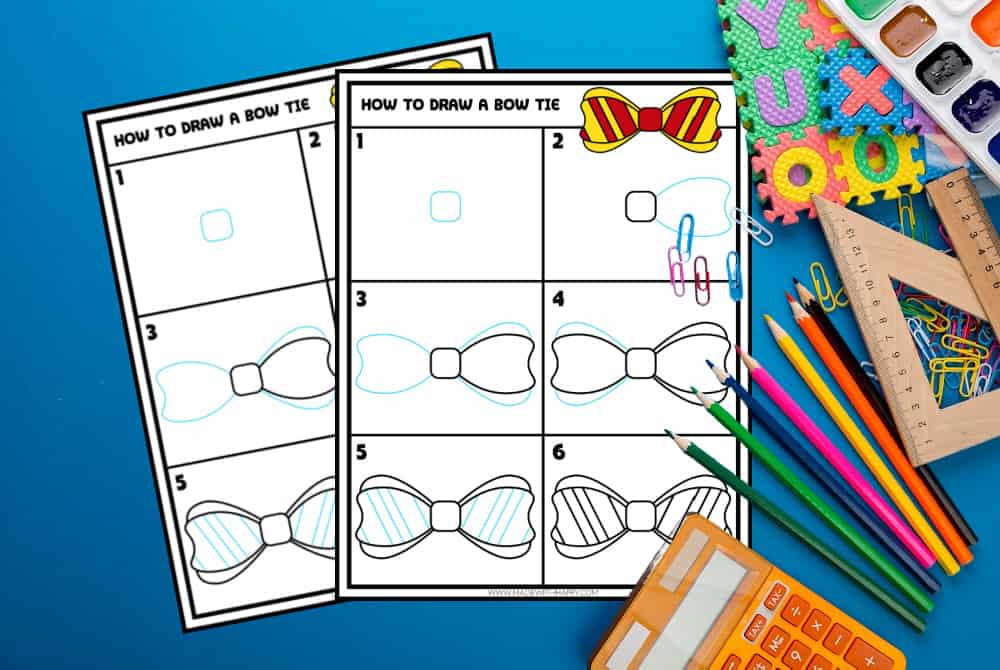
Center of The Bow Tie

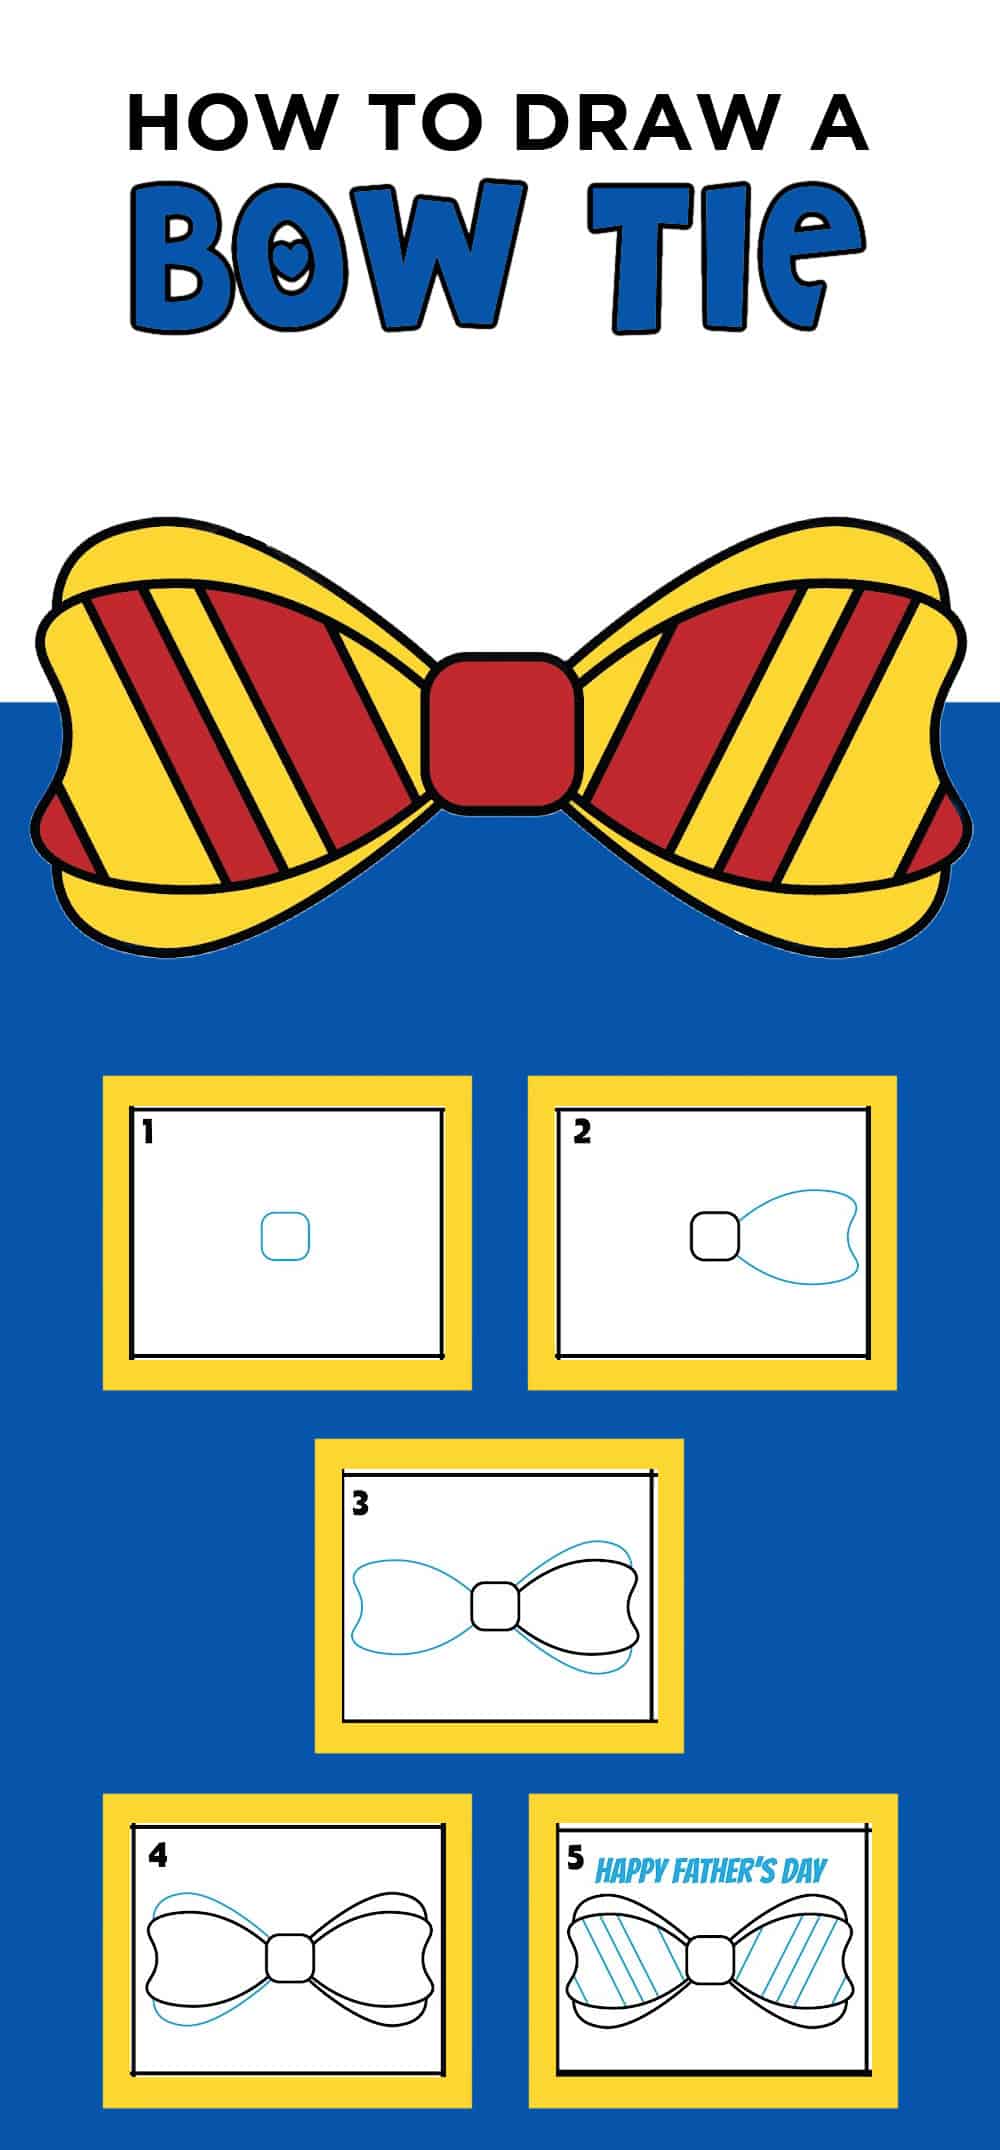
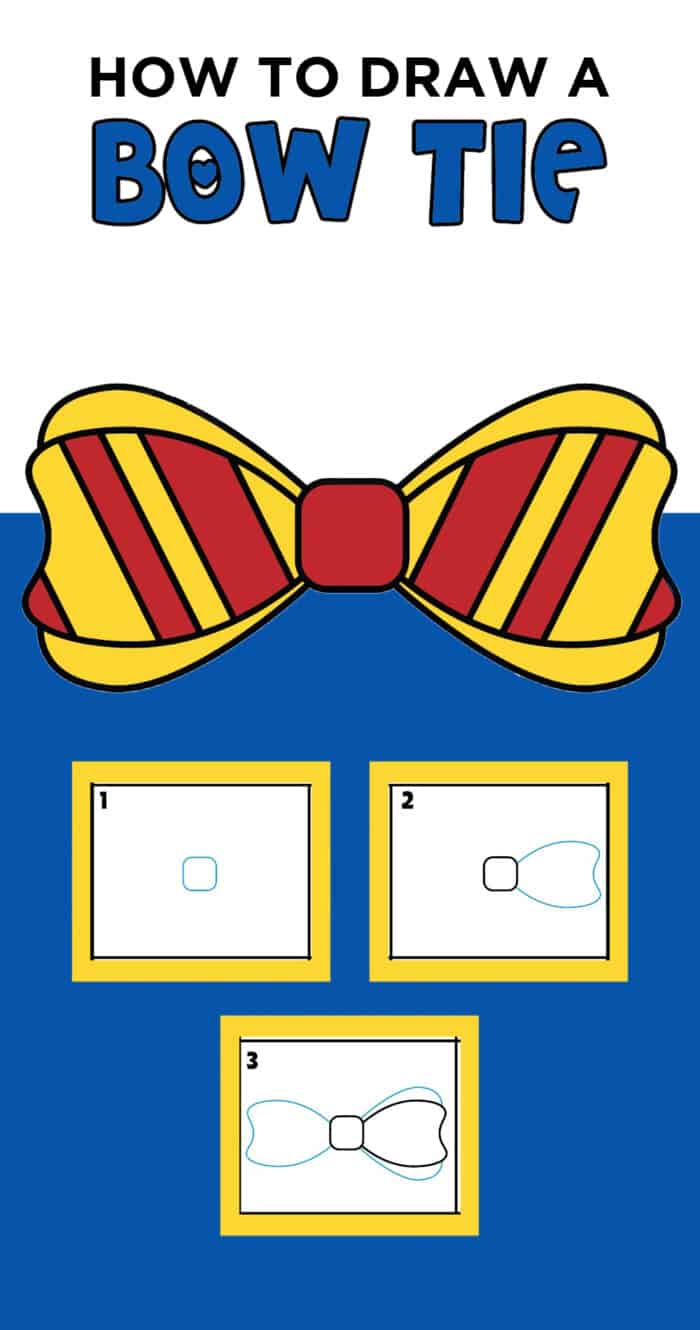
Start with drawing the center piece of the bow shape. Draw a square in the middle of the page. The corners of the middle of the bow square are rounded.
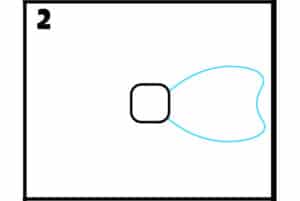
The next step is to draw a curved line off the right side of the middle of the bow. Curving the ends of the bow in a curved line will make it more realistic.
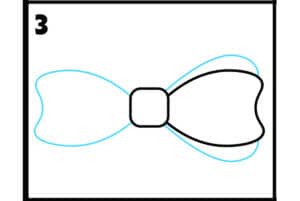
In this step, you will draw a similar curved line of the middle of the tie on the left side. Next, draw another curved line behind the front portion of the right side of the tie. The ends should be behind the front portion of the tie.
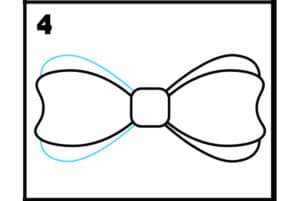
Draw the behind bow portion of the left side of the bow tie as you did on the other side.
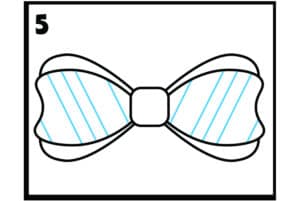
The last step in the drawing is to add a pattern to the front part of the tie. We dreaw straight lines to give it a striped pattern.
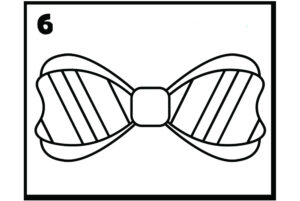
The final step is to go over the drawing of a bow tie with a darker pencil and erase all the extra drawing lines.

Grab your crayons, watercolor paint, watercolor pencils, and or markers to color in your own types of bow ties and colorful drawing.
easydrawingtutorial #cartoondrawing #cartoondrawings howtodrawstepbystep #howtodrawbowtie howtodrawabowtie #bowtiedrawing
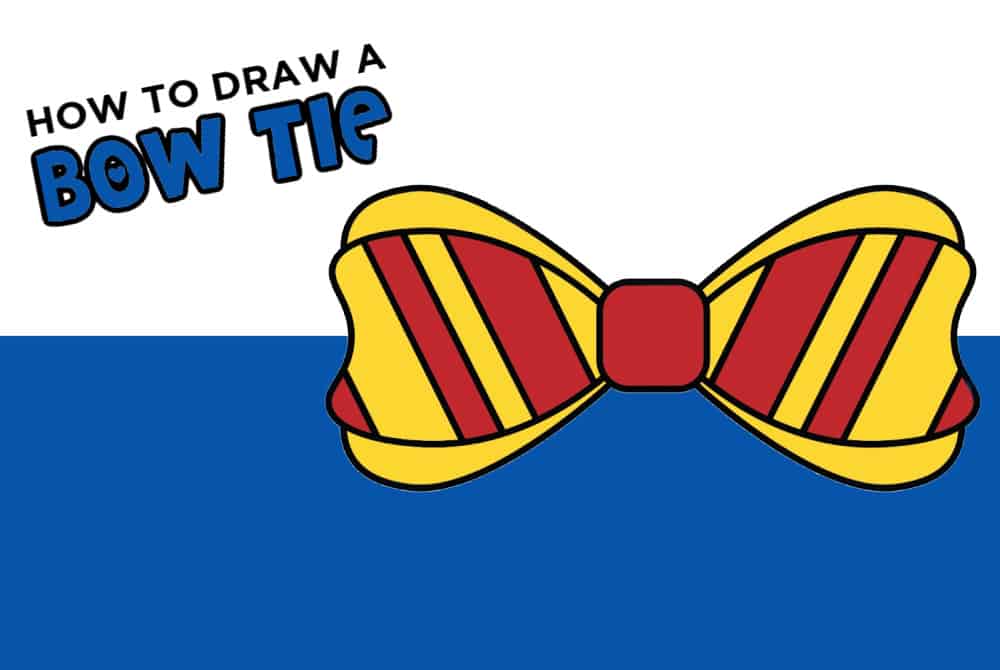
Viola, you have a BEAUTIFUL BOW TIE DRAWING finished product!
We highlighted this How to Draw along with some other fun kid's crafts in our June Crafts along with our 101+ Easy Kids Crafts.
You also do not want to miss our 101+ Printable Coloring Pages For Kids and 101+ Printables For Kids full of Crafts and Coloring Pages.
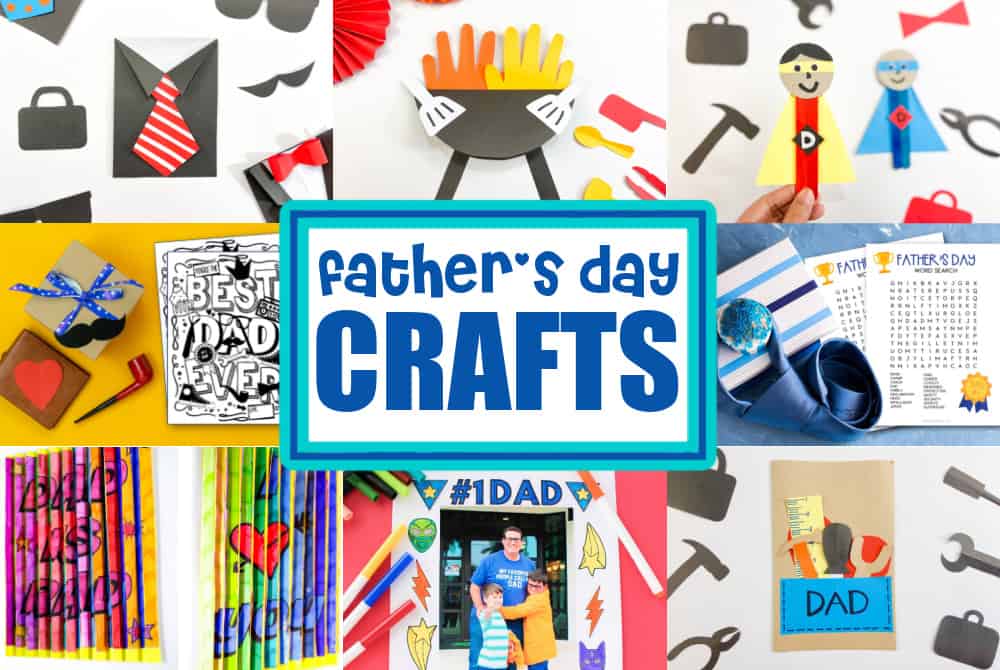
Other Father's Day Fun You'll Love
- Agamograph Printable Father's Day Card
- Father's Day Grill Card
- Father's Day Activities
- Superhero Dad
- Father's Day Picture Frame
- Father's Day Word Search
Download the Bow Tie Drawing Step-By-Step Guide
Enter your first name and email address in the form below and you'll get taken directly to the downloadable Bow Tie Step-By-Step drawing tutorial pdf file.
*For personal use only

How to Draw a Bow Tie
Equipment
- Drawing Pencils
Ingredients
Instructions
- Start with drawing the center piece of the bow shape. Draw a square in the middle of the page. The corners of the middle of the bow square are rounded.

- The next step is to draw a curved line off the right side of the middle of the bow. Curving the ends of the bow in a curved line will make it more realistic.
- In this step, you will draw a similar curved line of the middle of the tie on the left side. Next, draw another curved line behind the front portion of the right side of the tie. The ends should be behind the front portion of the tie.
- Draw the behind bow portion of the left side of the bow tie as you did on the other side.
- The last step in the drawing is to add a pattern to the front part of the tie. We dreaw straight lines to give it a striped pattern.
- The final step is to go over the drawing of a bow tie with a darker pencil and erase all the extra drawing lines.
- Grab your crayons, watercolor paint, watercolor pencils, and or markers to color in your own types of bow ties and colorful drawing.
Video
CONNECT WITH MADE WITH HAPPY!
Be sure to follow me on social media, so you never miss a post!
Facebook | Twitter | Youtube | Pinterest | Instagram
Find and shop my favorite products on my Amazon storefront here!
HOW TO DRAW A BOW TIE
PIN IT TO YOUR DIY BOARD ON PINTEREST!
FOLLOW MADE WITH HAPPY ON PINTEREST FOR ALL THINGS HAPPY!