Looking to decorate your house with burlap bows this holiday? We're sharing a simple DIY burlap bow perfect as a tree topper, wreaths, and pews for any occasion.

Want to save this project?
Enter your email below, and then we'll send it straight to your inbox. Plus get awesome new projects from us each week.
I am showing you a quick and easy way on how to make a bow out of burlap.
This tutorial can be used on all different types of ribbons and fabrics too.
If you love simple home DIY's like this, then you will not want to miss some of our other popular Fall decoration DIY Leaf Bowl, Pilgrim Hat Name Place Card, Give Thanks - Printable Banner, and Modern Fall Wreath.
Kind of Ribbon
I'm walking along the aisles in Michaels and often see the most beautiful ribbons along aisles and aisles. There are so many different types of ribbons and kinds of ribbons.
I love the idea of tying in different ribbons and fabrics for the holidays. There are many great fabrics and patterns too.
Burlap Bow
During the Fall months, I tend to see the most beautiful burlap bows and rolls of burlap ribbon. Green, tans, browns. Pinterest is filled with the most beautiful crafts and wreaths using burlap and so I give in and buy.
I get it home and onto my wall of ribbon, it goes. Then when it was time to use it, I realize a simple fact... a DIY burlap bow is not the same as using a regular ribbon.
This is when I thought, well if you're anything like me, then you too have this beautiful roll of burlap sitting there just waiting for a fun debut during the holidays.
So I made this great tutorial for a great home decor and front door Christmas wreaths without the use of floral wire.
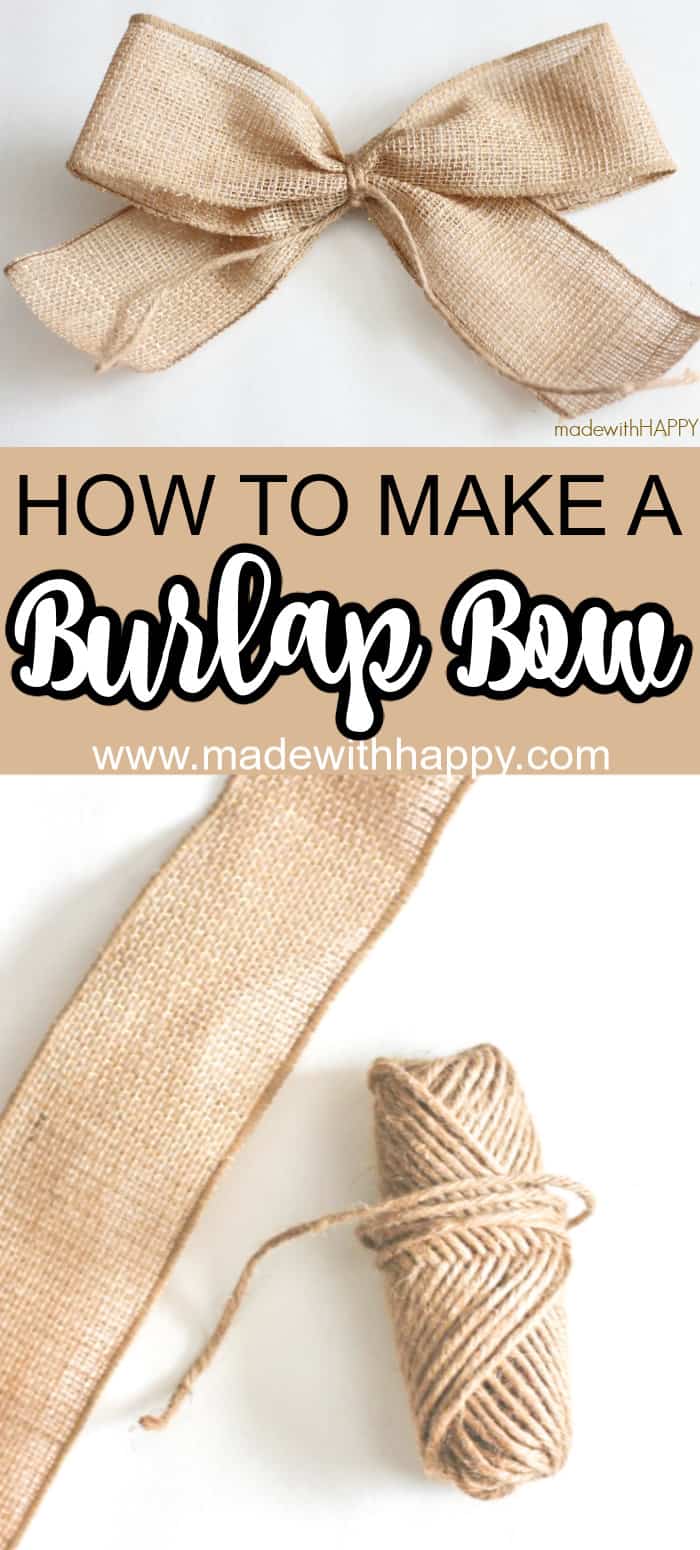
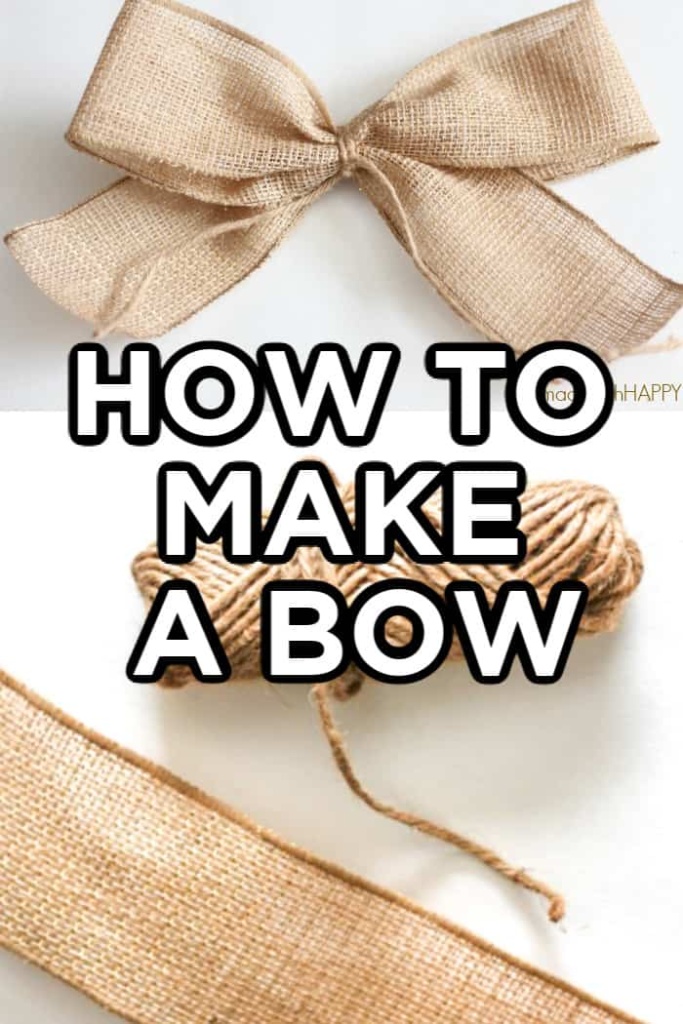
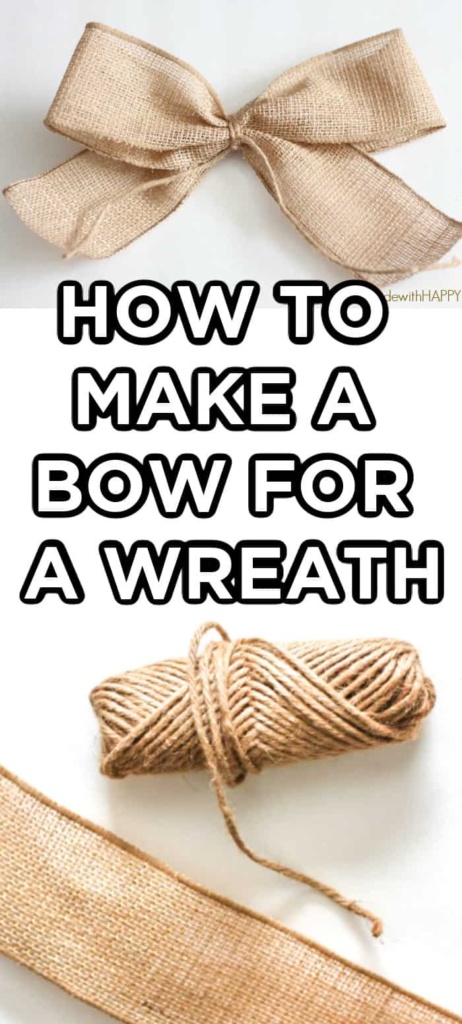
Supplies used to make a simple burlap bow
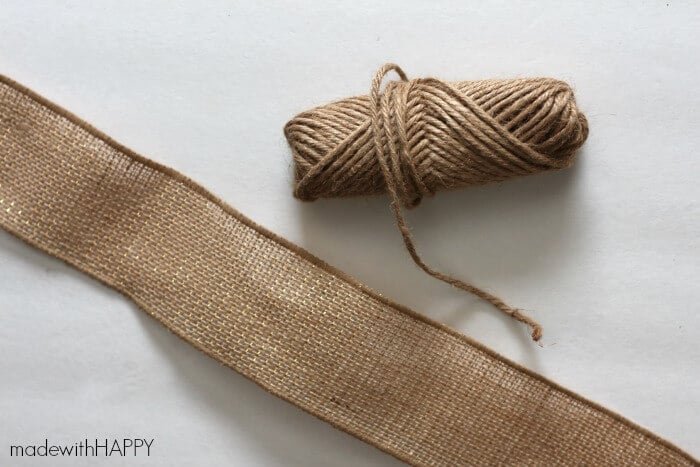
- Burlap Ribbon
- Twine
- Scissors
How to Make a Bow

Cut the piece of burlap ribbon and twine it at the same lengths for simplicity. In the case you are making very large bows, then I would wait to cut the twine till you are ready to tie it.
In terms of length, this will depend on the size of the bow you are trying to make.If you are making burlap bows for wreaths or looking to determine how to make burlap bows for pews, then they are both about the same size as the one I made in this example and that was approximately 8 inches wide.
If you looking for how to make a burlap bow for a tree topper, then I would make it bigger, approximately 12-18 inches wide. After you have determined the width of the bow, then I would multiply that by three and that will be the length you are going to cut both the piece of ribbon and the twine. In this example, I cut both at 24 inches.
How To Tie A Bow
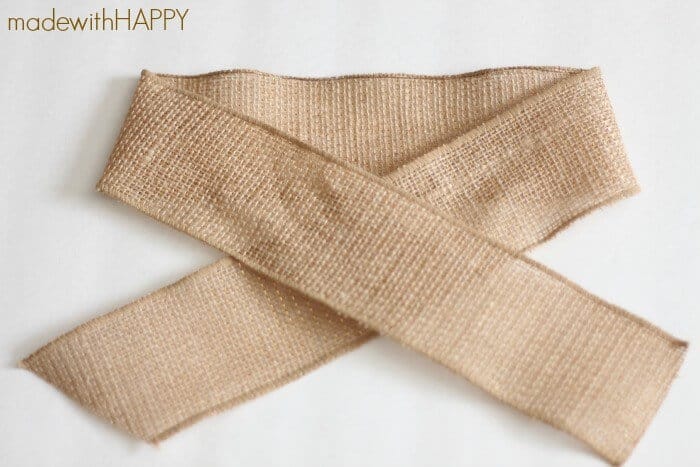
Fold the ribbon into three sections.
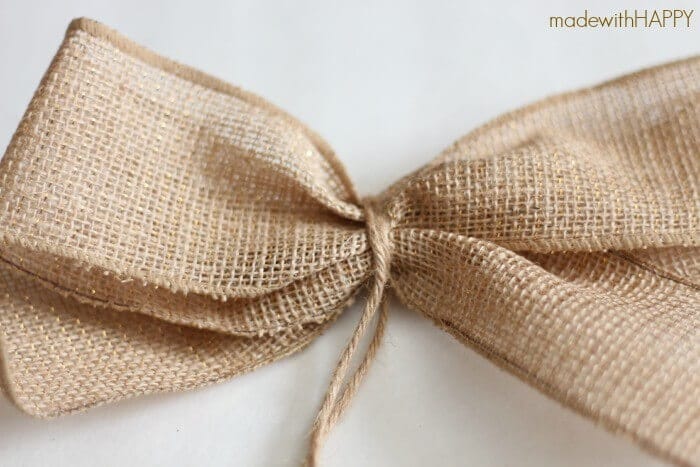
Using the twine, wrap it twice around the middle of the bow three times, and tie a knot at the bottom.
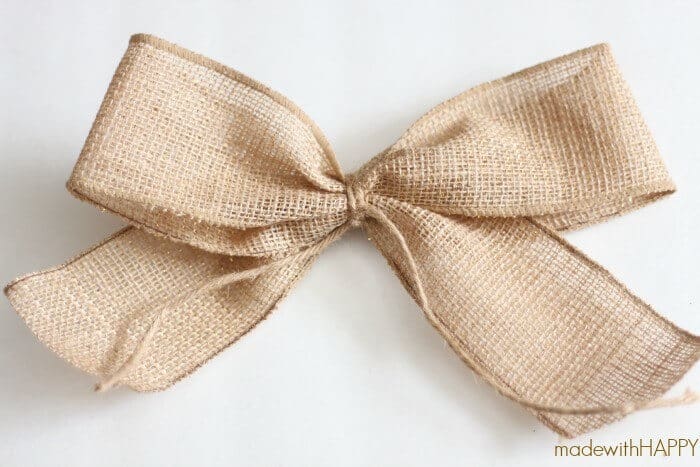
Cut the twine to the length of the bow feet and voila, you have yourself a burlap bow. See, I told you it was quick and simple! Now, cover your house with these beauties!
How do you tie a bow with 4 loops?
I have been asked how to adjust this tutorial for a bow with 4 loops. It is essentially made the same way, except that you would extend the length to four times the desired length.
The only difference is that the middle section which was once a third is now double the size. Create two loops on each side and then bunch in the middle as you did with the single loop. Tie it with the twine and there you have it.
If you have issues making your burlap bow?
There are a few different issues that have come up.
- If the burlap pieces of ribbon give off an odor. Burlap can smell. If it's too much for you to handle, there are plenty of polyester alternatives that resemble burlap and can be made into a bow using the same method.
- If you are having trouble creating the loops, you can also cross the loops and then tie the twine.
Tips for different uses of burlap bows
These bows are great for multiple uses. We've used them for holiday wreaths, tree toppers, church events on the pews, and on chairs for weddings. For each of these uses, you simply add another piece of twine and tie it to the center of the bow and then use the legs to tie it to the pew, wreath, tree, or chair.


Now that you know how do make your own Burlap Bow DIY, here are some other projects you might enjoy!
OTHER PARTY CRAFTS YOU MIGHT ENJOY
- If you are looking for a rainbow pinata idea, then look no further than this Rainbow Punch Pinata
- Looking for a simple way to dress up your next party. We are showing you this easy DIY tassel garland that will bring HAPPY to any party.
- Looking for a fun kids birthday party craft, then we have you covered with these super easy mini rainbow pinatas. They make a great party favor too!
- This color scavenger hunt for kids is lots of fun. It takes your children on a treasure hunt both indoors and outdoors looking for all kinds of happy colors.
- We're sharing how to make these pool noodle Nunchucks for a party or just for fun.
- Stir up your next party with these super cute DIY Pom Pom Drink Sticks.

How to make a Burlap Bow
Equipment
Ingredients
Instructions
- Cut the piece of burlap ribbon and twine at the same lengths for simplicity. In the case you are making very large bows, then I would wait to cut the twine till you are ready to tie it. In terms of length, this will depend on the size of the bow you are trying to make.If you are making burlap bows for wreaths, or looking to determine how to make burlap bows for pews, then they are both about the same size as the one I made in this example and that was approximately 8 inches wide. If you looking for how to make a burlap bow for tree topper, then I would make it bigger, approximately 12-18 inches wide.After you have determined the width of the bow, then I would multiple that by three and that will be the length you are going to cut both the piece of ribbon and the twine. In this example, I cut both at 24 inches.

- Fold the ribbon in three sections.
- Using the twine, wrap it twice around the middle of the three sections and tie a knot at the bottom.
- Cut the twine to the length of the bow feet and viola, you have yourself a burlap bow. See, I told you it was quick and simple! Now, cover your house in these beauties!


Video
CONNECT WITH MADE WITH HAPPY!
Be sure to follow me on social media, so you never miss a post!
Facebook | Twitter | Youtube | Pinterest | Instagram
Find and shop my favorite products on my Amazon storefront here!
HOW TO MAKE A BURLAP BOW
PIN IT TO YOUR KIDS CRAFTS PINTEREST BOARD
FOLLOW MADEWITHHAPPY ON PINTEREST FOR MORE GREAT GIFT IDEAS!