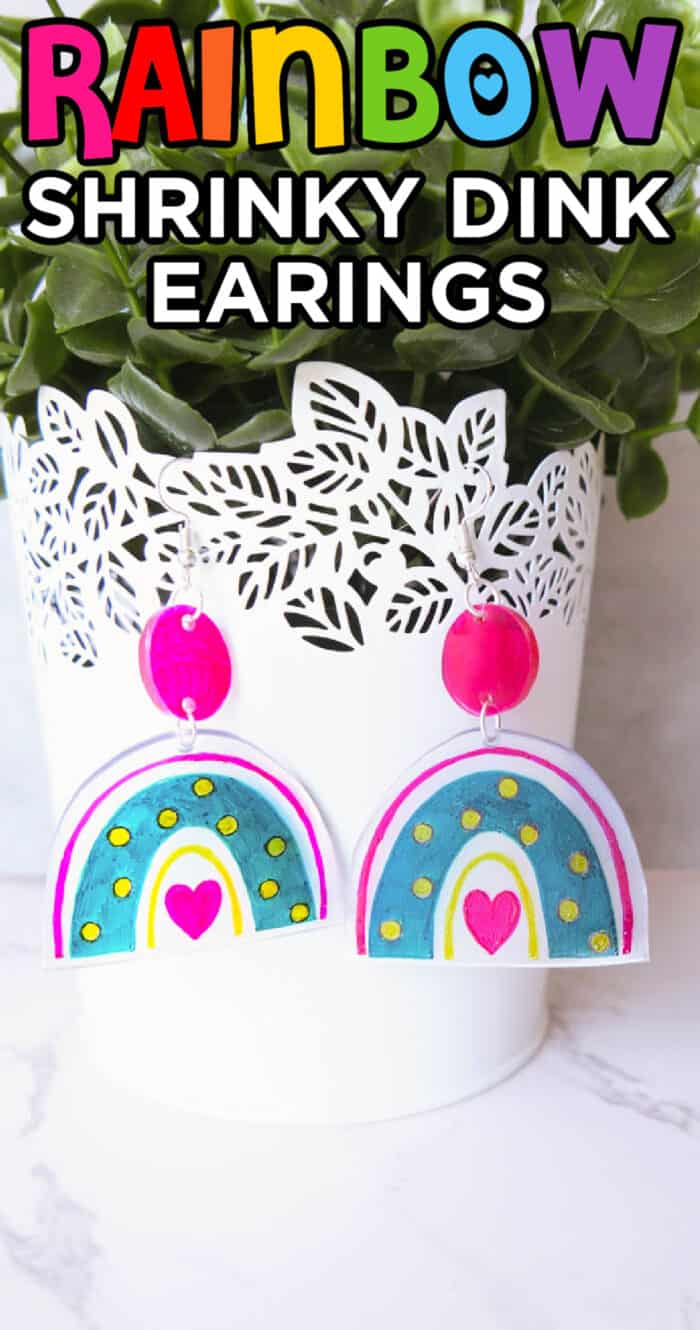
We're sharing the magic of shrinking plastic crafts and making rainbow DIY Shrinky Dink Earrings crafts for kids of all ages.
Want to save this project?
Enter your email below, and then we'll send it straight to your inbox. Plus get awesome new projects from us each week.
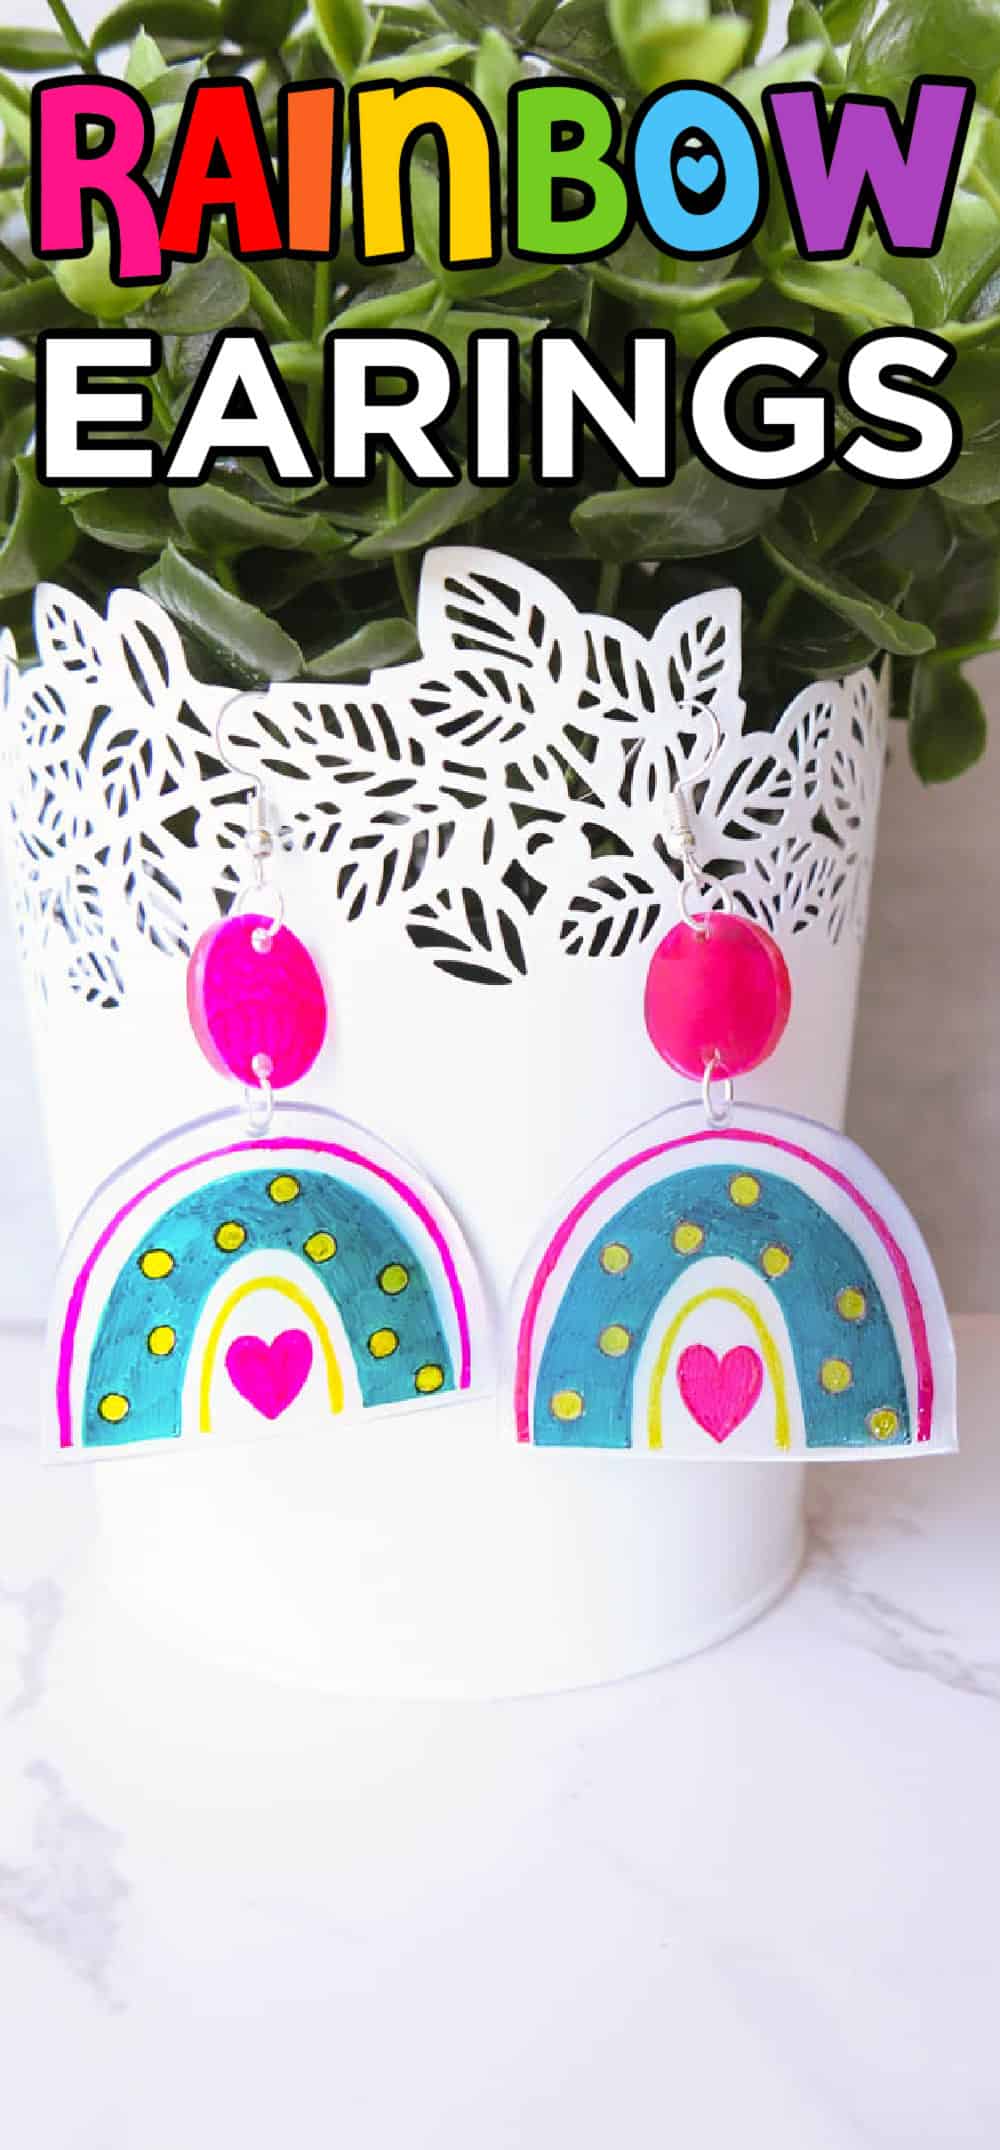
These Shrinky Dink Earrings are such a fun craft. Turning shrinky dinks into plastic earrings with a few supplies will remain one of our most fun crafts any time of year!
We're sharing our fun step-by-step tutorial to make your very own shrinky dink earrings. The fun part is, that after you make the rainbow earrings, you can easily change the rainbows out for flower shapes or any free cool designs to make whatever earring shape you want.
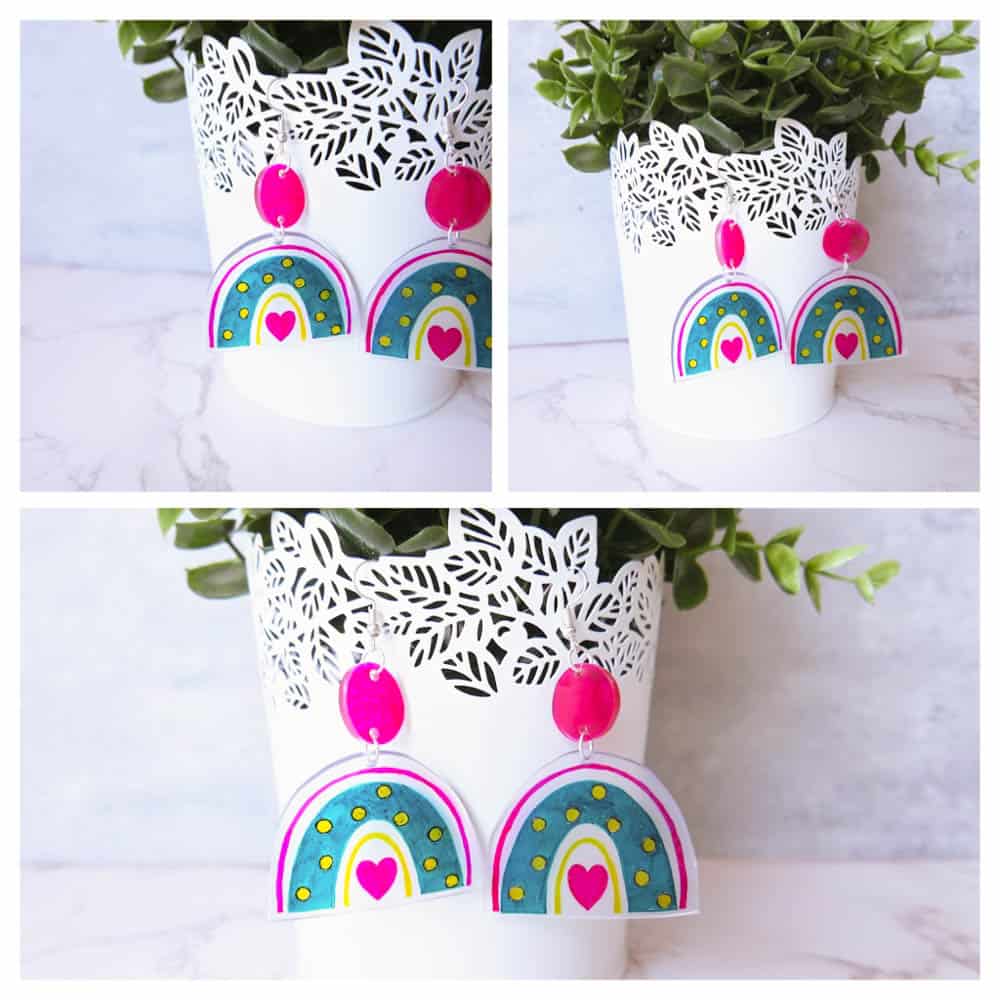
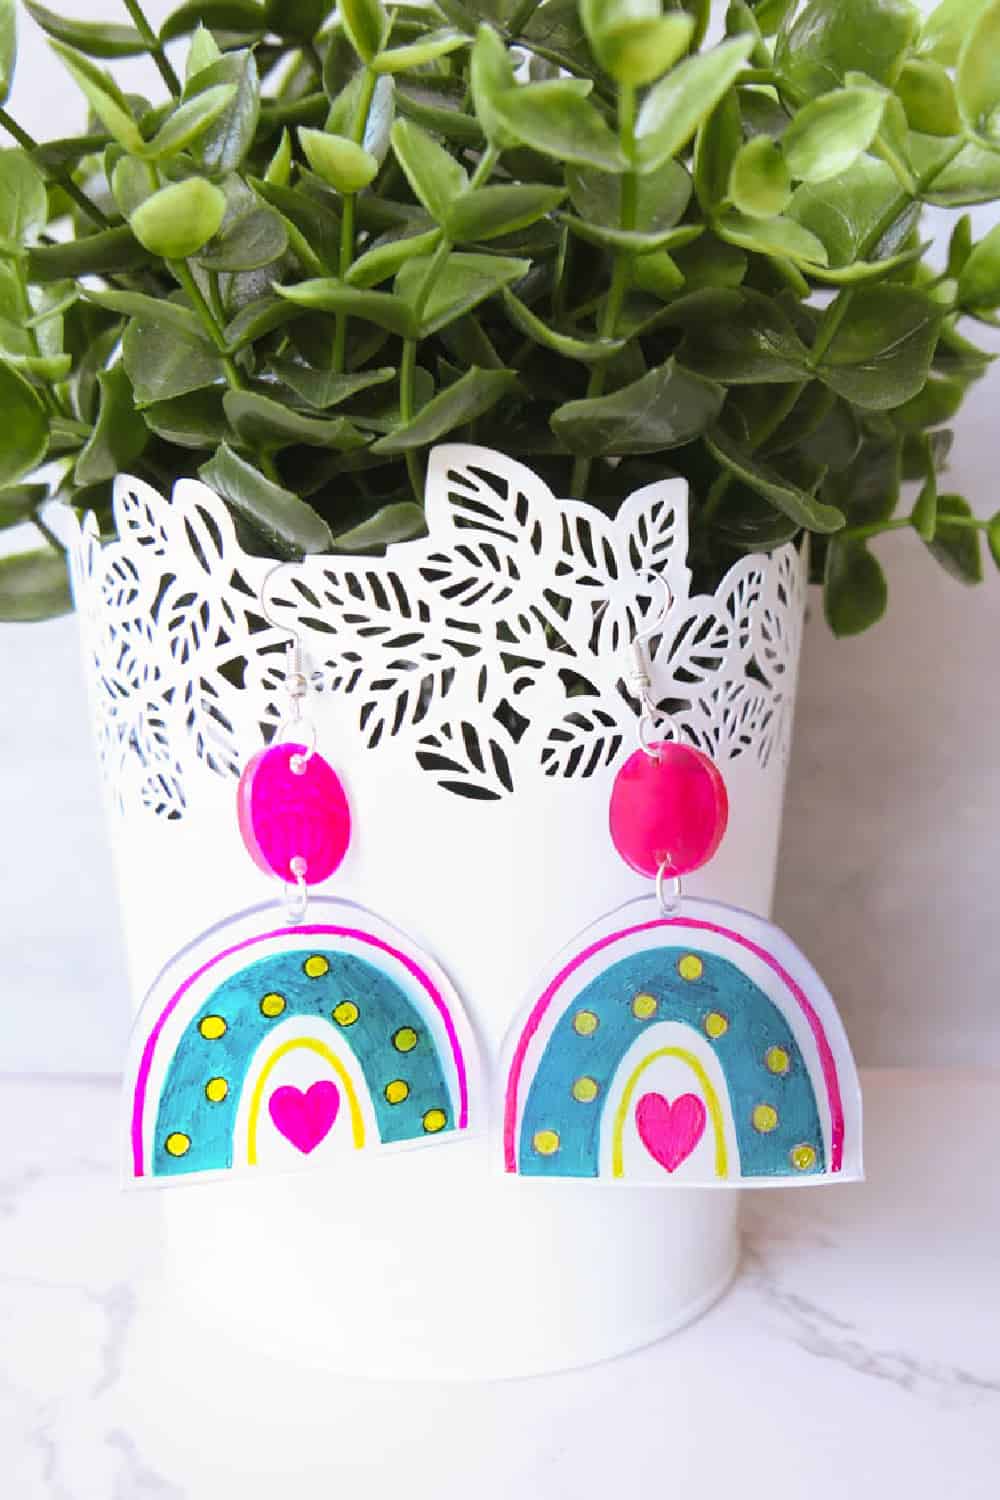
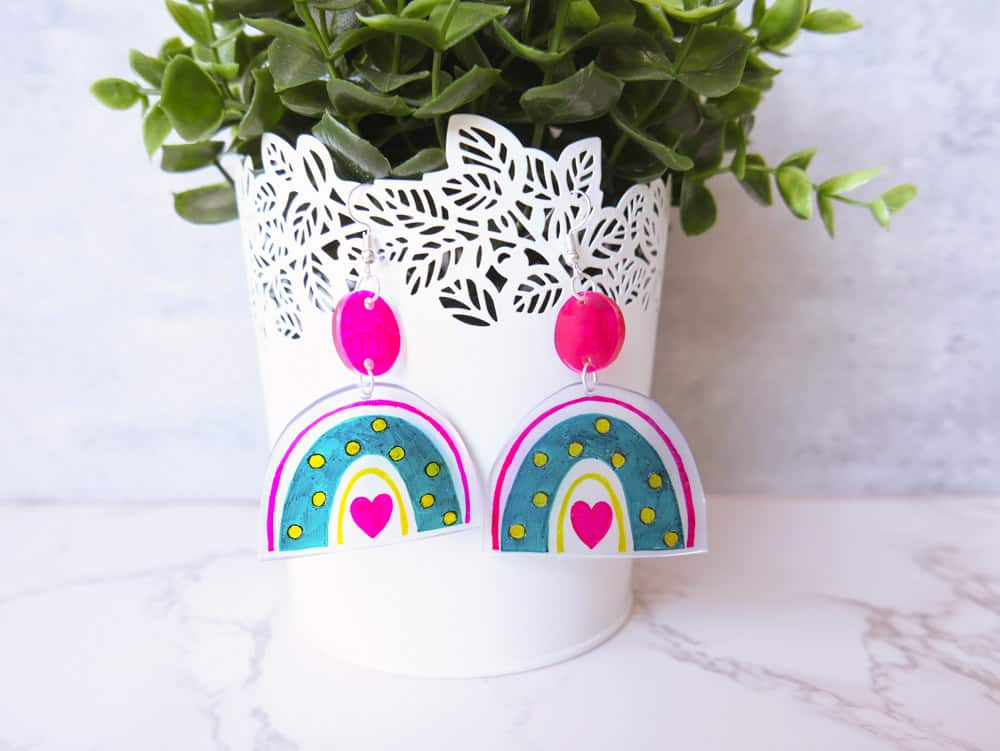
Rainbow Earrings
If you are a parent of little girls, this craft is for you!
We know how girls love everything glittery, colorful, and glitzy; therefore, why not turn their favorite things into a fun craft? Today I will teach you how to make shrinky dink craft rainbow earrings.
These pretty little dangle earrings are so easy to make, plus your girls are gonna love 'em! I know because my kids went crazy over them and went on to make several more different designs using the same technique. You won't want to miss our other DIY earrings craft, tassel earrings.
Making DIY Shrink Dink Earrings
Most of the supplies required to make these shrinky dink rainbow earrings are everyday items readily available at home. However, there are several items for which you'll have to make a run to the nearest craft shop. But for your ease and convenience, I have also included links to purchase them online.
So, the base of the earrings is made using a large sheet of plastic. I'm saying "large" because the plastic shrinks to quite a small size once in the oven. Therefore, we'll make large-sized rainbows so that when they shrink, they're perfectly sized for those little ears.
We need different colored permanent markers to draw the rainbow on the plastic sheet and a rainbow template to trace perfect rainbows. To give the rainbows the look of an earring, we'll use a single-hole puncher to make a hole for the jump rings and earring hooks. And, of course, we also require round and needle nose pliers to secure the jump rings and earring hooks in place.
Once you have drawn the rainbow on the plastic sheet, cut it out with scissors and fill in the colors. With all the basic stuff sorted, it's time to place them on a cookie sheet or parchment paper on a baking tray and bake for 5 minutes.
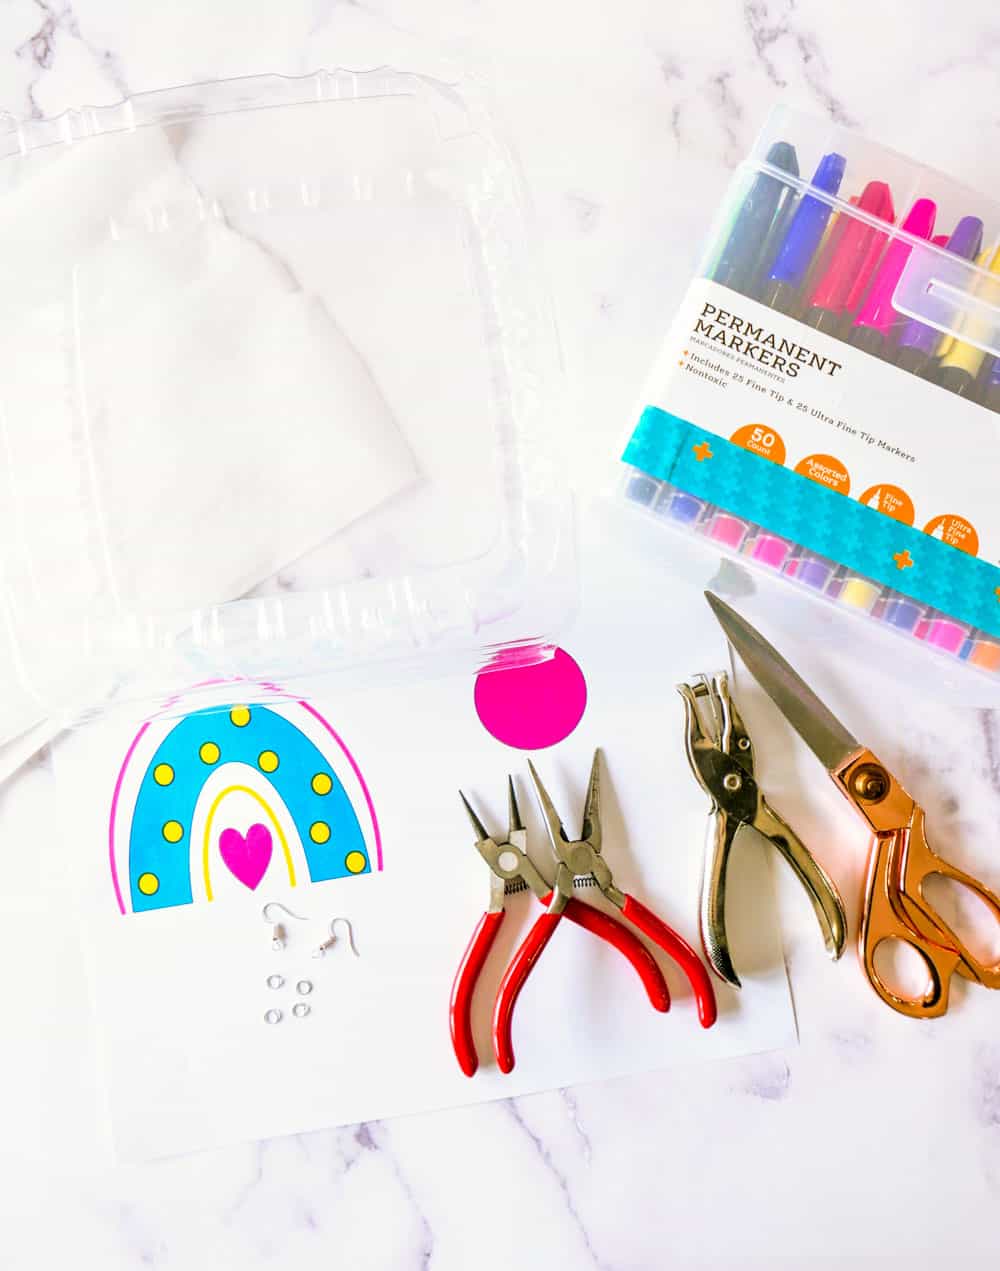
Supplies for Rainbow Earrings
- Shrinky Dink Paper (*You can use a plastic take-out container, check for the number 6 symbol in a triangle to ensure it's the right kind of plastic.
- Scissors
- Permanent markers in assorted colors
- Rainbow Template (download free template below)
- Single hole puncher
- Parchment paper
- (2) silver earring hooks and (4) silver jump rings
- Round nose and needle nose pliers
- Cookie sheet
How to Make Shrinky Dink Earrings
Preheat oven to 350℉.
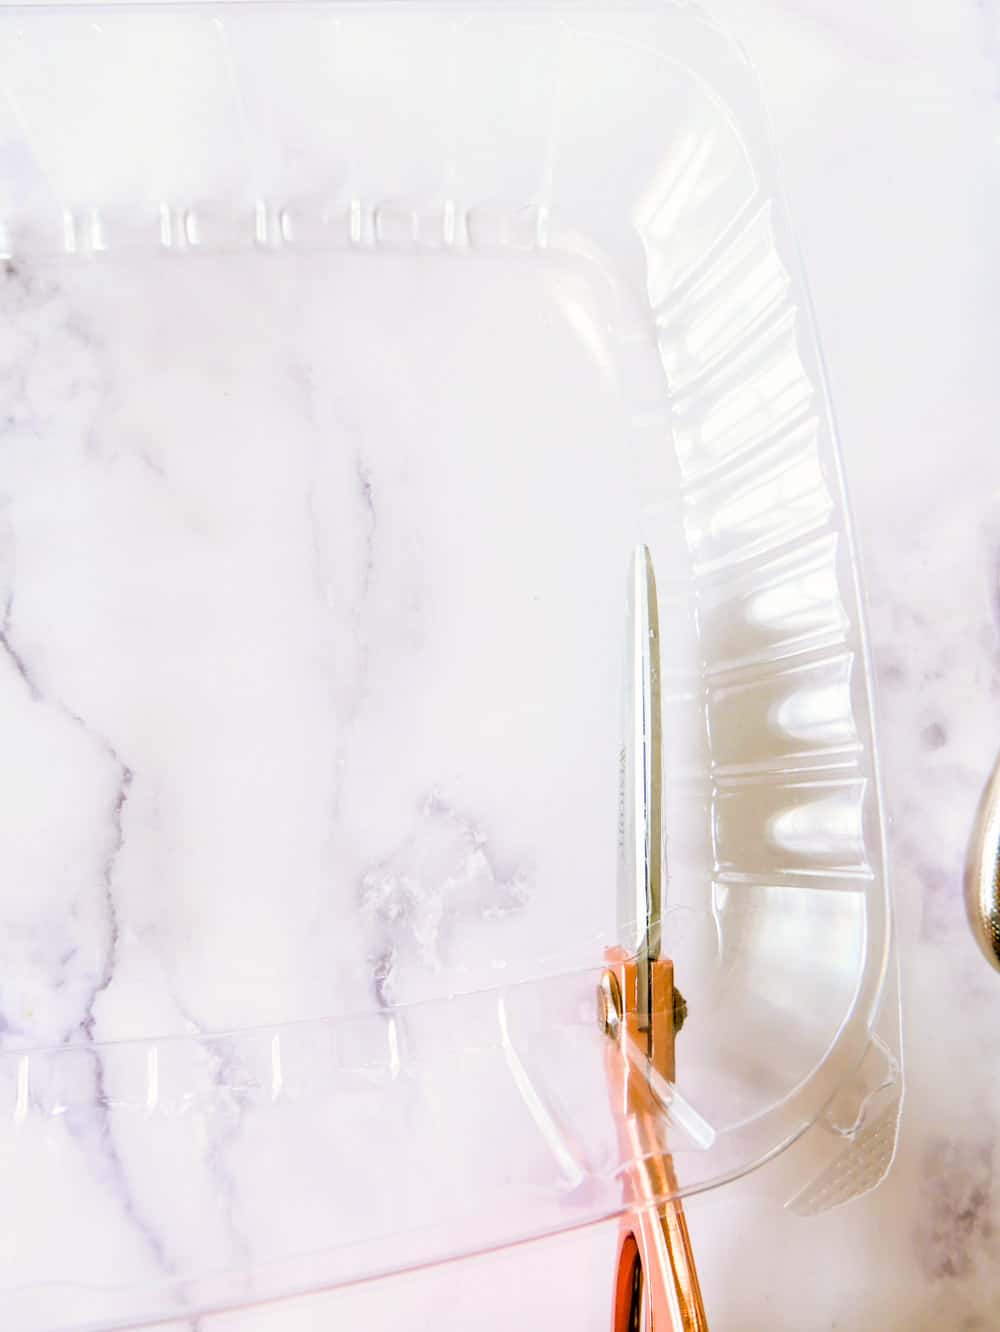
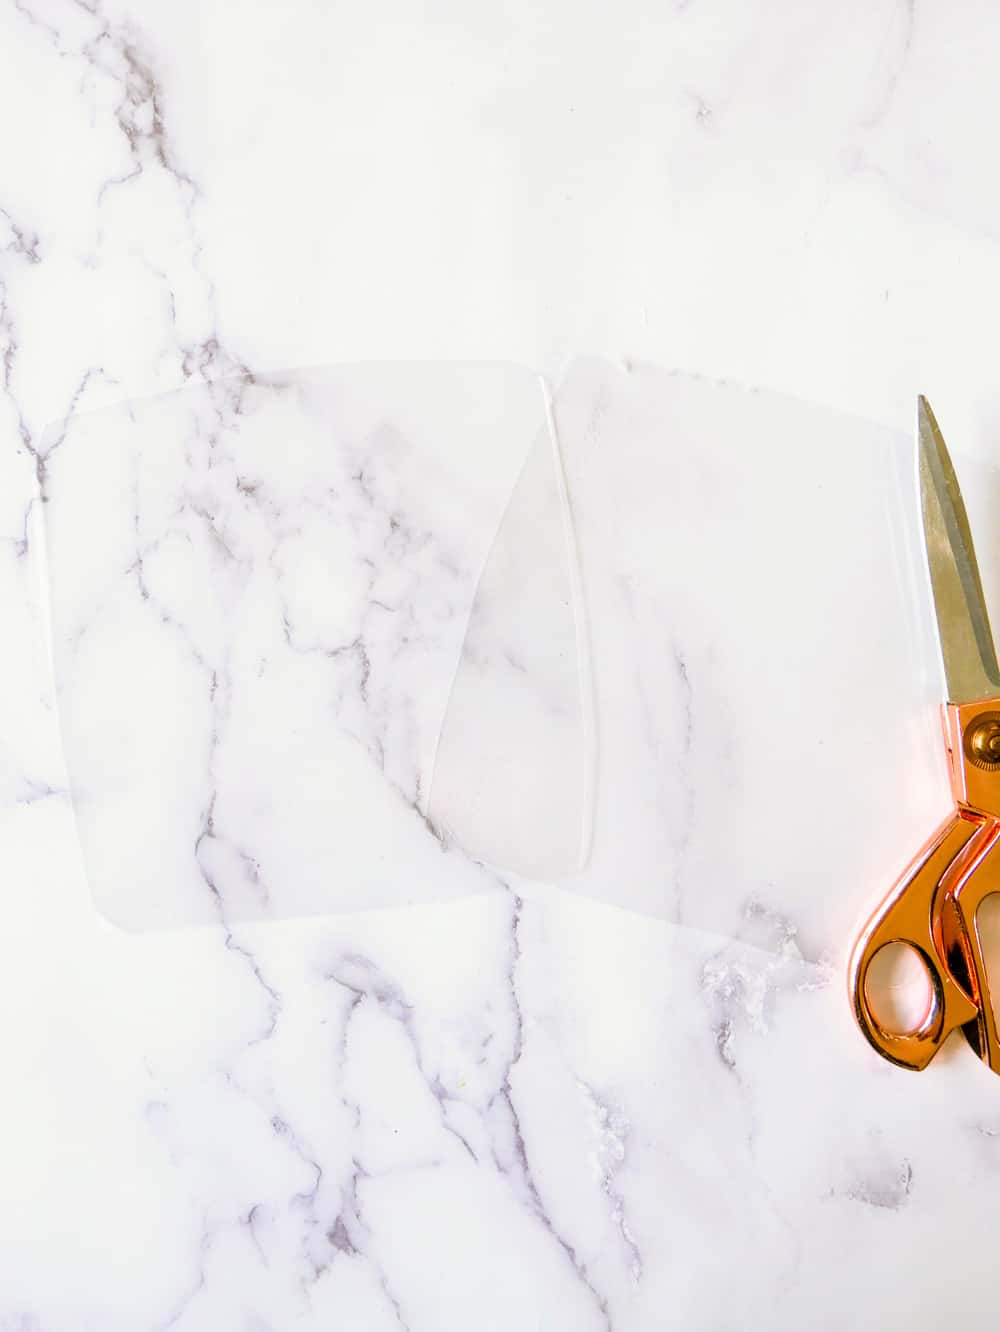
Begin by cutting the takeout container into two separate flat sheets, but be careful not to tear it, as it is thin and tears easily.
If you are using shrinky dink sheets, shrink film, or shrink paper, make sure you use the heating instructions according to the package directions.
Coloring Shrinkable Plastic
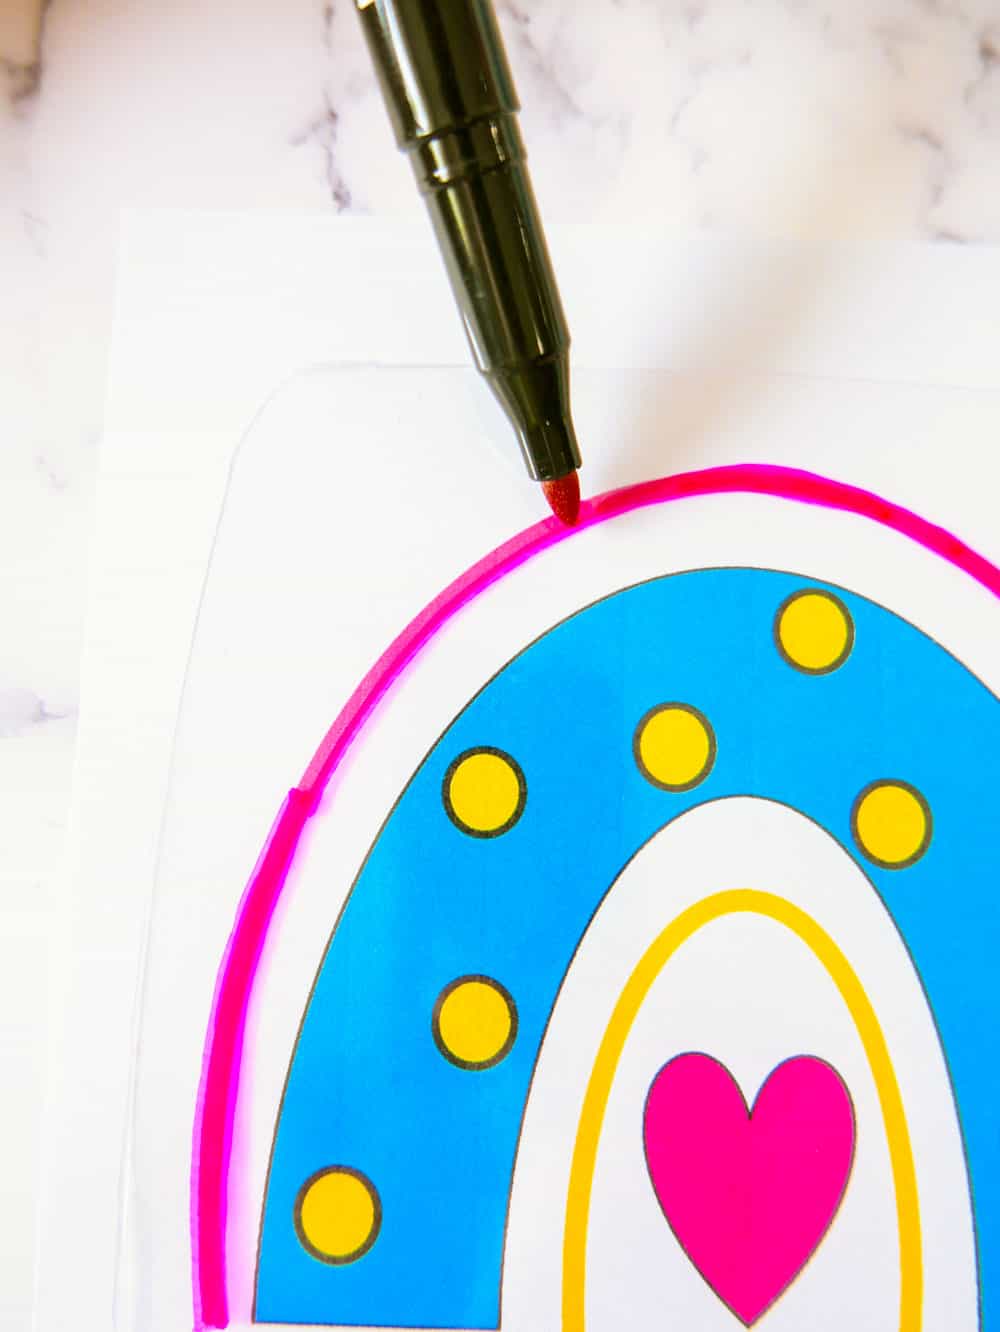
Place the first sheet on top of your template, and begin tracing the rainbow with the different color permanent markers. You can place a small piece of painter's tape on the plastic sheet to help hold it in place.
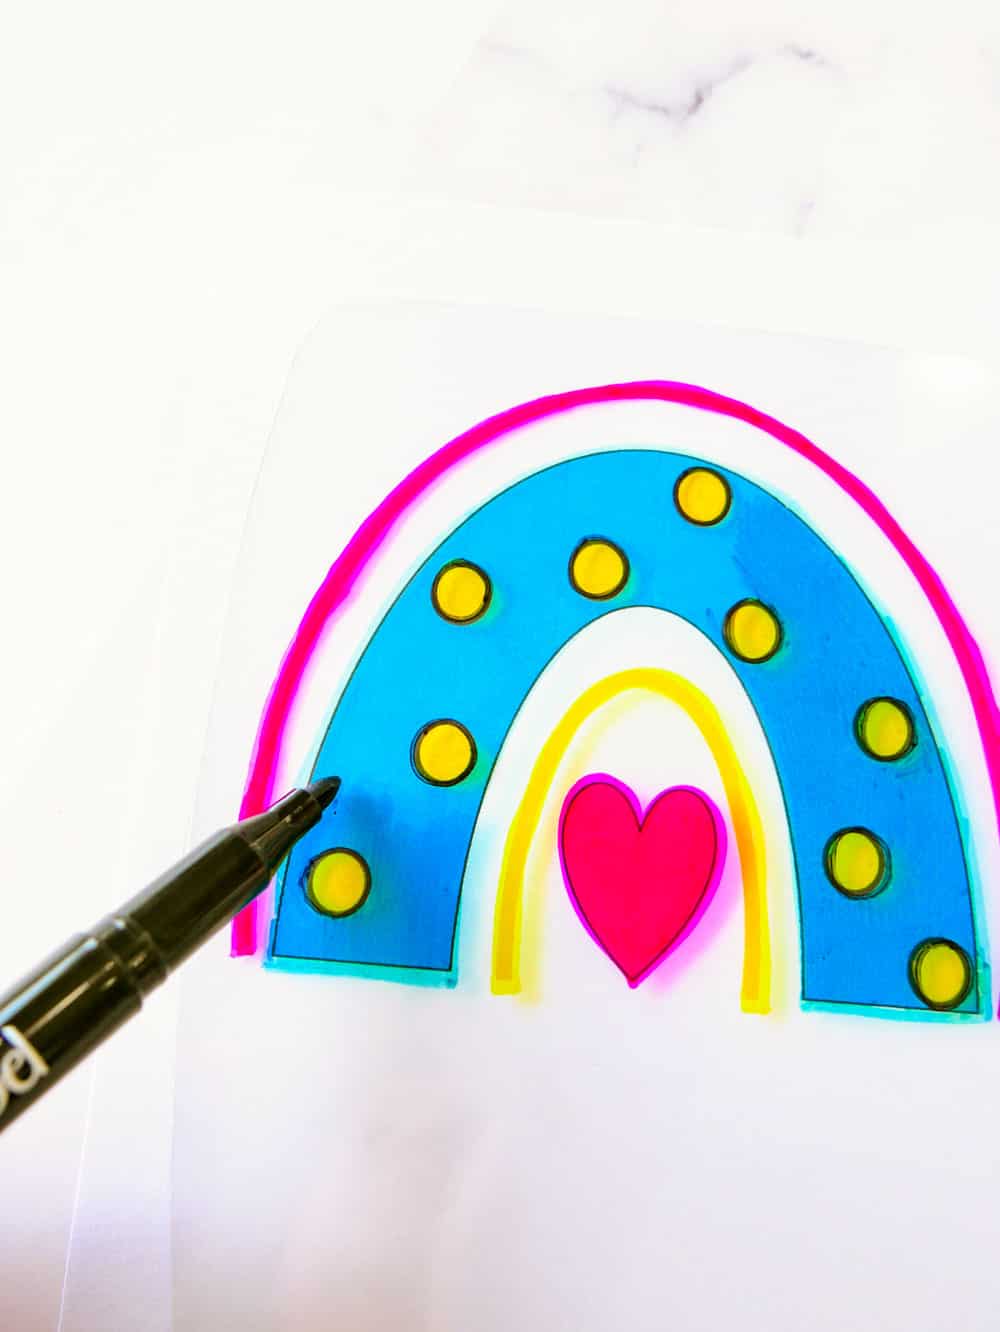
There are a lot of coloring methods, but I outlined each part of the rainbow first and then colored it in. Once you have traced and colored the rainbow, move the plastic over the circle template. Leave plenty of room between the rainbow and the circle, as you will need excess plastic around the rainbow-Trace and color in the circle.
Repeat step 1 with your second of the plastic sheets.
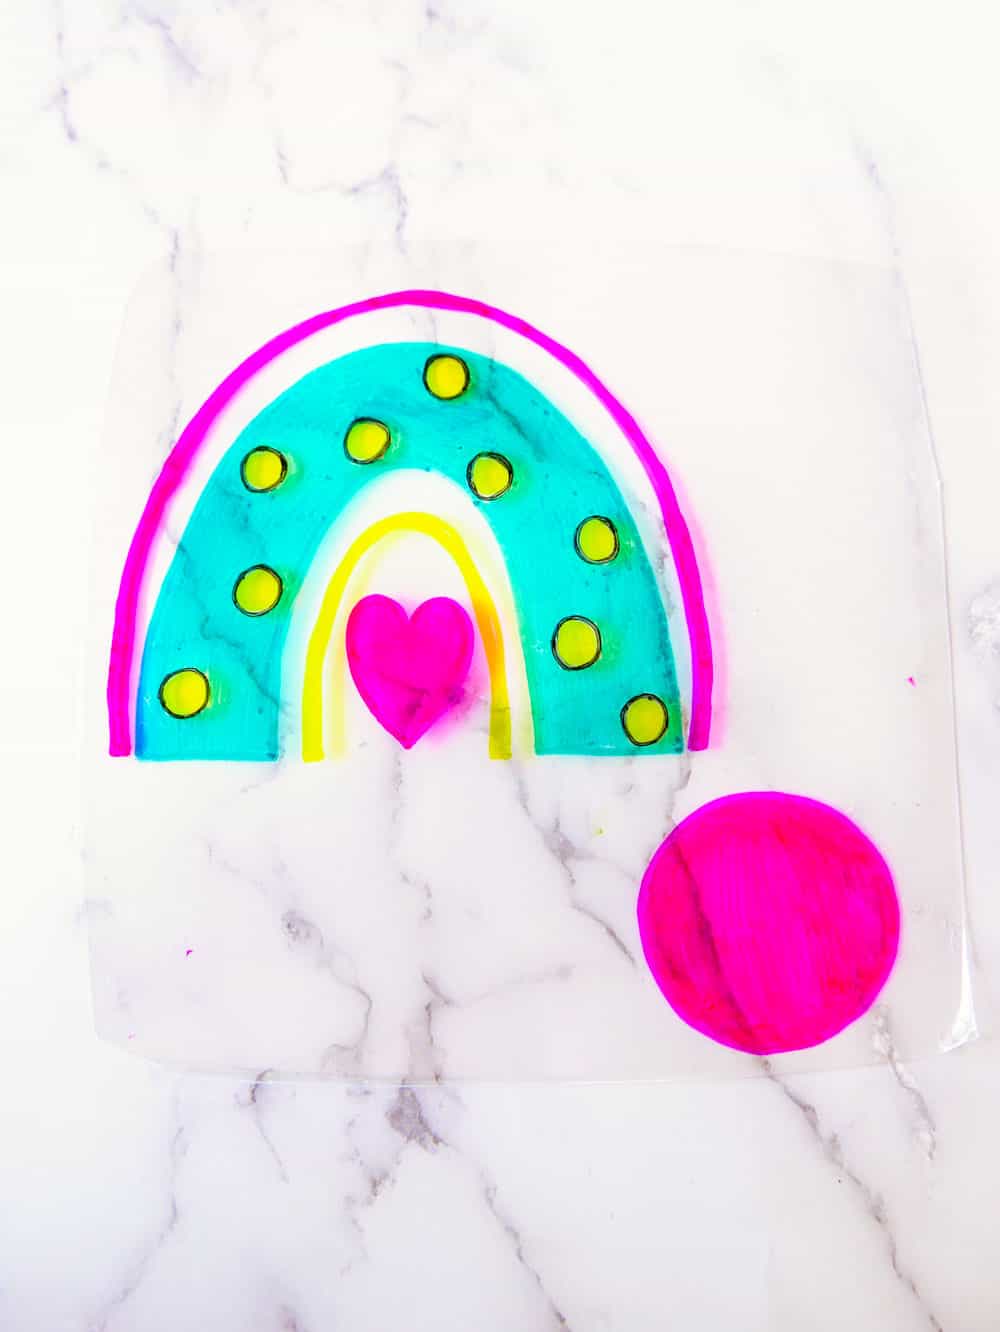
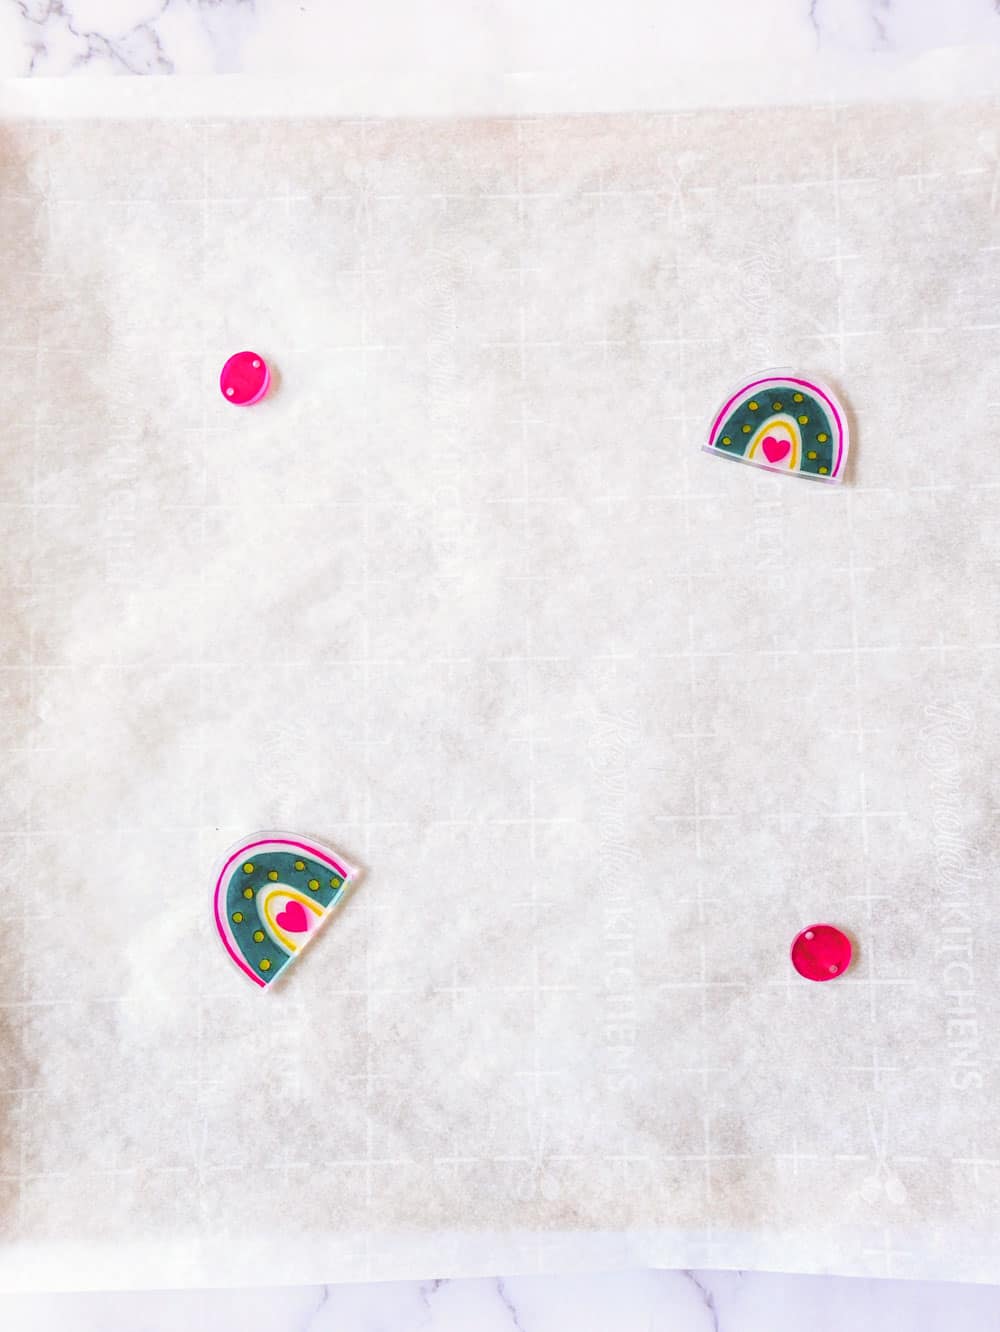
Cut out the circles, staying close to the outer edge. Cut out the rainbows, but leave about ¼" around the outer edge, and cut flat across the bottom.
Using the hole puncher, punch a hole at the top center of each rainbow in the excess clear plastic portion.
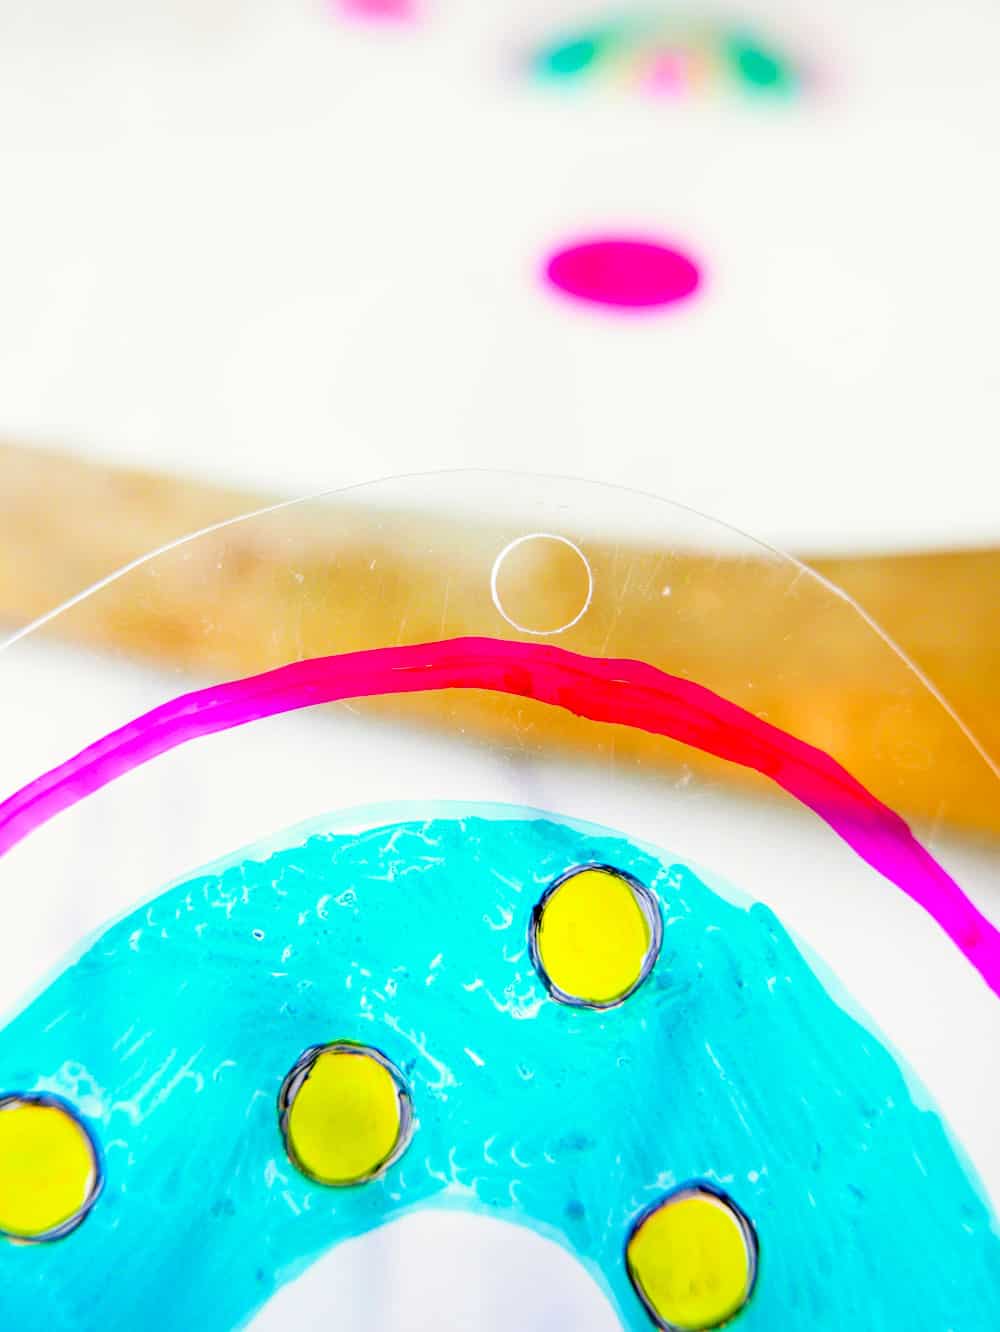
Remember the shrink plastic is why it's important to leave a little room an extra ¼".
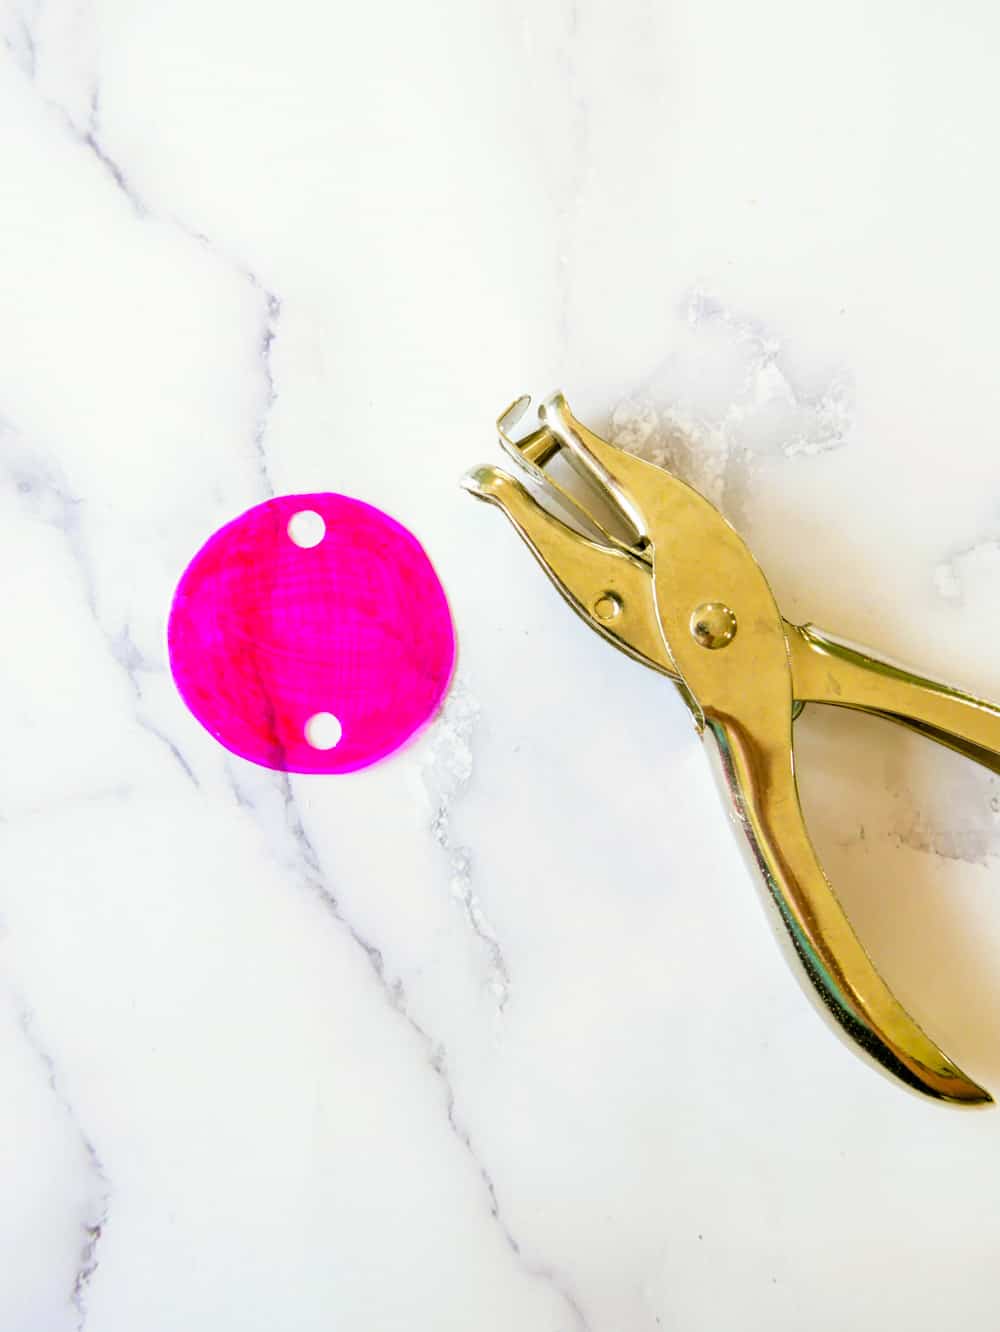
Next, make a hole at the top and bottom center of each circle.
Heating Instructions
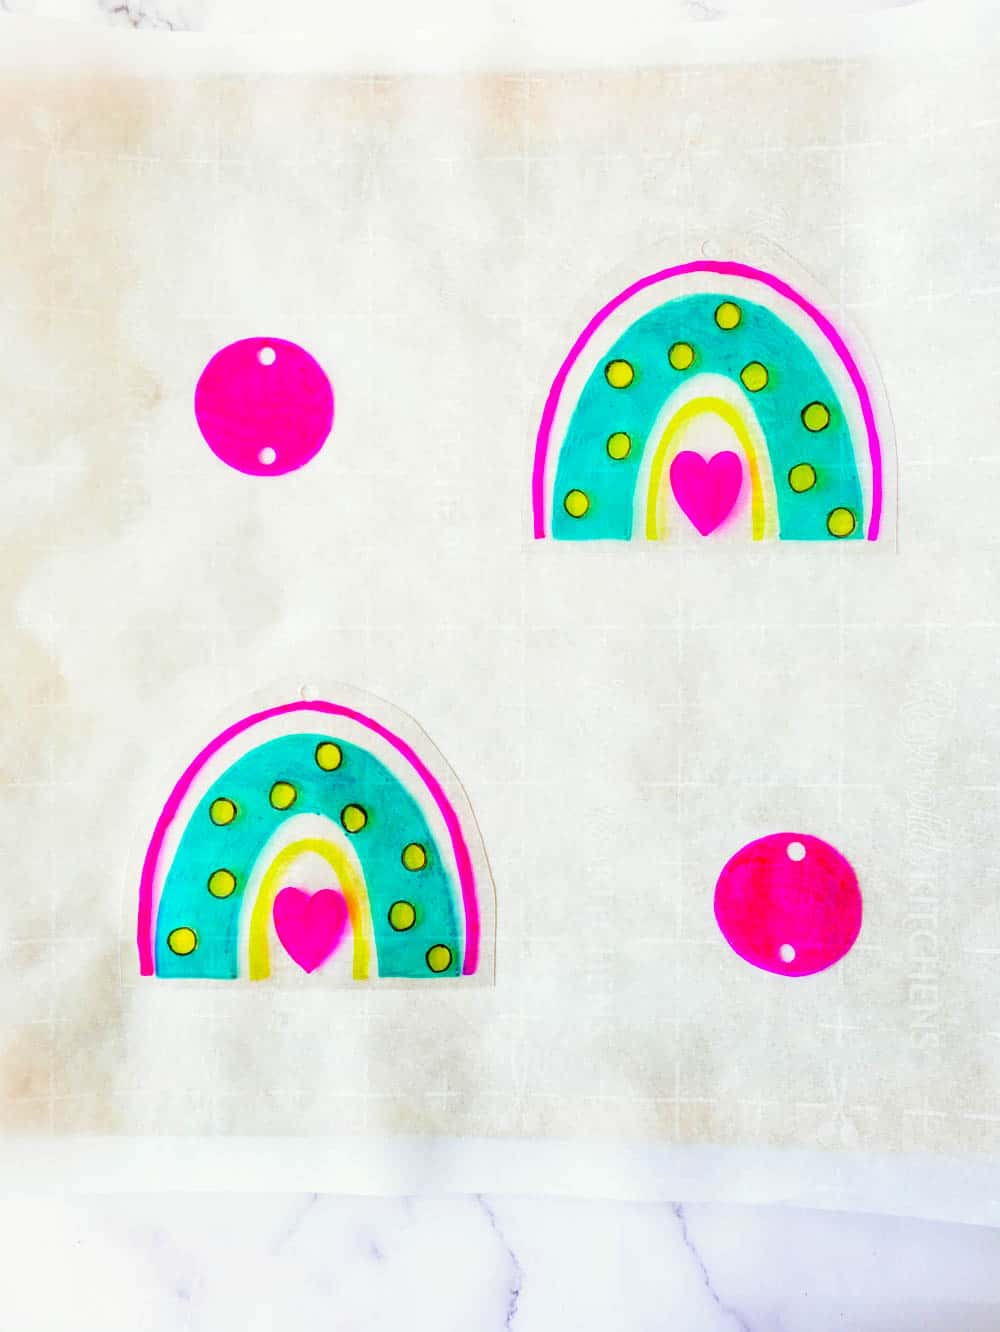
Place the rainbows and circles on a parchment paper-lined baking sheet. Make sure to leave plenty of space between each object, as they move quite a bit when baking, and you don't want them to stick together.
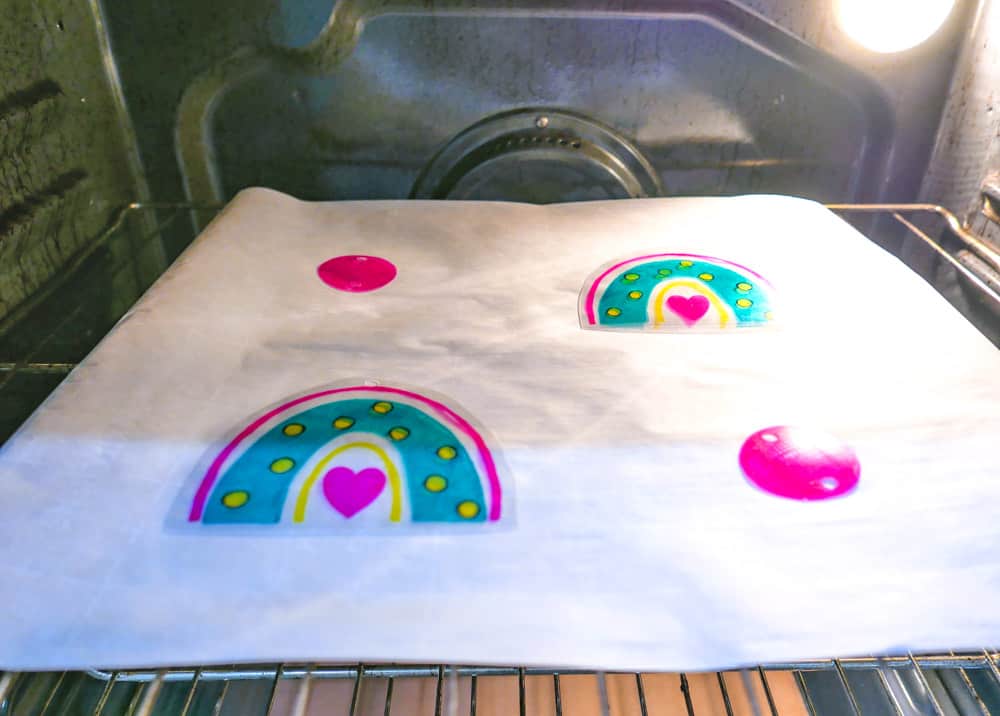
Place the baking sheet in the oven, and bake for 2-3 minutes. Keep the oven light on, and watch them as they bake.
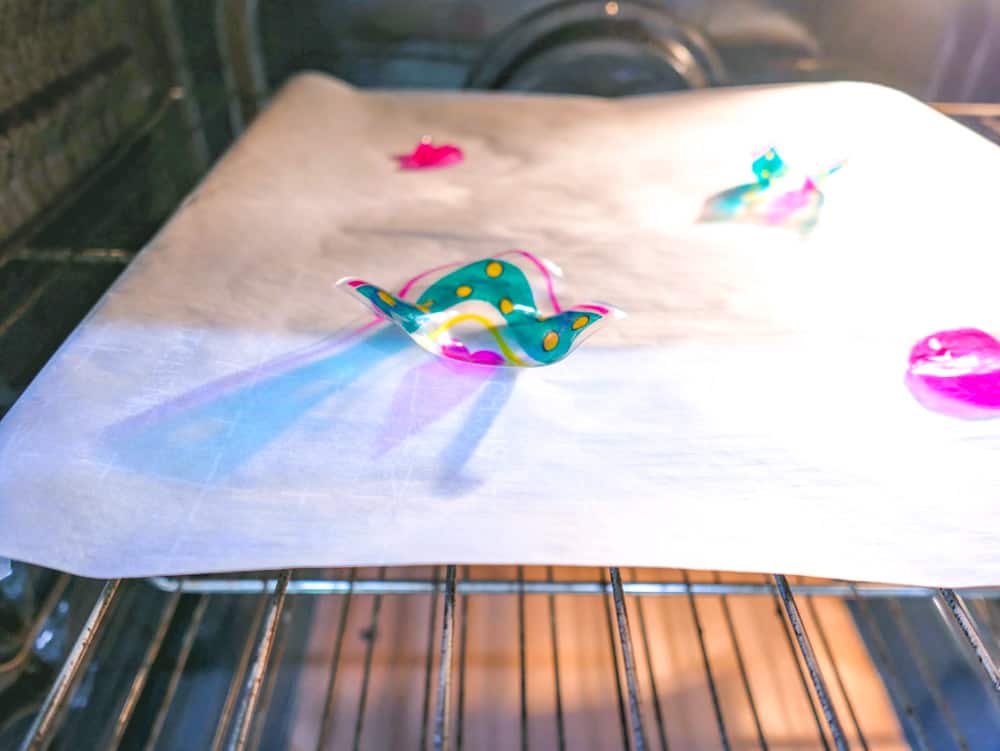
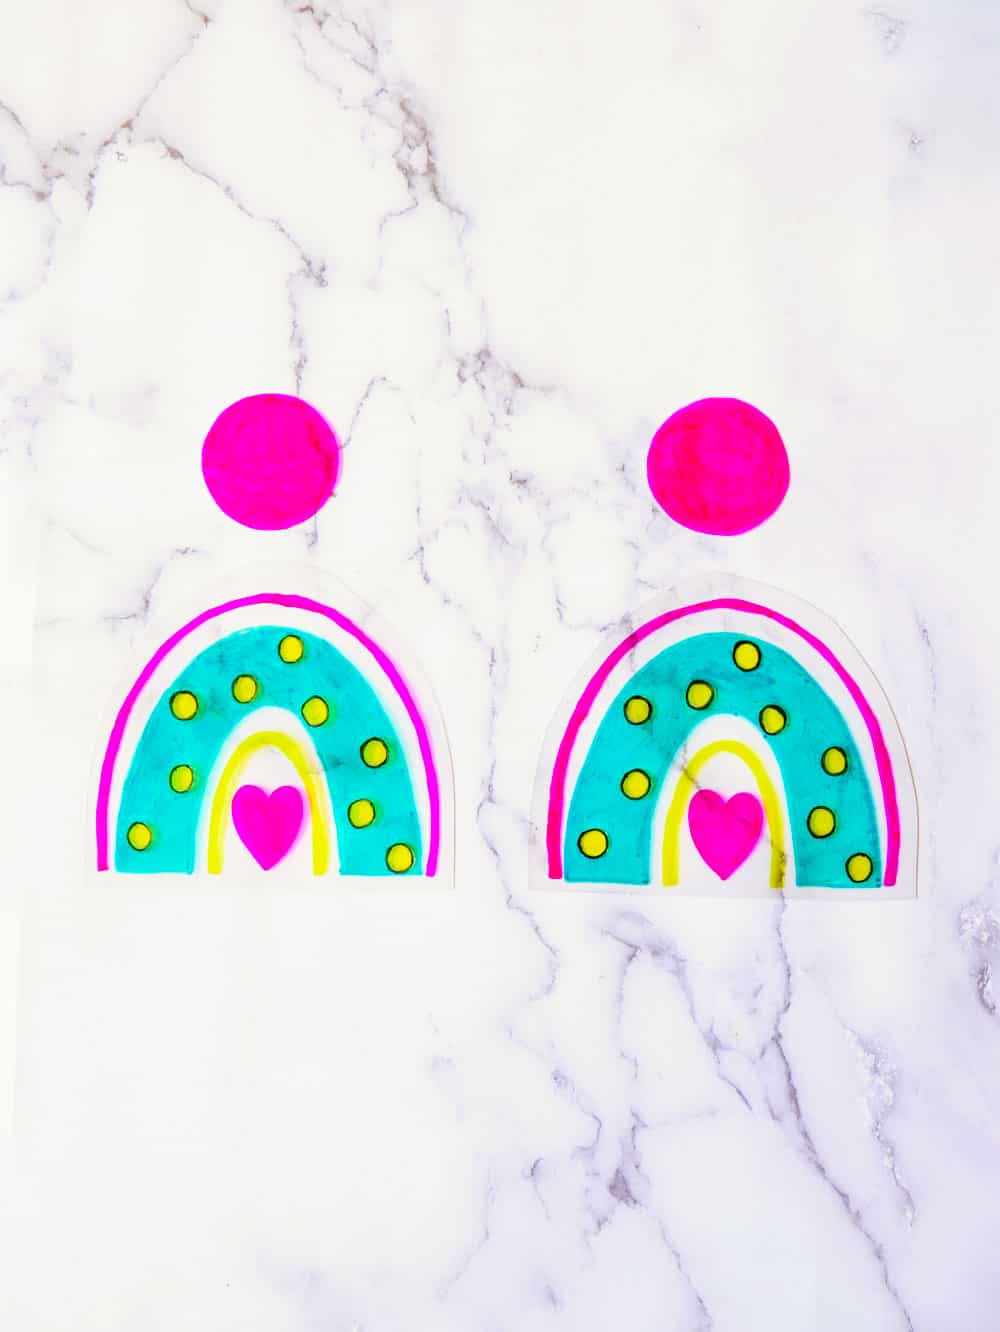
They will curl up, and some of the sides almost look like they are going to touch, but then they will start to flatten back out, and shrink in size. For best results continue baking until all pieces are completely flat, which usually takes 4-5 minutes.
Remove from the oven, and let cool. *You can use a heat gun in replace of the oven.
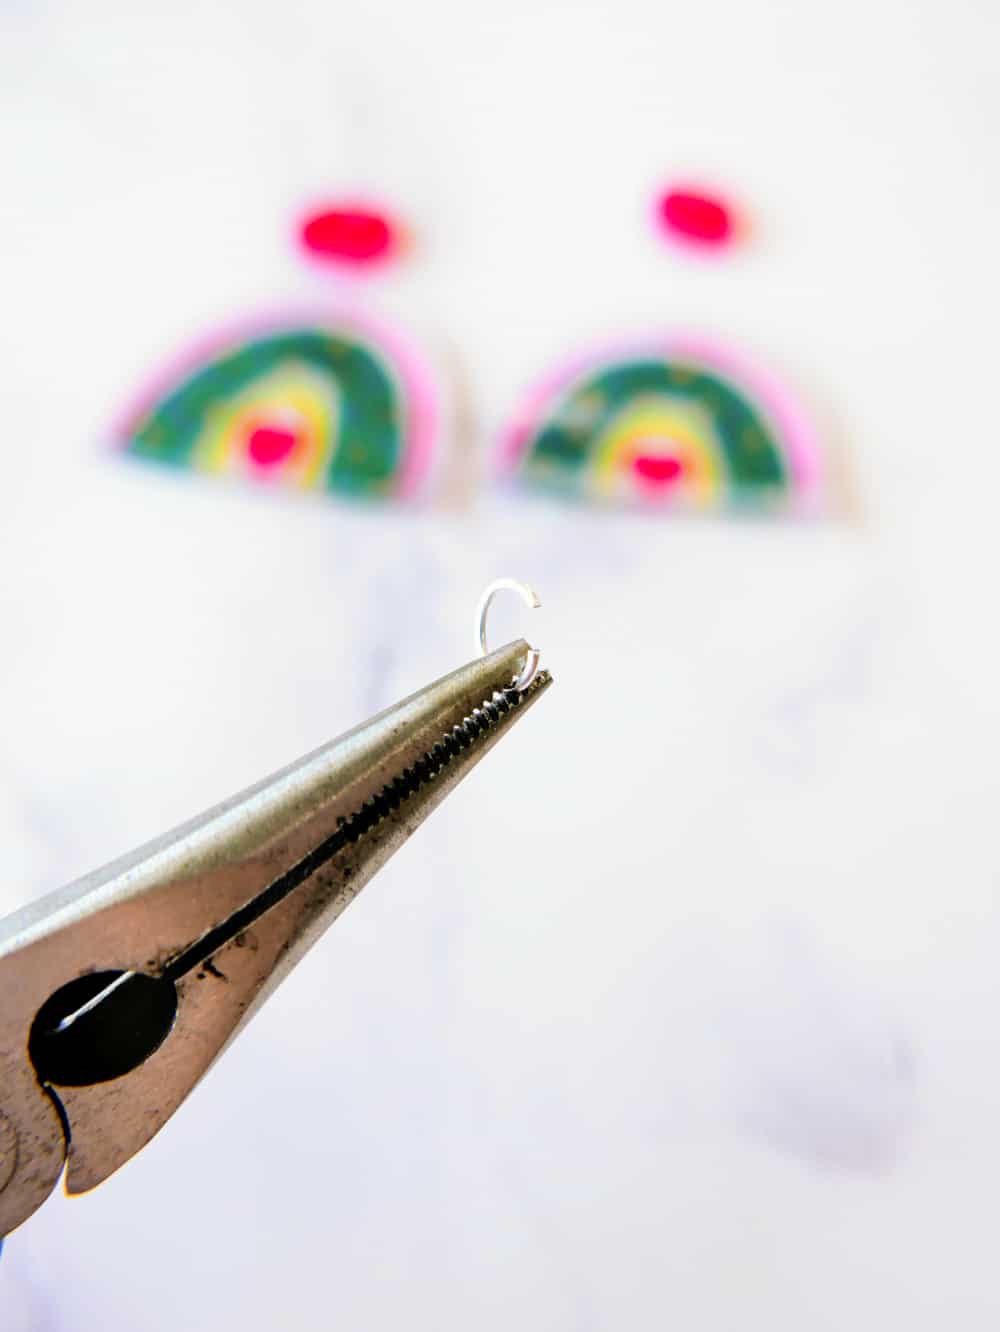
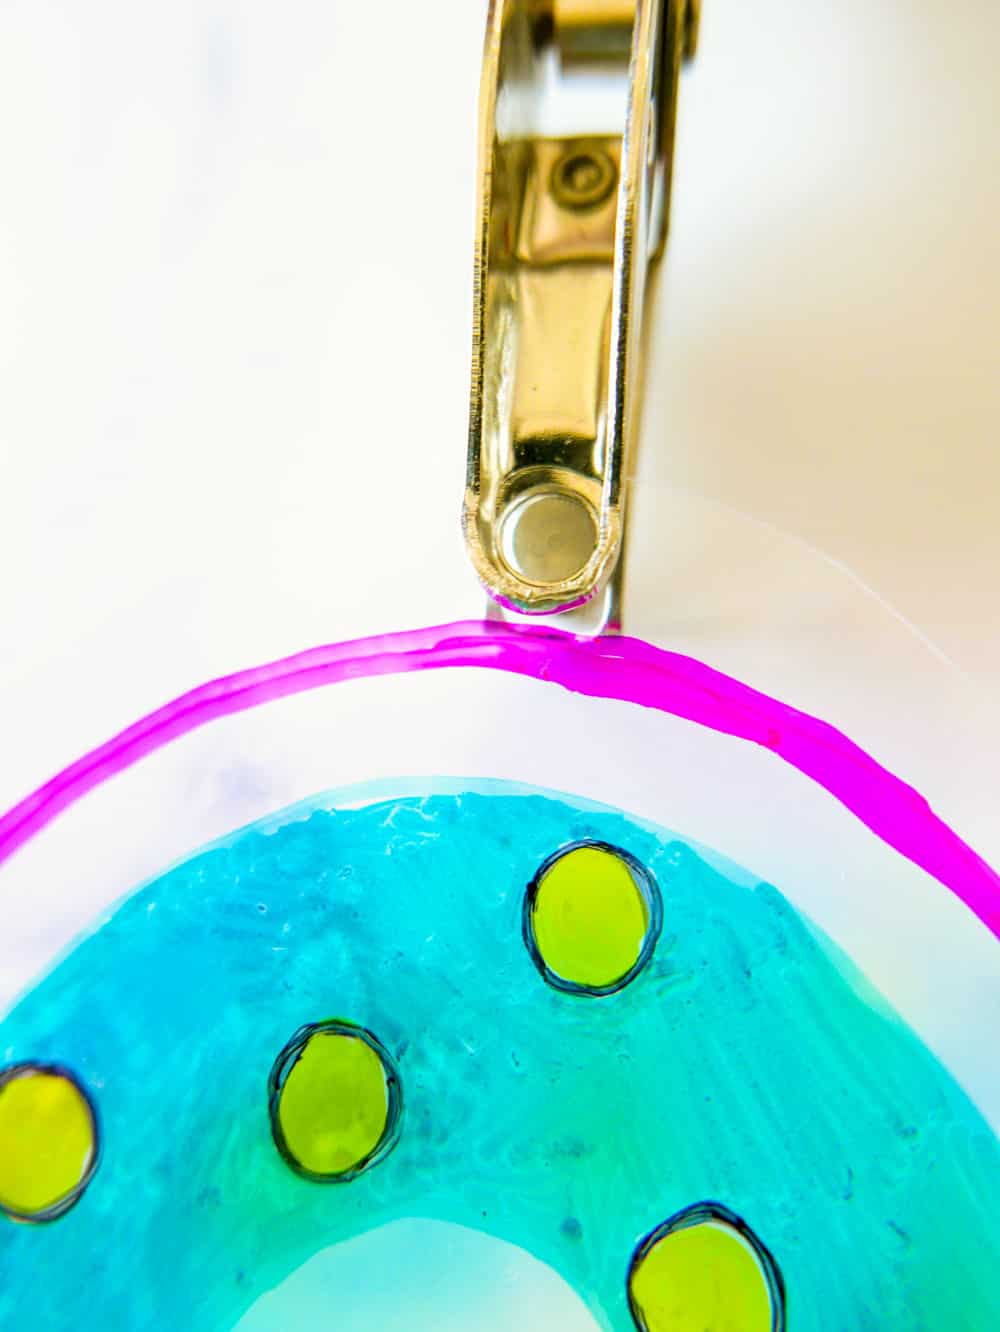
Once cooled, open a jump ring with a pair of round and needle nose pliers.
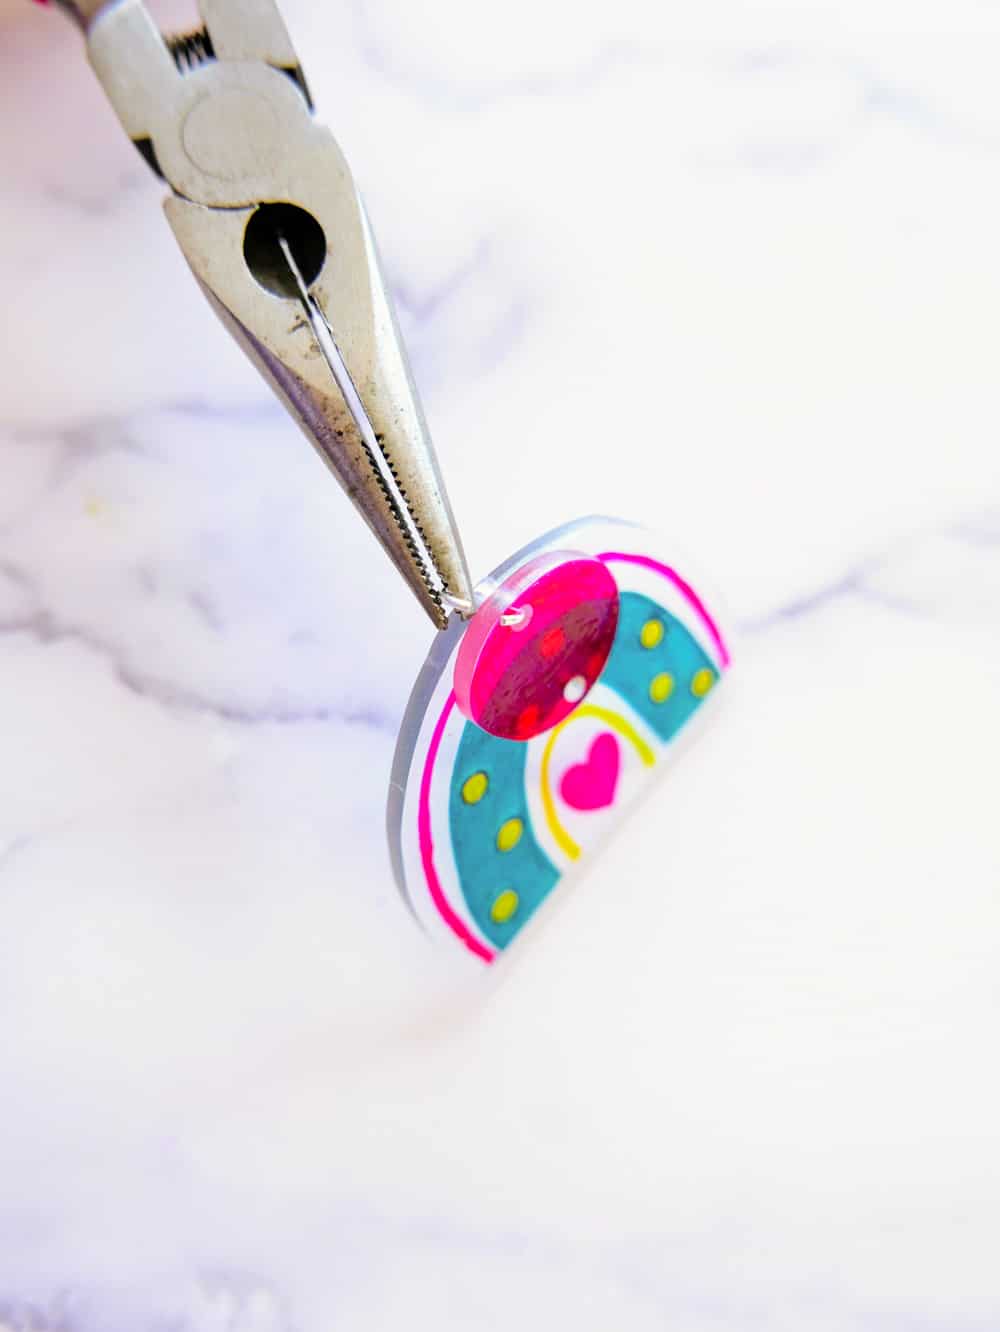
Place the jump ring through the top of a rainbow, and one hole in the pink circle.
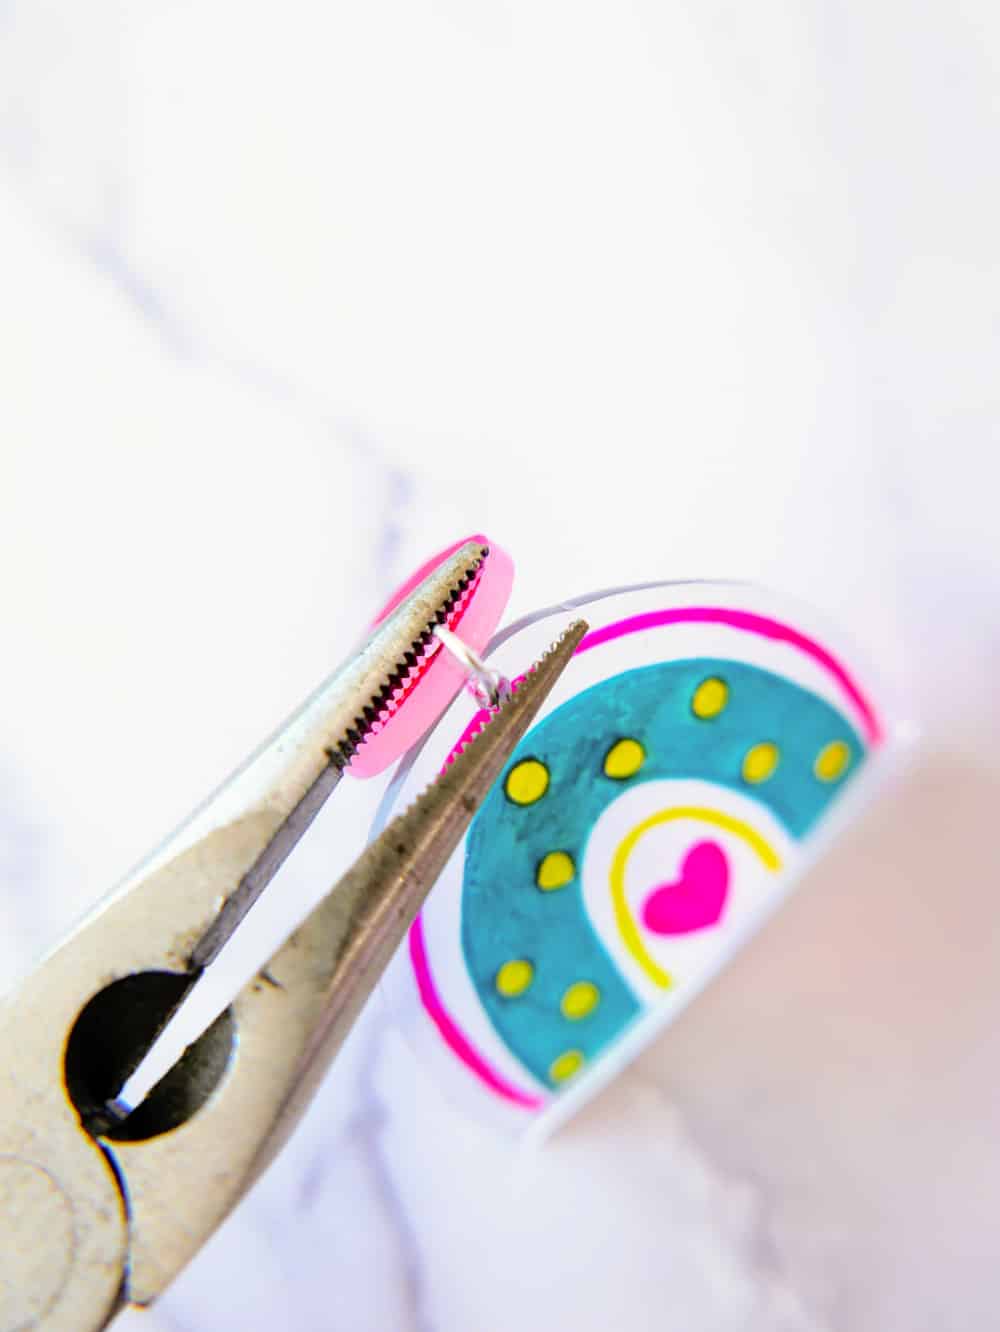
Close the jump ring with the needle nose pliers.
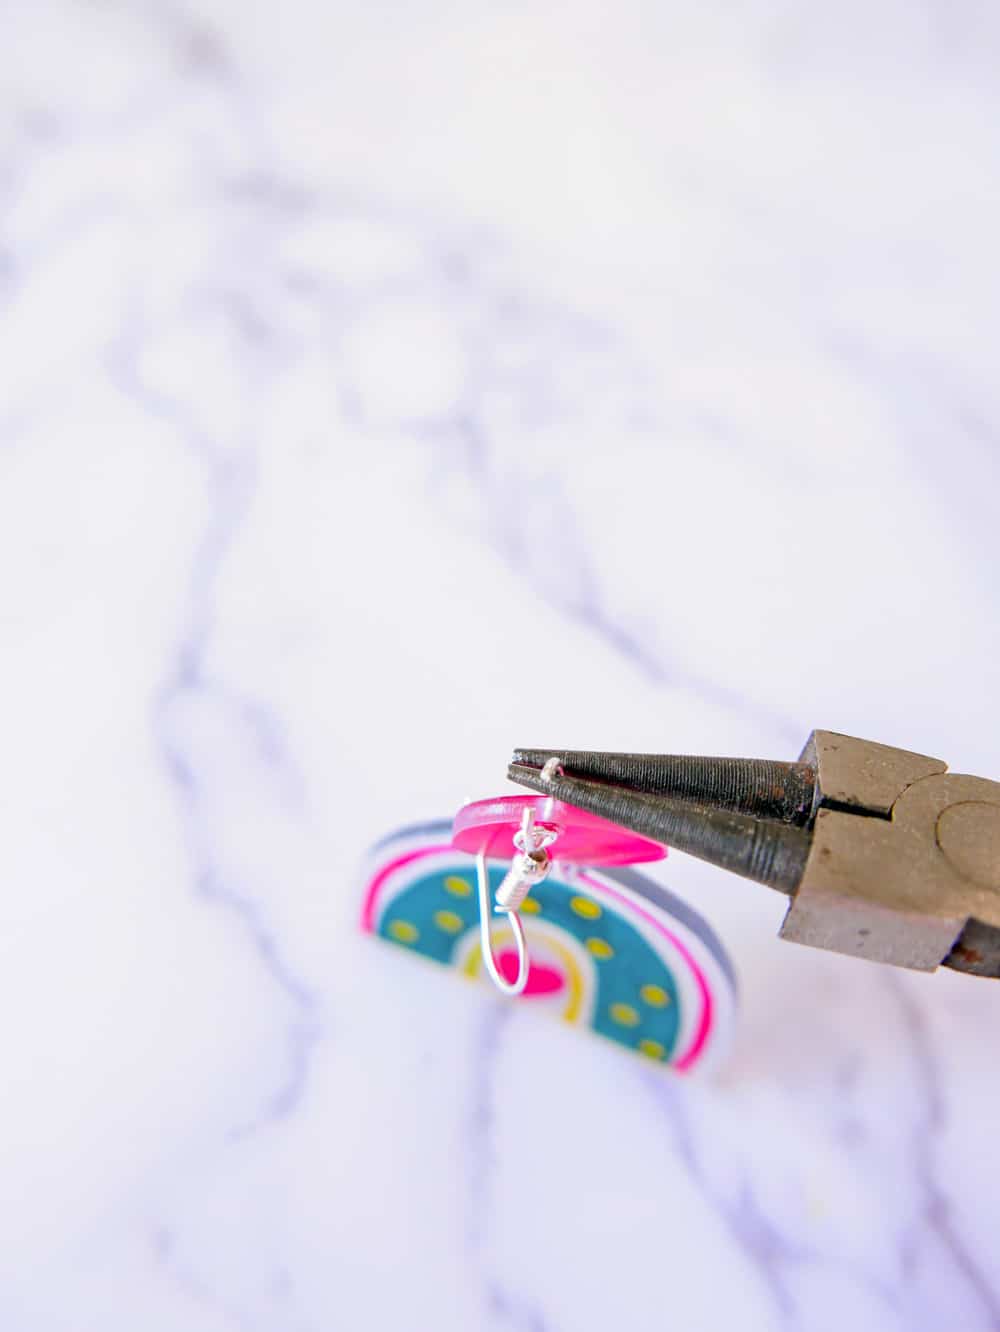
Open another jump ring, and place it through the other hole in the pink circle, and through one of the earring hooks.
Close the jump ring with needle nose pliers.
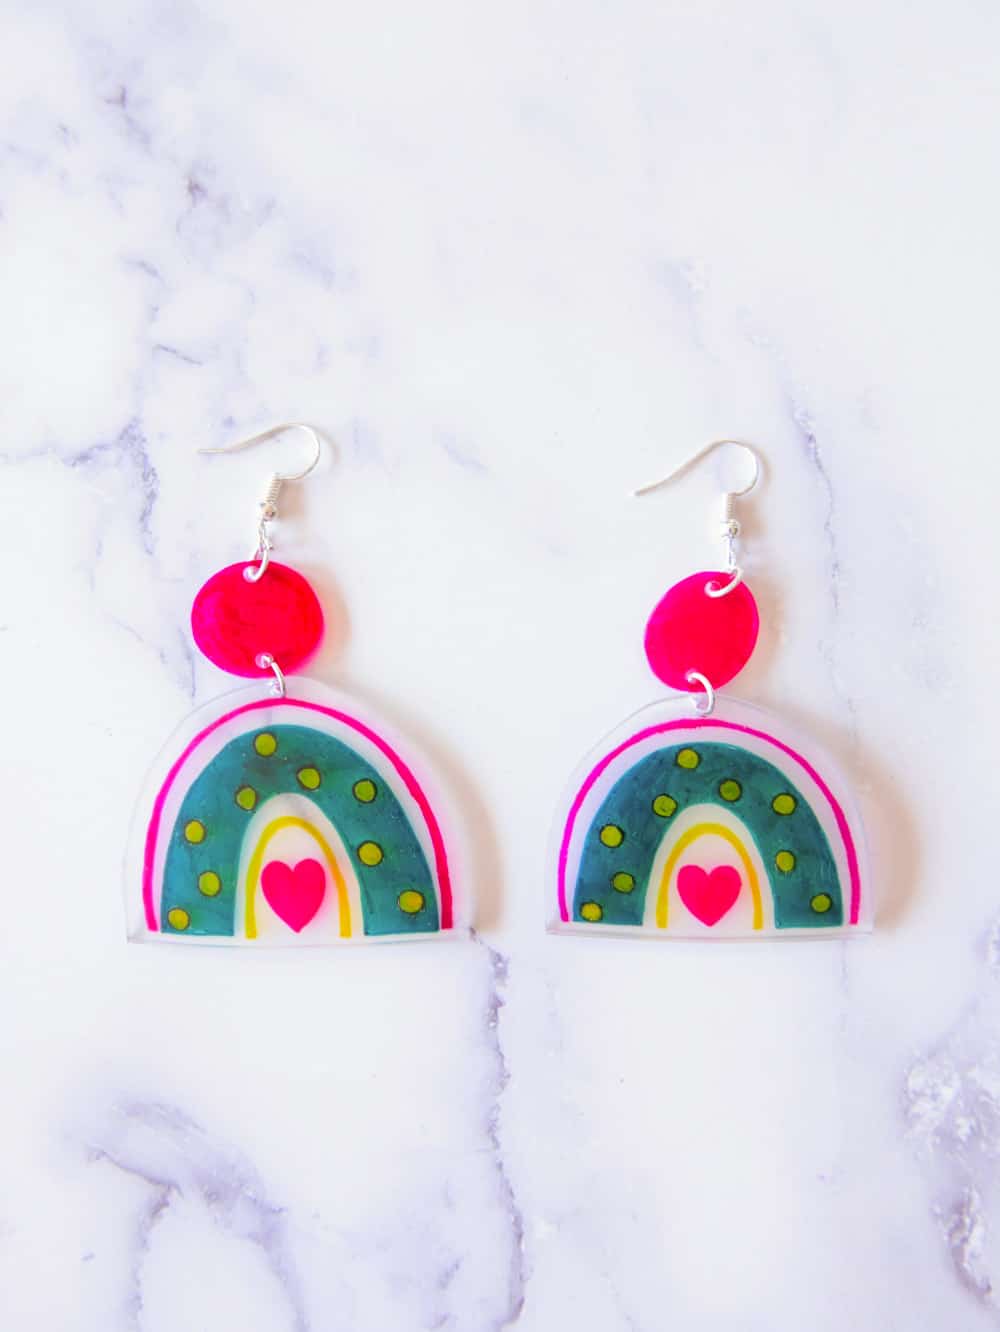
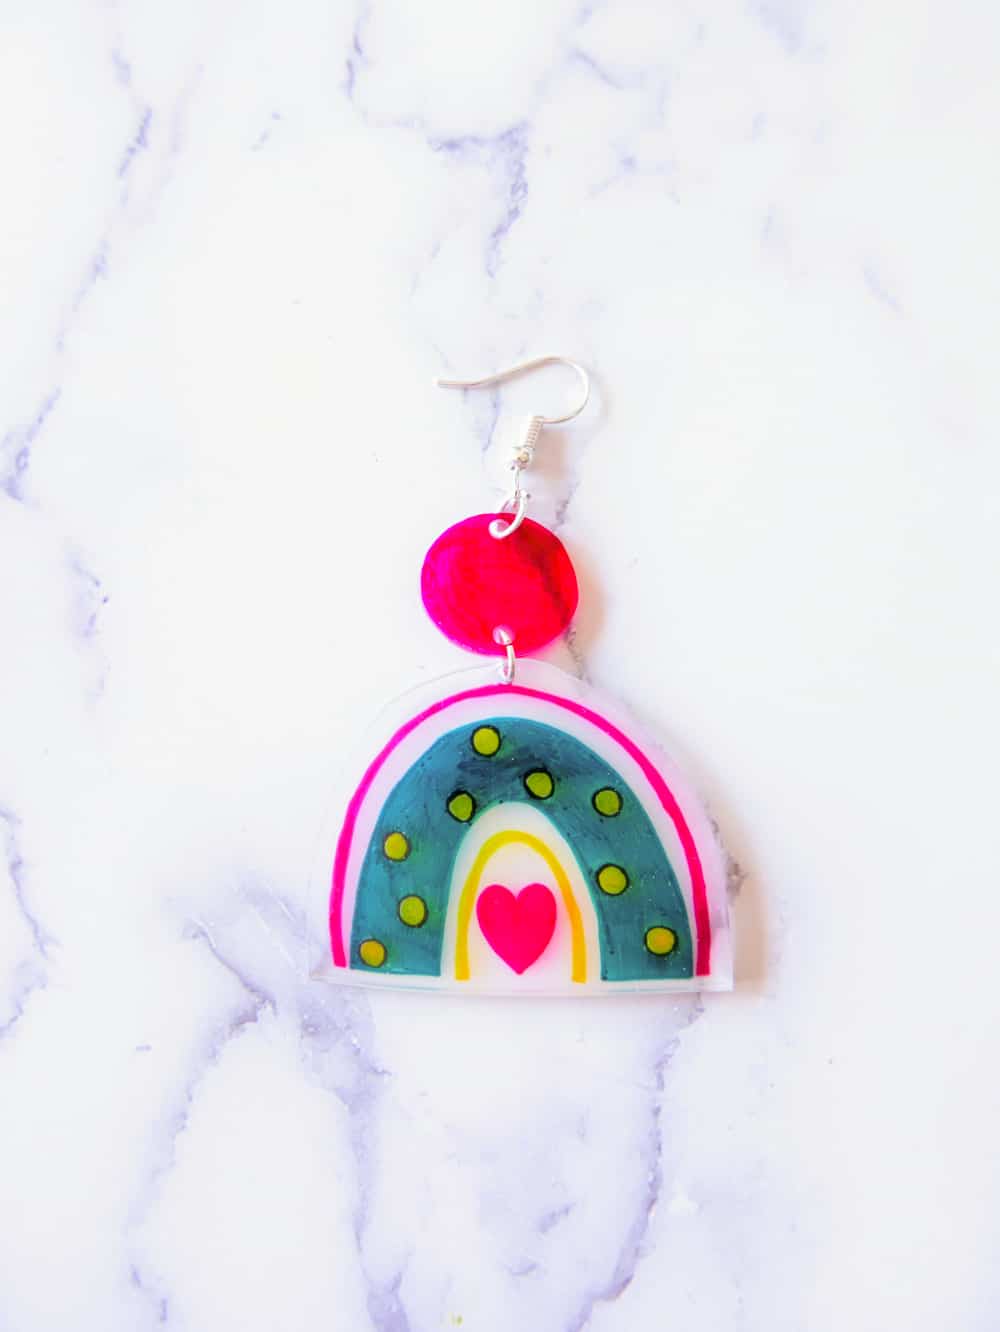
Repeat step 7 with the other rainbow and circle. Earring backs are optional. Your earrings are ready to wear!
Notes:
- The plastic will shrink considerably smaller than the original size, so it may seem like you are cutting and coloring a very large rainbow, but it will shrink to the perfect size for earrings.
- If you don't have markers, you can use acrylic paint or paint markers too.
- The color of the markers will turn much darker once baked, so make sure to pick lighter colors for any shrinky dink projects.
- This craft project is so versatile. You could make this into a keychain or necklace too.
How Do We Know the Earrings Are Done?
As you start baking, the plastic sheet will curl up and then go flat again. Once the earrings have flattened back to their original place, their size will shrink considerably. That's when they are ready to be removed from the oven and given the finishing touches.
The whole process takes hardly 4 to 5 minutes; therefore, you need to keep an eye on the earrings while they bake.
Looking for More Fun DIY Crafts?
Did you and your girls have fun trying out this fun and exciting shrinky-dink rainbow earrings craft? If yes, then I have good news for you!
My website features plenty of other DIY crafts that you can enjoy with your kids or at school. This includes several popsicle sticks crafts, ornaments for different occasions, and animal crafts as well.
And, if your kids are into coloring and games, you'll find an impressive collection of printable coloring pages, games, animal life cycles, and how-to crafts. All the crafts on my website are free of cost and offer hours of endless fun and learning!
We highlighted this Rainbow Craft along with some other fun kid's crafts in our March Crafts along with our 101+ Easy Kids Crafts.
You also do not want to miss our 101+ Printable Coloring Pages For Kids and 101+ Printables For Kids full of Crafts and Coloring Pages.

Other Rainbow Crafts You'll Love
Download Free Rainbow Earring Template
Enter your email address in the form below and you'll be taken directly to the free rainbow earring template pdf file.
*For personal use only

Rainbow Shrinky Dink Earrings Craft
Equipment
- Single hole puncher
- Round nose and needle nose pliers
Ingredients
- Shrinky Dink Paper *You can use a plastic take-out container, check for the number 6 symbol in a triangle to ensure it's the right kind of plastic.
- Permanent markers in assorted colors
- Rainbow Template
- Parchment paper
- 2 silver earring hooks and (4) silver jump rings
- Cookie sheet
Instructions
- Preheat oven to 350℉. Begin by cutting the takeout container into two separate flat sheets, but be careful not to tear it, as it is thin and tears easily.

- If you are using shrinky dink sheets, shrink film, or shrink paper, make sure you use the heating instructions according to the package directions.
- Place the first sheet on top of your template, and begin tracing the rainbow with the different color permanent markers. You can place a small piece of painter's tape on the plastic sheet to help hold it in place.
- There are a lot of coloring methods, but I outlined each part of the rainbow first and then colored it in. Once you have traced and colored the rainbow, move the plastic over the circle template. Leave plenty of room between the rainbow and the circle, as you will need excess plastic around the rainbow-Trace and color in the circle.
- Repeat step 1 with your second of the plastic sheets.
- Cut out the circles, staying close to the outer edge. Cut out the rainbows, but leave about ¼" around the outer edge, and cut flat across the bottom.
- Using the hole puncher, punch a hole at the top center of each rainbow in the excess clear plastic portion.
- Remember the shrink plastic is why it's important to leave a little room an extra ¼".
- Next, make a hole at the top and bottom center of each circle.
- Place the rainbows and circles on a parchment paper-lined baking sheet. Make sure to leave plenty of space between each object, as they move quite a bit when baking, and you don't want them to stick together.
- Place the baking sheet in the oven, and bake for 2-3 minutes. Keep the oven light on, and watch them as they bake.

- They will curl up, and some of the sides almost look like they are going to touch, but then they will start to flatten back out, and shrink in size. For best results continue baking until all pieces are completely flat, which usually takes 4-5 minutes.

- Remove from the oven, and let cool. *You can use a heat gun in replace of the oven.
- Once cooled, open a jump ring with a pair of round and needle nose pliers.
- Place the jump ring through the top of a rainbow, and one hole in the pink circle.
- Close the jump ring with the needle nose pliers.
- Open another jump ring, and place it through the other hole in the pink circle, and through one of the earring hooks.
- Close the jump ring with needle nose pliers.
- Repeat step 7 with the other rainbow and circle. Earring backs are optional. Your earrings are ready to wear!


Video
CONNECT WITH MADE WITH HAPPY!
Be sure to follow me on social media, so you never miss a post!
Facebook | Twitter | Youtube | Pinterest | Instagram
Find and shop my favorite products in my Amazon storefront here!
RAINBOW SHRINKY DINK EARRINGS
PIN IT TO YOUR DIY BOARD ON PINTEREST!
FOLLOW MADE WITH HAPPY ON PINTEREST FOR ALL THINGS HAPPY!