Learn how to draw the Grinch with a free printable step-by-step drawing tutorial. Having some easy Grinch drawing how-to-draw tutorial fun for kids of all ages.
Want to save this project?
Enter your email below, and then we'll send it straight to your inbox. Plus get awesome new projects from us each week.
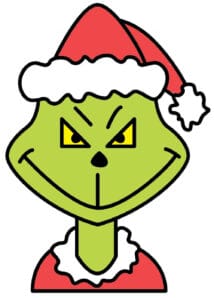
This How to Draw The Grinch Face for kids is giving us all kinds of happy feelings. Easy way to sketch the Grinch with just paper and a pencil.
The Grinch is fun to draw during the whole Christmas Season and all December long. Did you know that Grinch Day is December 1st?
The reality is that this Dr. Seuss icon is fun to learn to draw all year round, although it's a fan favorite during Christmas break. This easy Grinch drawing tutorial is great for kids of all ages.

How The Grinch Stole Christmas
There is something so much fun about Grinch and Christmas. How the Grinch Stole Christmas is most definitely one of our favorite holiday movies.
It only makes sense that having this fun tutorial on hand for kids to learn drawing skills throughout the season is all kinds of fun too. It is a fun way to talk about the classic tale of Mr. Grinch and his change of heart. The best way to get into the holiday season spirit.
Have some fun this winter and get drawing!

Easy Grinch Drawing
Fun simple drawing guides like this Grinch drawing are a great way to learn to draw. Simple lines and nothing too complicated.
Until they start going for it, they don't realize how freeing it can be and how easy it can be to create something with your own hand.
Before you start drawing, we also want to make sure you have the right tools. Here are the drawing paper, and drawing pencils we like to use.
If you like easy drawings, then don't miss our Drawing Animals Tutorial Bundle which includes 14 different printable step by step drawing guides.
Check out these other Grinch Activities!


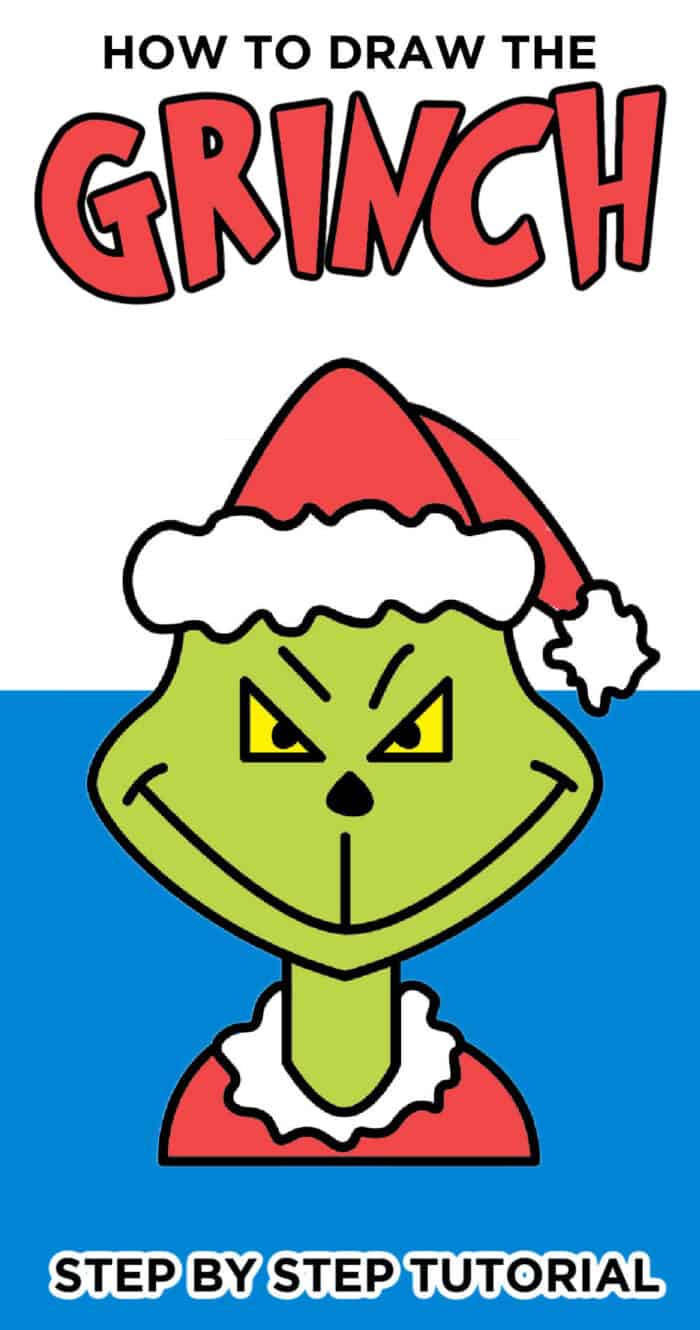
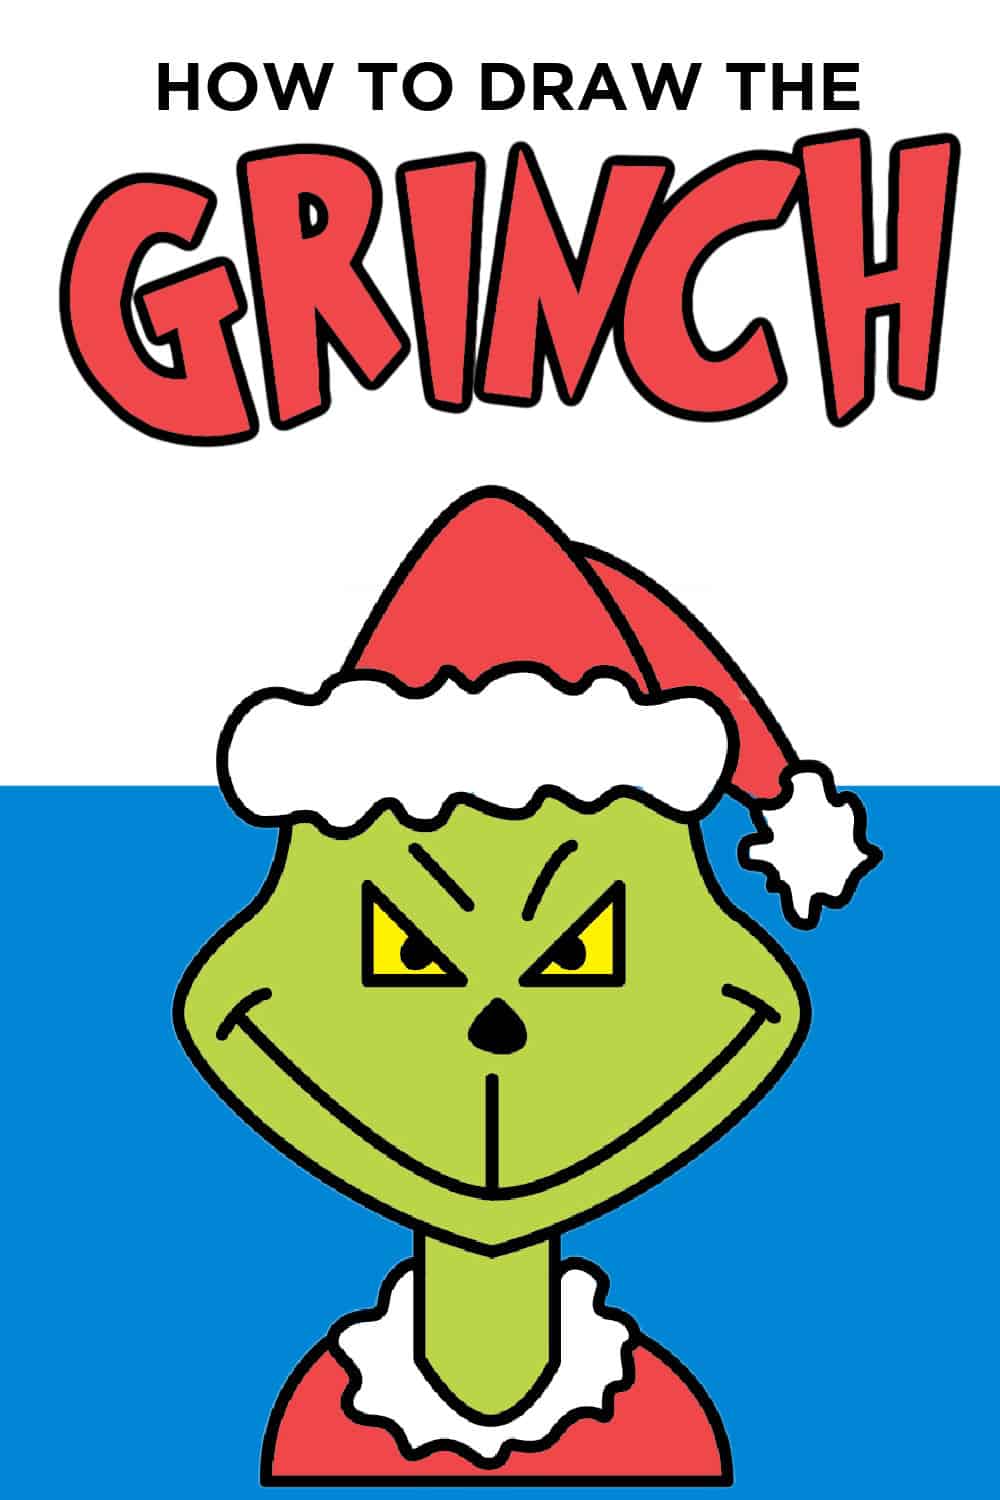
How To Draw The Grinch Step By Step
Below we're sharing an easy step-by-step tutorial drawing lesson using basic shapes. Don't forget to print out the printable Grinch drawing tutorial at the bottom and follow along.
Grab a piece of paper, and a pencil, and let's draw this Grinch face. Here are the simple steps to how to draw the grinch.
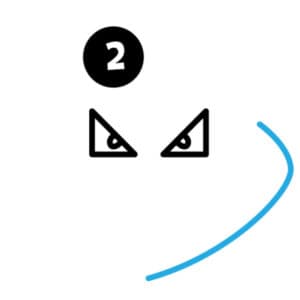
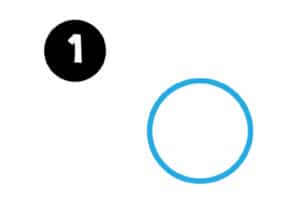
Drawing The Grinch Eyes

Start by drawing two right triangles with slanted sides (hypotenuse) facing inward. Inside each triangle, draw a small circle.
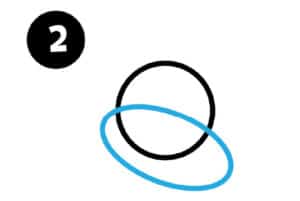
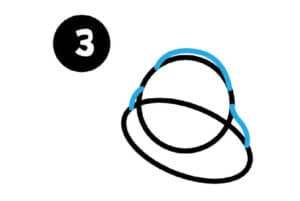
The Grinch's Head
Next, draw a curved line from the side of one of the eyes and make a sort of curved "7" shape.
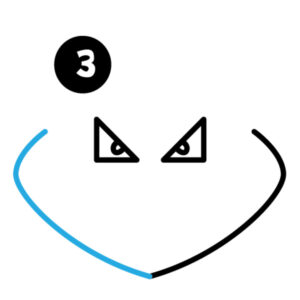
Draw the same-shaped curved line on the other side of the face.
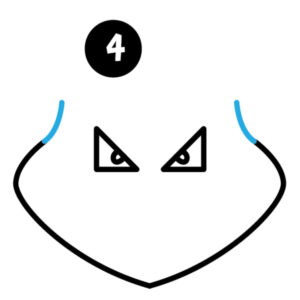
Next, draw two small lines on each side of the eyes inward slightly and up.
Drawing Grinch's Santa Hat
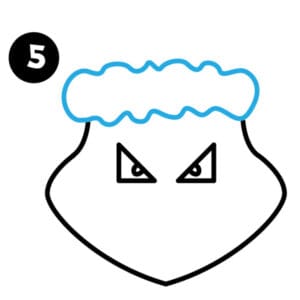
The next step is to draw a wiggly line across his forehead and into a cloud-like shape.
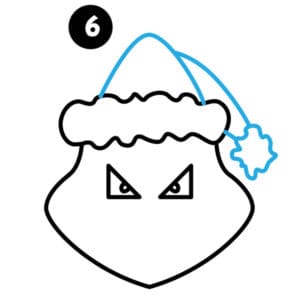
To finish off his hat you first draw a small cone shape off the top of the grinch hat rim. Then draw a floppy part of the hat off the side adding another cloud shape off the end of the hat.
Grinch Face
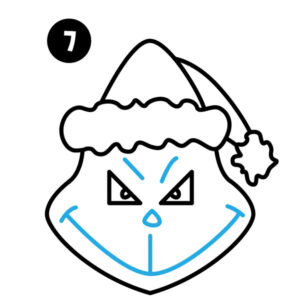
Start by adding a small triangle as the nose right below the center of the eyes. Then draw a straight line down from right below the nose to right above the line for the face. Next, draw two lines up the draw the smile. Then draw two lines above the eyes as eyebrows.
The last step is to draw a neck and shoulders or just leave it as the grinch's face. Then outline your drawing with a black marker, and then color in your Grinch drawing!
Viola, you have yourself the cutest cartoon easy grinch!
Check Out These Other Winter Drawing Step-By-Step Instructions!
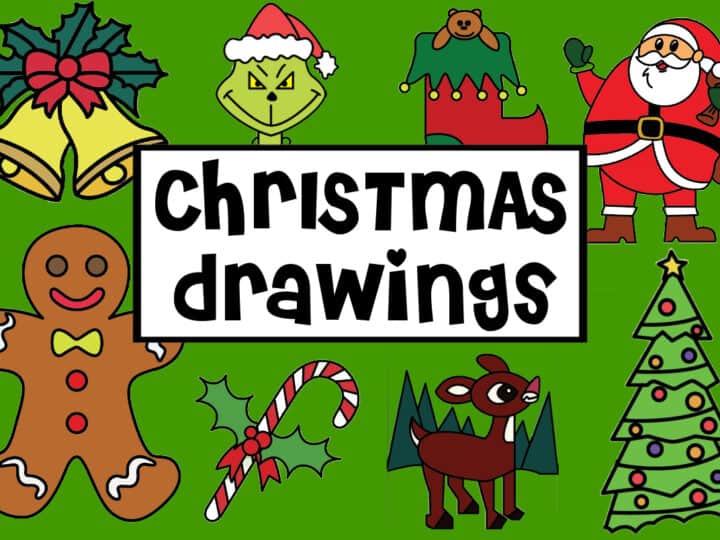
We highlighted these Christmas Printables and Christmas Drawings along with some other fun kid's crafts in our December Crafts along with our December Coloring Pages and Easy Craft Ideas for kids.
You also do not want to miss our Printable Coloring Sheets For Kids and Printables For Kids full of Crafts and Coloring Pages.

Download the Grinch Drawing Free Printable Template
Enter your email in the form below and be taken directly to the How To Draw The Grinch Printable free download.
*For personal use only

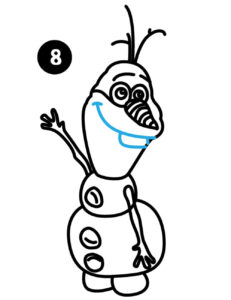
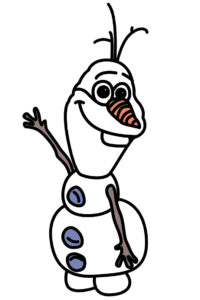
How To Draw Olaf
Equipment
- Drawing Pencils
Ingredients
Instructions
- The first step is to start drawing Olaf's head. Start by drawing a simple circle.

- Next, draw an oval at a slight diagonal over the bottom of the circle.
- Draw a few connecting curved lines to the top of the circle and oval smoothing out the top of Olaf's head.
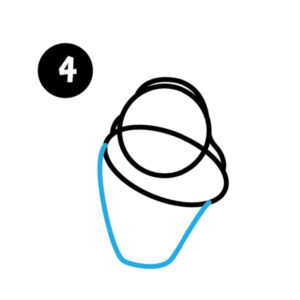
- The last part of Olaf's head is the bottom half of the head and "neck". That is if Olaf had a neck. :). Create a bucket-like U shape from one side of the oval to the other side of the oval. Erase all the inside lines after you have the head to the correct shape.

- Next, you are going to create one smaller circle at the base of the "neck" as the middle of Olaf. Then add another slightly bigger circle under that as the general body. The last piece in this step is to draw two smaller circles at the very bottom as Olaf's legs.

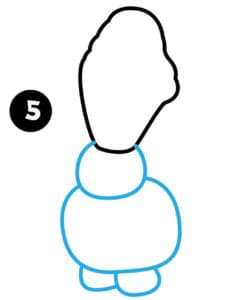
- The next step is to draw Olaf's arms and coal buttons on the front of his body. Remember Olaf's arms are twigs. If you draw straight lines and then add small branches at the ends. For the buttons, draw three small circles on the front of Olaf's body. Then a small curved line inside each one gives the coal buttons shape.
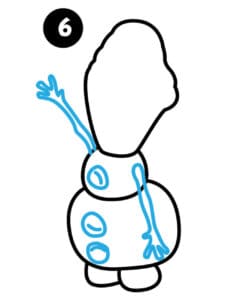
- The next step is to draw Olaf's carrot nose and Olaf's eyes. We drew lines across his carrot nose.
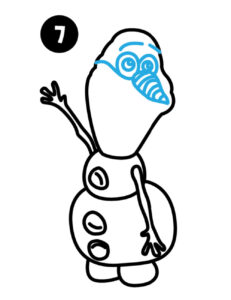
- The next step is to draw Olaf's teeth and smile. Viola, you have yourself the cute cartoon version of Olaf!
- What we love to do at this point is to outline the drawing with a black marker. Black marker outline of Olaf and then color in your drawing with crayons, pencils, or colored markers! Have fun!

Video
CONNECT WITH MADE WITH HAPPY!
Be sure to follow me on social media, so you never miss a post!
Facebook | Twitter | Youtube | Pinterest | Instagram
Find and shop my favorite products in my Amazon storefront here!
HOW TO DRAW THE GRINCH PRINTABLE
PIN IT TO YOUR DIY BOARD ON PINTEREST!
FOLLOW MADE WITH HAPPY ON PINTEREST FOR ALL THINGS HAPPY!