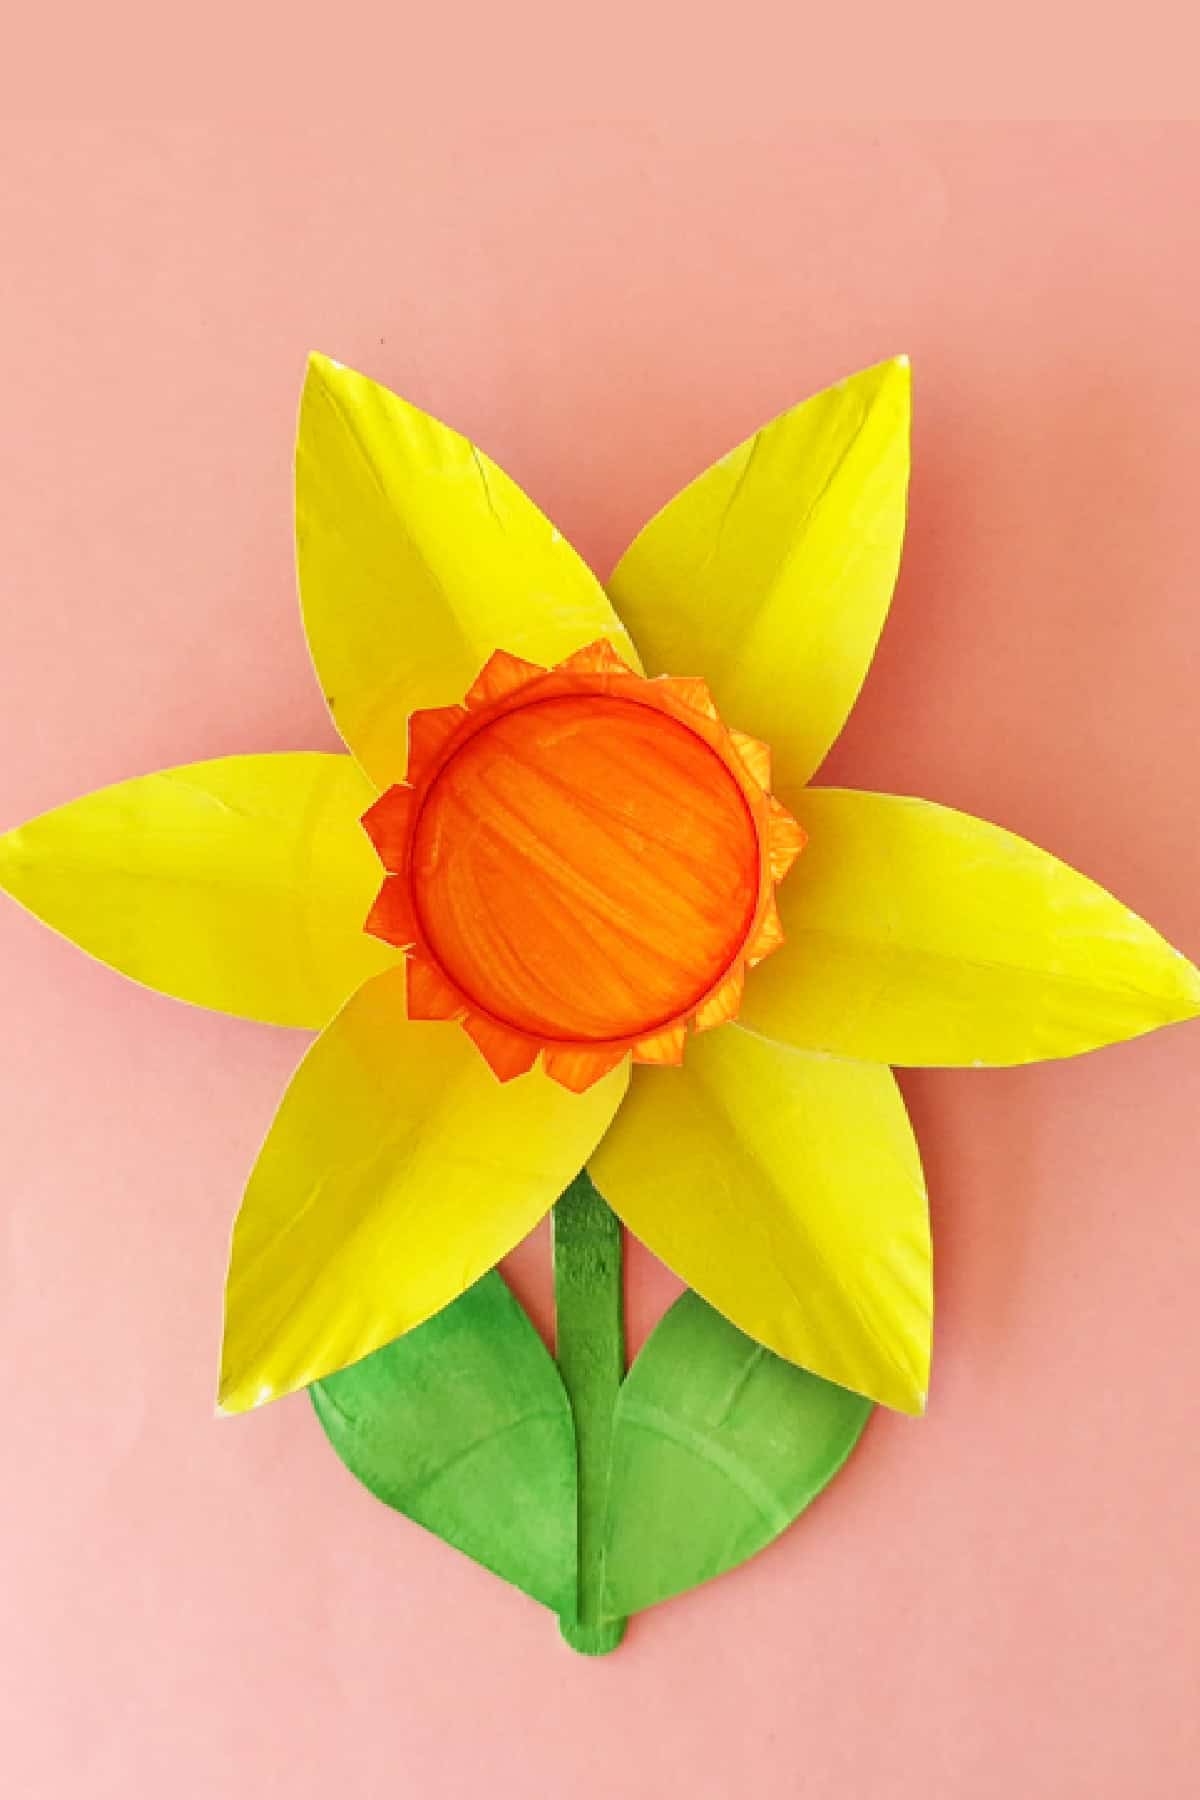
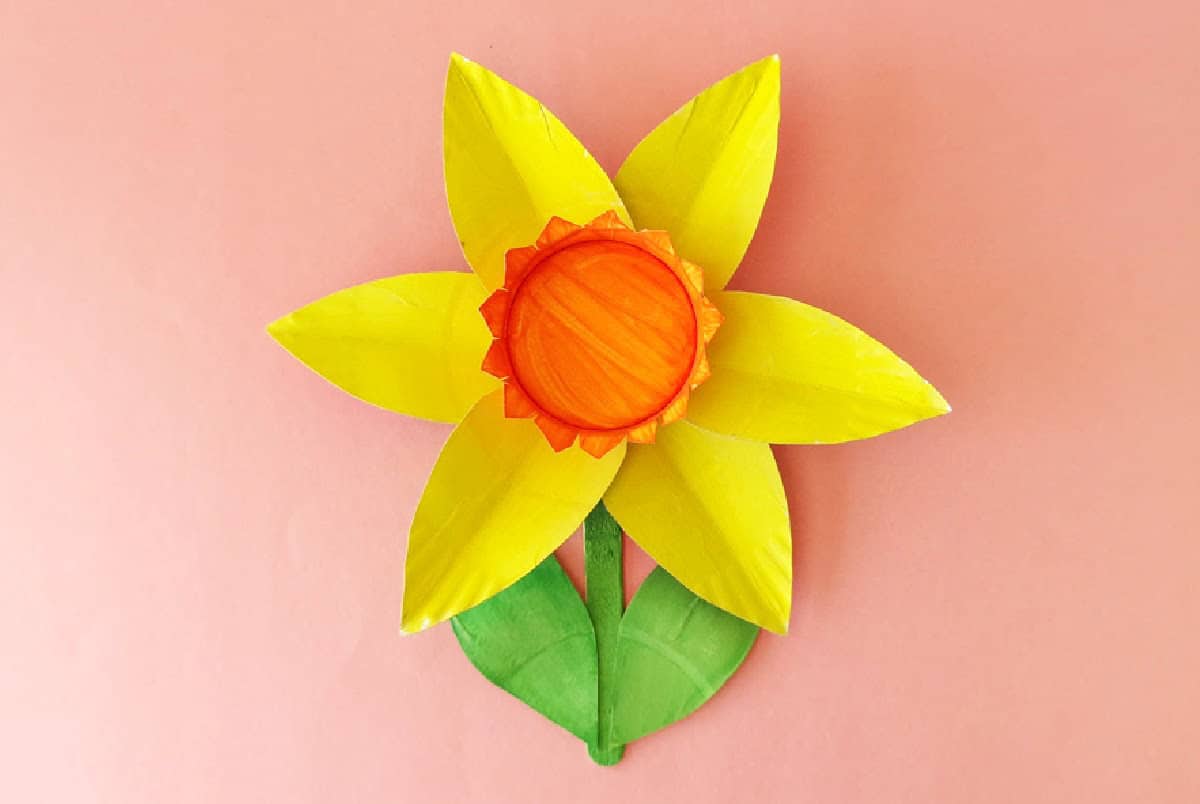
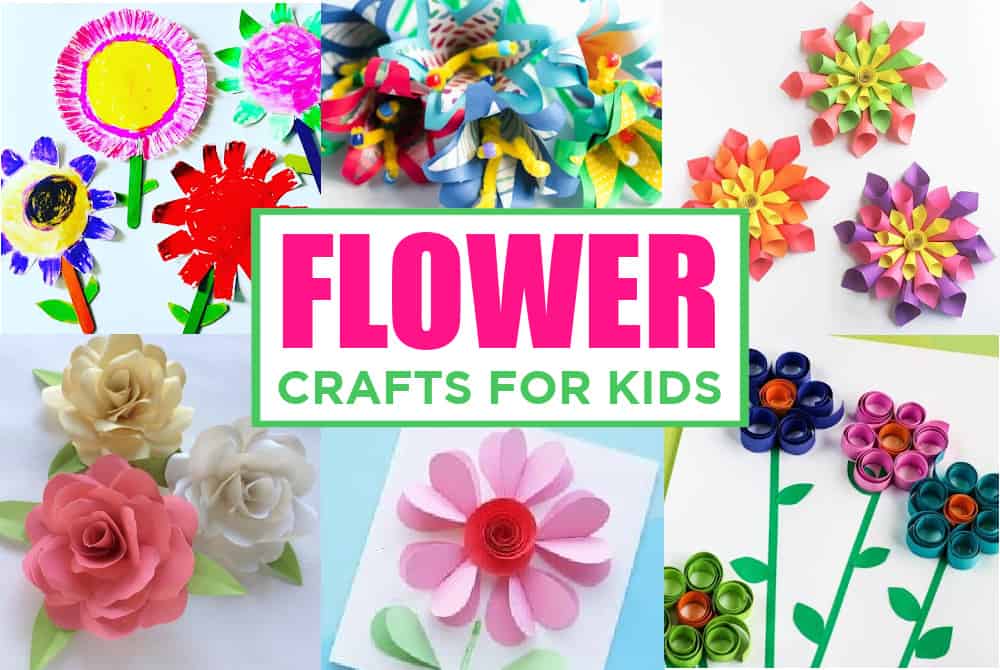
Make a fun and easy paper plate daffodil craft for kids! A simple spring project perfect for home or classroom activities.
Want to save this project?
Enter your email below, and then we'll send it straight to your inbox. Plus get awesome new projects from us each week.
Spring is in the air, and what better way to celebrate than with a bright and cheerful Paper Plate Daffodil Craft! This fun and easy craft is perfect for kids of all ages, bringing the beauty of spring right into your home or classroom.
With just a few simple materials, your little ones can create their very own daffodil flower to display, spreading a burst of sunshine and happiness. Let's get crafting and make some flowers that will brighten up any room!
Be sure to check out our Crepe Paper Daffodil Craft too!
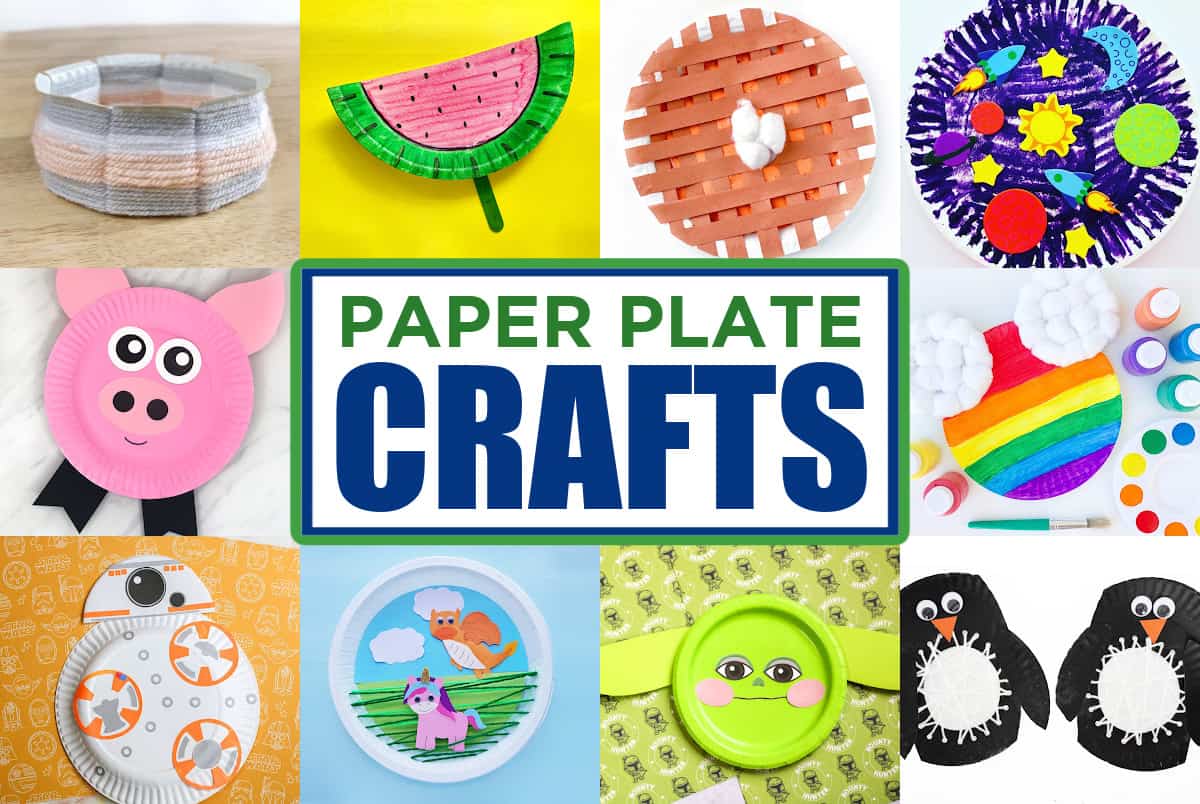
Paper Plate Crafts This Spring
Paper plate crafts are the perfect way to celebrate spring and get creative with your kids! With their simple shape and versatility, paper plates can easily be turned into all kinds of fun, spring-themed projects.
Whether you're making a Paper Plate Daffodil or designing colorful butterflies, these crafts bring the joy of the season to life with minimal supplies. Plus, they're easy to customize, so each craft is unique and full of personal flair. So grab some paper plates, paint, and glue, and let your imagination bloom this spring!
Don't miss our other paper plate flowers including Paper Plate Sunflower and Paper Plate Flower Wreath.
Paper Plate Daffodil Craft Supplies
- Paper plate
- Paper cup
- Pencil
- A pair of scissors
- Acrylic paint
- Paintbrush
- Craft glue
- Popsicle stick
- Colored craft paper
How To Make a Paper Plate Daffodil

Select 1 clean paper plates. For this craft, use the plain and matte surface of the paper plate.

Trace and cut out 2 daffodil flower base patterns from the 2 selected paper plates. Apply a coat of white paint if your plate has a colored pattern on it.
Step 3:

Grab a paper cup.

Cut the paper cup short and then trace a zigzag border. Use scissors to cut out the traced zigzag border.
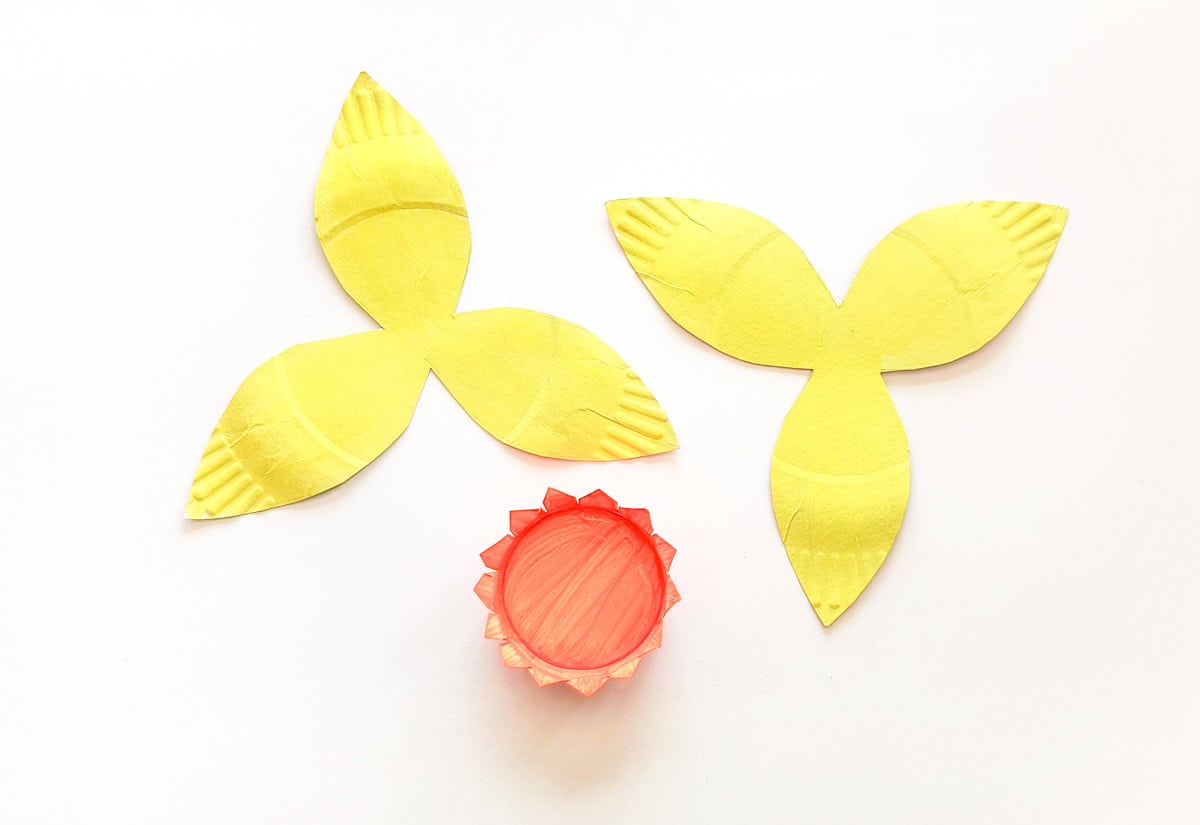
Apply yellow acrylic paint on the paper plate pattern cutouts and apply orange acrylic paint on the inner surface of the paper cup pattern cutout. Allow the paint to dry.
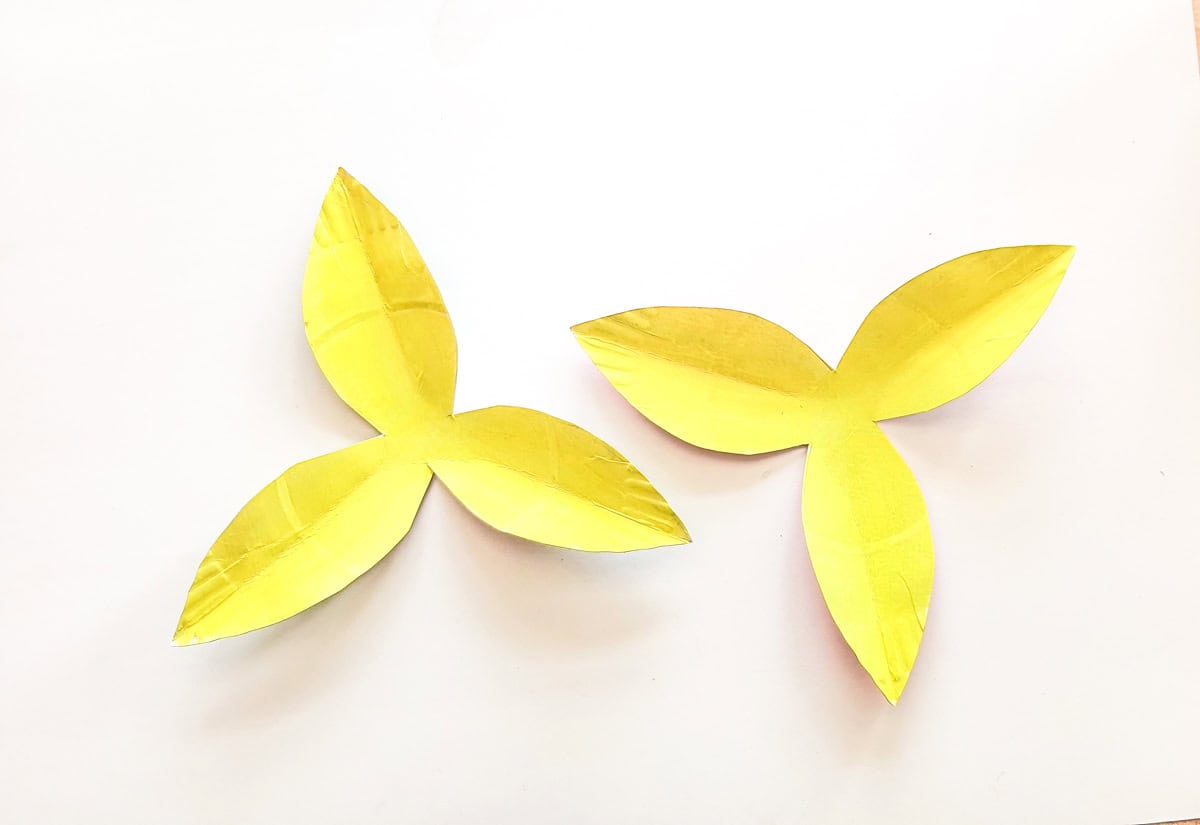
Make creases along the petals of the paper plate flower bases (from the tip of each petal to the center of the flower).

Join the 2 paper plate flower base cutout together.

Glue the paper cup pattern in the center of the top flower base.

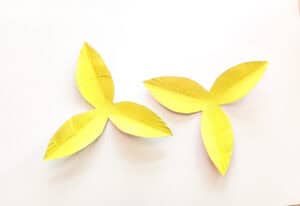
Select a popsicle stick and apply green acrylic paint on it. Trace and cut out 2 leaf shapes from a paper plate and apply green acrylic paint on them. Allow the paint to dry.

Glue the leaves on 2 sides of the popsicle stick. Glue the paper plate daffodil at the top end of the popsicle stick.

Viola, you have the cutest paper daffodil!
Happy Crafting and Happy Flowers!
Flower Crafts
- Brighten your day with these easy and colorful construction paper flowers that are perfect for kids of all ages!
- Learn how to draw a rose step-by-step with this simple and fun tutorial that budding artists will love.
- Get crafty with these adorable popsicle stick flowers-fun to make and perfect for spring or any sunny day!
- Make your own whimsical floral crown headband for pretend play, parties, or just to feel like flower royalty!
- Grab our free printable flower template to create colorful crafts, greeting cards, or sweet spring decorations in a snap!
Paper Daffodil Craft
Want to save this project?
Enter your email below, and then we'll send it straight to your inbox. Plus get awesome new projects from us each week.
Material
- Paper plate
- Paper cup
- Pencil
- Acrylic paint
- Paintbrush
- Craft glue
- Popsicle stick
- Colored craft paper
Tools
Instructions
- Select 1 clean paper plates. For this craft, use the plain and matte surface of the paper plate.

- Trace and cut out 2 daffodil flower base patterns from the 2 selected paper plates. Apply a coat of white paint if your plate has a colored pattern on it.
- Grab a paper cup.
- Cut the paper cup short and then trace a zigzag border. Use scissors to cut out the traced zigzag border.
- Apply yellow acrylic paint on the paper plate pattern cutouts and apply orange acrylic paint on the inner surface of the paper cup pattern cutout. Allow the paint to dry.
- Make creases along the petals of the paper plate flower bases (from the tip of each petal to the center of the flower).
- Join the 2 paper plate flower base cutout together.
- Glue the paper cup pattern in the center of the top flower base.
- Select a popsicle stick and apply green acrylic paint on it. Trace and cut out 2 leaf shapes from a paper plate and apply green acrylic paint on them. Allow the paint to dry.
- Glue the leaves on 2 sides of the popsicle stick. Glue the paper plate daffodil at the top end of the popsicle stick.
- Viola, you have a paper daffodil


CONNECT WITH MADE WITH HAPPY!
Be sure to follow me on social media, so you never miss a post!
Facebook | Twitter | Youtube | Pinterest | Instagram
Find and shop my favorite products on my Amazon storefront here!
Paper Daffodils
PIN IT TO YOUR DIY BOARD ON PINTEREST!
FOLLOW MADE WITH HAPPY ON PINTEREST FOR ALL THINGS HAPPY!