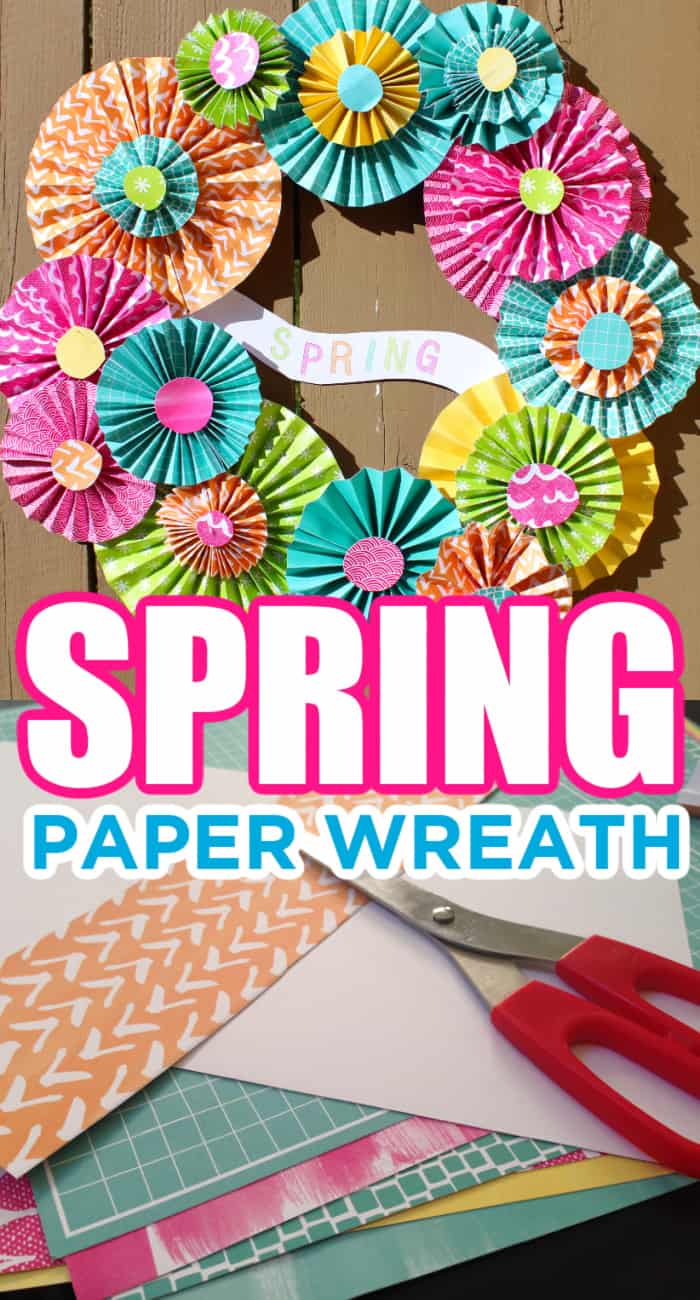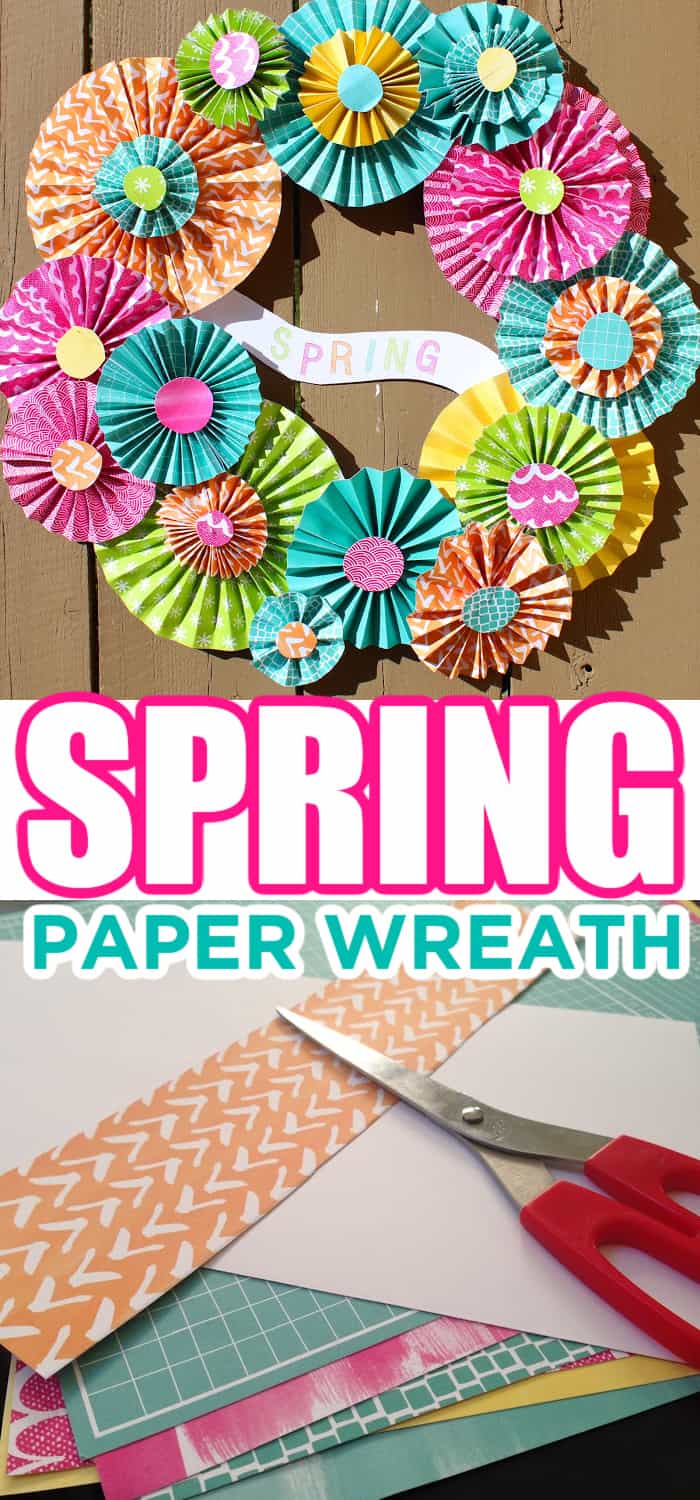
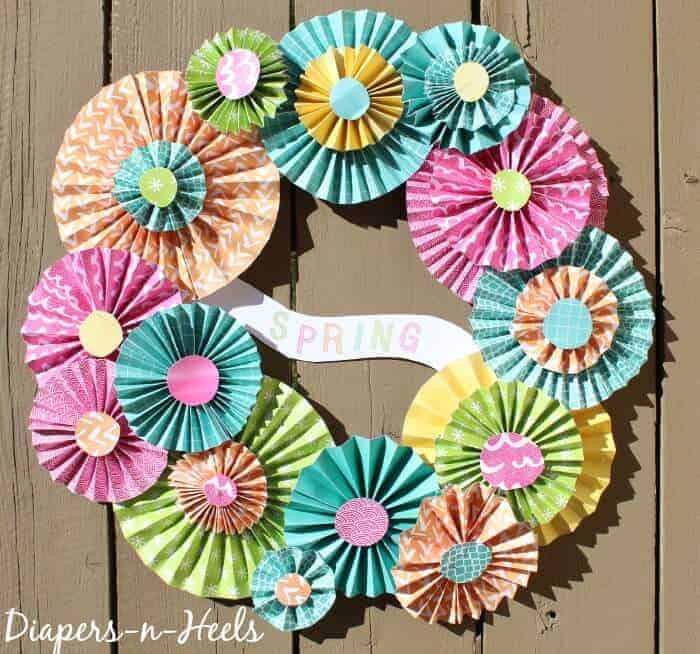
Create this beautiful Spring Pinwheel Paper Wreath out of scrapbook paper and glue. It's an easy craft that can be made by kids of all ages.
Want to save this project?
Enter your email below, and then we'll send it straight to your inbox. Plus get awesome new projects from us each week.
This paper wreath is the perfect addition to your Spring door. It is simple to make and makes a huge statement on any spring door.
If you enjoy Spring as much as we do then you will not want to miss our other popular Spring craft posts including Picture Flower Kids Craft, Popsicle Stick Bird Feeder, DIY Flower Crown,
We highlighted this Spring Craft along with some other fun kids craft in our April Crafts for Kids along with our 101+ Easy Craft Ideas for kids.
You also do not want to miss our 33+ Easy Construction Paper Crafts and 101+ Free Kids Printables full of Crafts & Coloring Pages.
Craft Paper Pad

Next month, I will be attending a blog conference fully dedicated to crafting and DIY bloggers, called the SNAP conference. I am beyond ecstatic about the opportunity to be among such a creative bunch. As part of one of the campaigns for the conference, a few bloggers were challenged to create something from a selection of goodies from the great Amy Tangerine.
In the words of the great Barney Stinson -- Challenge Accepted!!!
Scrapbooker I am not, but paper addict I AM! Flipping through the beautiful patterns and designs, it didn't take long to decide that I was going to make a Spring Pinwheel Wreath
Supplies:
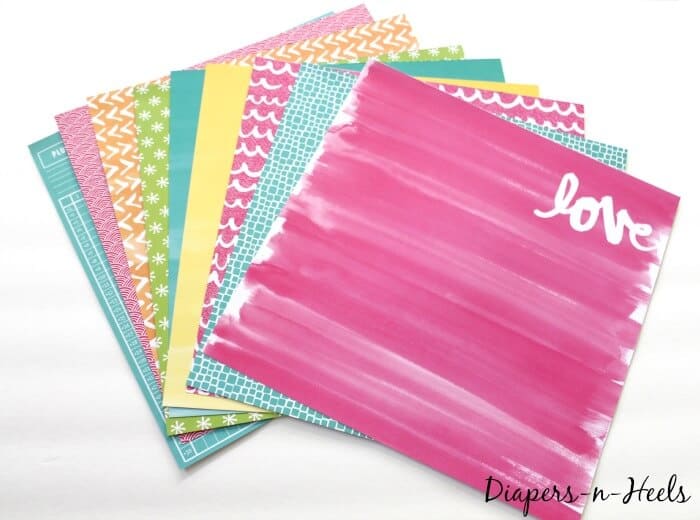
- Approximately 8-10 piece of scrapbook paper (like the Amy Tangerine Plus One Paper Craft Collection from above)
- Scissors
- Hot Glue
- Stapler
- Poster Board - For wreath form backing
How to Make a Spring Wreath
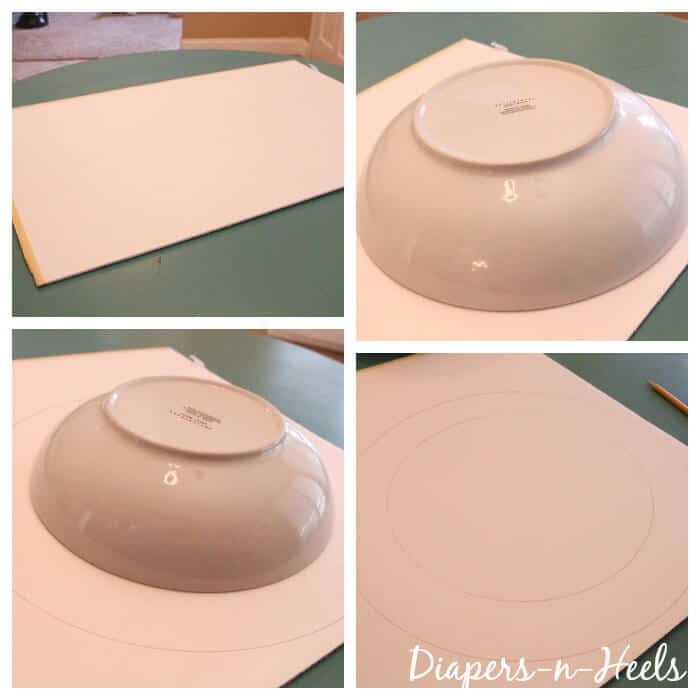
I simply used a few nested bowls from my kitchen and used them to draw a wreath approximately 2.5 inches thick. Cut out using a craft knife or scissors.
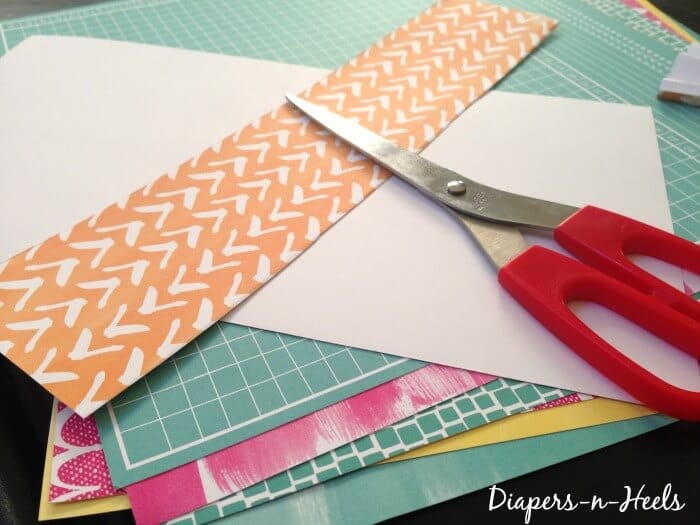
Each of the pinwheels is made from two strips of the same paper cut at similar widths and lengths. We found it easiest if the strips were between an inch and two inches thick and left them at 12 inches long.
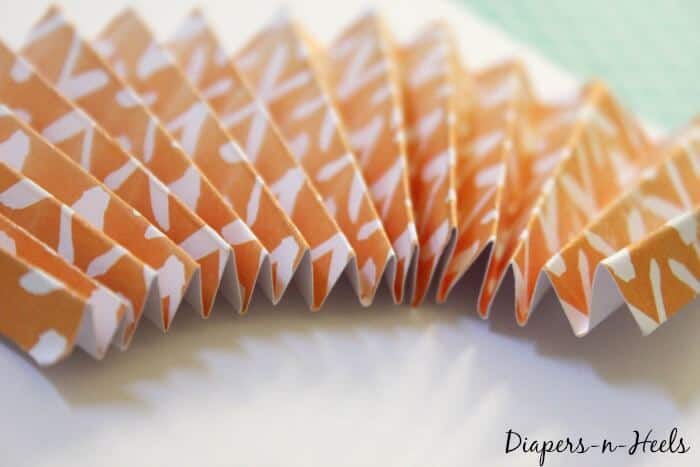
Once you have the paper strips, along the short end of the strip, you fold the paper (approximately a centimeter thick)back and forth creating an accordion-looking piece of paper. You do that for both strips. Each strip can be molded into a half-moon/half pinwheel shape (why you need two pieces for a full pinwheel)
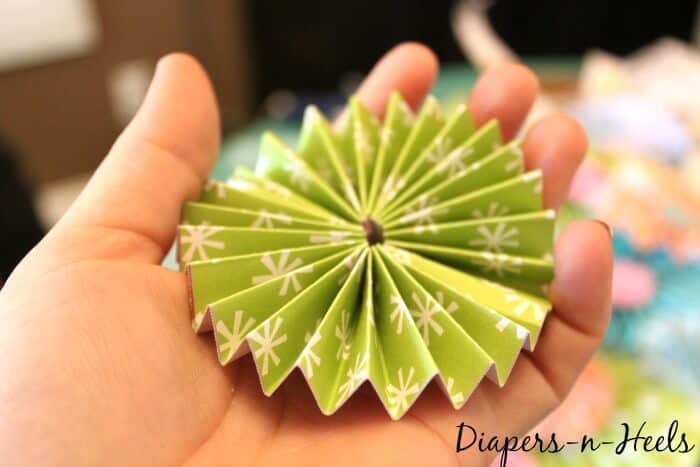
On the backside of the paper (white side, if you're paper, has the design on the front side), staple the ends of the two accordion strips together. Then fold into a full pinwheel and staple the other ends together. Make sure the staples are on the backside, so you don't see them.
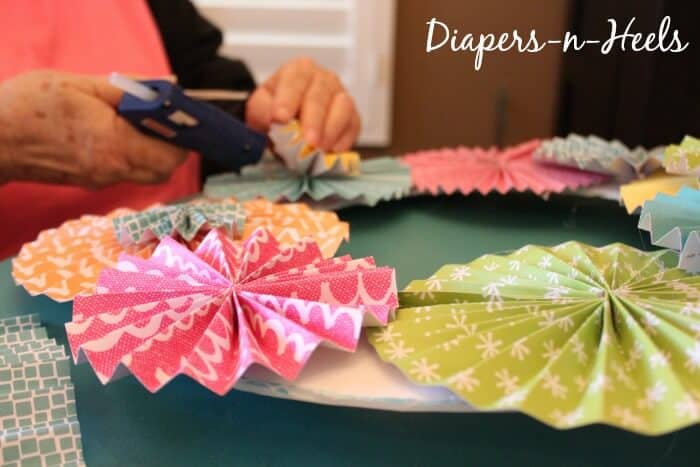
Then it's a matter of placing and gluing the different colors and size pinwheels around your foam board wreath. With the leftover scraps of papers either using a circle paper cutter or just freehand cutting, cut out 1-inch circles and glue those to the middle of the pinwheels. We also used a leftover scrap piece of paper for the "SPRING" banner portion of the wreath.

Using these fabulous letter stickers included in the Plus One Collection too, we added the SPRING to the paper. Easy Peezy!
You have yourself a fabulous Spring Pinwheel Wreath
Amy Tangerine Collection
We are just loving everything about this Amy Tangerine Paper Collection. Not only was it the top-selling signature line released in the winter of 2014, but it also sold out in most stores and online. I know why... it's AWESOME!
On March 24th the collections will be available on HSN in five different bundles including a basic kit, an embroidery kit, an embellishment kit, and a stamping kit all starting at just under $20. UMMM... even more amazing! Definitely check them out!
I did receive the product in exchange for the post, but the project and all opinions are 100% my own.
Spring Wreath Ideas
- EGG CARTON FLOWER WREATH
- EASTER BUNNY WREATH
- SPRING APPLE WREATH
- SPRING MONOGRAMMED DOOR HANGINGS
- EASY DIY YARN WALL HANG

Spring Pinwheel Paper Wreath
Equipment
Ingredients
- Approximately 8-10 piece of scrapbook paper
- Hot Glue
- Stapler
- Poster Board - For wreath backing
Instructions
- I simply used a few nested bowls from my kitchen and used them to draw a wreath approximately 2.5 inches thick. Cut out using an craft knife or scissors.

- Each of the pinwheels is made from two strips of the same paper cut at similar widths and lengths. We found it easiest if the strips were between an inch and two inches thick and left them at the 12 inches long.

- Once you have the paper strips, along the short end of the strip, you fold the paper (approximately a centimeter thick)back and forth creating an accordion looking piece of paper. You do that for both strips. Each strip can molded into a half moon/half pinwheel shape (why you need two pieces for a full pinwheel)

- On the back side of the paper (white side if you're paper has the design on front side), staple the ends of the two accordion strips together. Then fold into a full pinwheel and staple the other ends together. Make sure the staples are on the backside, so you don't see them.
- Then its a matter of placing and gluing the different colors and size pinwheels around your foam board wreath. With the left over scraps of papers either using a circle paper cutter or just free hand cutting, cut out 1 inch circles and glue those to the middle of the pinwheels. We also used a left over scrap piece of paper for the "SPRING" banner portion of the wreath.
- Using these fabulous letter stickers included in the Plus One Collection too, we added the SPRING to the paper. Easy Peezy!

- You have yourself a fabulous Spring Pinwheel Wreath


Video
CONNECT WITH MADE WITH HAPPY!
Be sure to follow me on social media, so you never miss a post!
Facebook | Twitter | Youtube | Pinterest | Instagram
Find and shop my favorite products in my Amazon storefront here!
SPRING PINWHEEL PAPER WREATH
FOLLOW MADE WITH HAPPY ON PINTEREST FOR ALL THINGS HAPPY!