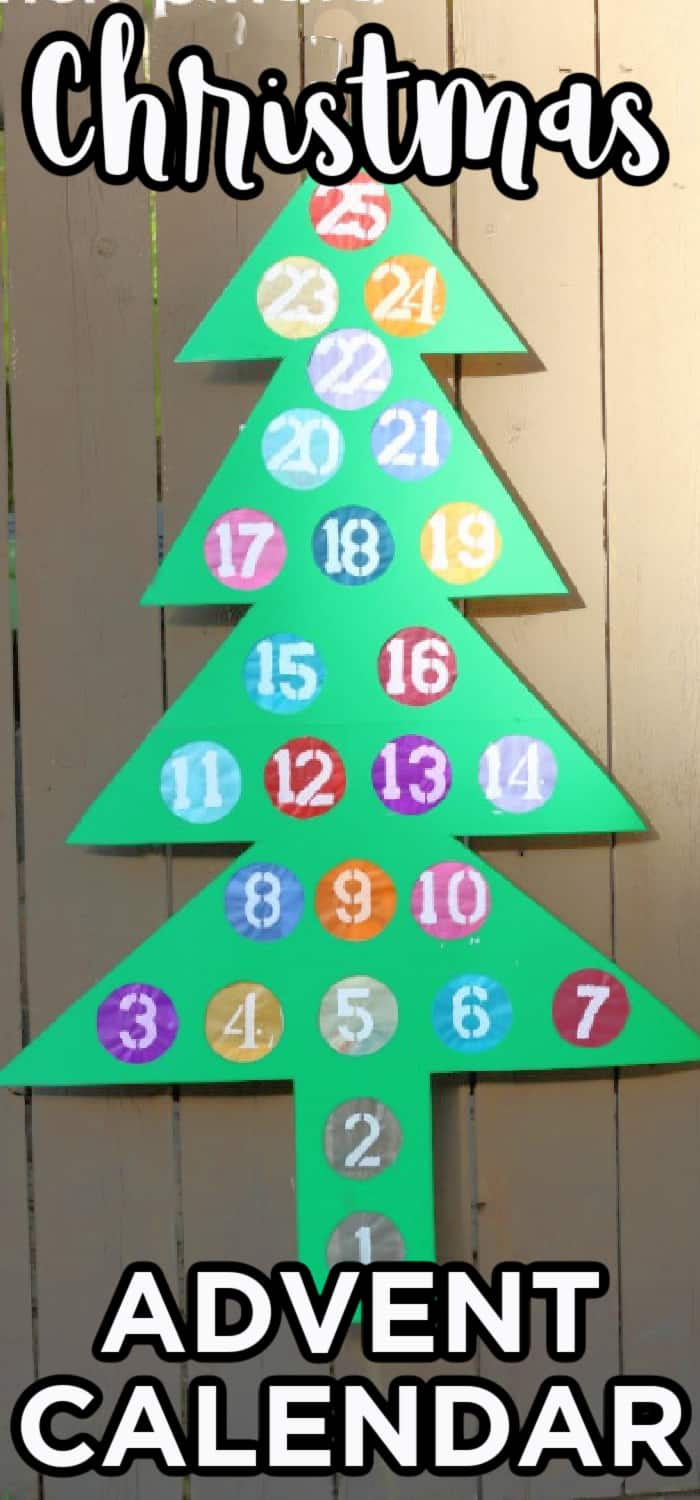
Countdown to Christmas with this Christmas Tree Advent Calendar made into a punch pinata. The kids will love the countdown.
Want to save this project?
Enter your email below, and then we'll send it straight to your inbox. Plus get awesome new projects from us each week.
Is there anything sweeter than a Christmas tree punch advent calendar? I think not!
This fun punch pinata Christmas tree is a great way to surprise each family member with small gifts each day till Christmas Day. We love putting up this homemade advent calendar and counting down the days!
Oh my gosh, friends... I am so excited about our advent calendar this year.
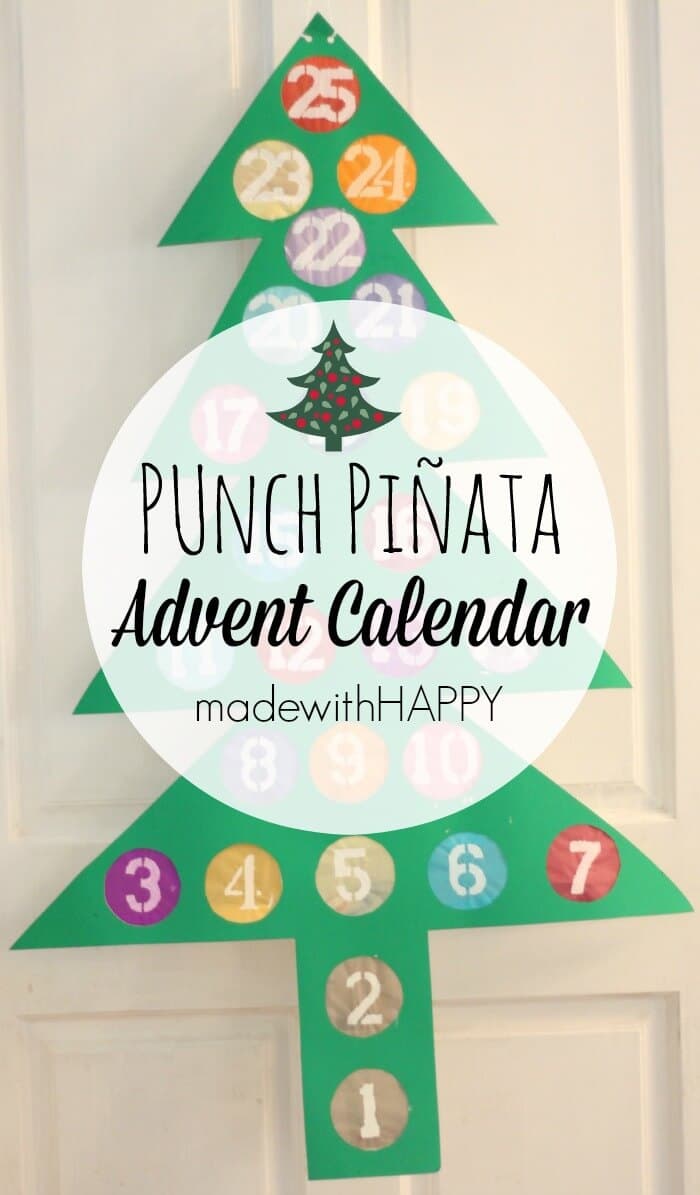
We love the idea of a wooden tree Christmas advent calendar. This year, we took our love of pinatas and Christmas and came up with a fun advent calendar that combines them.
As you may know, we are slightly (okay majorly) obsessed with punch piñatas.
Check Out These Other DIY Advent Calendar Idea!

Christmas Countdown
We love making them so much and the kids love playing with them, that we decided it was time for another... A Christmas Countdown Version.
It combines the idea of a punch pinata with a Christmas tree. It can become a holiday tradition year after year. All the fun of a traditional chocolate advent calendar but in our own advent calendar fun way!
The great idea of a Christmas tree that provides small surprises each day of the holiday season warms my heart. Christmas truly is one of the best times of the year!
Another Unique Advent Calendar idea you might enjoy includes DIY Christmas Advent Calendar, Christmas Countdown Printable, and Grinch Countdown Chain
Also don't miss our fun collection of DIY Advent Calendars!
Supplies Needed
- Two Piece of Green Poster Board
- 2 Packages of Mini-Paper Bags
- Tissue Paper
- Number Stencils
- White Paint
- Stencil Sponge or Paint Brush
- One piece of Duct Tape
- Ruler
- Masking Tape
- X-acto-Knife
- Scissors
- Circle Stencil (jar lid, cup, bowl) approximately 3 inches in diameter.
- Toys, Chocolate, Treats
- Hole Punch
- 1 foot of yarn
How to Make a Punch Advent Calendar
The Tree Structure
The first thing to do is to tape the two pieces of poster board together on the long edge using duct tape. You can certainly use a foam core piece for a sturdier front.
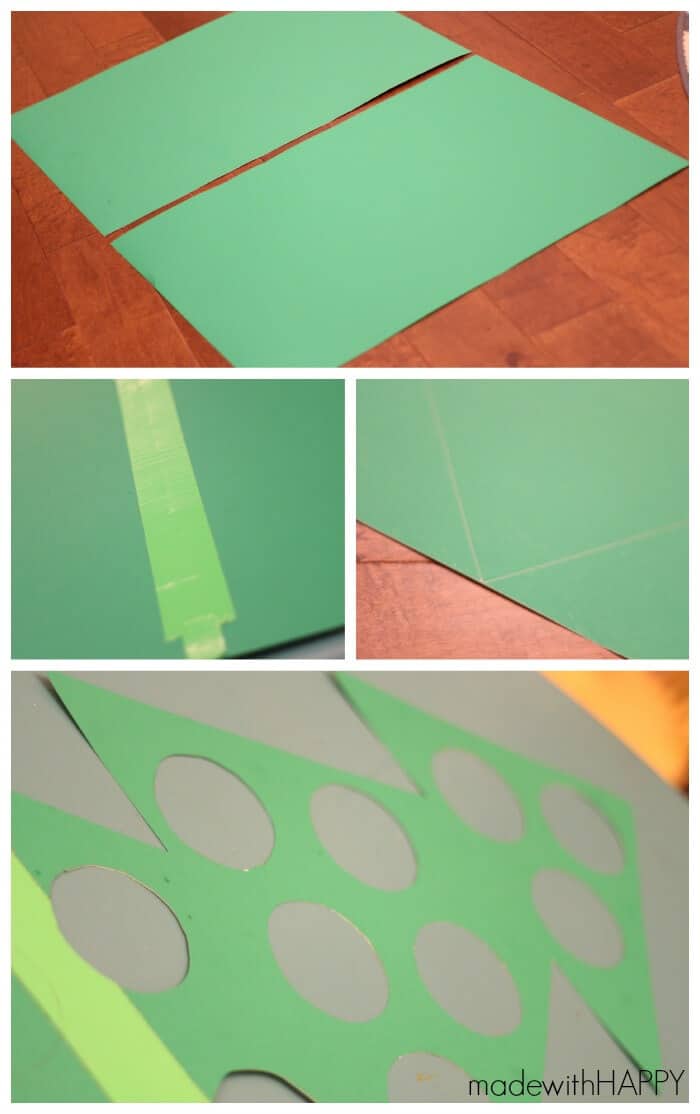
Next is to draw out your tree onto the poster board. Hint: I drew it out on a piece of paper first to make sure I had enough width for the number of holes.)
I drew the base approximately 5 inches wide and made each tree level approximately 8.5 inches apart. Once you have the tree drawn, using the scissors, cut it out.
Then using your circle stencil (I used a cup lid), on the backside of the poster board draw your circles.
Advent Calendar
Just remember that most wooden advent or box advent calendars have 24 days. They are designed with 24 numbered doors.
For this project, we went with 25 days. We love the idea of one last present on Christmas morning.
Using the x-acto knife, cut out the holes.
Punch Board
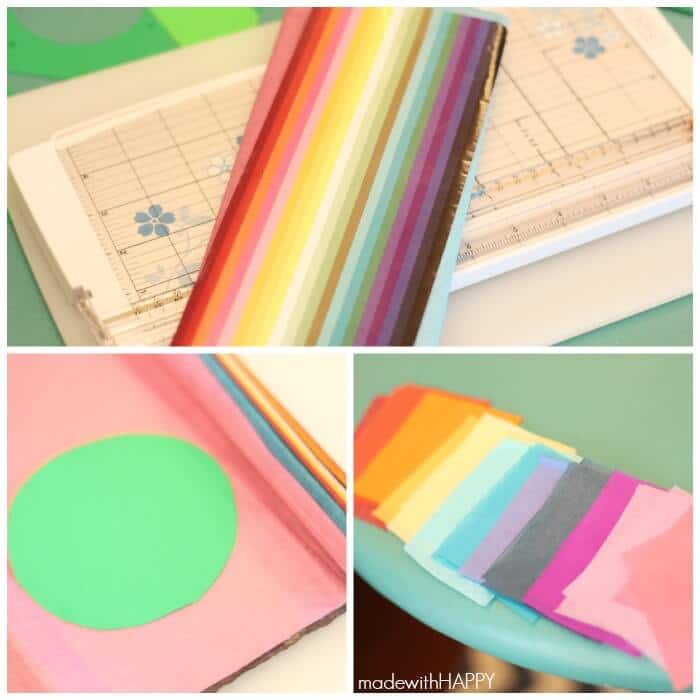
Next, you will need to cut out your tissue paper. Using one of the circles cut from the poster board. Cut out two squares of each color of tissue paper.
We kept them square but if you would like to make the tissue paper circles, you absolutely can. Just make sure it is bigger than the smaller circle poster board. Truthfully, it might be a lot of work that isn't necessary.
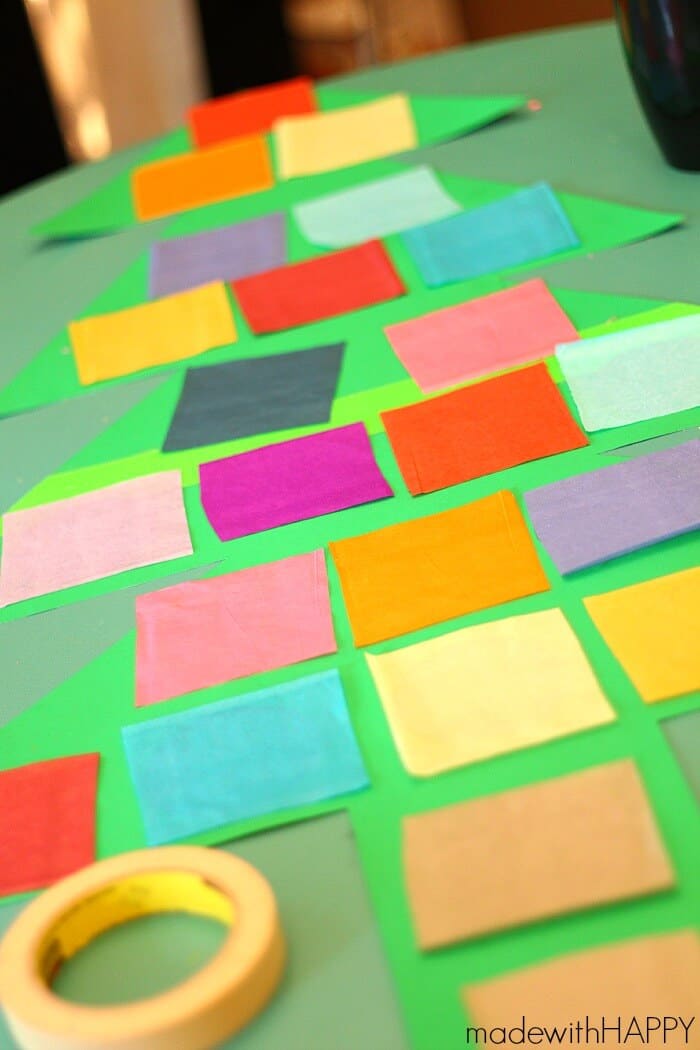
On the backside of the poster board layout your tissue papers to cover the holes.

Using masking tape or clear tape, tape the tissue paper to each hole. You may need to trim the tissue paper that hangs over the edges of the trees.

Next, you are going to turn your tree over and start to stencil the numbers onto the tissue paper. I used a 2-inch stencil. Lightly press the paint and let it dry.
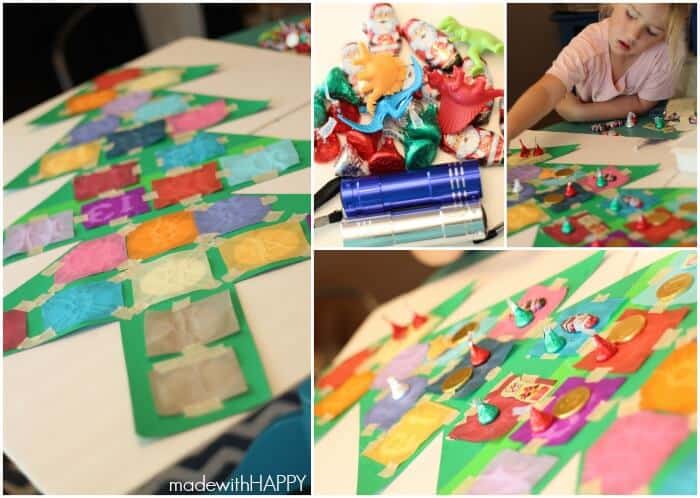
Dry the numbers.
Advent Calendar Goodies
It is time to fill up the holes. We filled the holes with lightweight chocolates, small toys, stickers, and little treats that I know my kids would love.
It is always a good idea to head to the dollar store and grab some goodies that are small enough to fit in the bag.
It can also be fun to write a special note, good deeds, random acts of kindness items, or verse in each of the spots for the kids to discover each day.
These are great items to find in the party favor aisles. Just remember they have to be pretty small to fit in the 3-inch hole. Lunch brown paper bags are great for this too. Layout all your goodies, it is time to add the paper bags.
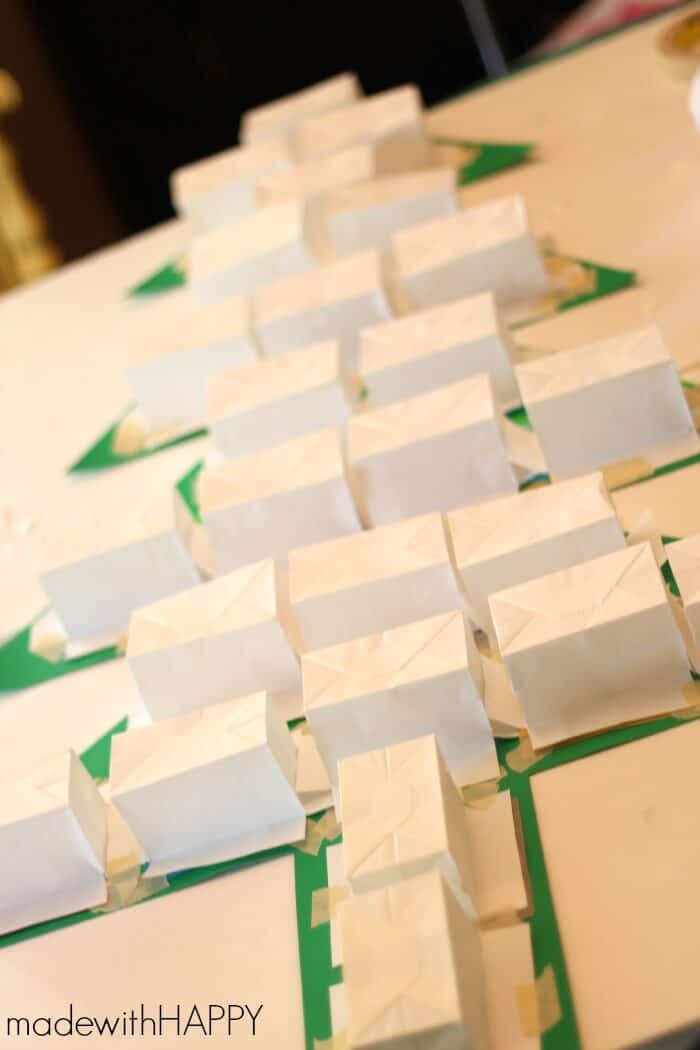
For the paper bags, you will only need the bottom 3 inches of the bag.
Cut each of the tops off the bags first. Then make a cut, using the scissors, along with the corners down from the top approximately an inch. Fold each of the sides down.
Once you have them all down, lay them out over each of the tissue holes covering the trinkets underneath. Using your tape, tape each of the corners down to hold the treats in place.

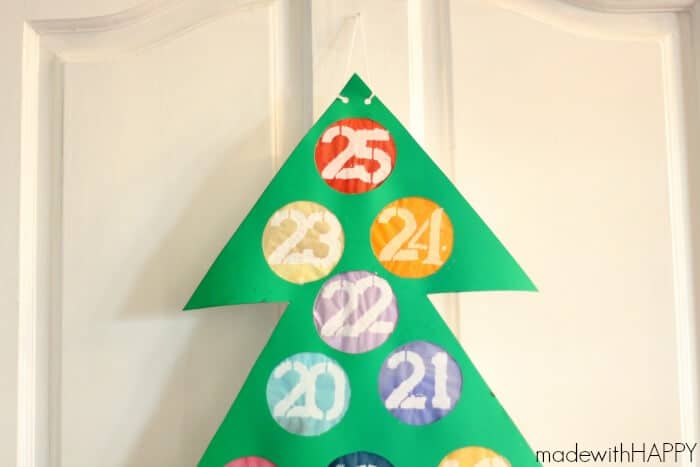
The last step is to hole punch two holes at the top. Then tie your yarn to each hole creating a holder.
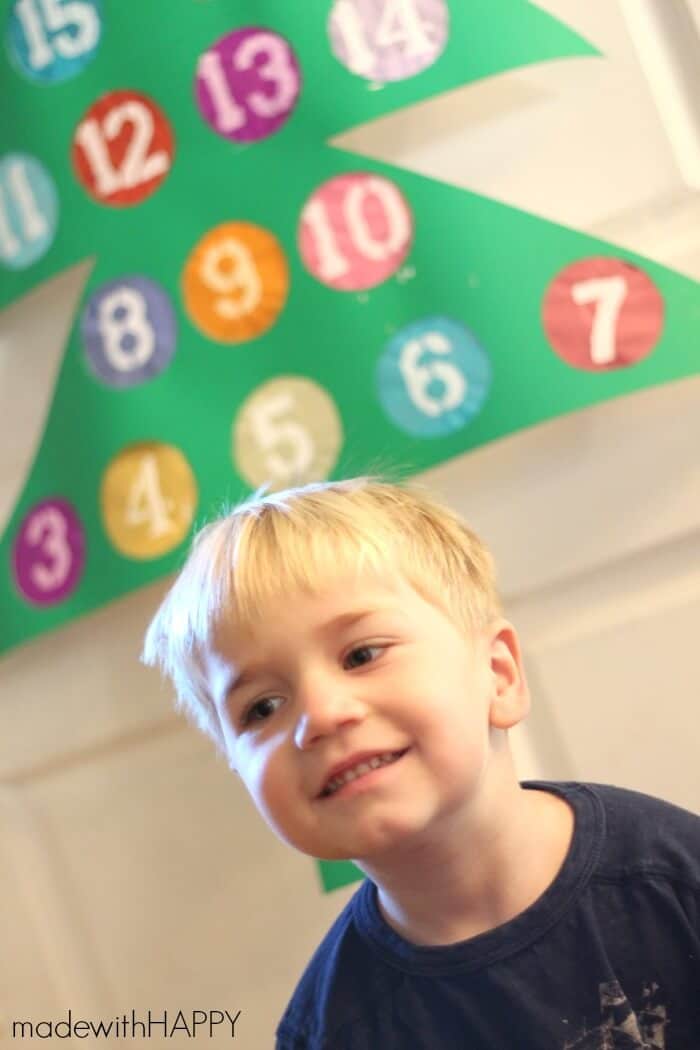

Viola, you have yourself the most fun punch pinata advent calendar. You can hang it on the back of a door using a nail or wreath hook. You are guaranteed to have some HAPPY HAPPY kids come December 1st and all Christmas season long!
Other Christmas Kids Crafts You'll Love
- Paper Plate Reindeer Craft
- Yarn Christmas Tree Craft
- 3D Christmas Tree
- Easy Wine Cork Snowflake Ornaments
- Reindeer Christmas String Art
CONNECT WITH MADE WITH HAPPY!
Be sure to follow me on social media, so you never miss a post!
Facebook | Twitter | Youtube | Pinterest | Instagram
Find and shop my favorite products in my Amazon storefront here!
PUNCH ADVENT CALENDAR
PIN IT TO YOUR DIY BOARD ON PINTEREST!
FOLLOW MADE WITH HAPPY ON PINTEREST FOR ALL THINGS HAPPY!