Learn the art of drawing a pumpkin with our step-by-step guide. Create your festive masterpieces with these easy instructions.
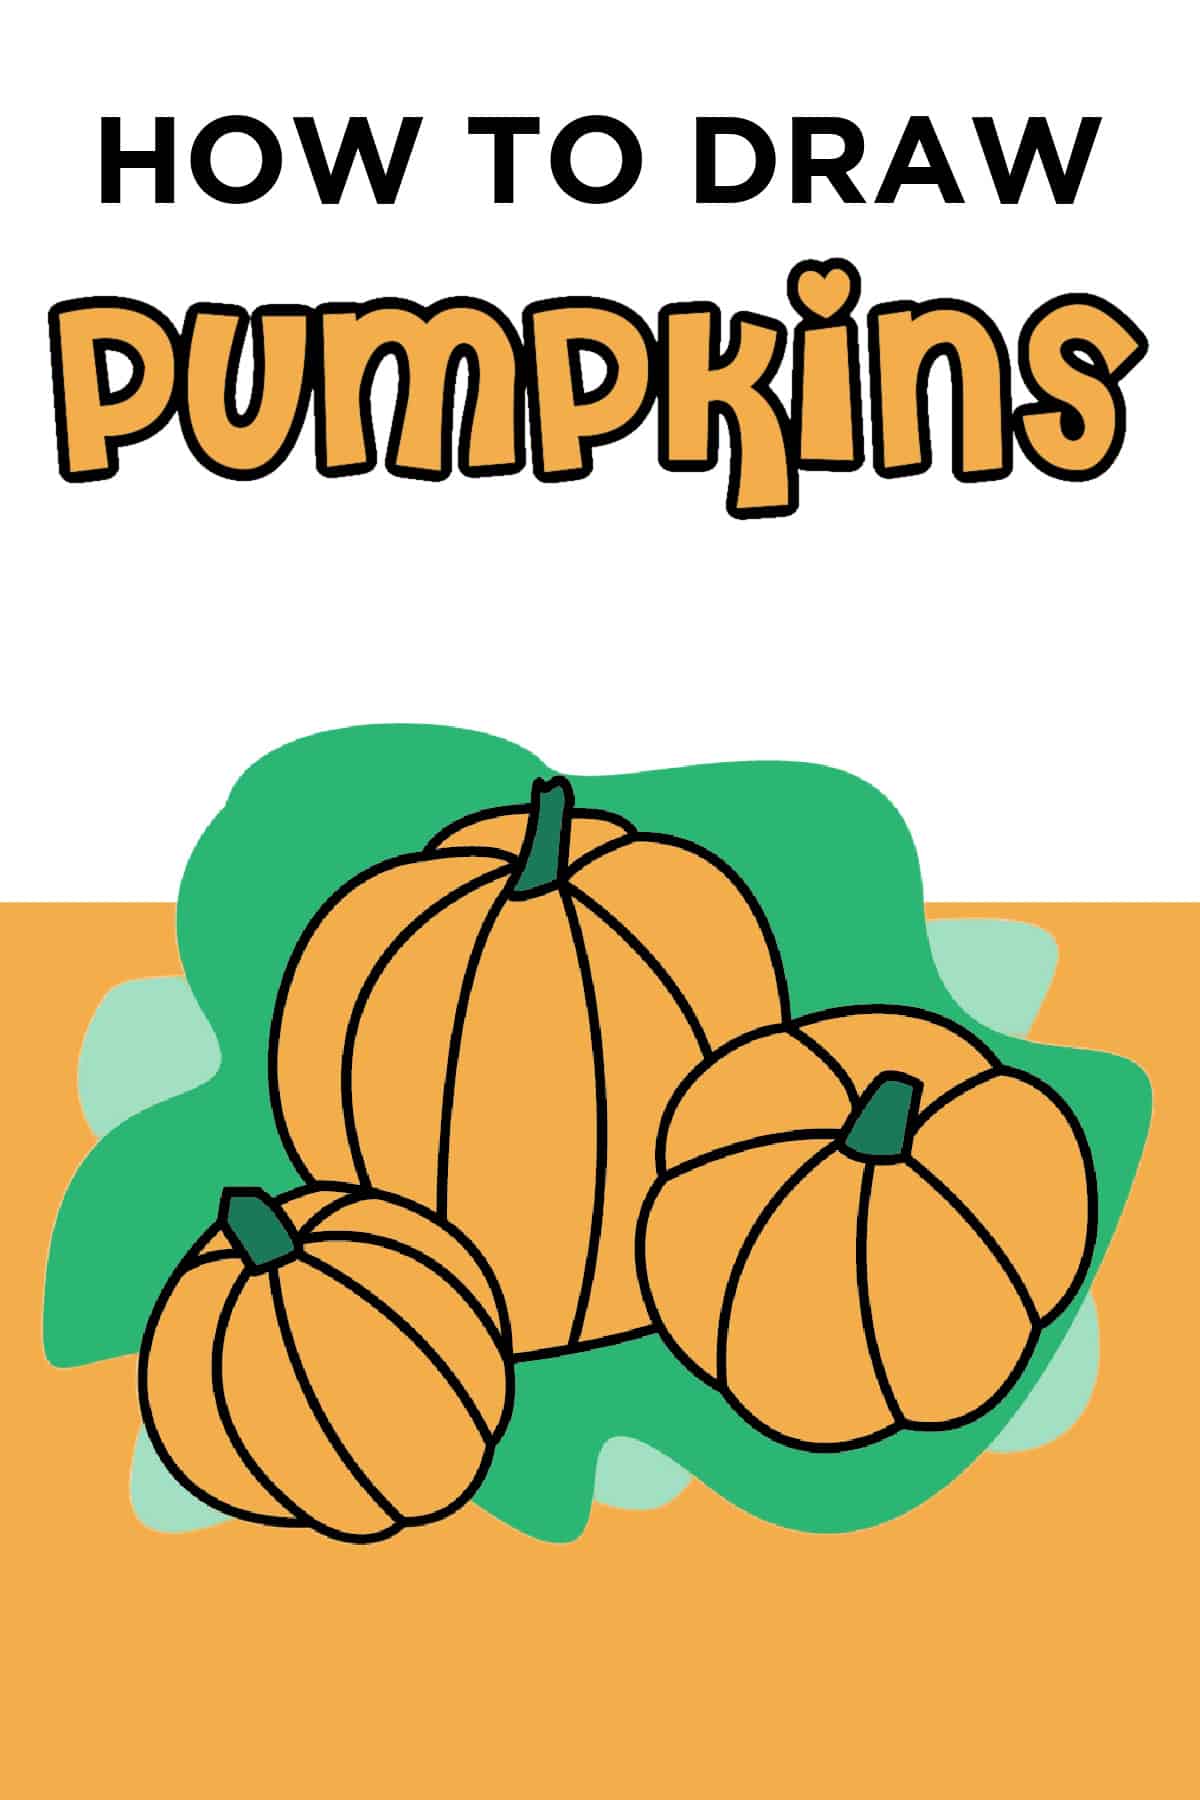
This How to Draw a Pumpkin easy steps tutorial is for kids of all ages. It involves only a few simple shapes and is a lot of fun. If you're looking for season-appropriate craft activities to keep your little ones busy, this one is perfect for the fall season.
You can help your kids draw some cute pumpkins on Halloween greeting cards, make cool pumpkin theme wall frames for your Halloween theme dinner, or just for fun.
Learning how to draw a pumpkin will keep your kids engaged and teach them some essential skills, such as following instructions and problem-solving. And, of course, they'll get more creative with time.
With this simple tutorial, it will be easy for even the youngest artists to draw pumpkins that look like real pumpkins!

Want to save this project?
Enter your email below, and then we'll send it straight to your inbox. Plus get awesome new projects from us each week.
Tips for Helping Young Ones Become Drawing Pros
Kids draw to express themselves. At 4, they'll pick up their crayons and randomly doodle whatever's cooking in their imaginary worlds. But at 10, they want to learn how to do things right. Shaky lines and out-of-shape circles make them feel less competent.
If your kiddo is a young drawing enthusiast, the responsibility of teaching them how to draw is on your shoulders. Not sure where to begin? I have some tips:
- Use drawing guides and videos with simple step-by-step instructions.
- Start with easy drawing lessons and then move to full scenes.
- Show them a reference image of what they're drawing to help them understand the look they're trying to achieve.
- To keep your kiddo interested, pick objects or themes of their interest.
- Be patient and encouraging.
Check out these other Fall Drawings!
These fun drawings plus our monthly drawings including November Drawings.
Decorating the Pumpkin Drawing
Now, for the fun part, let's check out some ways to decorate our pumpkin drawings:
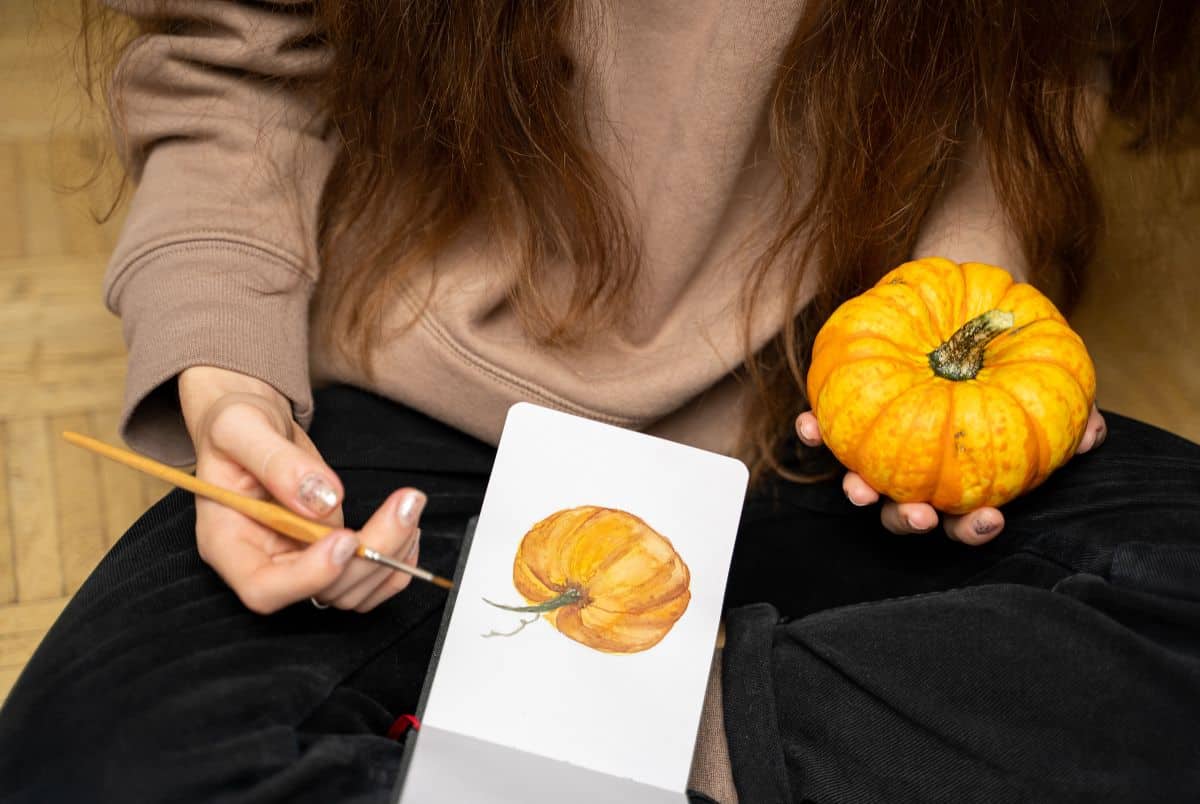
Sprinkle green glitter on the pumpkin stem and shade the rest of the pumpkin in hues of orange and yellow.
- Stick green pipe cleaners as stems on your drawing.
- Draw scary pumpkin faces, like a Jack o lantern expression, for a spooky vibe.
- Make several different shapes of pumpkins and color them in rainbow colors.
- For a realistic pumpkin, sketch some contour lines at the bottom of the pumpkin and draw ribs of the pumpkin on the back.
- Draw pumpkins in a Halloween scene with hats, spiders, witch brooms, and bats.
While your kids are busy decorating, secretly bake them a yummy pumpkin pie as an appreciation for their creativity. Trust me; they'll feel amazing.
Don't miss our other fun pumpkin crafts including Pumpkin Coloring Page, Mickey Mouse Pumpkin, 3D Pumpkin Craft, and Pumpkin Pie Craft.
Using the Pumpkin Drawings
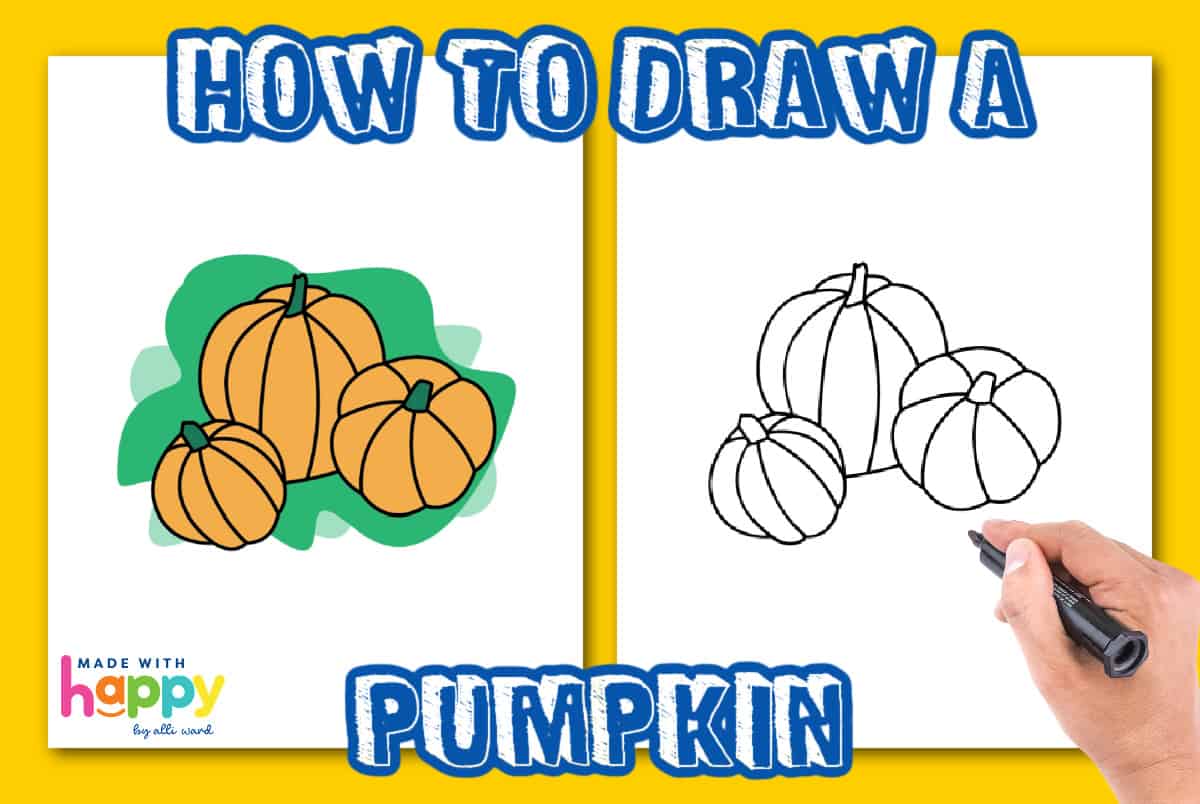
Use this drawing tutorial to make cute pumpkins and then fancy them up with your creative skills.
- Once the pumpkins are ready, you can cut them out and string them together to make a garland for your fireplace.
- You can also add popsicle sticks at the back of the pumpkins and use them as puppets.
- Frame the beautiful pumpkin drawings and hang them in the entryway for a holiday-appropriate welcome.
- If your littlest one can't draw yet, print free pumpkin coloring pages and give them chalk pastels or crayons to make their own art.
Learning to Draw a Pumpkin
Drawing funny and cute drawings together is a great way to bond with your child. They'll notice your presence and participation in their lives and be really happy about it.
Now, if you guys are ready with your texture paper and pencil, let's start drawing pumpkins.
You'll find an simple steps tutorial at the end of this page for more ease.
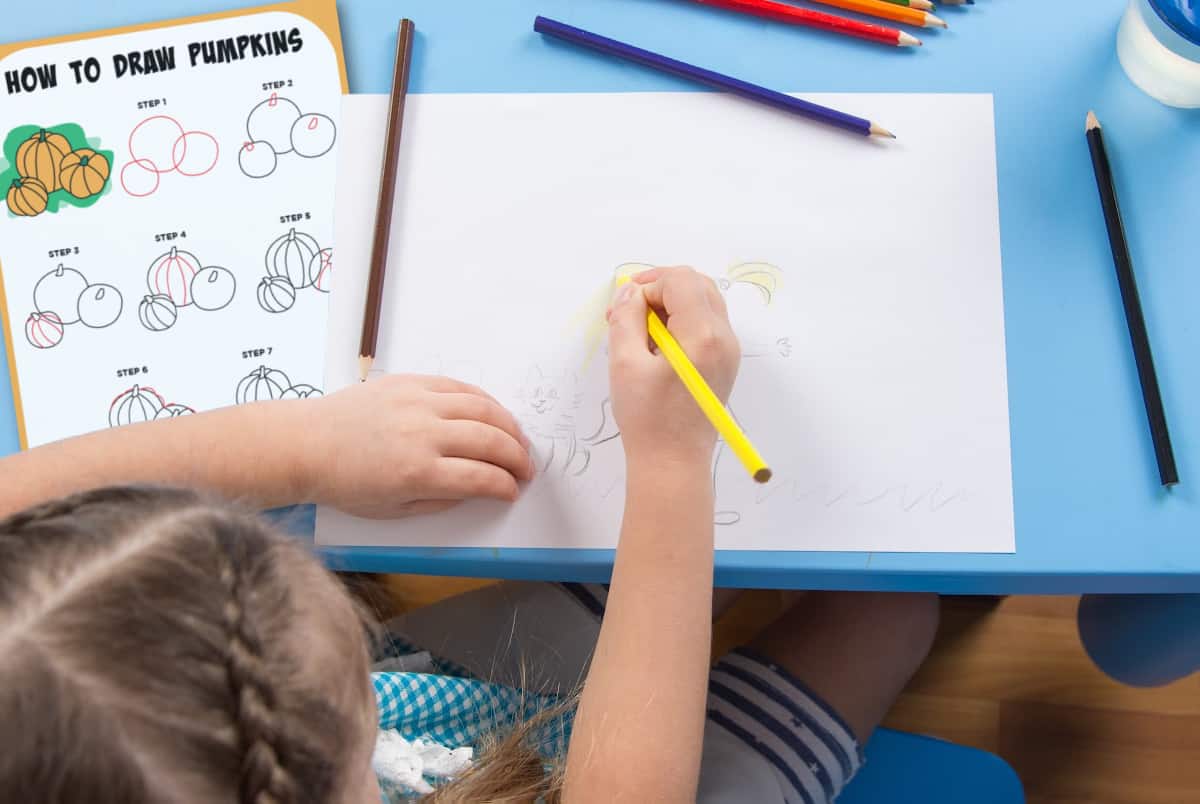
How to Draw a Pumpkin
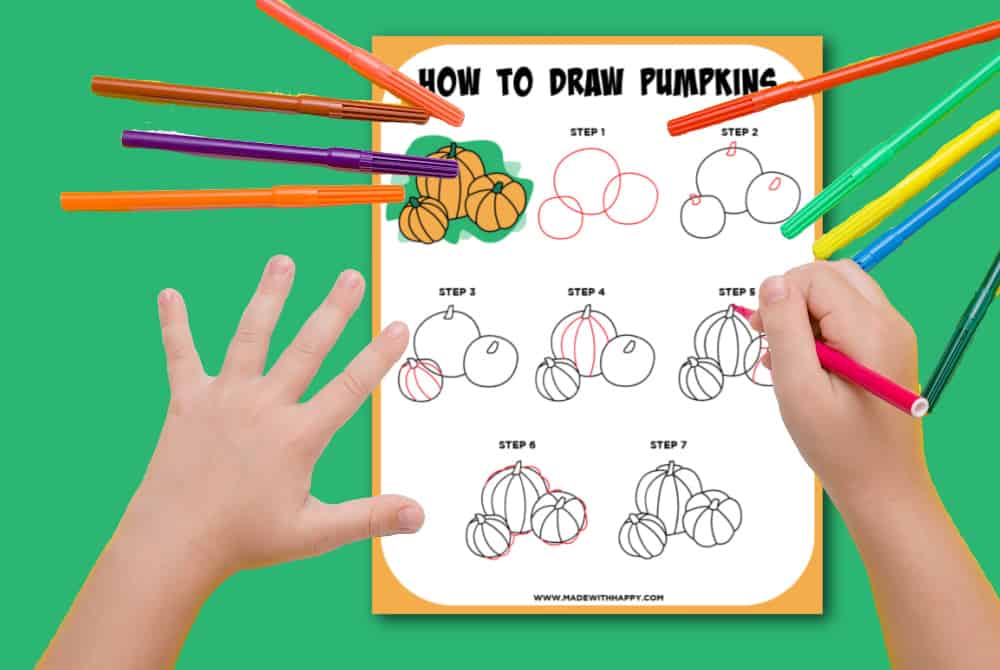
Start by printing out the beautiful pumpkin drawing step-by-step tutorial first as a guide.
Outline of The Pumpkin
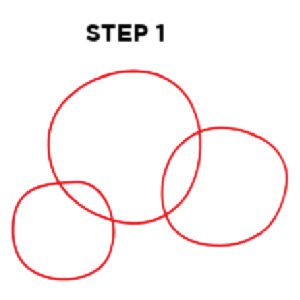
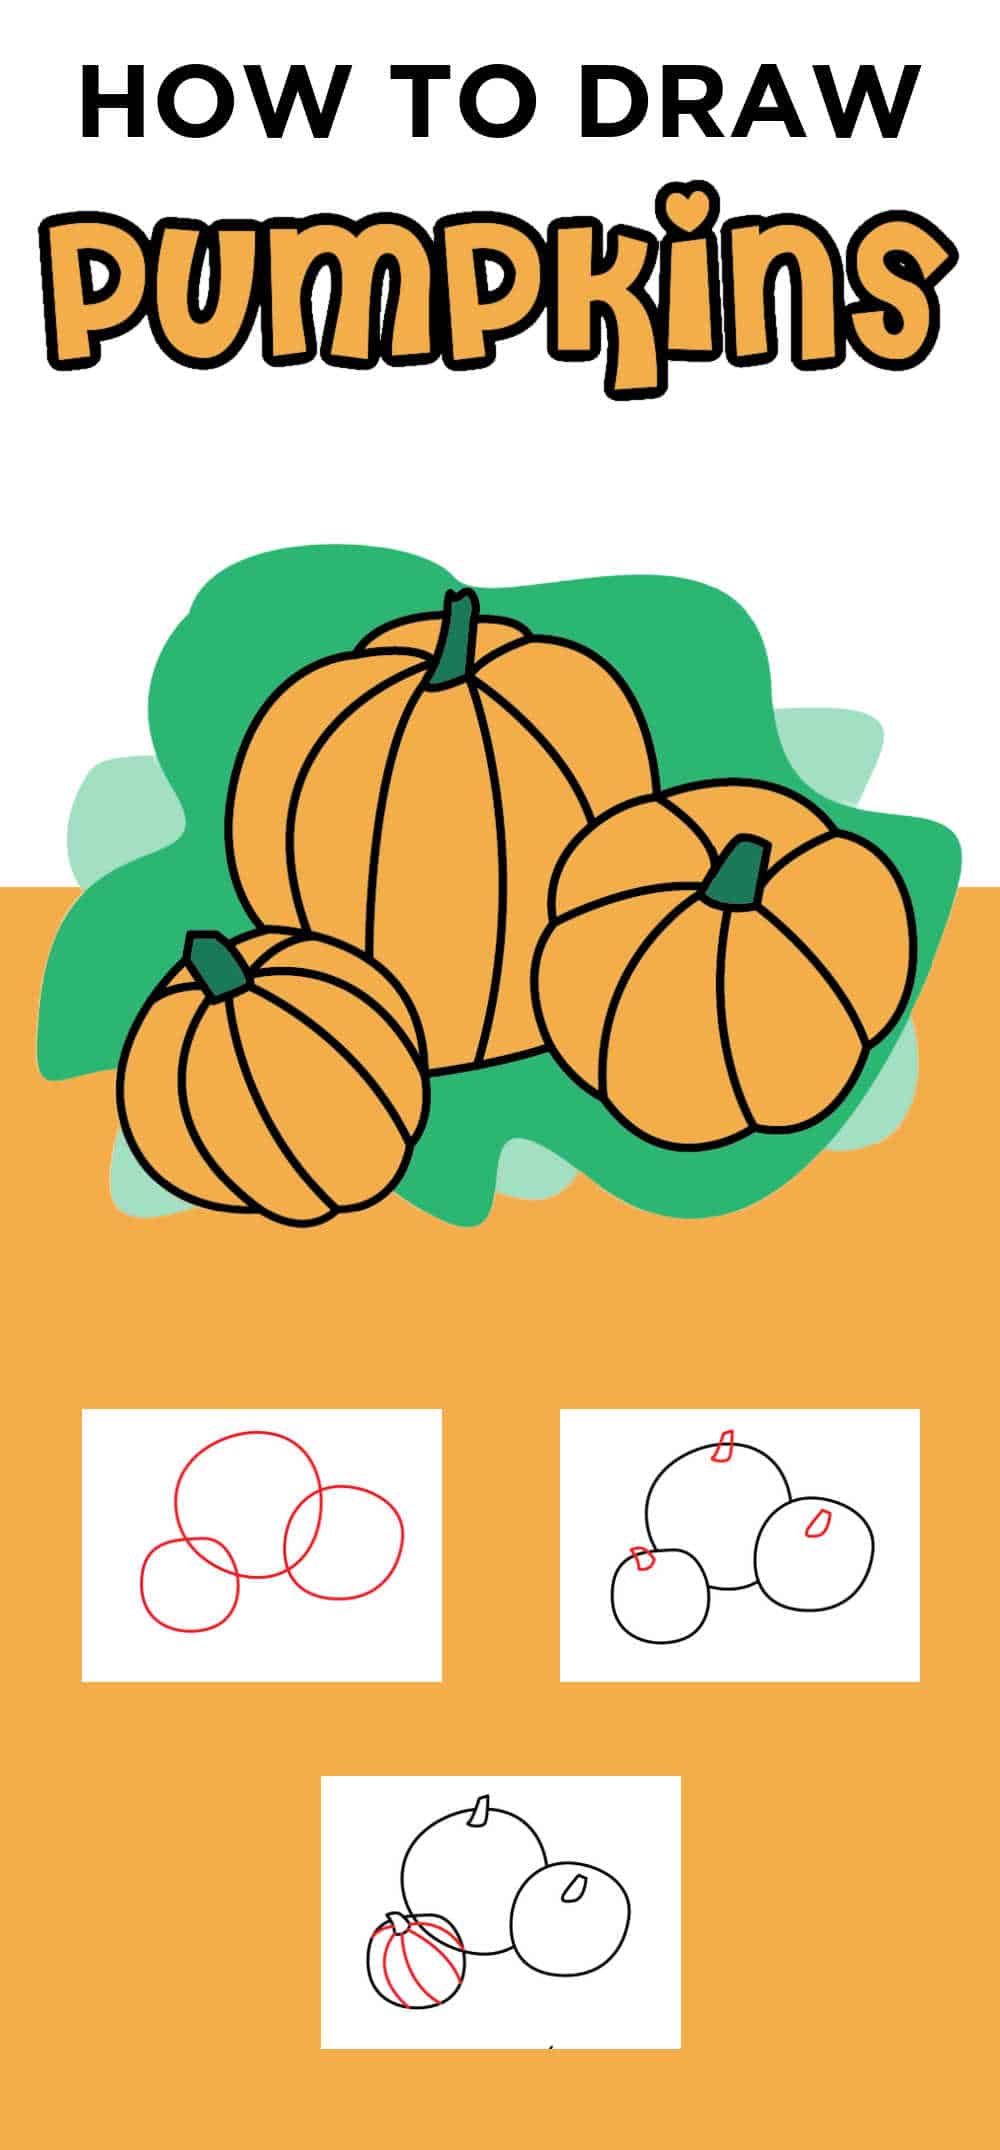
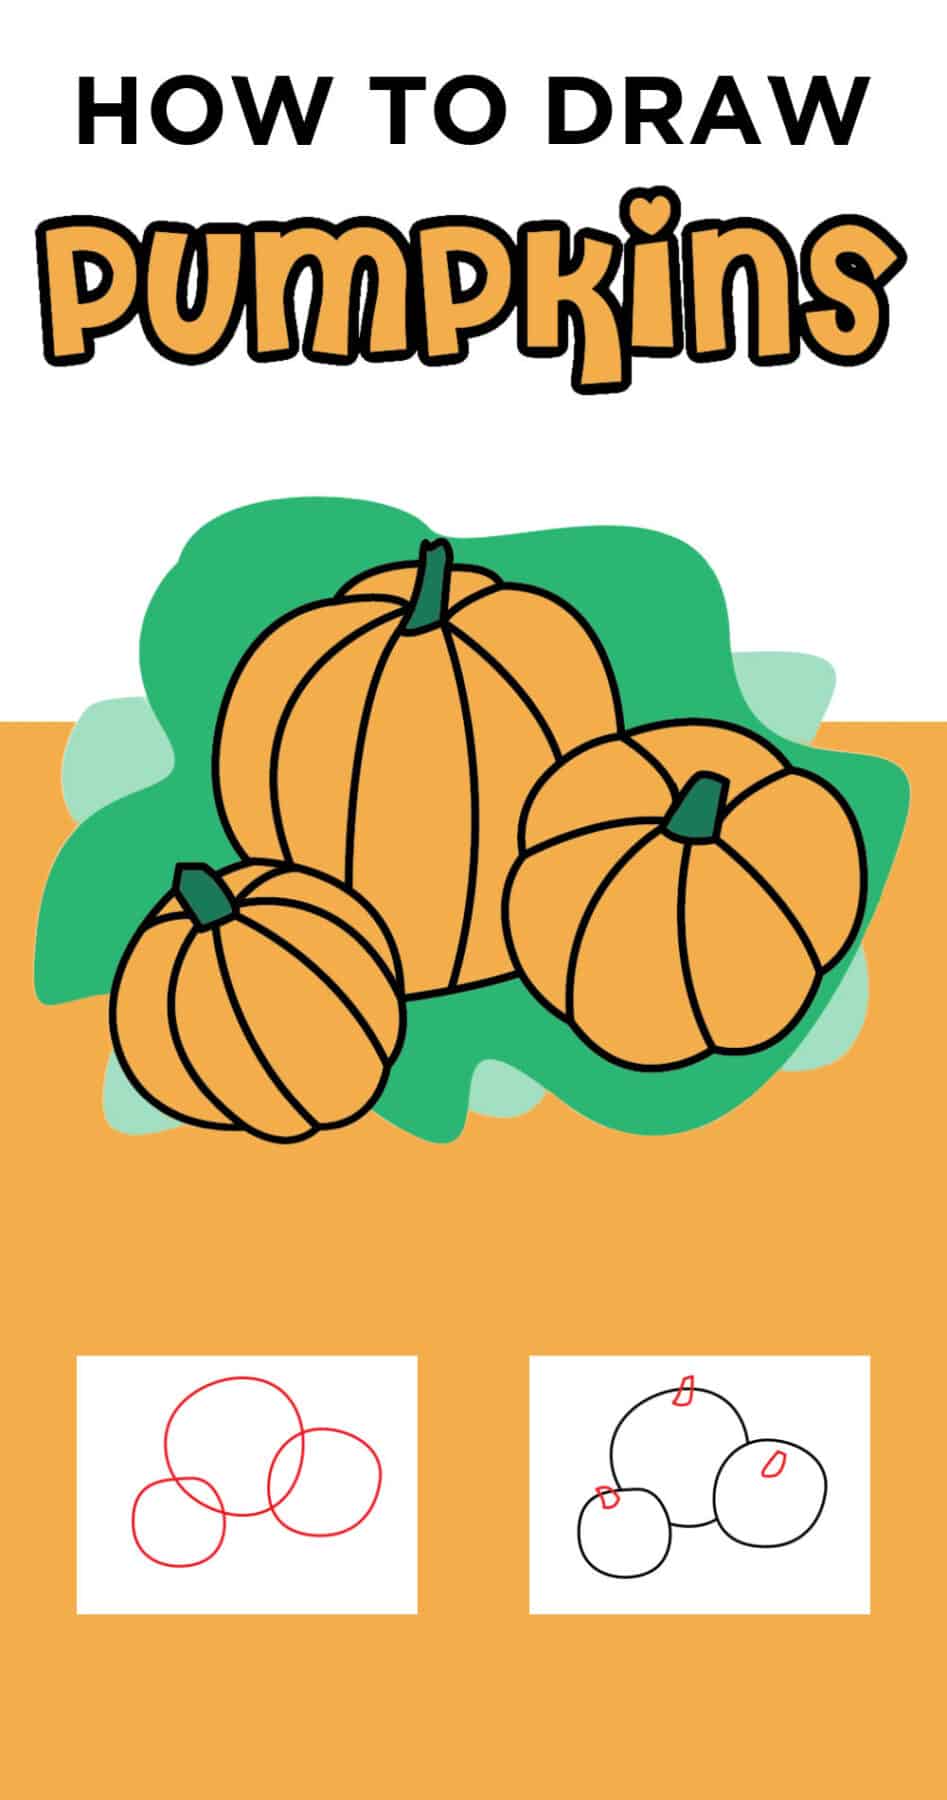
The base shape of a circle. The first step is to draw one larger circle in the middle and two others overlapping the middle one on either side.
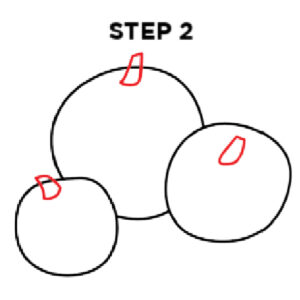
The next step is to draw small stems on the top of the pumpkin. Small curved lines drawing the basic shape of a stem.
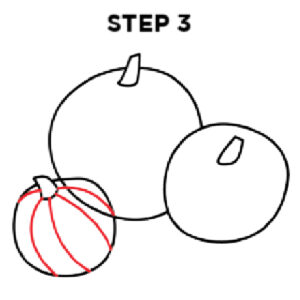
Next, draw some simple texture lines from the stem to the bottom of the pumpkin starting on the left side pumpkin.
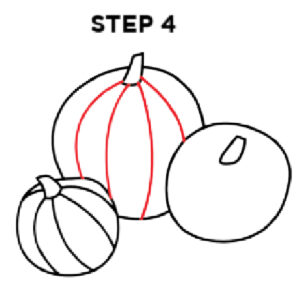
Next, draw the curved lines down the middle pumpkin.
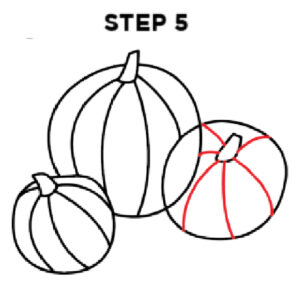
Draw lines down the side of the pumpkin on the right side.
Pumpkin Ridges
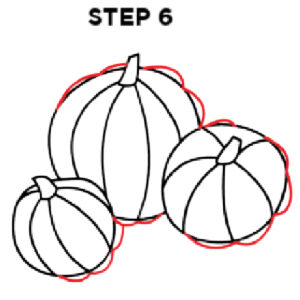
The next step is to draw small curved lines from each of the vertical lines along the outside of the pumpkin. Erase the lines from the initial circle and then these new lines will become the new shape of the pumpkin.
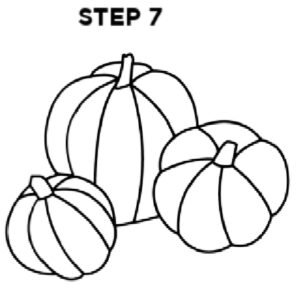
The final step is to outline the pumpkins with a black pen on the final lines and erase any extra lines you had while sketching each of the pumpkins.
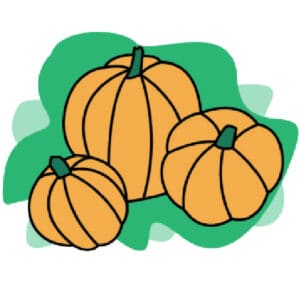
The last step is to treat your new real pumpkin drawing project as a coloring page and color in your pumpkins with your favorite crayons, colored pencils, markers, or even watercolor paint.
We highlighted this Fall Printables along with some other fun kid's crafts in our October Crafts for National Pumpkin Day - October 26th along with our 101+ Easy Kids Crafts.
You also do not want to miss our 101+ Coloring Pages For Kids and 101+ Printables For Kids full of Crafts and Coloring Pages.
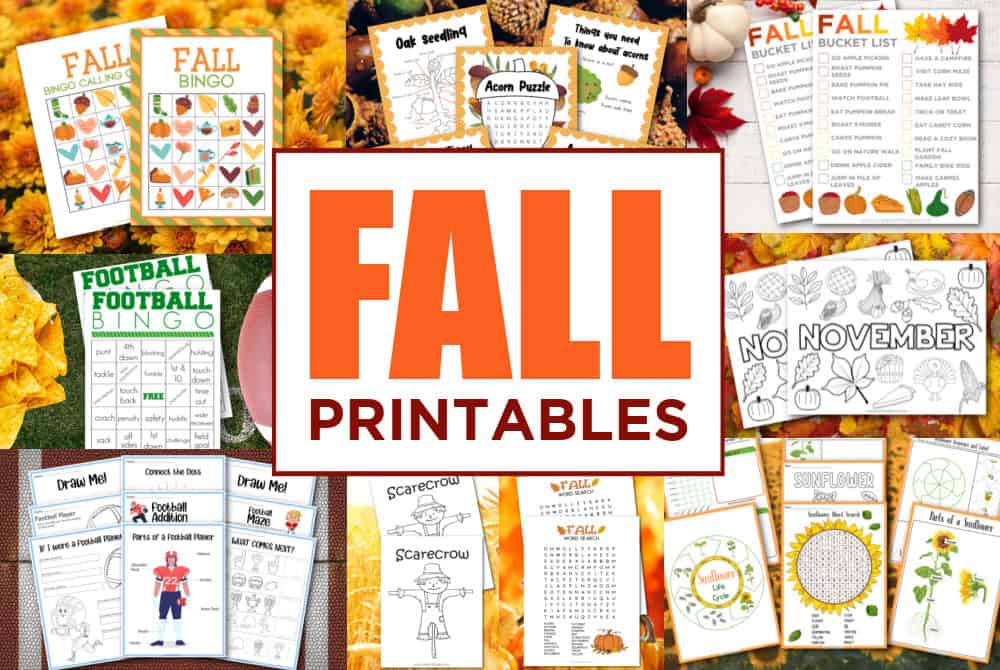
Other Fall Printables You'll Enjoy
- Fall Word Scramble
- Fall Color By Number
- Free Printable Fall Bingo
- Happy Fall Coloring Pages
- Fall Activity Sheets
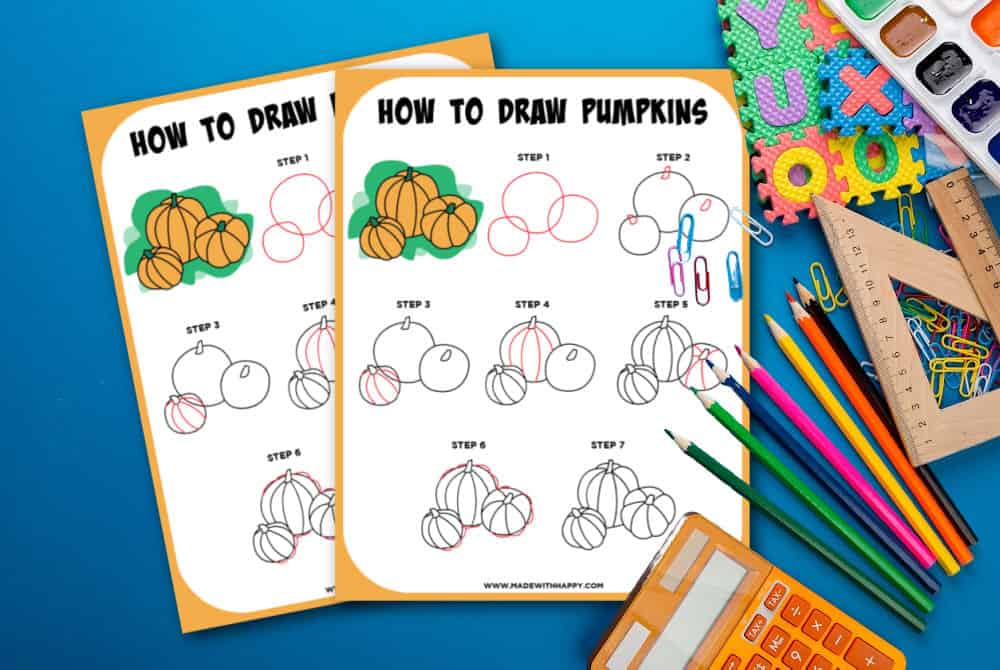
Download Free Pumpkin Drawing Tutorial
Enter your email address in form below and you'll be directed to the free printable pumpkin drawing tutorial pdf file.
*For personal use only
Pumpkin Drawing
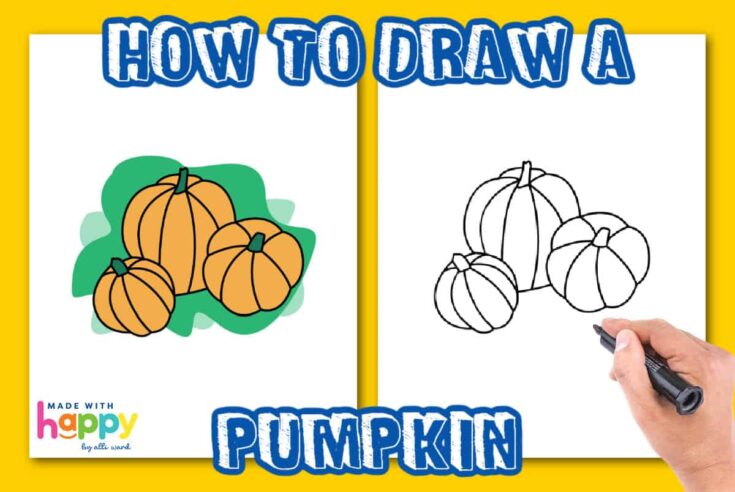
Learn the art of drawing a pumpkin with our step-by-step guide. Create your festive masterpieces with these easy instructions.
Materials
Tools
- Drawing Pencils
Instructions
The base shape of a circle. The first step is to draw one larger circle in the middle and two others overlapping the middle one on either side.
The next step is to draw small stems on the top of the pumpkin. Small curved lines drawing the basic shape of a stem.
Next, draw some simple texture lines from the stem to the bottom of the pumpkin starting on the left side pumpkin.
Next, draw the curved lines down the middle pumpkin.
Draw lines down the side of the pumpkin on the right side.
The next step is to draw small curved lines from each of the vertical lines along the outside of the pumpkin. Erase the lines from the initial circle and then these new lines will become the new shape of the pumpkin.
The final step is to outline the pumpkins with a black pen on the final lines and erase any extra lines you had while sketching each of the pumpkins.
The last step is to treat your new real pumpkin drawing project as a coloring page and color in your pumpkins with your favorite crayons, colored pencils, markers, or even watercolor paint.
CONNECT WITH MADE WITH HAPPY!
Be sure to follow me on social media, so you never miss a post!
Facebook | Twitter | Youtube | Pinterest | Instagram
Find and shop my favorite products on my Amazon storefront here!
How To Draw a Pumpkin
PIN IT TO YOUR DIY BOARD ON PINTEREST!
FOLLOW MADE WITH HAPPY ON PINTEREST FOR ALL THINGS HAPPY!


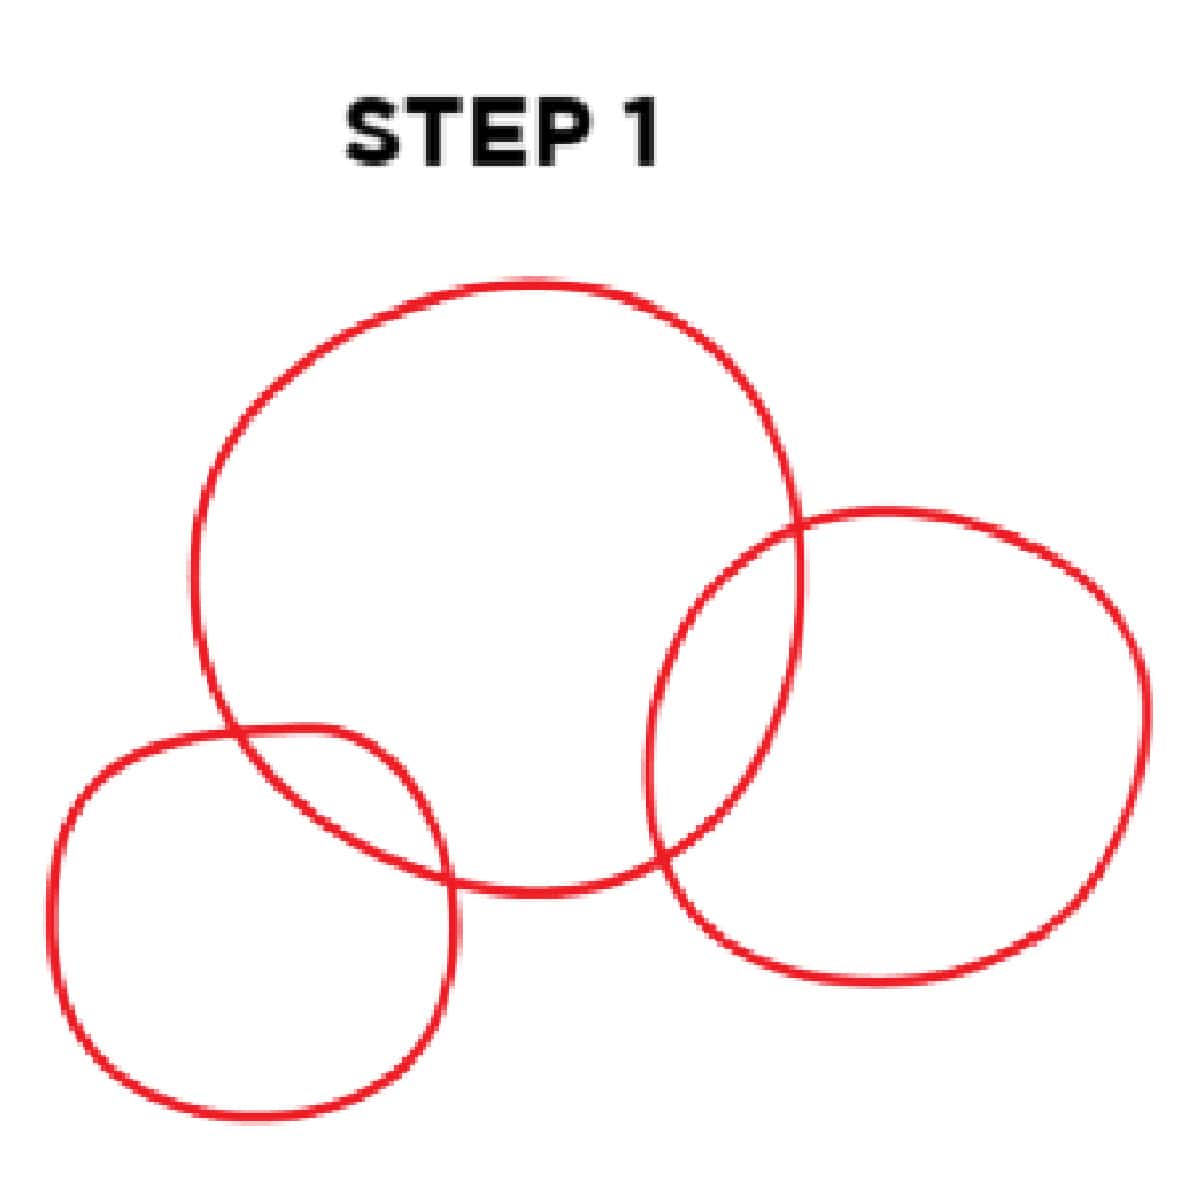 The base shape of a circle. The first step is to draw one larger circle in the middle and two others overlapping the middle one on either side.
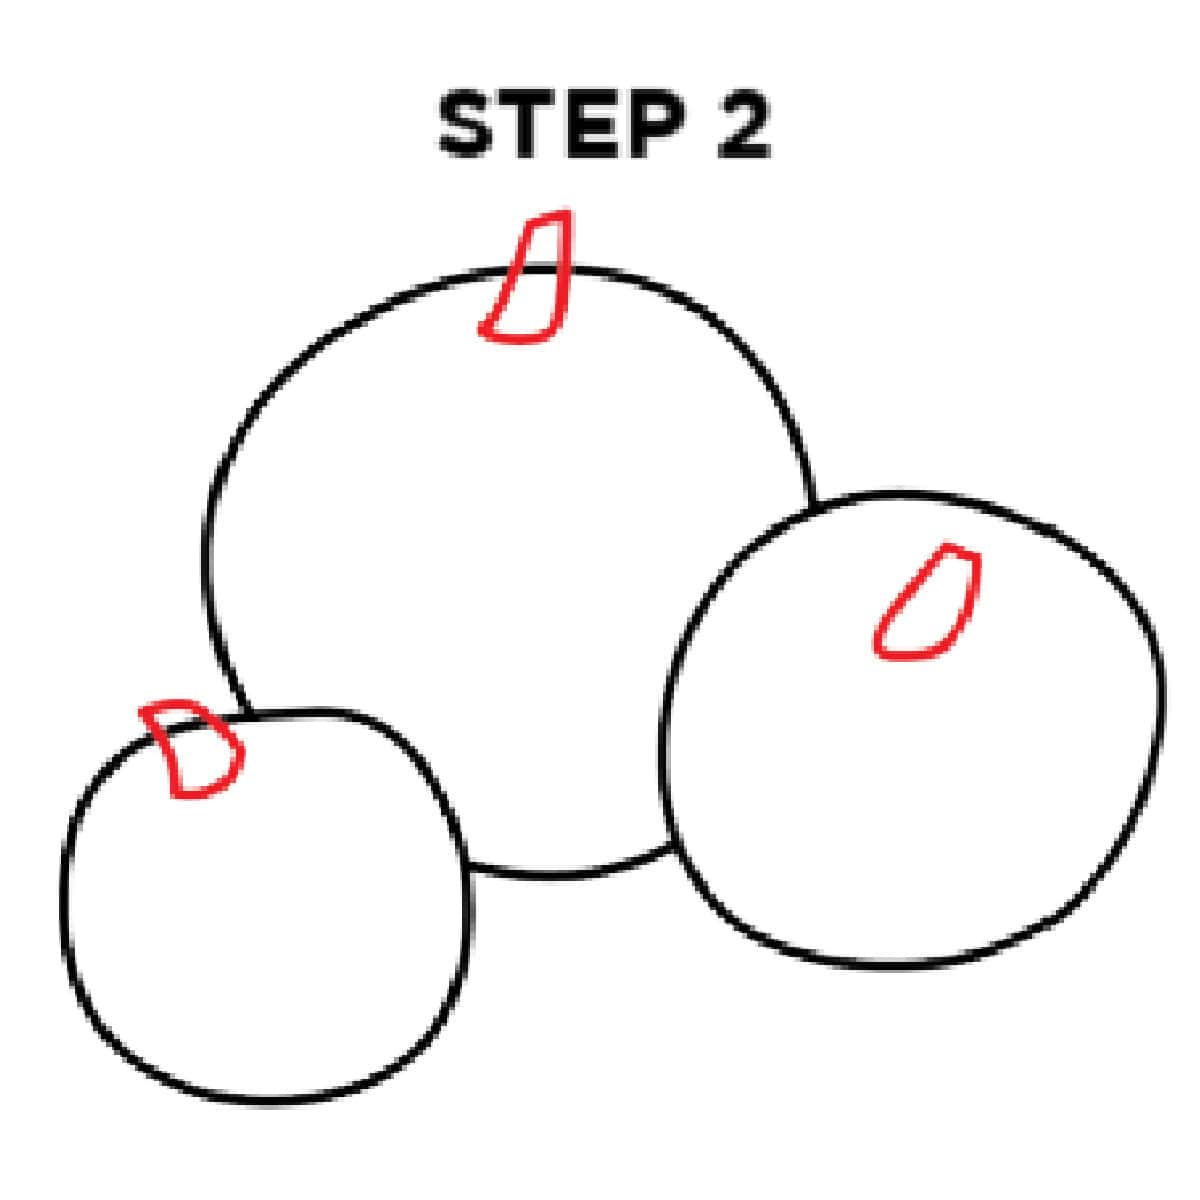 The next step is to draw small stems on the top of the pumpkin. Small curved lines drawing the basic shape of a stem.
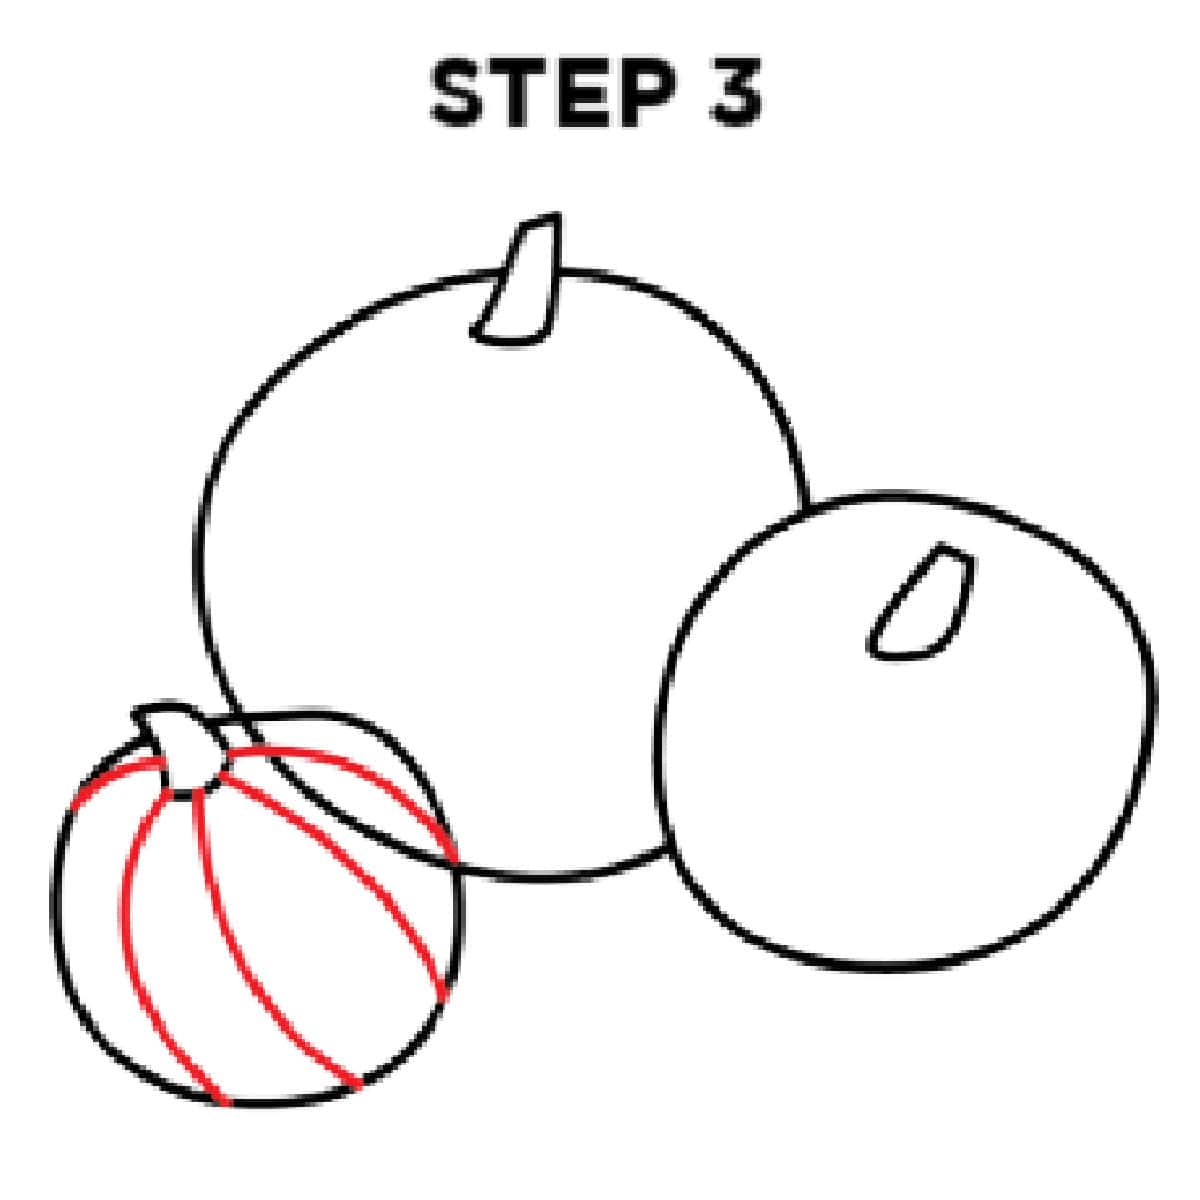 Next, draw some simple texture lines from the stem to the bottom of the pumpkin starting on the left side pumpkin.
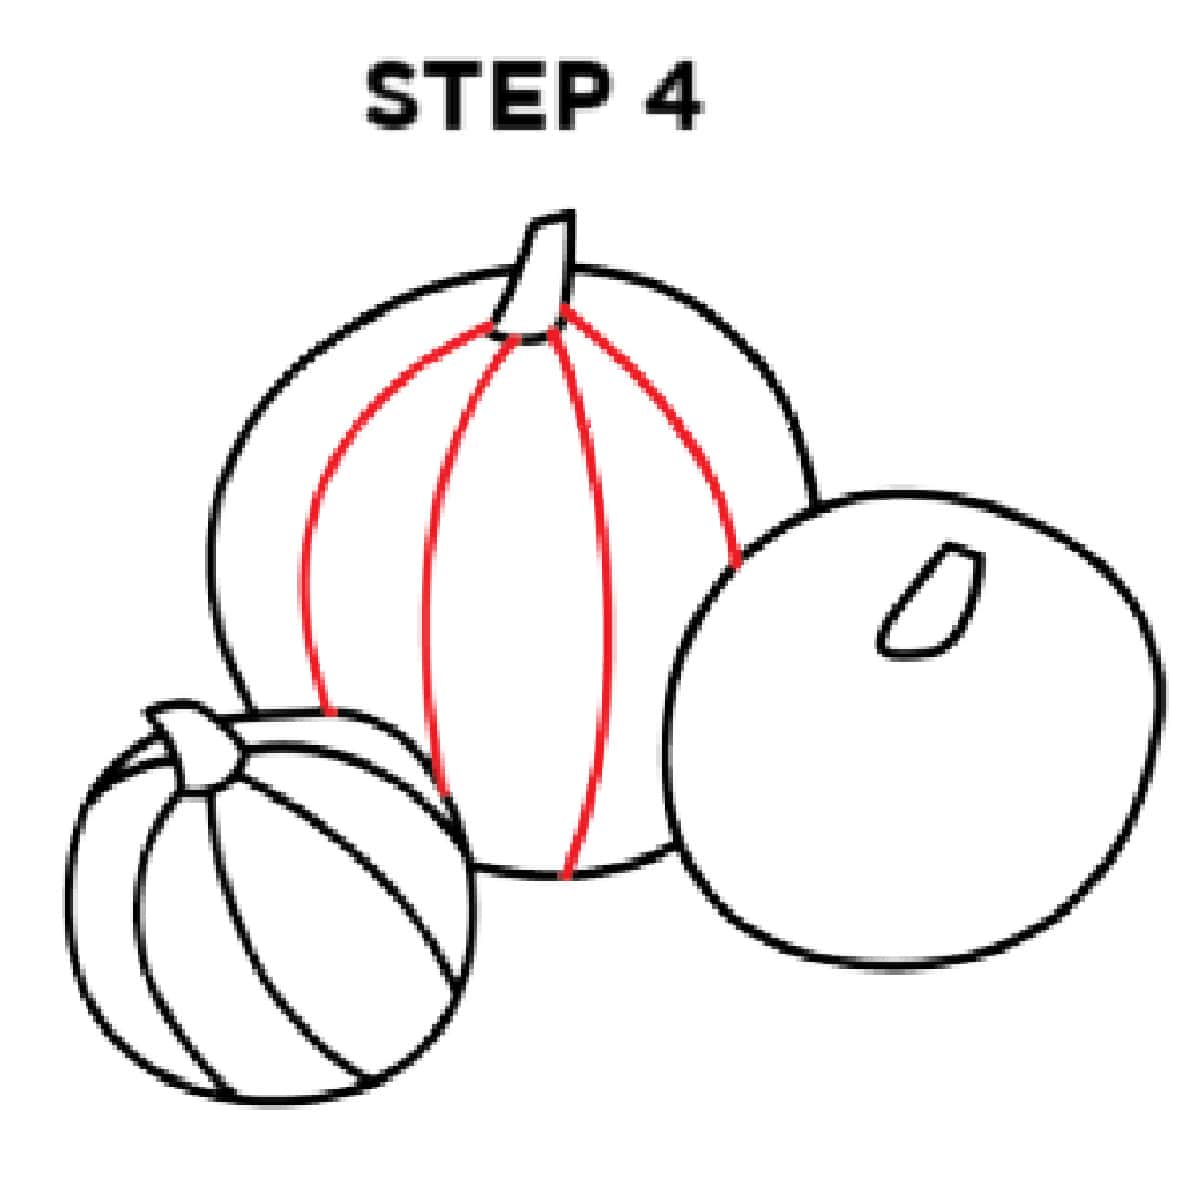 Next, draw the curved lines down the middle pumpkin.
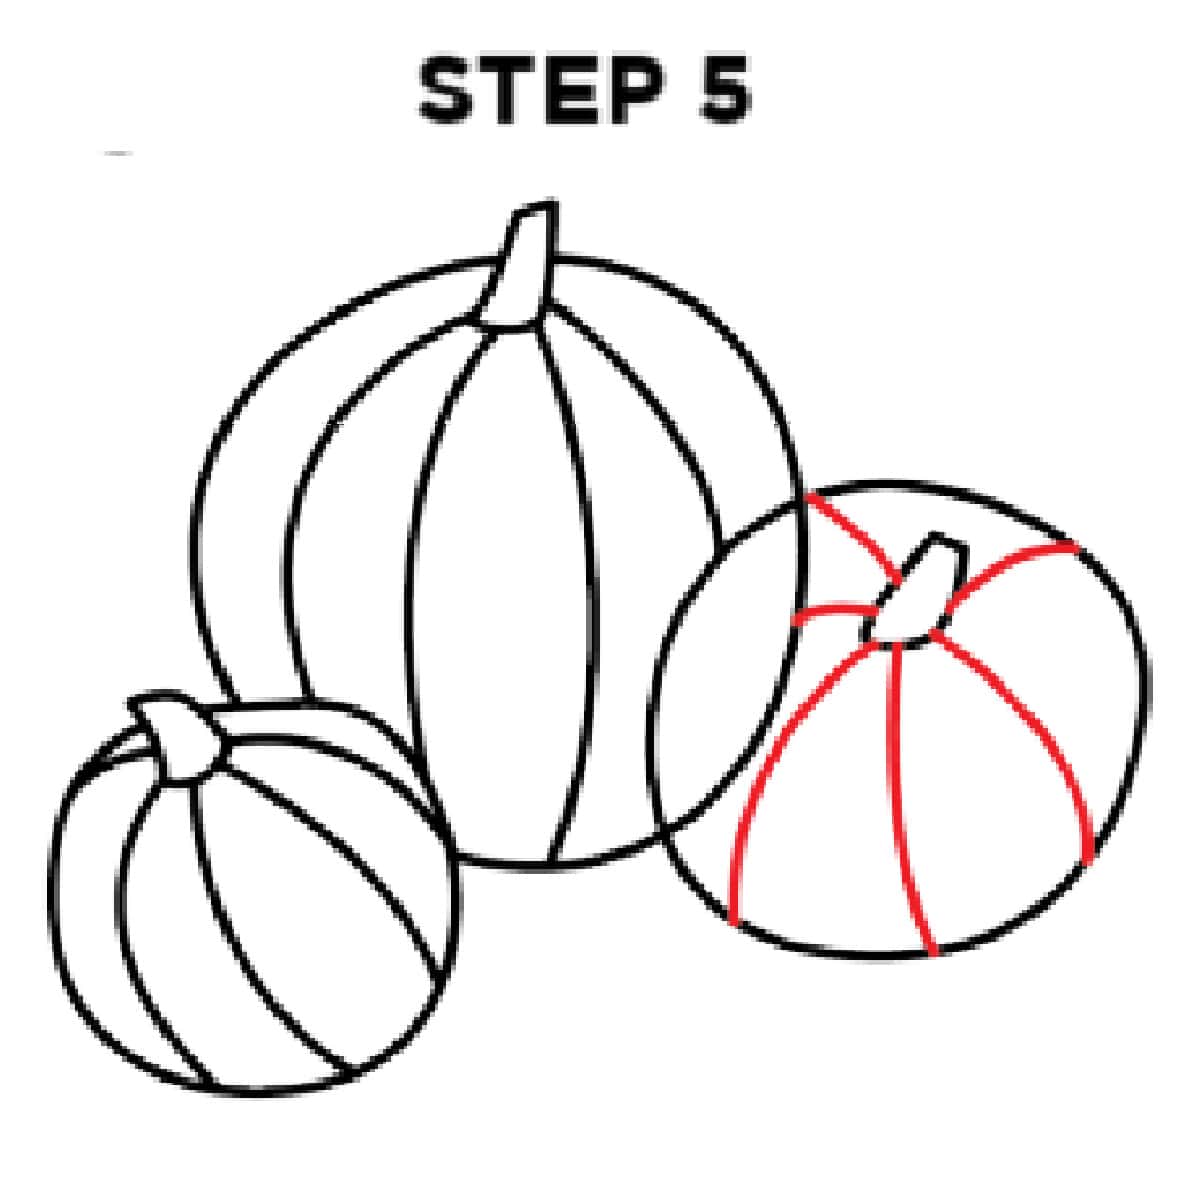 Draw lines down the side of the pumpkin on the right side.
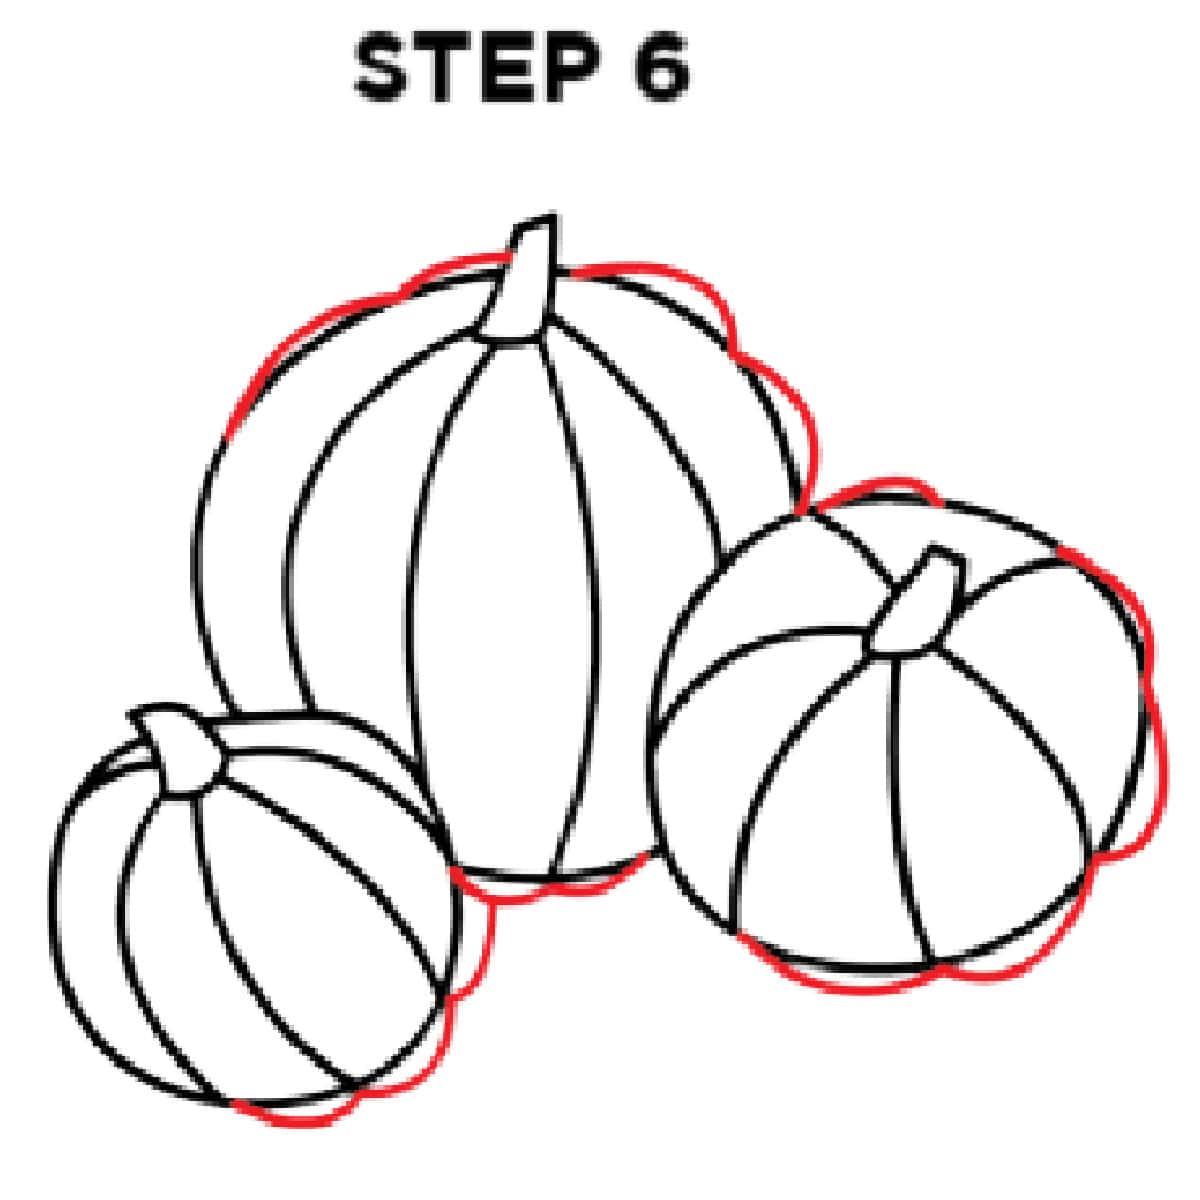 The next step is to draw small curved lines from each of the vertical lines along the outside of the pumpkin. Erase the lines from the initial circle and then these new lines will become the new shape of the pumpkin.
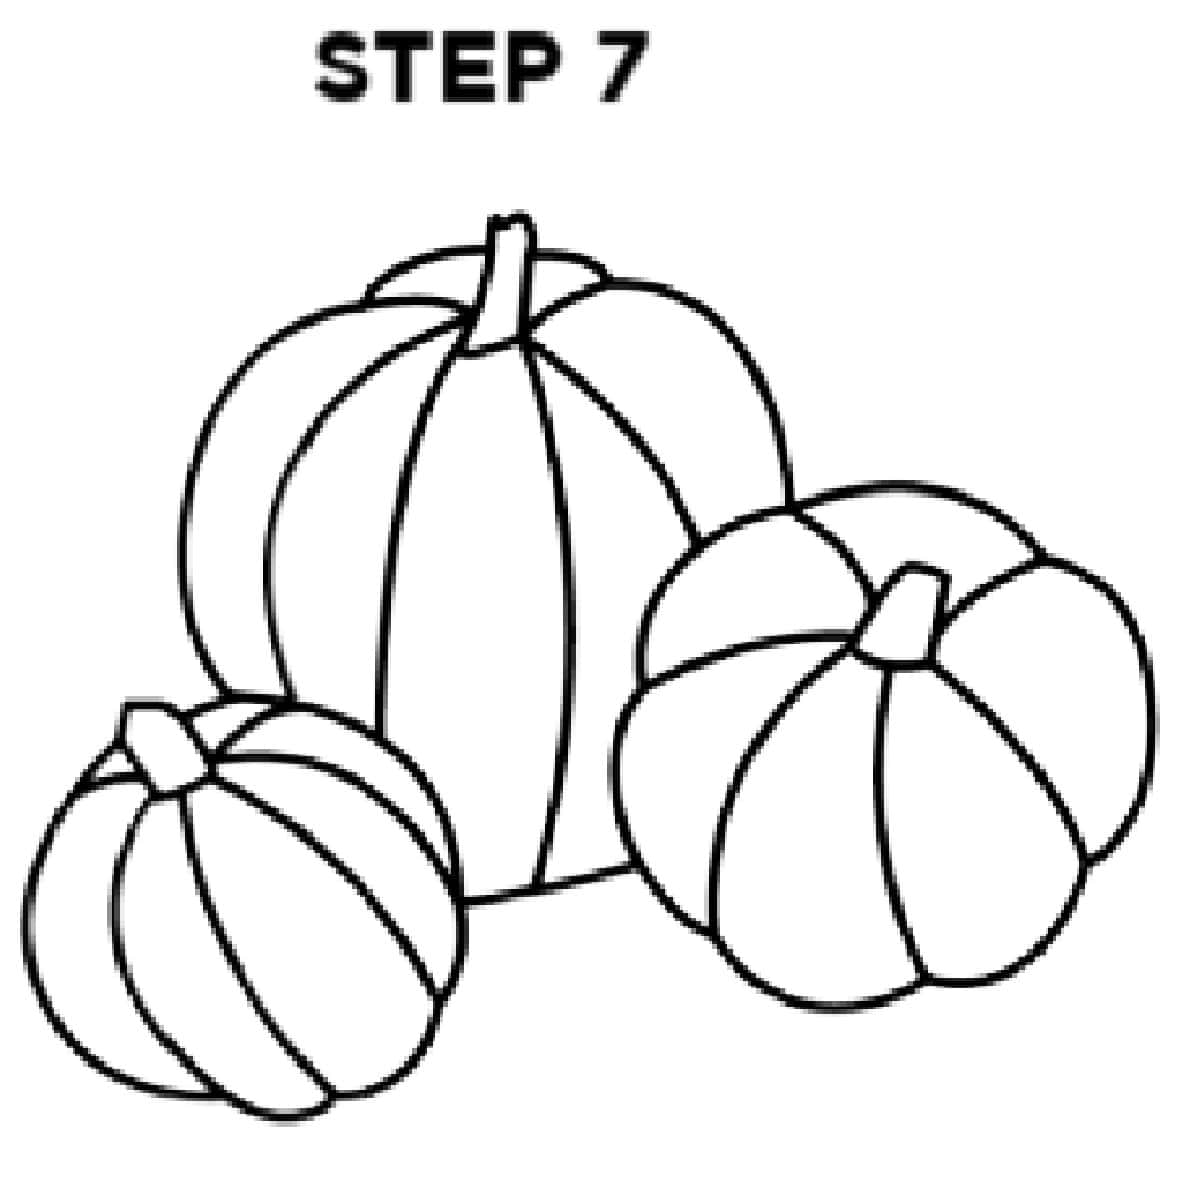 The final step is to outline the pumpkins with a black pen on the final lines and erase any extra lines you had while sketching each of the pumpkins.
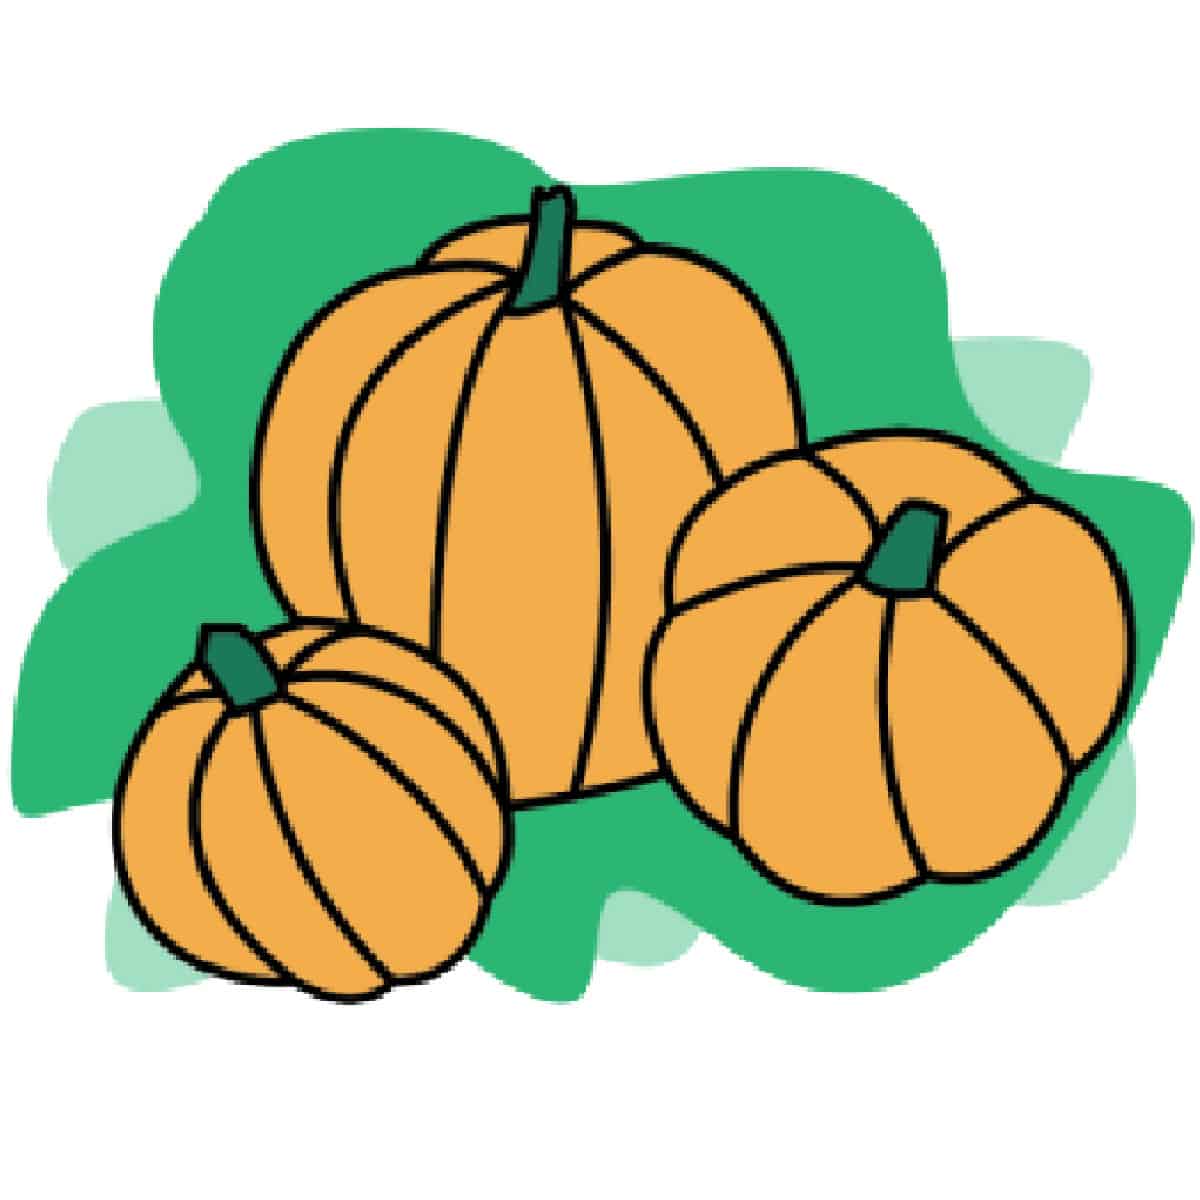 The last step is to treat your new real pumpkin drawing project as a coloring page and color in your pumpkins with your favorite crayons, colored pencils, markers, or even watercolor paint.