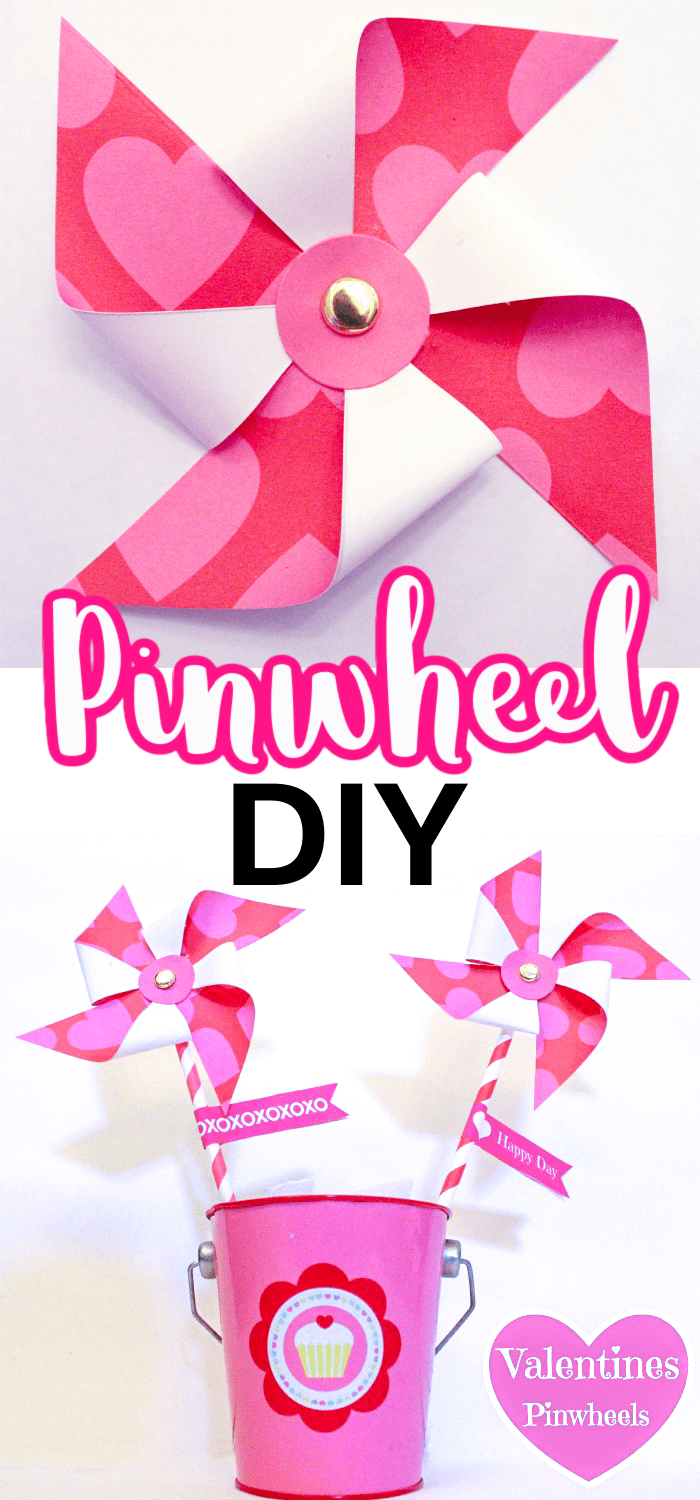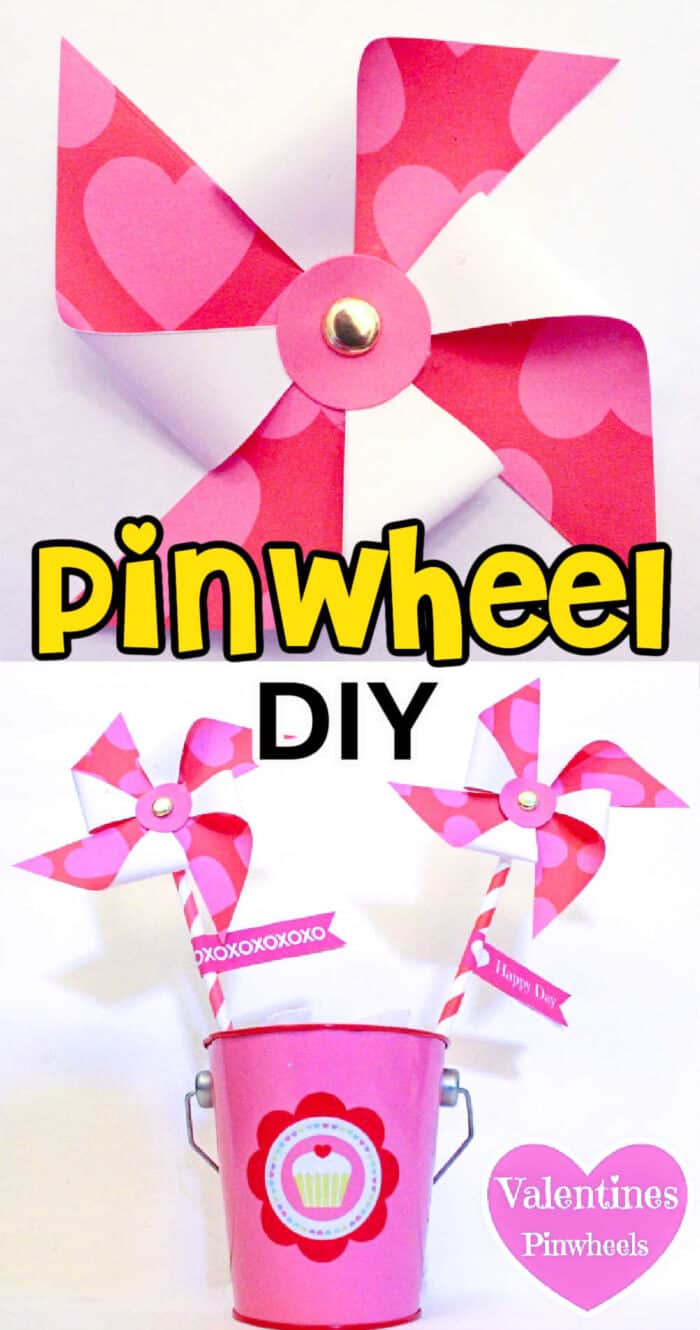
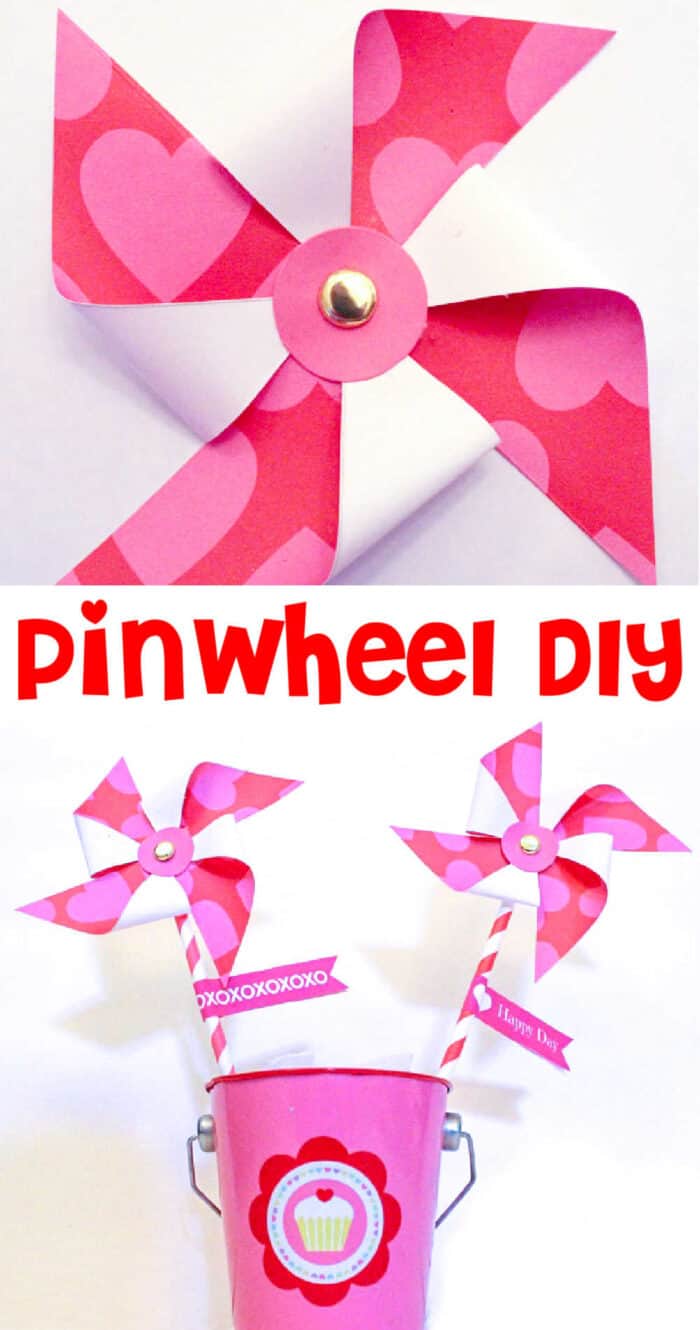
We are sharing how to create these fun and whimsical pinwheel DIYs. With just a few supplies, we are creating paper pinwheel crafts for kids.
Want to save this project?
Enter your email below, and then we'll send it straight to your inbox. Plus get awesome new projects from us each week.
These pinwheel DIY crafts are fun paper crafts for kids of all ages. They make a great Valentine to hand out to friends too!
Valentine's Day is one of our favorite seasons. All the Love! Do not miss our Valentine's posts including Bubble Valentines, 21+ Heart Craft Projects For Kids, and 15+ FREE Valentines Printables.
Paper Pinwheels DIY
Today is January 14th and you know what that means...
We are one month away from the LOVE-liest and most HEARTwarming holidays of them all! Valentines Day!!! YAY!
Look for some great ideas coming your way over the next month, January and February. We'll be showing you all kinds of DIY Projects including everything from heart craft projects, to party decorations, to what to wear for a romantic night, to kid's valentines cards. We are excited. We hope you are too.
To kick off the fabulous holiday, today we're giving showing you a fabulously easy paper craft for kids that are sure to put the wind in their sail.
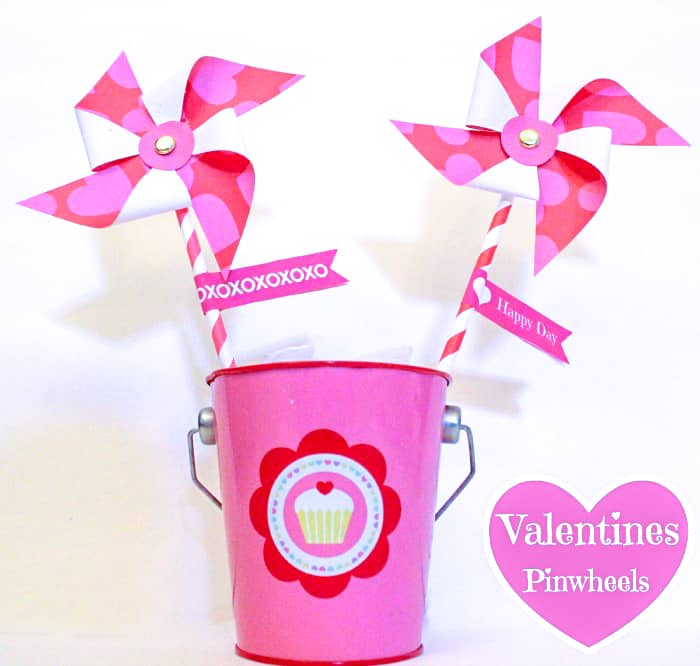
DIY Valentines Pinwheels
What makes these little beauties even sweeter is that they are pretty easy to make. Have fun making this Valentines Craft for Kids!
Don't miss our other Valentine's Cards For Kids that we know you'll love.
Supplies For Pinwheel Craft

- One piece of 8.5x11 craft paper - we chose a red paper with pink hearts
- One more piece of paper for the circles in the center of the pinwheels
- Paper Straws
- Brass Fasteners
- Scissors
- Glue
- Circle Cutter (if you have one)
How to Make Paper Pinwheels
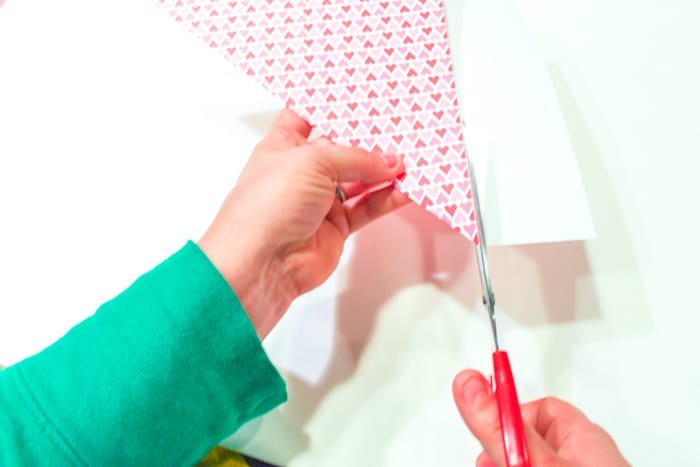
The first step is to cut your paper into squares.
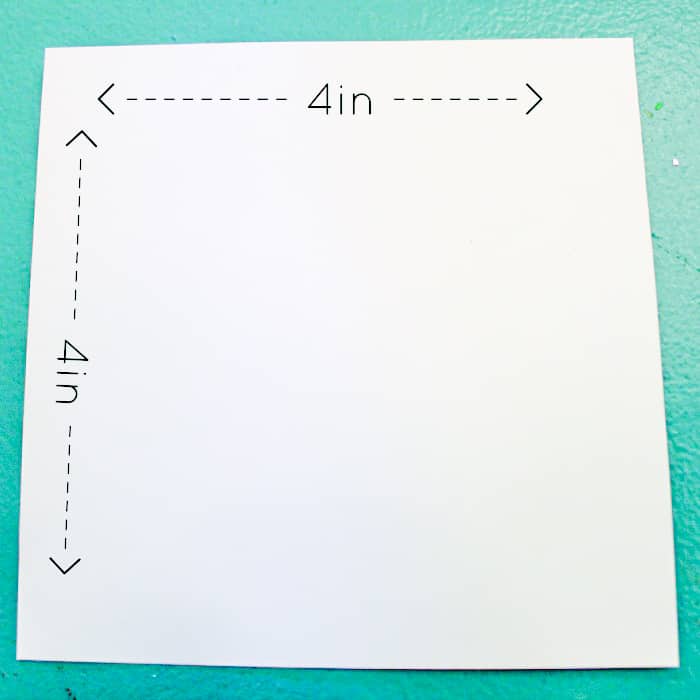
There are a few ways to do this. If you have a ruler and want to measure out four 4 inches by 4-inch squares you can do it that way.
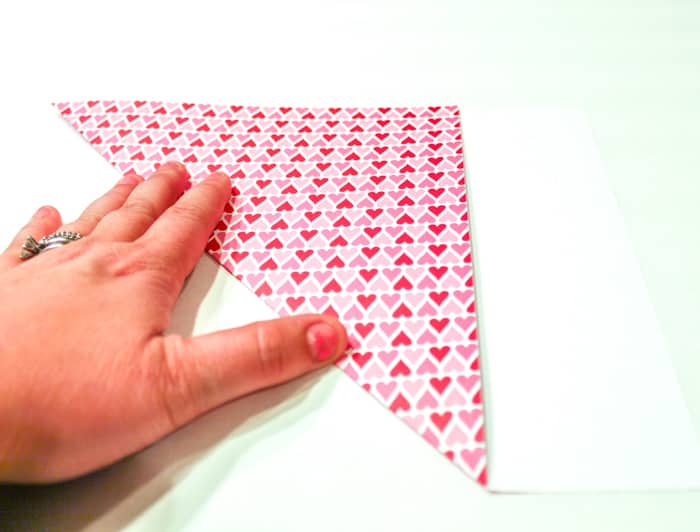
If you don't have a ruler, here is an easy way to measure out four even squares from an 8.5x11 piece of paper. Fold the short end corner over to line up with the side of the paper.
Then cut the extra paper off the end. From there fold the square in half and cut. Then fold each of the halves in half again and cut. Viola, you have yourself super easy four square pieces of paper.
Assembling Paper Pinwheel DIY
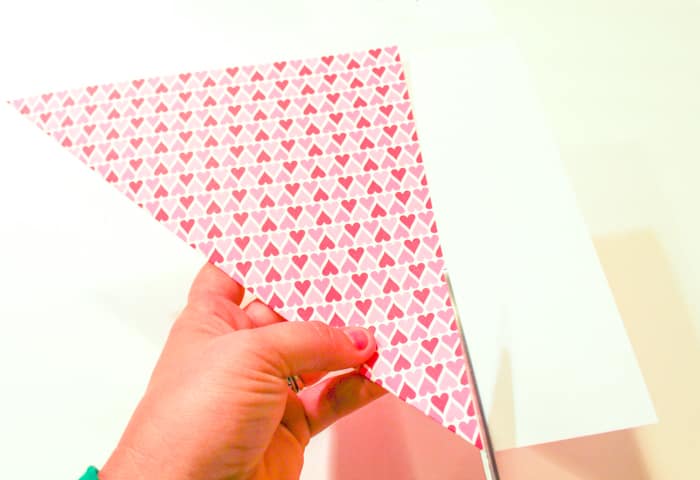
Once you have your roughly 4 inches by 4-inch piece of paper (however you get to it). Fold the piece of paper diagonally lining up corner to corner, and then unfold.
Fold the other two corners together and then unfold.
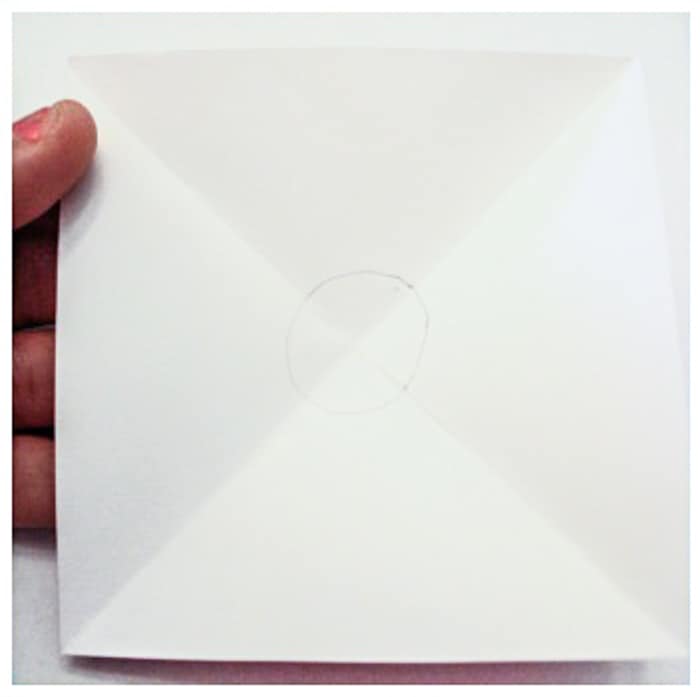
Draw a circle approximately an inch in diameter around the center.
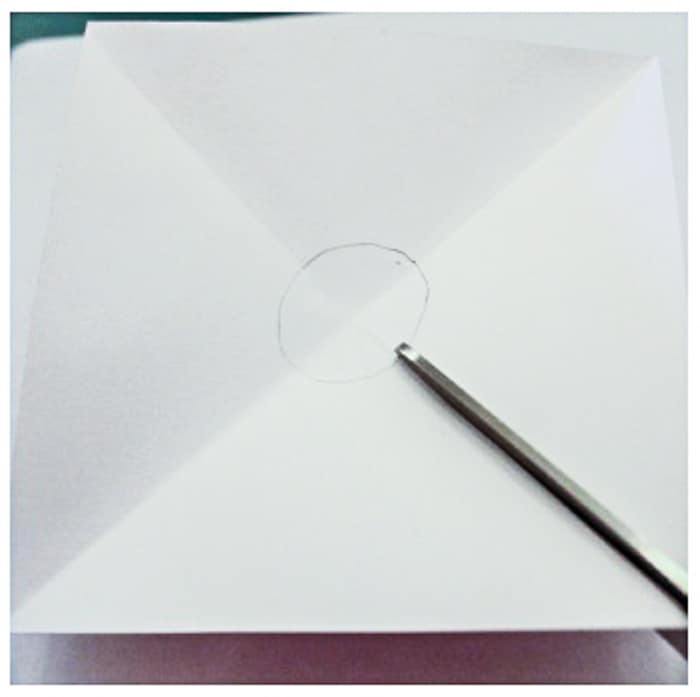
Using the scissors, cut along the folded lines of the paper down to the circle.
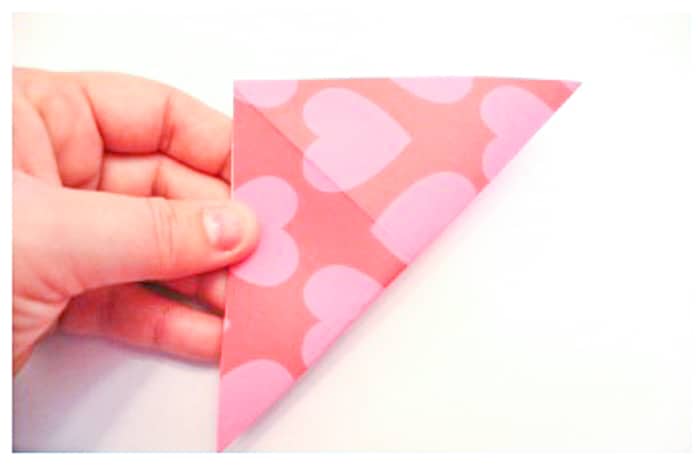
Using your circle cutter or drawing compass or simply free-hand, draw and cut out a circle approximately 1 inch in diameter. This will be the center of your pinwheel, so pick a colored paper to coordinate.
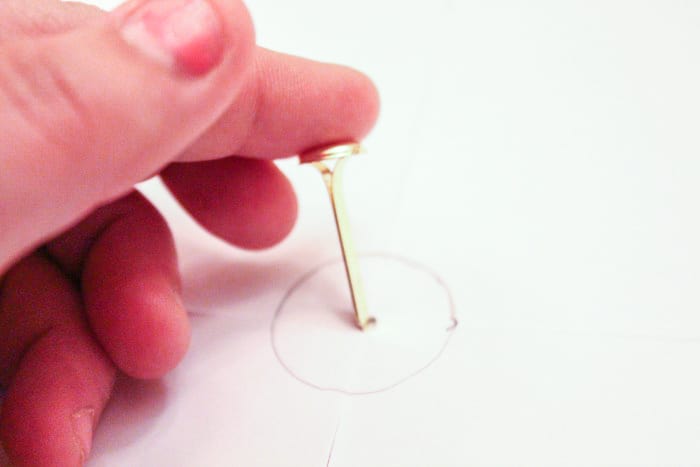
Either using the scissors or the fastener itself, make a hole through the center of the paper.
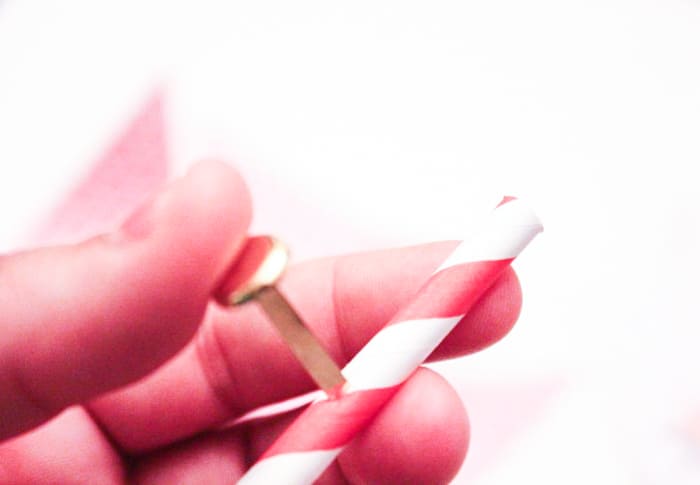
Then using the same method, make a hole through the straw, approximately an inch from one end.

In the case you have two-sided paper, make sure you are drawing the backside. Glue the tip of the paper to the center using glue folding it forward on the front side of the pinwheel.
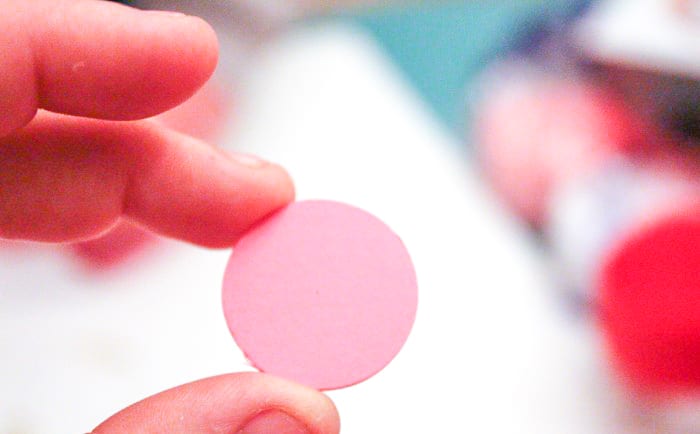
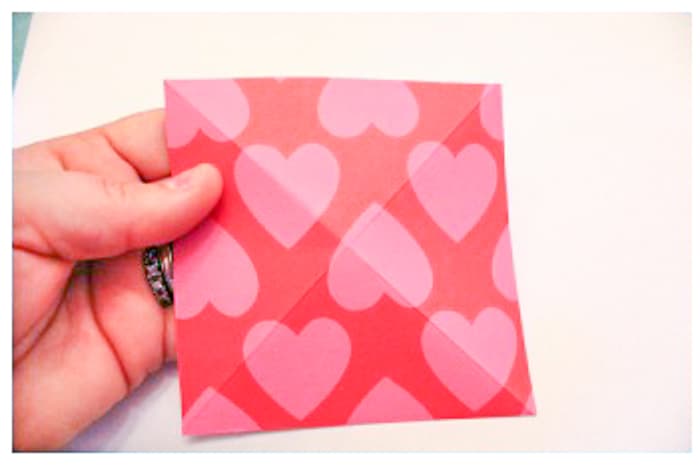
Now using the glue attach the 1-inch circle you cut for the center of the pinwheel over the edges you just glued down.

Make a hole through the middle of the paper, center of the square, and attach the fastener through the pinwheel and straw and expand on the back. Attaching the pinwheel
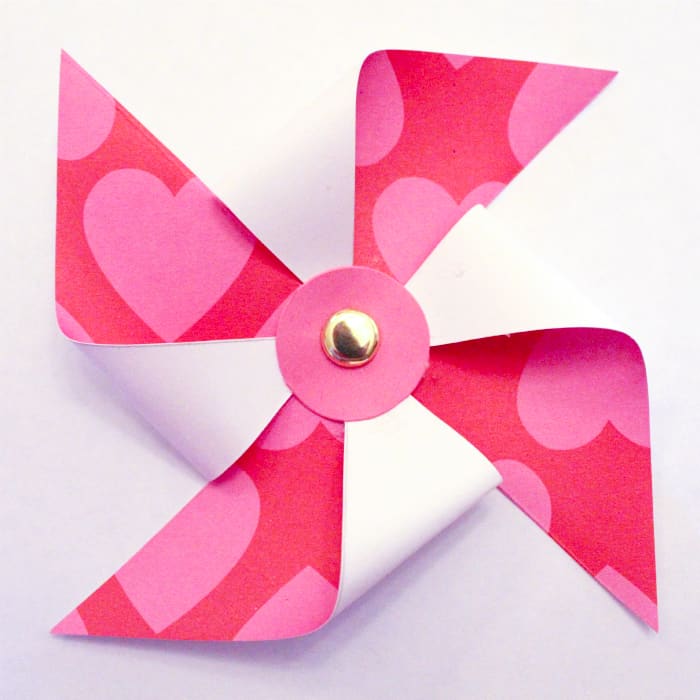
Viola, you have yourself a pinwheel!
We highlighted this Valentine's Paper Craft along with some other fun kid's crafts in our February Crafts for Kids along with our 101+ Easy Craft Ideas for kids.
You also do not want to miss our 33+ Easy Construction Paper Crafts and 101+ Free Kids Printables full of Crafts & Coloring Pages.
Additional Questions
Here are some questions you might have now that you've started this project:
If you do not have a brad or pin for the pinwheel, you can easily use a pipe cleaner in the middle. Twist the top of the pipe cleaner into a small knot or ball and then slip the long end through the back of the pinwheel and wrap it around the straw or pencil.
The pinwheel we made above is great for kids. If you are finding that your pinwheels spin isn't as great as you would like, then make the hole in the center using a hole punch.
If you do not have a brad or paper fastener, then you can use a pin, and instead of a straw, use a pencil. Simply pin the pin to the side of the pencil eraser and viola.
Download a Happy Note For Valentines
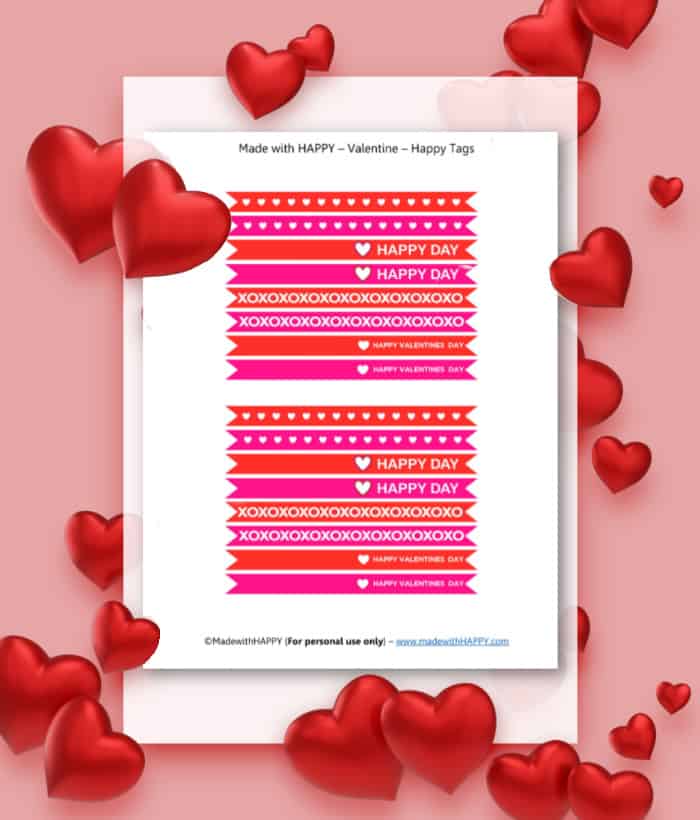
I created a few sweet tags you can attach to the straw if you are giving them out as Valentine. Enter your email below and it will take you straight to the document.
Other Valentines Printables You'll Love
- VALENTINES DIY CANDY BAR WRAPPERS
- FREE DRAGONFLY TOY PRESCHOOL VALENTINES PRINTABLE
- PRINTABLE VALENTINES DAY PUNS BOOKMARKS
- HAPPY VALENTINES DAY COLORING SHEETS
- VALENTINES DAY SUCCULENTS

Paper Pinwheel DIY
We are sharing how to create these fun and whimsical pinwheel DIYs. With just a few supplies, we are creating paper pinwheel craft for kids.
Equipment
Ingredients
- One piece of 8.5x11 craft paper - we chose red paper with pink hearts
- One more piece of paper for the circles in center of the pinwheels
- Paper Straws
- Brass Fasteners
- Glue
- Circle Cutter optional
Instructions
- First step is to cut your paper into squares.

- There are a few ways to do this. If you have a ruler and want to measure out four 4 inch by 4 inch squares you can do it that way.

- If you don't have a ruler , here is an easy way to measure out four even squares from a 8.5x11 piece of paper. Fold the short end corner over to line up with the side of the paper. Then cut the extra paper off the end. From there fold the square in half and cut. Then fold each of the halves in half again and cut. Viola, you have yourself four square pieces of paper.

- Once you have your roughly 4 inch by 4 inch piece of paper (however you get to it). Fold the piece of paper diagonally lining up corner to corner, and then unfold.

- Fold the other two corners together and then unfold.

- Draw a circle approximately an inch in diameter around the center.
- Using the scissors, cut along the folded lines of the paper down to the circle.
- Draw a simply free-hand, and cut out a circle approximately 1 inch in diameter.
- This will be the center of your pinwheel, so pick a colored paper to coordinate.

- Either using the scissors, or the fastener itself, make a hole through the center of the paper.
- Then using the same method, make a hole through the straw, approximately an inch from one end.

- In the case you have two sided paper, make sure you are drawing the back side.

- Glue the tip of the paper to the center using glue folding it forward on the front side of the pinwheel.
- Now using the glue attach the 1 inch circle you cut for the center of the pinwheel over the edges you just glued down.
- Make a hole through the center and attach the fastener through the pinwheel and straw and expand on the back.
- Viola, you have yourself a pinwheel!


Video
CONNECT WITH MADE WITH HAPPY!
Be sure to follow me on social media, so you never miss a post!
Facebook | Twitter | Youtube | Pinterest | Instagram
Find and shop my favorite products in my Amazon storefront here!
PINWHEEL DIY
PIN IT TO YOUR FAVORITE BOARD ON PINTEREST!
FOLLOW MADE WITH HAPPY ON PINTEREST FOR ALL THINGS HAPPY!