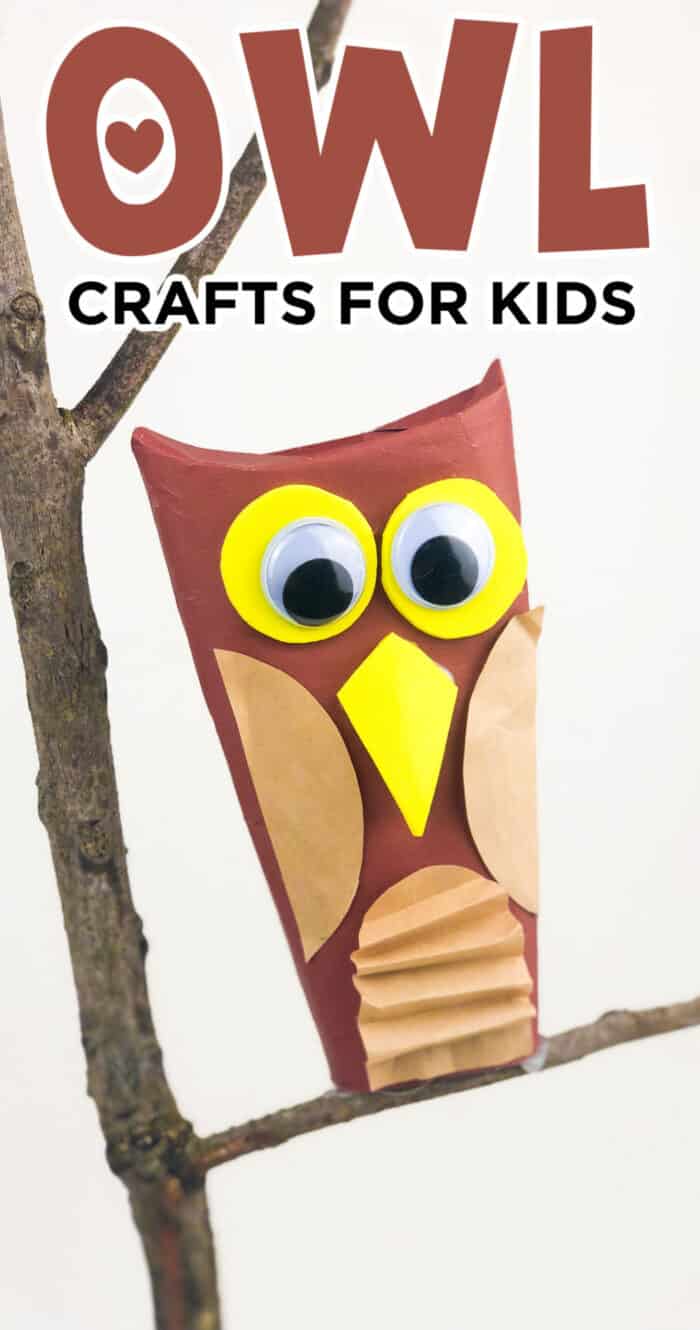

Have a hoot with this super simple, super cute paper owl craft for kids of all ages. A fun easy craft you can make with only a few craft supplies.
Want to save this project?
Enter your email below, and then we'll send it straight to your inbox. Plus get awesome new projects from us each week.
This easy owl craft is made out of construction paper and is one of our favorite fall crafts. Cute owls and easy crafts are our jam and kids will love this fun idea.
Letting kids' creativity run wild on easy crafts like this adorable owl craft is great for their development. It is also great for fine motor skills and well as a sense of pride as they make something on their own!
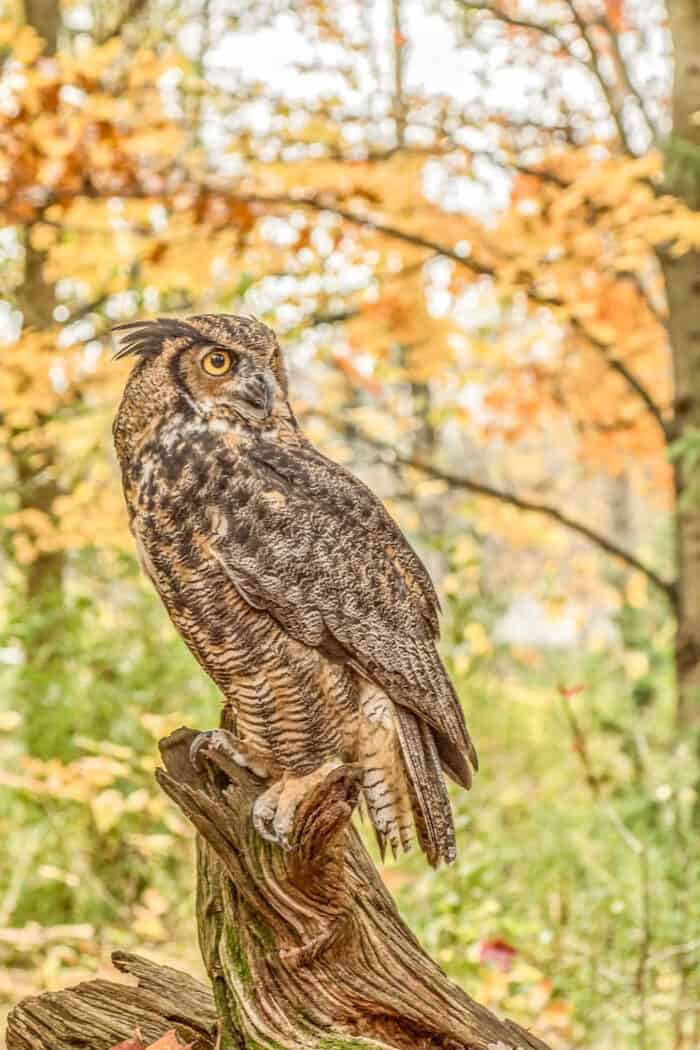
Fall Season and Owls
Have you ever wondered what it is about Fall and owls? October is Owl Month! There is actually a fairly good explanation.
The main reason is that owls are more active in the Fall. They are trying to establish their winter territories and can be heard with all their different noises..."Hoot, Hoot"!
There are other reasons why owls are associated with Halloween. Owls are generally nocturnal (active at night) and that is why you see a lot of owl moon depictions.
Because of that, they tend to get categorized into creepy night creatures, like bats! Halloween of course is the celebration of all creepy creatures!
We highlighted this Fall Craft Project and Fall Printables along with some other fun kid's crafts in our October Crafts along with our 101+ Easy Craft Ideas for kids.
Cute Owl Crafts
Regardless of whether Halloween tries to make these majestic birds spooky. I mean snowy owls are incredibly beautiful and love owl art projects that show their cuteness.
With all the cuteness, we decided we were going to make a cute owl craft. In the past, we've made adorable using all kinds of different supplies. Pinecone owls, crayon owl, cupcake liner owls, Owl Drawing Tutorial, and even a paper plate owl.
With these adorable owls, we're getting rid of the paper plates, cupcake liners, and pinecones and showing you how to make adorable owl crafts with just paper and glue.
No matter what the Fall month (September, October, and November), there is so much fun and the perfect Fall craft for kids.
Check out our 101+ Animal Crafts too!
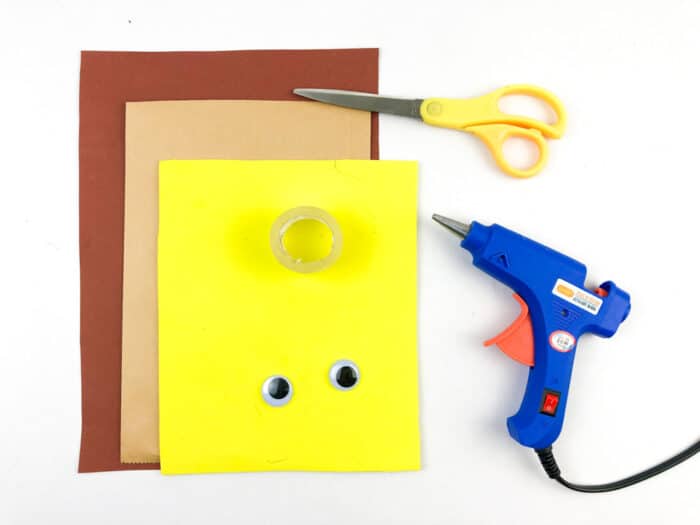
What you Need to Make a Paper Owl
In order to make this easy paper owl, you really only need paper, scissors, and glue. We have added a few other fun additions with googly eyes and tape. Our goal is to make this as simple of a paper craft as possible.
- Construction Paper (Dark Brown, Light Brown, and Yellow)
- Googly Eyes
- Glue (Glue Stick, Hot Glue, or White Regular Glue)
- Scissors
- Tape (optional)
How To Make an Easy Paper Owl Craft
Making Owl Body
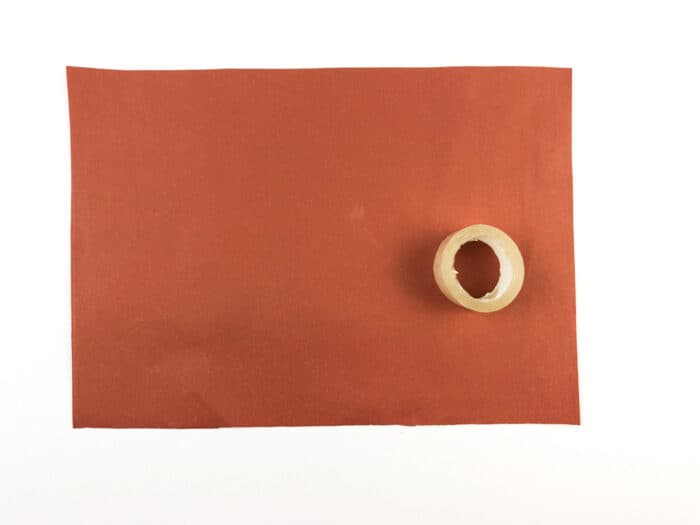
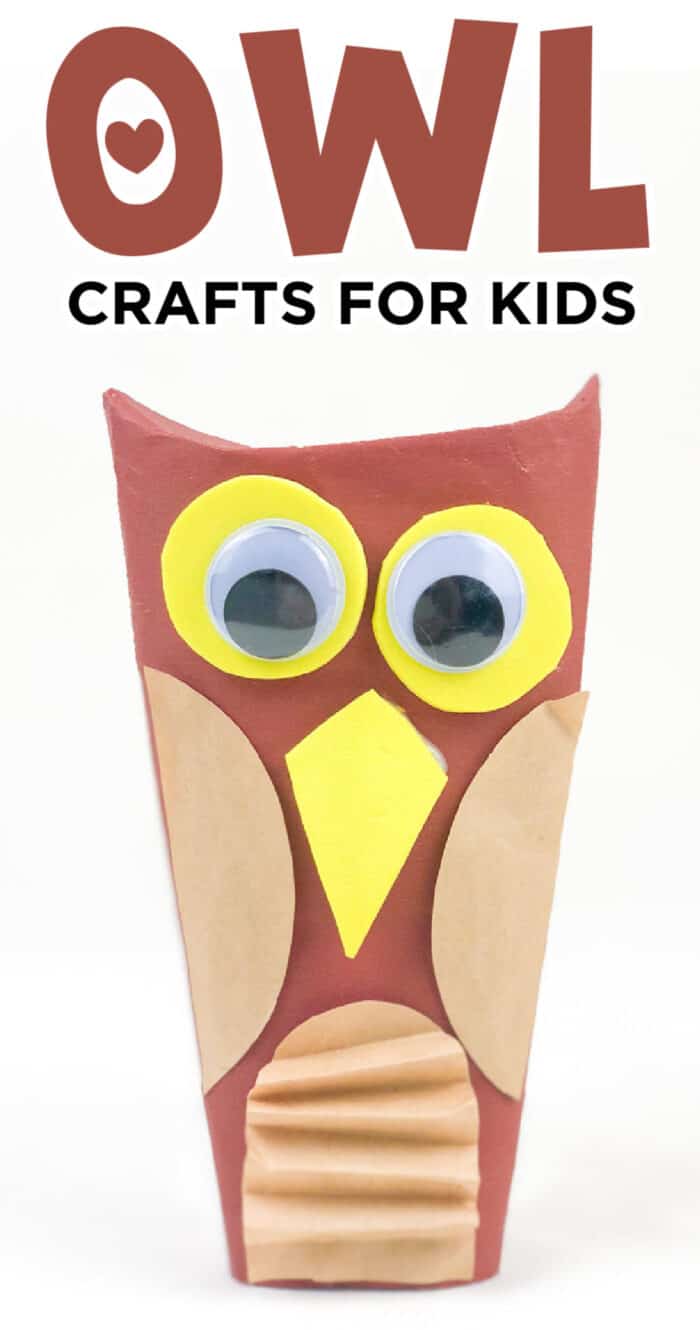
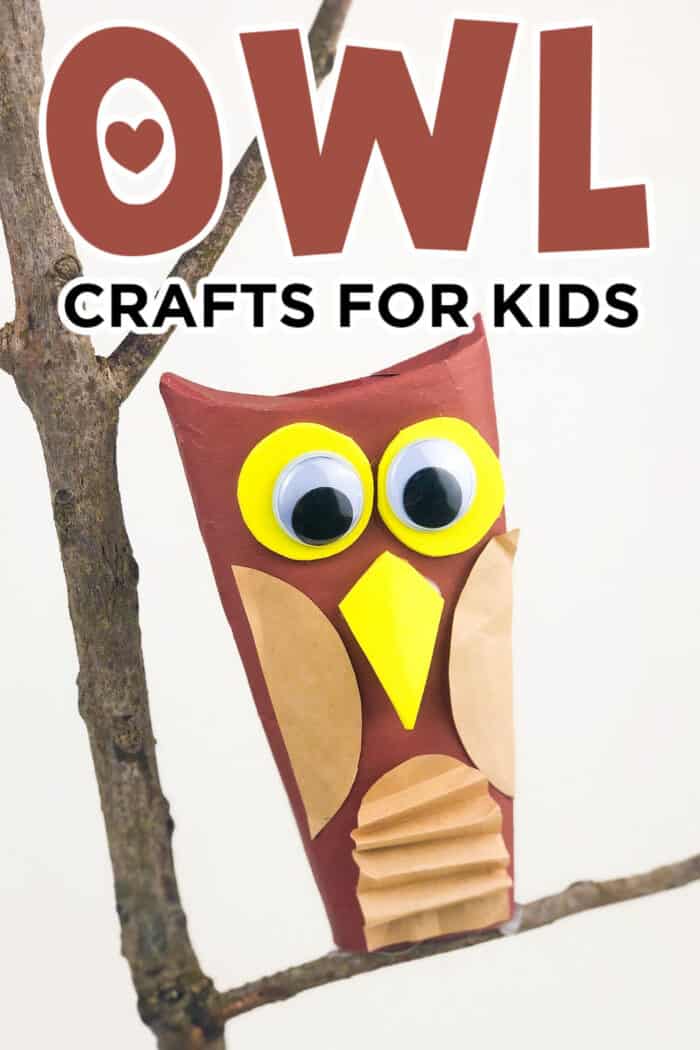
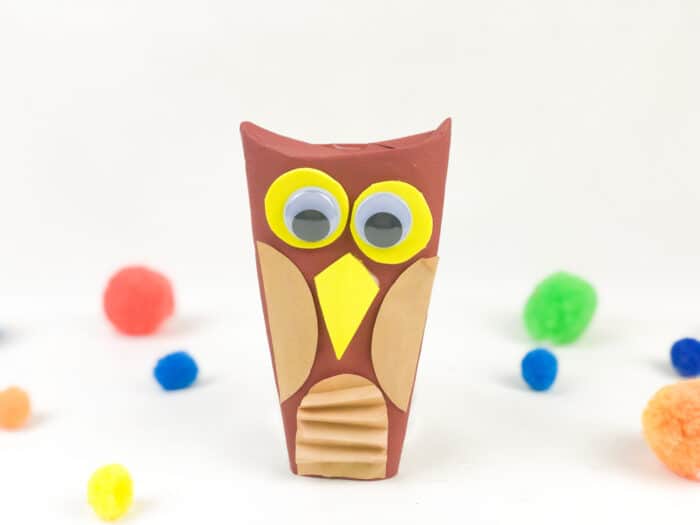
Start with a piece of brown paper and tape. You can use different colors for the owl base to make your colorful owl craft your own. We went with a traditional brown.
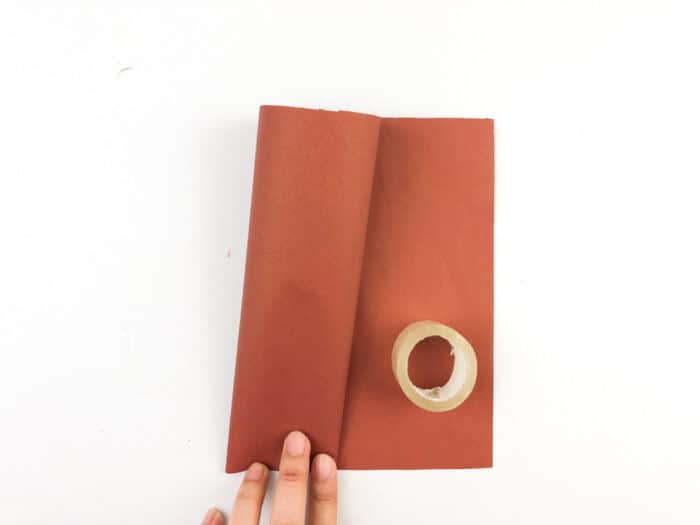
Roll the brown paper into a cone so that the short side of the paper is the height of the cone.
Tape the end of the paper the full length of the cone to hold it in place. If you do not have tape, you can certainly glue the paper in place. You will just need to wait for the glue to dry before moving to the next step.
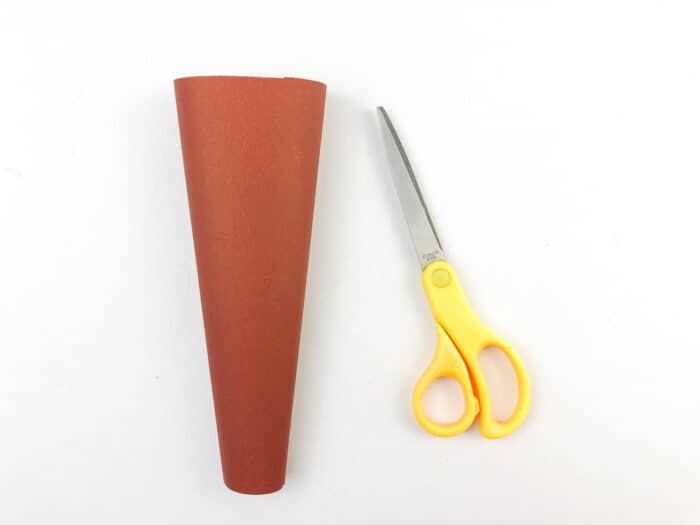
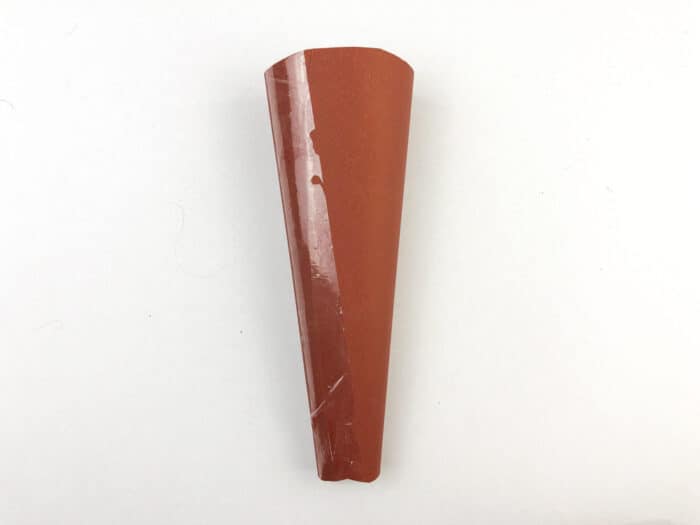
Next, grab your scissors because we're going to put those scissor skills to work. Cut off the top and bottom of the cone so the paper is level.
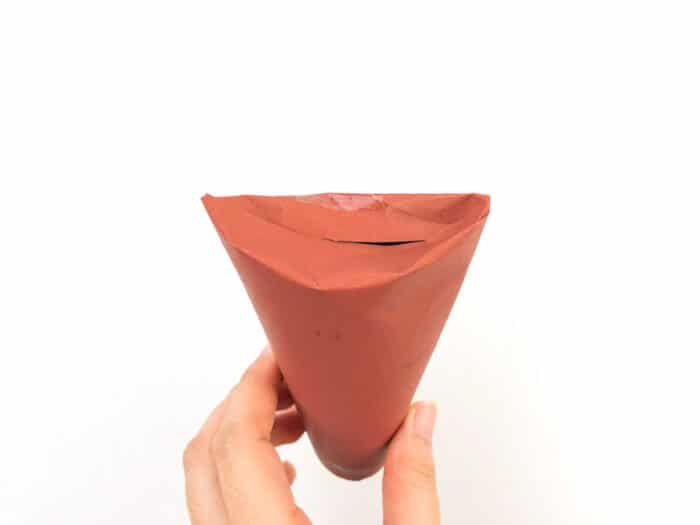
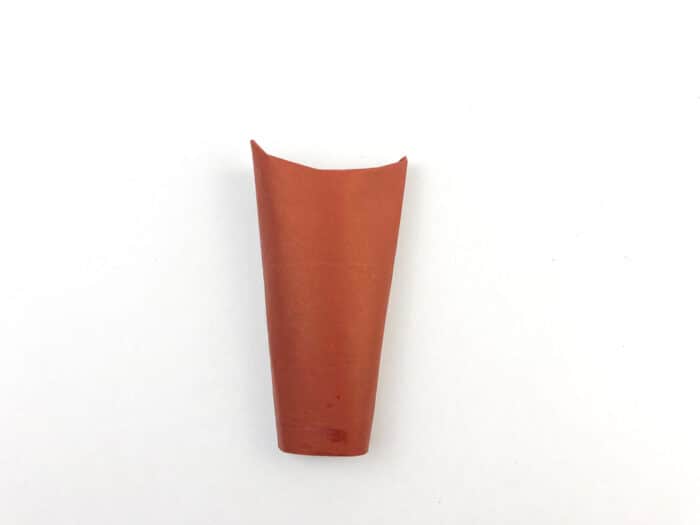
At the top of the cone, fold two sides slightly to create a curve. This should leave the other two sides pointed up.
Making the Owl Face
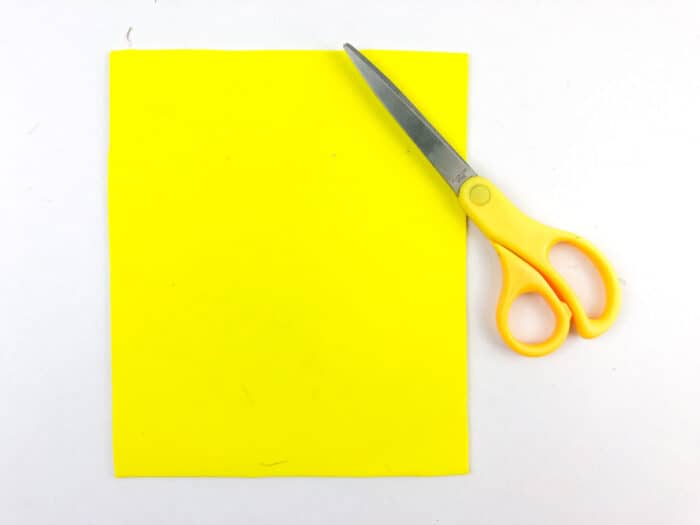
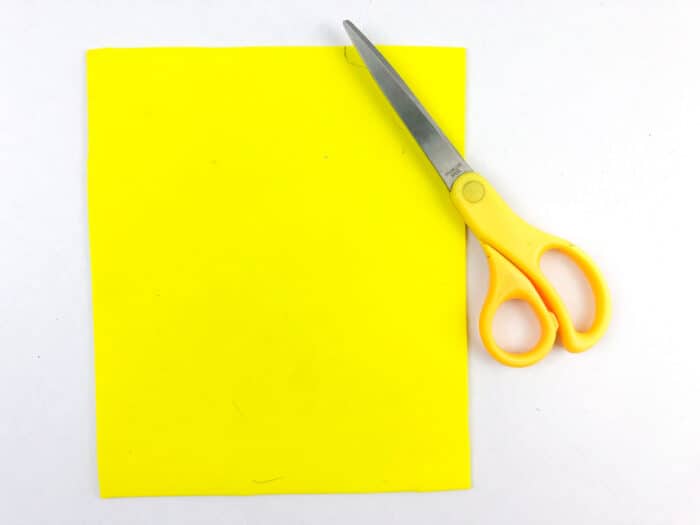
Next, grab the yellow paper and the scissors.
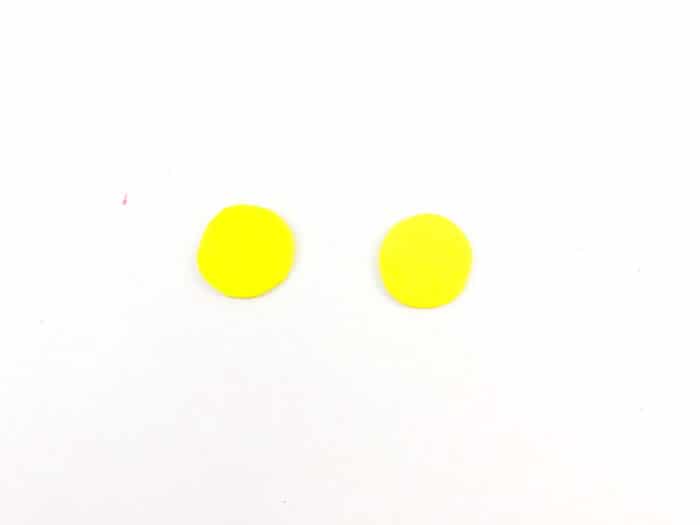
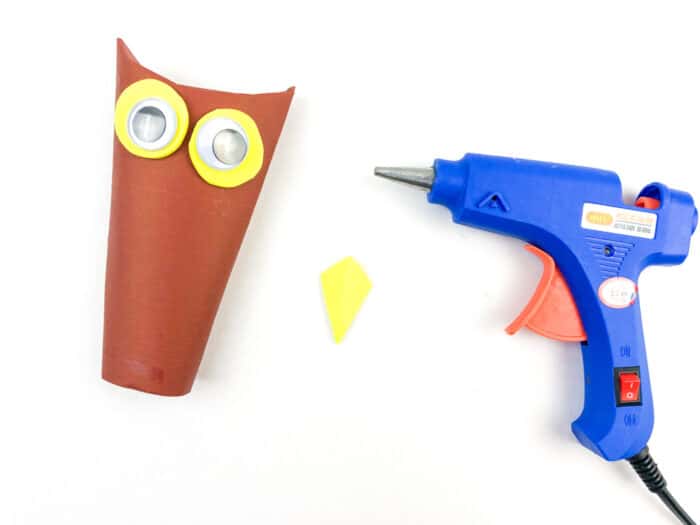
Cut two circles out. They should be about a size of a quarter.
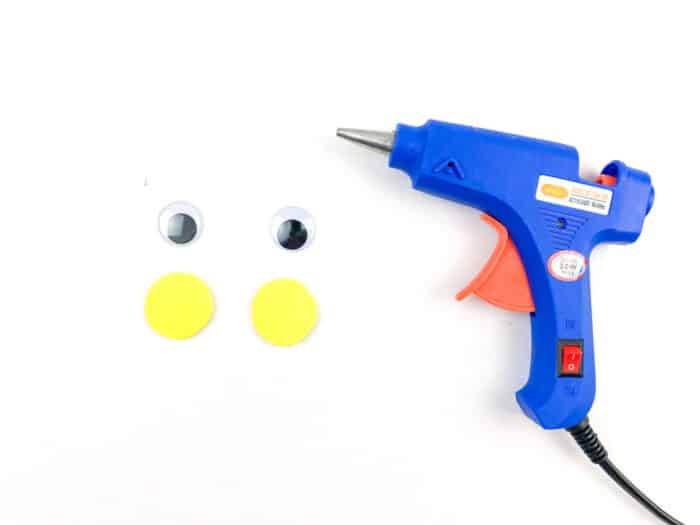
Next, grab the yellow circles and your googly eyes. If you do not have plastic googly eyes, you can create your own by cutting out white circles. Using a black marker, draw bright eyes.
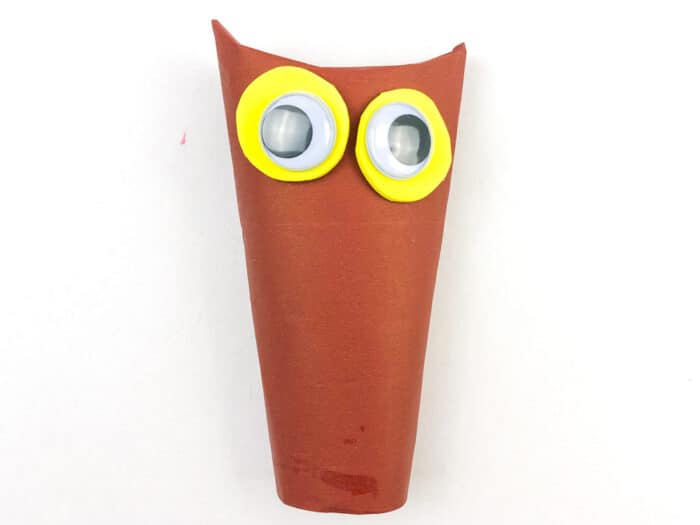
Glue the googly eyes onto the yellow circles. Then glue the yellow circles towards the top of the owl's head.
Making Owl Body
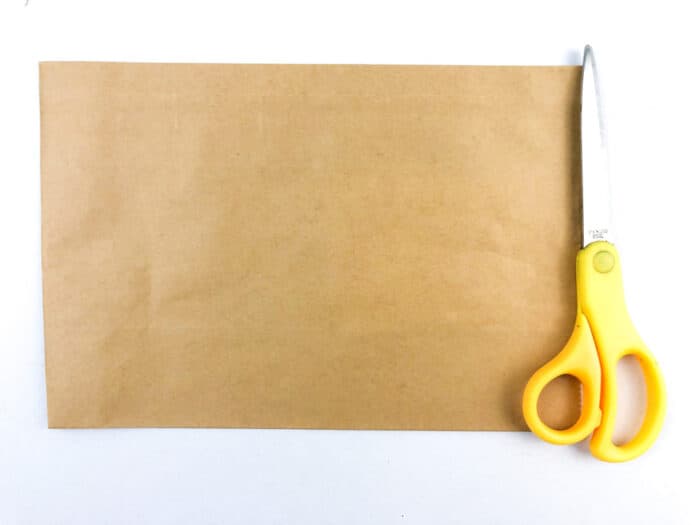
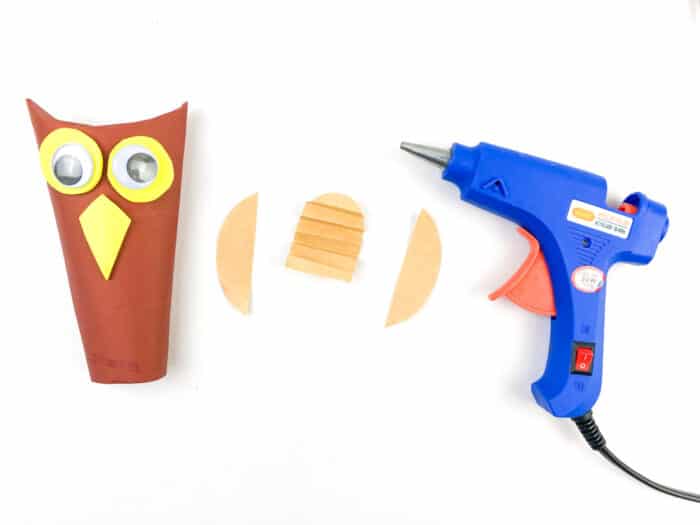
Grab the light brown paper or paper bag.
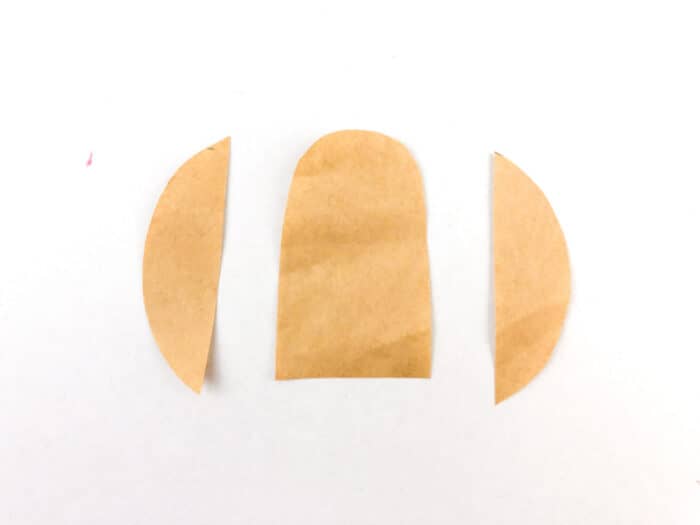
Start by cutting out an oval shape approximately 3 inches wide and 2.5 inches tall. Holding the oval so the longer end is down, cut each side of the oval off making a half-moon shape. It only needs to be an inch wide with the remaining middle piece of paper. Cut the top into a half circle which should give you a tall rainbow shape.
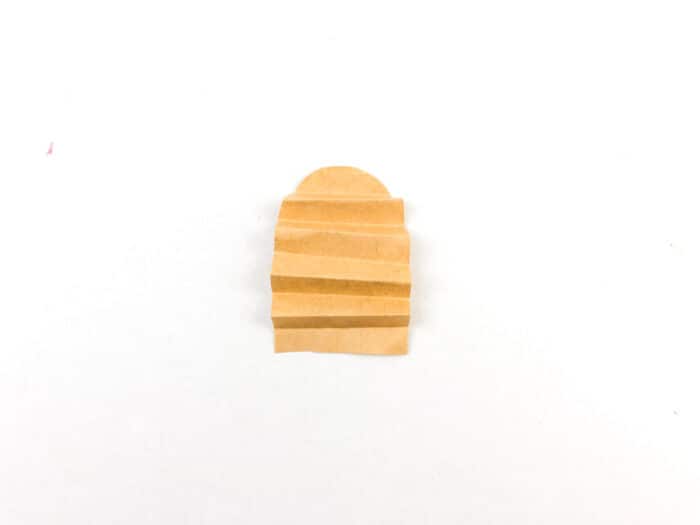
Accordion fold the middle rainbow piece of paper.
Grab the remnant yellow piece of paper.
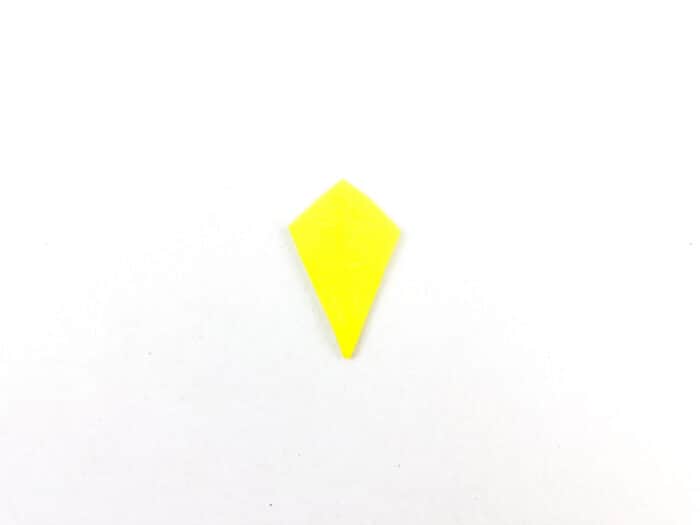
With the remaining yellow paper, cut out a small diamond/kite shape to create the owl's beak
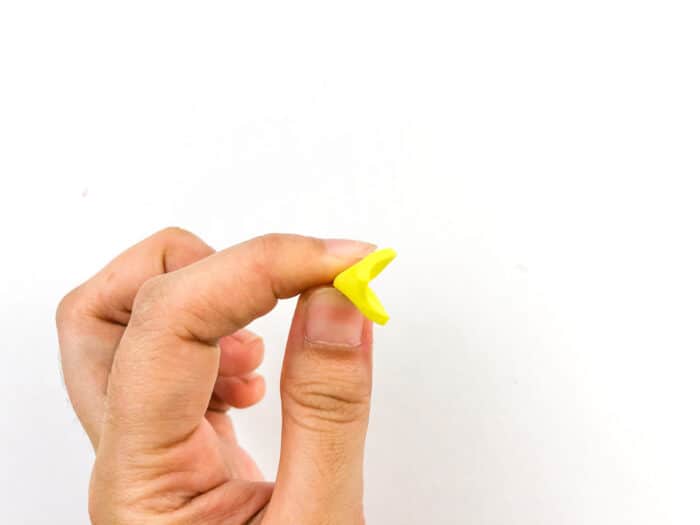
Pinch the beak towards the bottom to give it a little curve outwards.
Glue the beak right below the owl's eyes.
Next, glue the light brown paper pieces to the owl body.
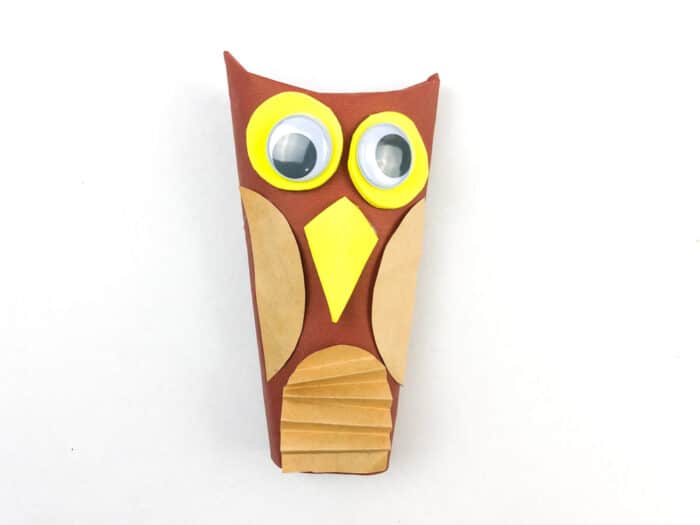
The half circles go to the side o the beak with the flat end lining up with the outside of the cone. Glue the accordion rainbow shape to the bottom of the owl.
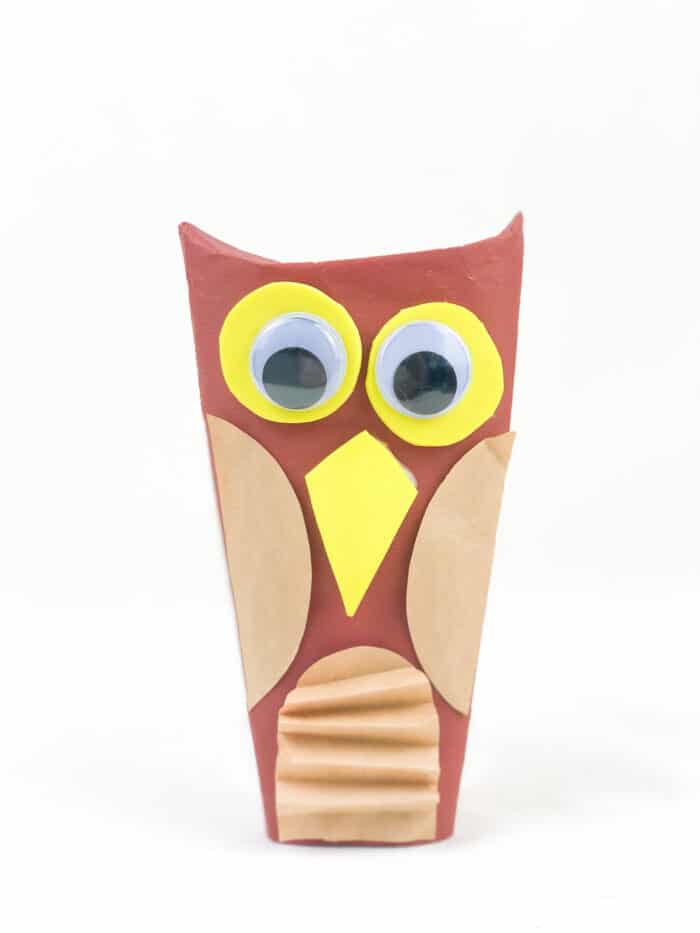
Viola, you have your own wise owl.
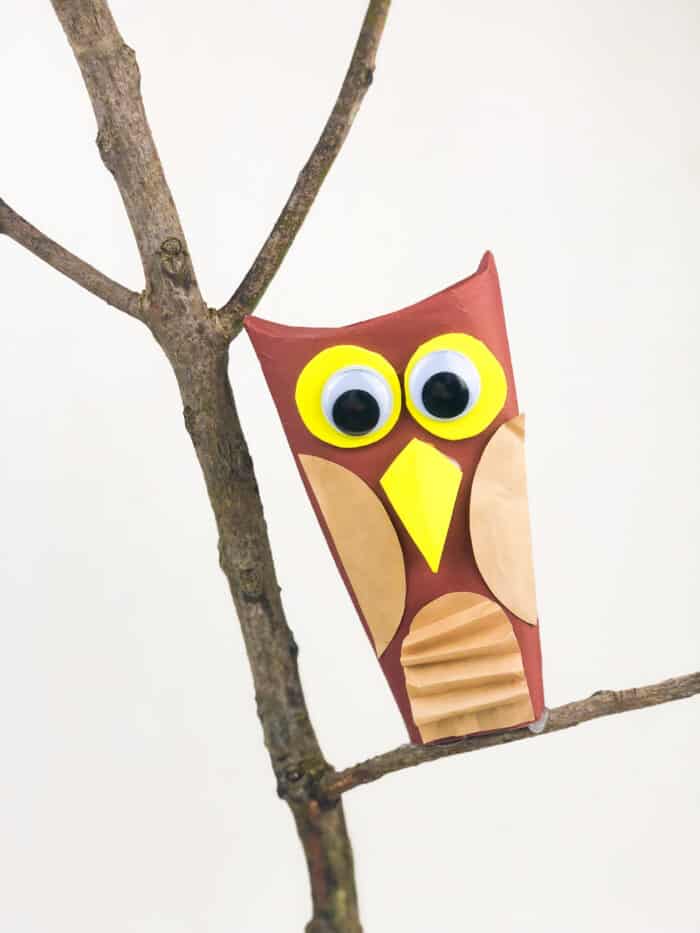
If you want to take it a step further, a great idea is to have the kids go outside and find a small tree branch. Glue the owl to the tree brand and you have your own cute owl art piece that will be a great addition to any Fall home decor.
We hope you enjoy this owl art project as much as we do. If you want to print these full instructions, you can find the printable owl craft at the bottom of the post.
Happy Crafting!
Other Fun Fall Crafts You'll Love
CONNECT WITH MADE WITH HAPPY!
Be sure to follow me on social media, so you never miss a post!
Facebook | Twitter | Youtube | Pinterest | Instagram
Find and shop my favorite products in my Amazon storefront here!

Easy Paper Owl Craft
Equipment
Ingredients
- Craft Paper Dark Brown, Light Brown, and Yellow
- Googly Eyes
- Glue
- Tape
Instructions
- Start with a piece of brown paper and tape. You can use different colors for the owl base to make your colorful owl craft your own. We went with a traditional brown.

- Roll the brown paper into a cone so that the short side of the paper is the height of the cone.
- Tape the end of the paper the full length of the cone to hold it in place. If you do not have tape, you can certainly glue the paper in place. You will just need to wait for the glue to dry before moving to the next step.
- Next, grab your scissors because we're going to put those scissor skills to work. Cut off the top and bottom of the cone so the paper is level.
- At the top of the cone, fold two sides slightly to create a curve. This should leave the other two sides pointed up.
- Next, grab the yellow paper and the scissors.
- Cut two circles out. They should be about a size of a quarter.
- Grab the light brown paper or paper bag.
- Start by cutting out an oval shape approximately 3 inches wide and 2.5 inches tall. Holding the oval so the longer end is down, cut each side of the oval off making a half-moon shape. It only needs to be an inch wide. with the remaining middle piece of paper, cut the top into a half circle which should give you a tall rainbow shape.
- Accordion fold the middle rainbow piece of paper.
- Next, grab the yellow circles and your googly eyes. If you do not have plastic googly eyes, you can create your own by cutting out white circles. Using a black marker, draw bright eyes.
- Glue the googly eyes onto the yellow circles. Then glue the yellow circles towards the top of the owl's head.
- Grab reminant yellow piece of paper.
- With the remaining yellow paper, cut out a small diamond/kite shape to create the owl's beak
- Pinch the beak towards the bottom to give it a little curve outwards.
- Glue the beak right below the owl's eyes.
- Next, glue the light brown paper pieces to the owl body.
- The half circles go to the side o the beak with the flat end lining up with the outside of the cone. Glue the accordion rainbow shape to the bottom of the owl.
- Viola, you have your own wise owl.

- If you want to take it a step further, a great idea is to have the kids go outside and find a small tree branch. Glue the owl to the tree brand and you have your own cute owl art piece that will be a great addition to any Fall home decor.


Video
PAPER OWL CRAFT
PIN IT TO YOUR DIY BOARD ON PINTEREST!
FOLLOW MADE WITH HAPPY ON PINTEREST FOR ALL THINGS HAPPY!